Object Properties
Click the three dots button to open a file selector. Use the file selector to choose the picture that will be converted to splines. Click the arrow left of the filename box to open the picture's preview.
Keep in mind that only pure black (RGB 0/0/0) is interpreted as a solid background — all other colors will be bordered with a line. The larger the source image, the better the results will be.
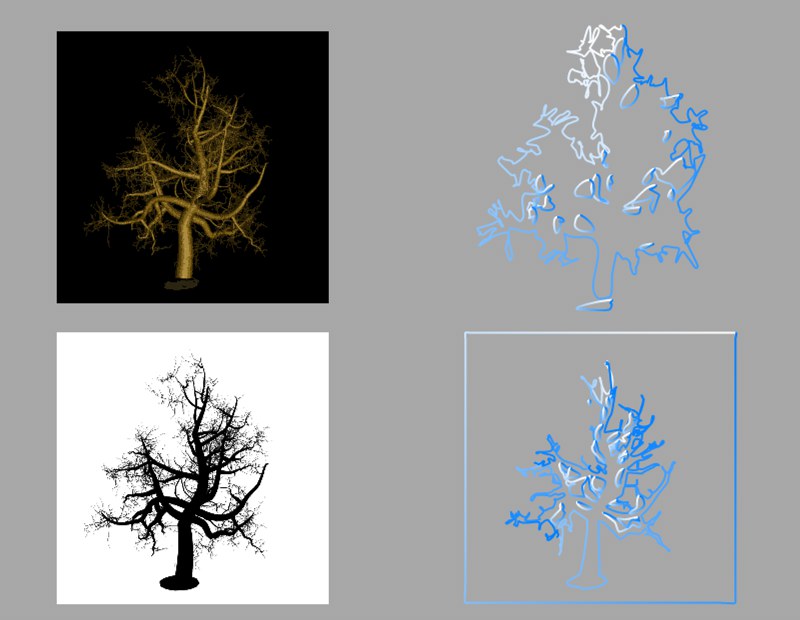 Converting an image (color image with black background and black image with white background).
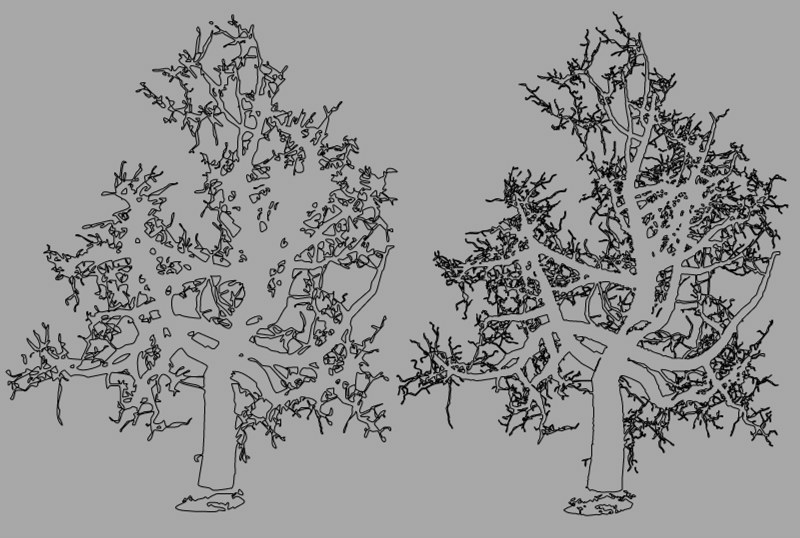 Effect of the image size on the result (left: 512x512 and right: 1024x1024 pixels).
This parameter defines the size in the X direction. The height (Y direction) is calculated automatically using the picture's aspect ratio and the Width value.
This defines the smoothing of the conversion. The higher the value, the smoother the contour appears. However, more and more detail will also be lost. The smaller the value, the more detail of the original picture will appear in the result. However, this can lead to staircase-like jaggies at the spline's edges.
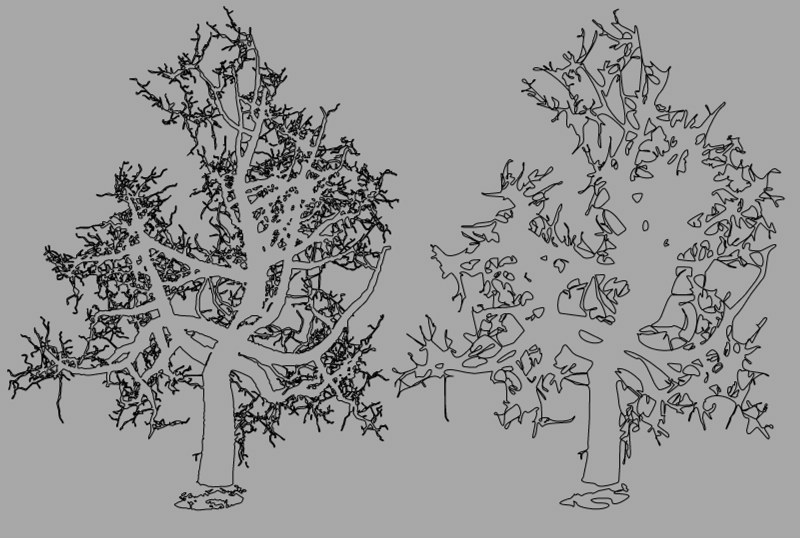 Different tolerance values affect the accuracy of the spline.
Here you can define the layer on which the spline should come to rest.
Enabling this option will reverse the point order of the spline (see also Spline Primitives.
This parameter, which is only effective in Subdivided Interpolation mode, controls the maximum spline segment length without an intermediate point (see above for Subdivided) must be inserted.