Shader Properties
Here you will find several material presets that are defined using the following settings.
This color represents the general color of the SSS effect. This color can indicate the (illuminated) surface of the material and the parameters Red, Green and Blue (click on the small arrow at the left of Path Length to open the parameter) can indicate the material's inner dispersion color, which will improve the look of regions not directly affected by the light.
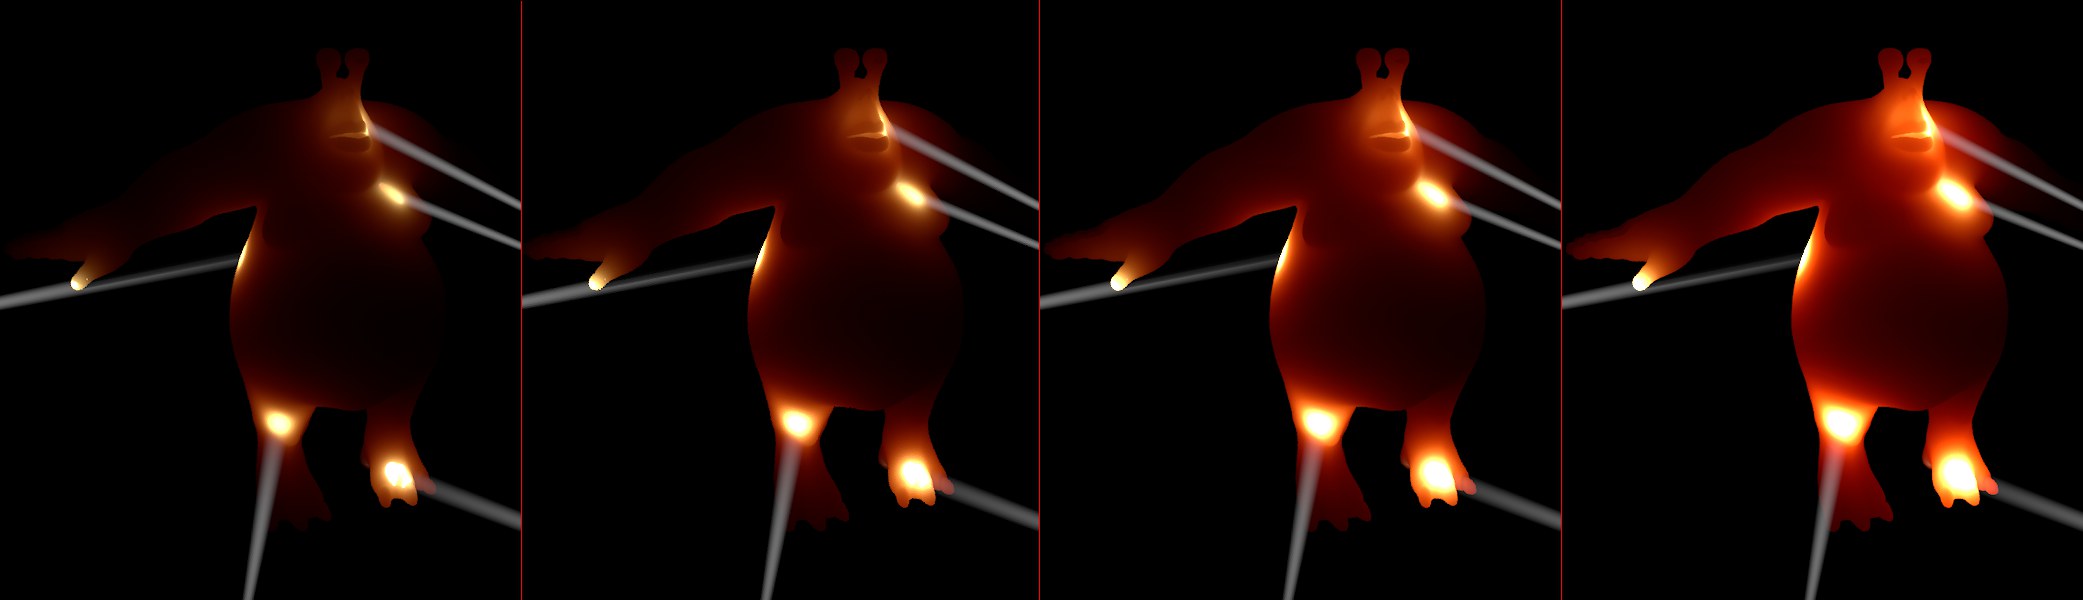 Increasing Strength values from left to right.
The Strength value is a multiplier for the SSS effect. Use it to define the overall strength of the SSS. Greater values are possible, which will cause the object to radiate more brightly.
Using this Shader you can define on an object's surface how the light hitting it should be colored. Imagine this Shader as a type of color mask (the object's interior color is defined via the previously described Color value). Generally speaking, any texture used in the material's Color channel should also be placed here. Quite often, however, this is not necessary and the Shader can be left empty.
 The Shaders shown produce interesting effects (Color is set to white).
What you see in the image above is not the result of the effect a texture has in the Material channel but solely the light dispersed across the object surface. If the material's Color channel is also enabled, make sure that Color channel's Brightness and Luminance channel's Strength do not exceed a combined value of 100% in order to achieve a physically correct result.
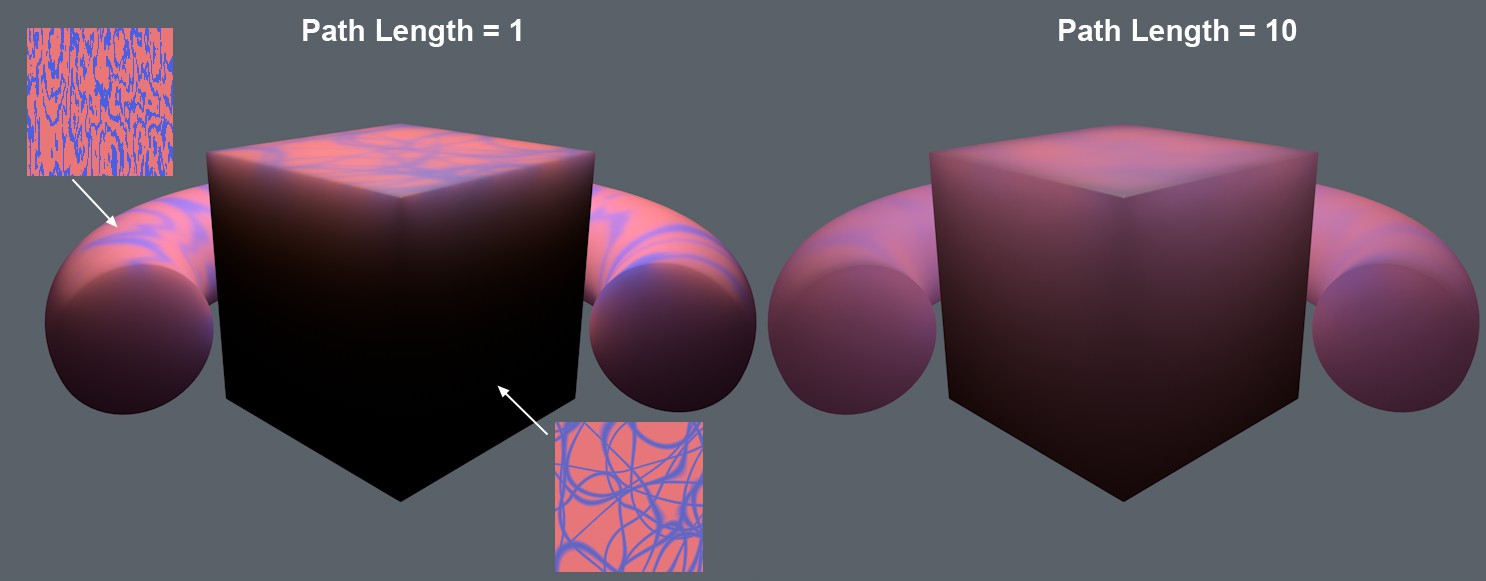
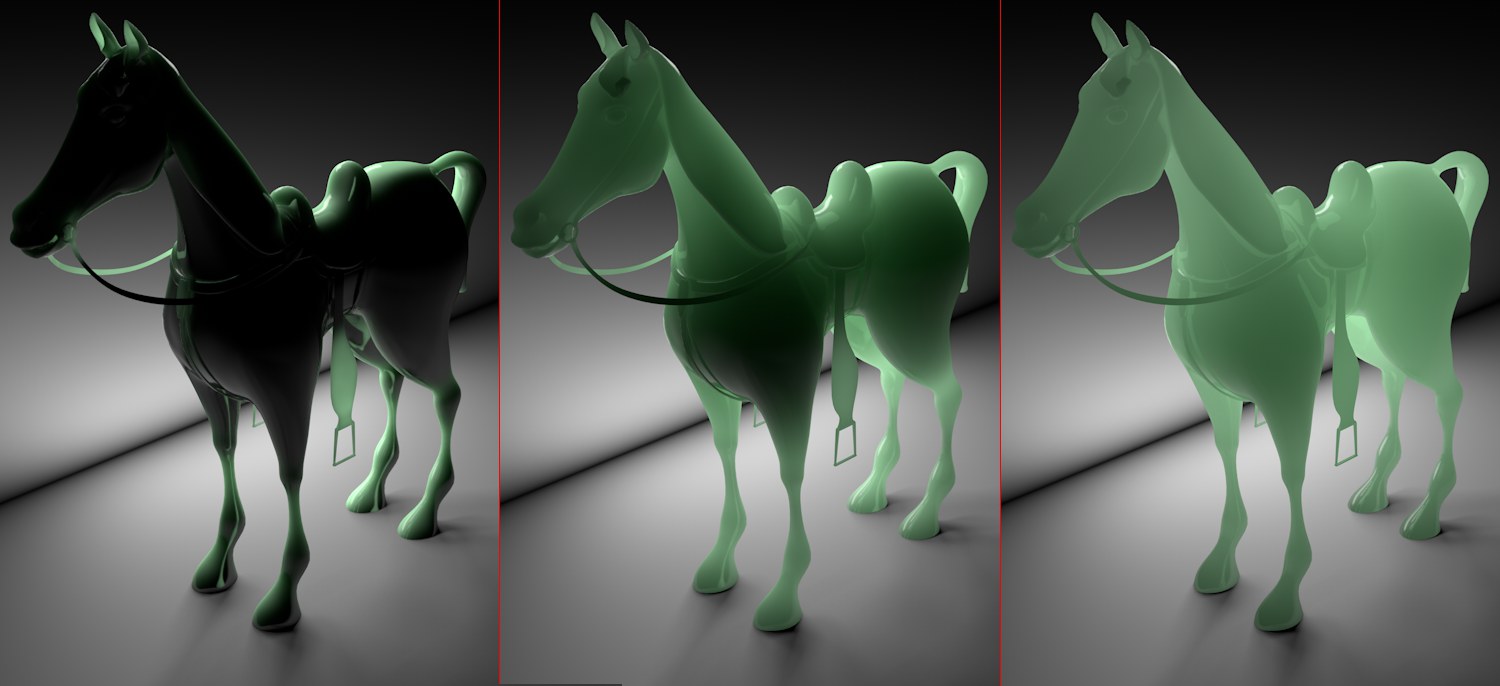 Increasing Path Length values from left to right (1cm, 7cm, 20cm by 300cm path length) and decreasing render times. Scene 2 is illuminated by 2 Area lights from the horse's left.
This value defines how far the light can penetrate beneath a given surface. Lesser values absorb faster than greater values. The latter offers the light correspondingly less resistance.
The lower the value the longer the render time. This is because far more samples have to be calculated the shorter the path length. For animations, the values will in part be cached, which causes the first frame of animation to take much longer to finish than the following frames.
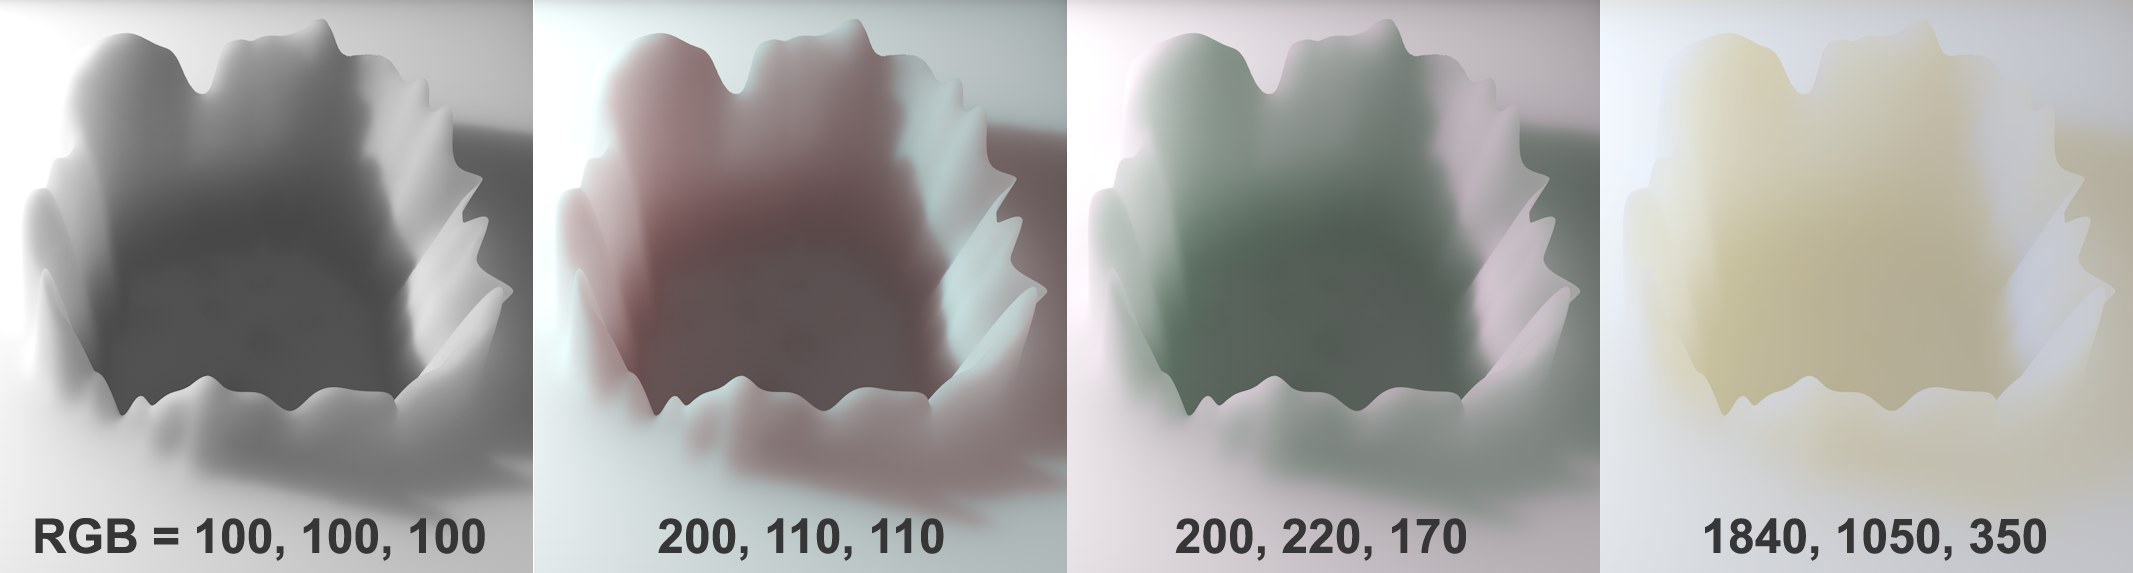 Various red, green and blue values with unchanging parameters.Color (white).
Three additional RGB sliders can be displayed by clicking on the small arrow at the left of the Path Length parameter. So, what are these sliders good for and why are they only subordinates of the Path Length parameter? Simple: these are multipliers of the Path Length, i.e., you can define here, which color can penetrate deeper (higher values) or less deep (lower values) into a material (or to put it differently: lighter colors (higher values) disperse more light; darker colors (lower values) make the material more translucent).
The interplay of defining colors using the Color setting is complicated. To put it simply, these colors influence the color effect inside the object (that can also be combined with the Color). These effects primarily occur in object regions not directly affected by light (shadow regions). For the most part, subtle (but nevertheless critical for the overall visual impression) color effects can be achieved. This is, for example, important when rendering a milk material, which is basically white (and defined as such in the Color parameter), for which a non-which a brownish (oily) color can be defined. Take a look at the Preset to see an example of how such color values can be defined.