![]() Falloff
Falloff
Falloff
Contrary to the description below, the Falloff object is not primarily responsible for joints (whose Field function in the meantime mainly does what the Falloff object did) but only for the things described below.
The Falloff object is a special object that allows the user to set a specific falloff to a joint as a separate object.
This has two advantages: First, it allows an area of influence to be defined from an object position (and not from the joint itself but from a Field, for example); second, it allows you to bypass weight painting altogether by using the Falloff function of the Falloff object as your area of influence.
Assigning a Falloff object to a joint is pretty straight-forward:
- Assign a Weight tag to the object to be deformed
- Place a Skin deformer as a Child of the object to be deformed
- Drag the joints to be used in the Weight tag's list
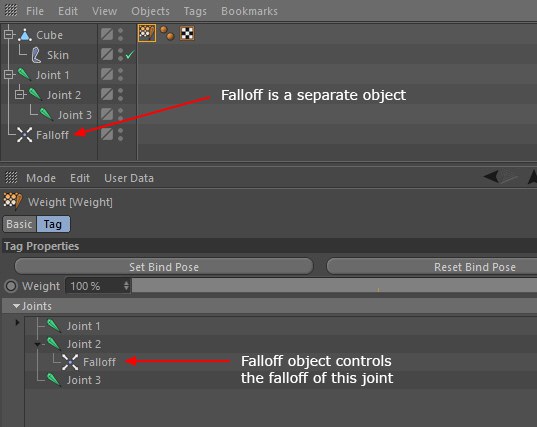
- Drag the Falloff object onto the joint to which it will be assigned in the same joints list
 Since Falloff objects are separate objects they can be in the joint hierarchy, or not, depending on what you need.
Once done, you can easily see which Falloff object is assigned to which joint, since each Falloff object will be shown as a Child of said joint.
Since the Falloff object is not a deformer, it can be placed anywhere in the hierarchy, much like joints. Only the Skin Deformer needs to be placed as a Child of the mesh to be deformed.
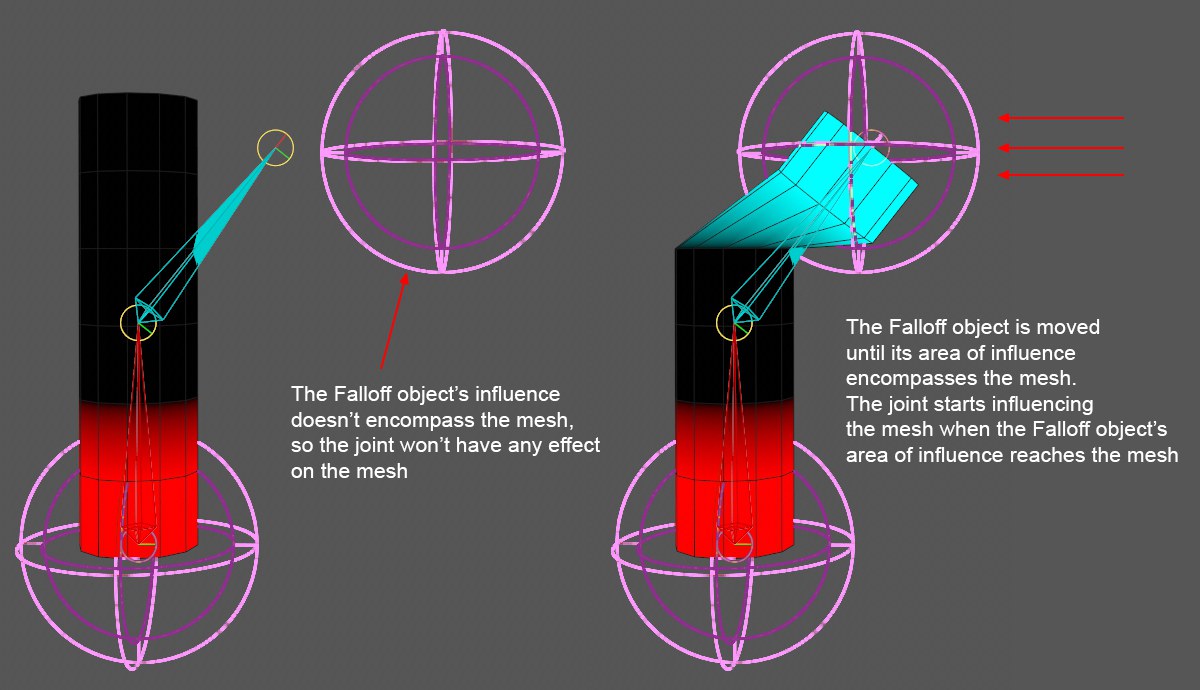
Keep in mind that moving or rotating the Falloff objects alone will not deform the mesh. They are tied to joints, so only joints can actually be used to deform the meshes. Falloff objects are only spatial falloffs and define the area of influence of a joint. While they can be moved separately from the joints, only the area of influence of the joints will be changed when doing so (in other words, the mesh vertices are tied to the joint. The Falloff object defines which area of influence the joint will have on these points).
 Here, a Falloff object (with a Spherical Field) is moved independently from the joint to which it is assigned. Note that the mesh will only deform if the joint is rotated, otherwise the mesh will stay in its initial state, even if the Falloff object encompasses it (since the is only a falloff and the points are not directly tied to its position/orientation).
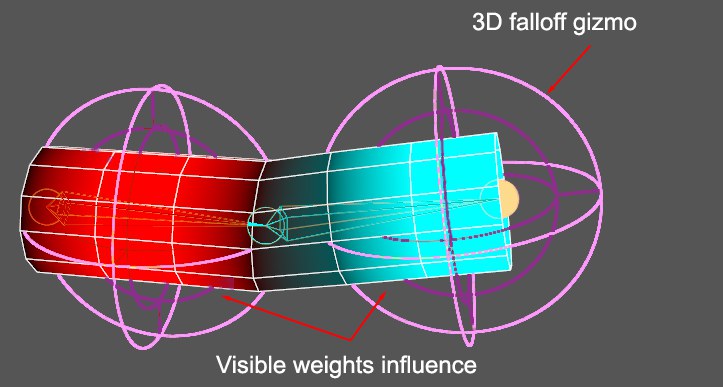
You can visualize the weights of a Falloff object by
While limited, this is still useful to check out the influence of a Falloff object, as the falloff gizmo in the editor view can sometimes be hard to read, especially if a lot of Weight Effectors are used.
 Visualizing weights by color is always easier.
While Falloff objects can be used without actually painting any weights manually, you can still do so if you wish. In this case, the Falloff object will be used to fine-tune your weighting, or to better manage transitions with other joints.
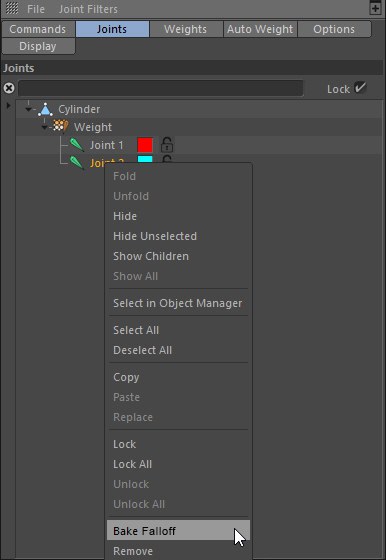
Falloff objects can also be baked easily by opening the Weight Manager (hold

Falloff objects can also be used:
- As spatial limits for other objects, e.g., Voronoi Fracture objects (see Falloffs).
- Create OpenVDB Volums (sess also Falloff object in a Volume Builder).