Tag Properties
This is where the Hair material is linked to the tag. This is also done automatically when hair is added. This material can be replaced by any other Hair material.
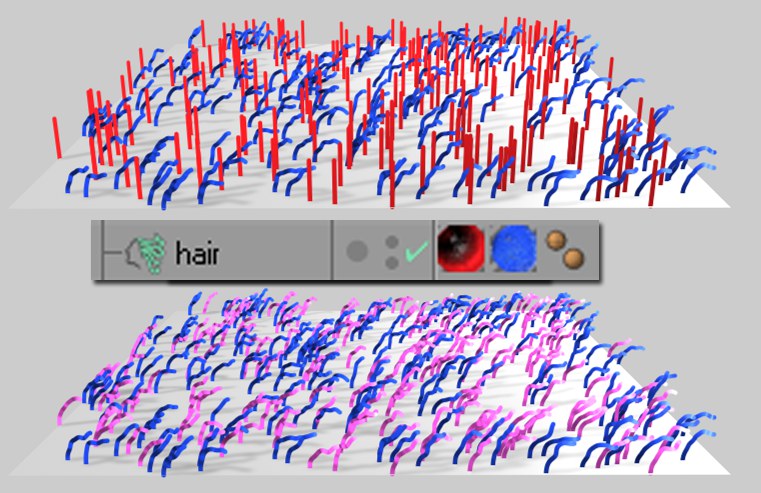 Use Available is active in the example at the top, and was deactivated in the example at the bottom (here the red hairs are also bent and colored).
This setting is only of importance if an additional Hair Material tag already lies to the left of the selected Hair Material tag. If the first Material tag is applied to the hair (Remove Available active in this Tag), the second tag can only be applied to any hair that remains.
If this setting has been deactivated, the selected tag will (depending on its settings) more or less affect all hair with its Hair material. This is evident in the foregone example, in which the pink hair (lower half of the image) is affected equally by both Tags.
Activating this option will take away from the subsequent tag all hair to which this tag is applied (this subsequent tag must have Use Available deactivated).
Select from this menu the method with which the tag should be applied to the hair. Depending on which method is chosen, different options will be made available.
Selecting All will cause the tag to affect every hair. This is the default mode for individual Hair Material Tags. The following applies to each of the next four options: If parts of the hair remain unaffected, the default (blonde) Hair material will be applied.
Selecting this option will make the Amount slider available. Use this slider to determine the percentage of available that hair should be affected by the tag.
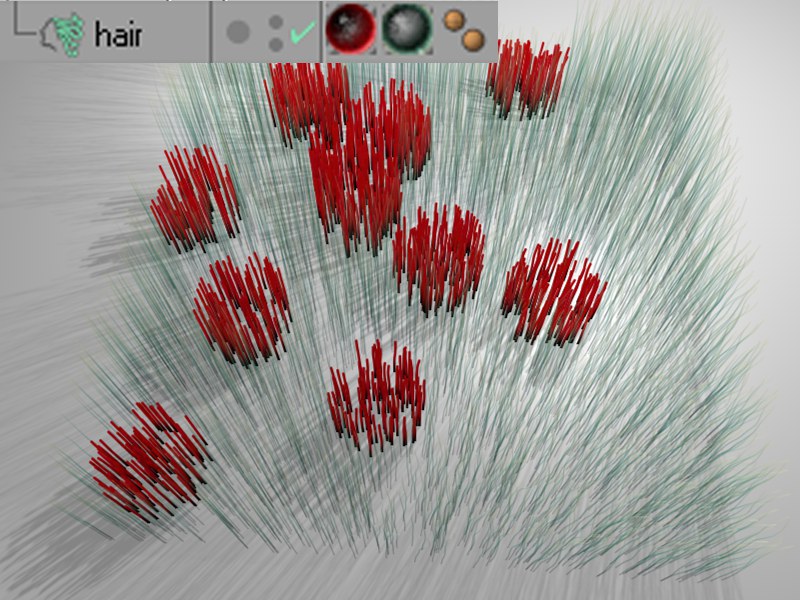 Circular clumps with Clump applied (red).
If you want numerous Tags to be dispersed as clumps, this is the right option for you. This tag creates only circular clumps of hair (the hair will not merge at the tip). Amount regulates the number of clumps that will be created in relation to the amount of hair to be rendered. If, for example, you have a total of 1,000 hairs, an Amount value of 1% will result in a maximum of 10 clumps being created. A value at or around 0.1% can also be entered, depending on the result you are trying to achieve.
Radius defines the maximum allowable clump radius, and Limit defines the maximum number of hairs allowed per clump. These three settings do not work independently of on another, i.e., the desired result will not be achieved if one of these settings conflicts with any of the other two. If you are not satisfied with the result of the randomly placed clumps, their placement can be varied using the Seed setting in the HAIR object’s Advanced tab.
Selecting this option makes a Selection text field available, which can be made to contain point -, edge -, or polygon selections. This tag will then only affect any hair located on that specified area. The following applies to point or edge selection: Corresponding hair will only be selected if the selection encompasses an entire polygon.
With this option you can define which hairs will be selected for this tag to affect, based on the grayscale values of a texture loaded into the Texture field. Use the Start and End sliders to constrain the grayscale values, thereby constraining the number of hairs selected. You can mix this Tag’s Texture setting with that of the preceding Tag’s (at 0 and 100 for both settings). If you want to avoid mixing, give both Tags equal Start and End values. If no preceding tag exists (no Hair Material tag to the left of the current tag in the Object Manager), the blonde default Hair material will be mixed with your current tag.
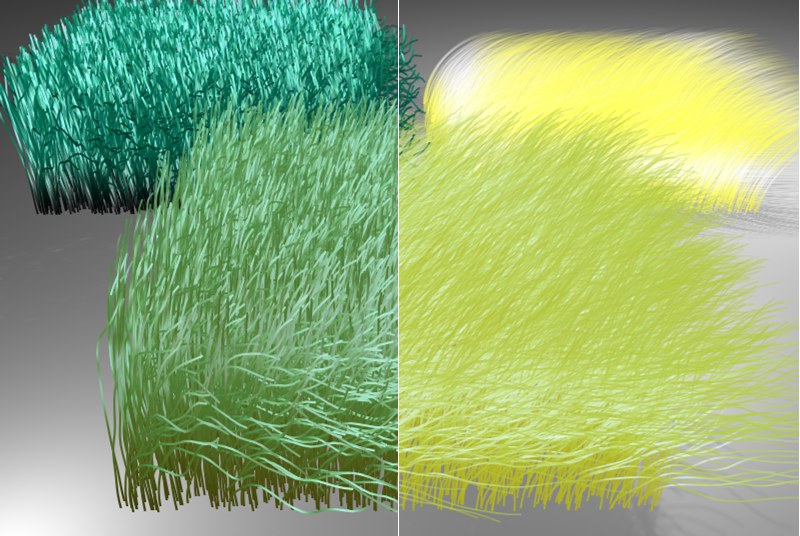
 Left, a soft transition; right, a more abrupt transition.
In the image above, two Hair materials (thick red and thin green hair) have been applied to the Hair object. If you want to use the texture shown in the insert at the top left of the image, the following prerequisites must be met:
The left (red) Tag: Remove Available must be deactivated, and Use set to All.
The right (gray) Tag: Use must be set to Texture, all other settings in should remain in their default states.
Both hair types will be influenced according to your Start and End settings. If both settings are equal, the resulting transition will be abrupt.
If you apply several Hair Material Tags to the same hair (always deactivate Remove Available), their various colors will also be mixed. You can use Blend to define how these colors should be mixed. How these blend modes work is described under Blend Modes.
 In the background, each material is shown on a separate Hair object; in the foreground, both colors are shown on a single Hair object: Left, a Mix value of 30%; right a Mix value of 70%.
This setting lets several Hair materials affect the same hair to varying degrees. Not only can hair color be mixed, the Hair material settings can be mixed as well!
In order for this to take place, both Use & Remove Available options must be deactivated and Use set to All. A tag with a large Mix value will cause that tag to be dominant. A Mix value of 0 will nullify the effect. The Mix setting always works in relation to the tag located to the left of the tag in which it lies.
The channels you want to mix must all be activated in their respective Hair materials. If a material channel has been deactivated, it will be ignored and not mixed with the others.
Mixing is automatically done in the most effective manner. For example, the Hair material channel Length will be mixed in such a manner (when Mix is set to 100%) that will increase the effect: The values will be multiplied, i.e., the Length channel in the first material has a value of 50%, as is the case for the second Length channel, thus the hair will have a length of 0.5*0.5=0.25=25%.
Other settings, such as the thickness of the hair, will not multiply their effect. If, for example, two Hair materials have their thickness set to 1m and 10m, respectively, the overall thickness of the hair will vary from 1m to 10m.
This only applies to Mix when Texture has been selected in the Use setting. Instead of a linear transition, a gradual change will take place at the beginning and end of the transition. This effect is, though, not very pronounced.
See selection.
See texture.
Radius [0..+∞m]
Variation [0..+∞m]
See clump.
See clump.
See texture.
See texture.
These three available options are needed when applying textures to the hair itself, e.g., when a texture has been loaded into the Texture fields of the Color or Transparency channels.
Hair itself has no UV-coordinates – they must be generated during rendering.
In order to demonstrate, very thick hair was used in the next example.
Since it does not make much sense to project a 2D texture on very thin hair, a gradient shader should be used.
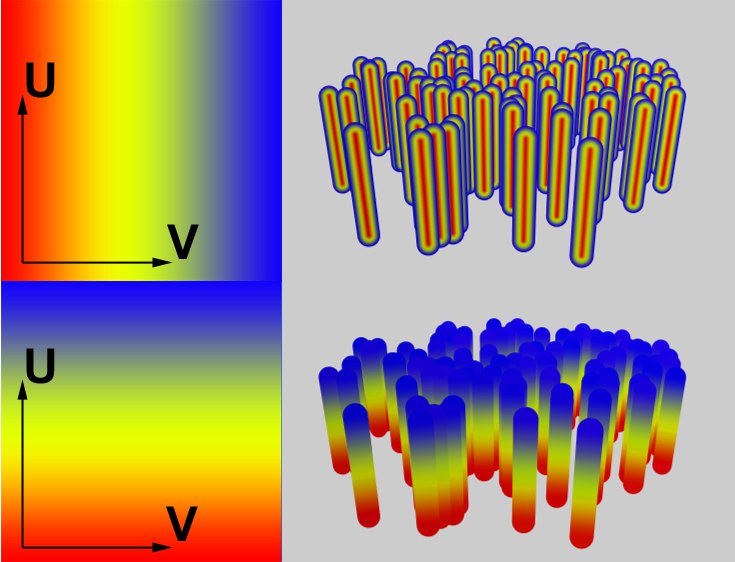
This option will apply the texture to the hair in the following manner:
The texture will be mirrored to the left (hence the name Symmetric) and applied in the U-direction through to the tip of each hair, and in the V-direction from the center of each hair to its outer edge.
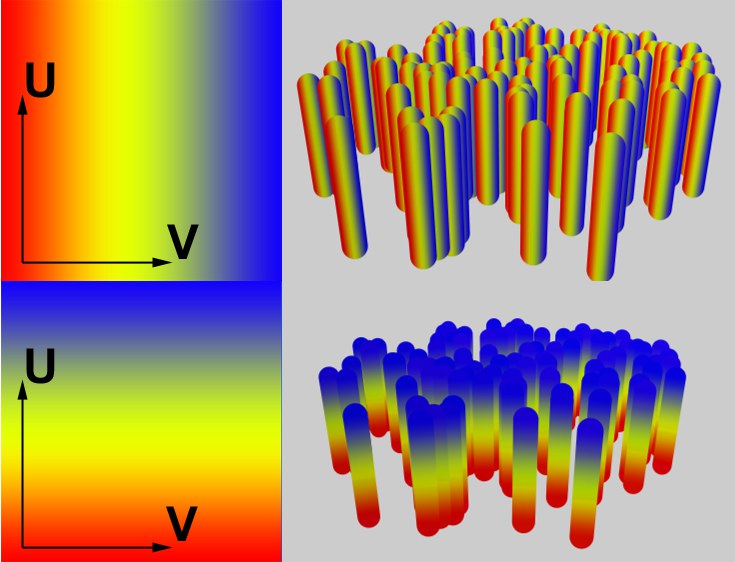
This option will apply the texture to the hair in the following manner:
In the U-direction, the texture will be applied from the hair root to the tip; in the V-direction, the texture will be applied from the left edge of the hair to the right.
 Feather mode with a spline shader. The text is deformed in accordance with the Feather settings (insert).
This option was specially designed for use with the Feather object. Use this option to apply a texture to the entire feather. The texture can be placed precisely, using the Layer shader’s Transform effect. The applied texture will follow any distortions applied to the feather.