Options
If this option is enabled, the brush will only affect regions that are visible in the respective view. If disabled, the brush’s effect will be projected through the surface in the angle of view so the occluded polygons can be edited (e.g., on the object’s back side).
Use this option to turn the radius preview on or off.
The falloff functions for the brush are the same as those for the Magnet tool. For information on these modes, look up Magnet tool in the index.
If Falloff is set to Spline you can define your very own falloff function using Function Graph.
The following brush modes apply to modeling:
Smears the mesh in the direction you drag the mouse.
Pulls the mesh towards the camera.
Pulls the mesh in the direction of the point Normals in the middle of the brush.
Deforms the mesh in the direction of its point Normals.
Repels the mesh radially away from the highlighted point.
Spins the mesh around the highlighted point.
Twists the mesh and pulls it towards the center of the brush.
Same as twister except the mesh is also pulled towards the camera.
Smooths the mesh.
The following brush modes apply to vertex map painting and editing (select the desired vertex map, otherwise a new one will be created).
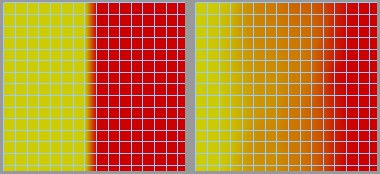 Original vertex map (left) and the vertex map after being edited in Blur mode (right).
Paint the vertex map weighting.
Blurs the weighting. Useful for smoothing out and preventing abrupt changes in the weights.
Takes the weighting from the center of the brush and spreads this value over the Radius.
Increases/decreases existing weighting values.
This option is available if Mode is set to Surface or Normal.
If the option is enabled, the Normals will be updated in real-time while you paint and the brush will take the updated Normals into account. If the option is disabled, the brush will use the original normal directions instead, i.e., the normal directions prior to the brush stroke.
This defines the strength of the brush effect. To invert the effect, hold down
The Radius controls the brush size, which is displayed in the viewport as a circle.
This option is available if Falloff is set to Dome, Bell or Needle. It defines the scale of these falloff functions in the X direction.