Lens Distortion
 Both methods with their individual guides
The difference between these modes are:
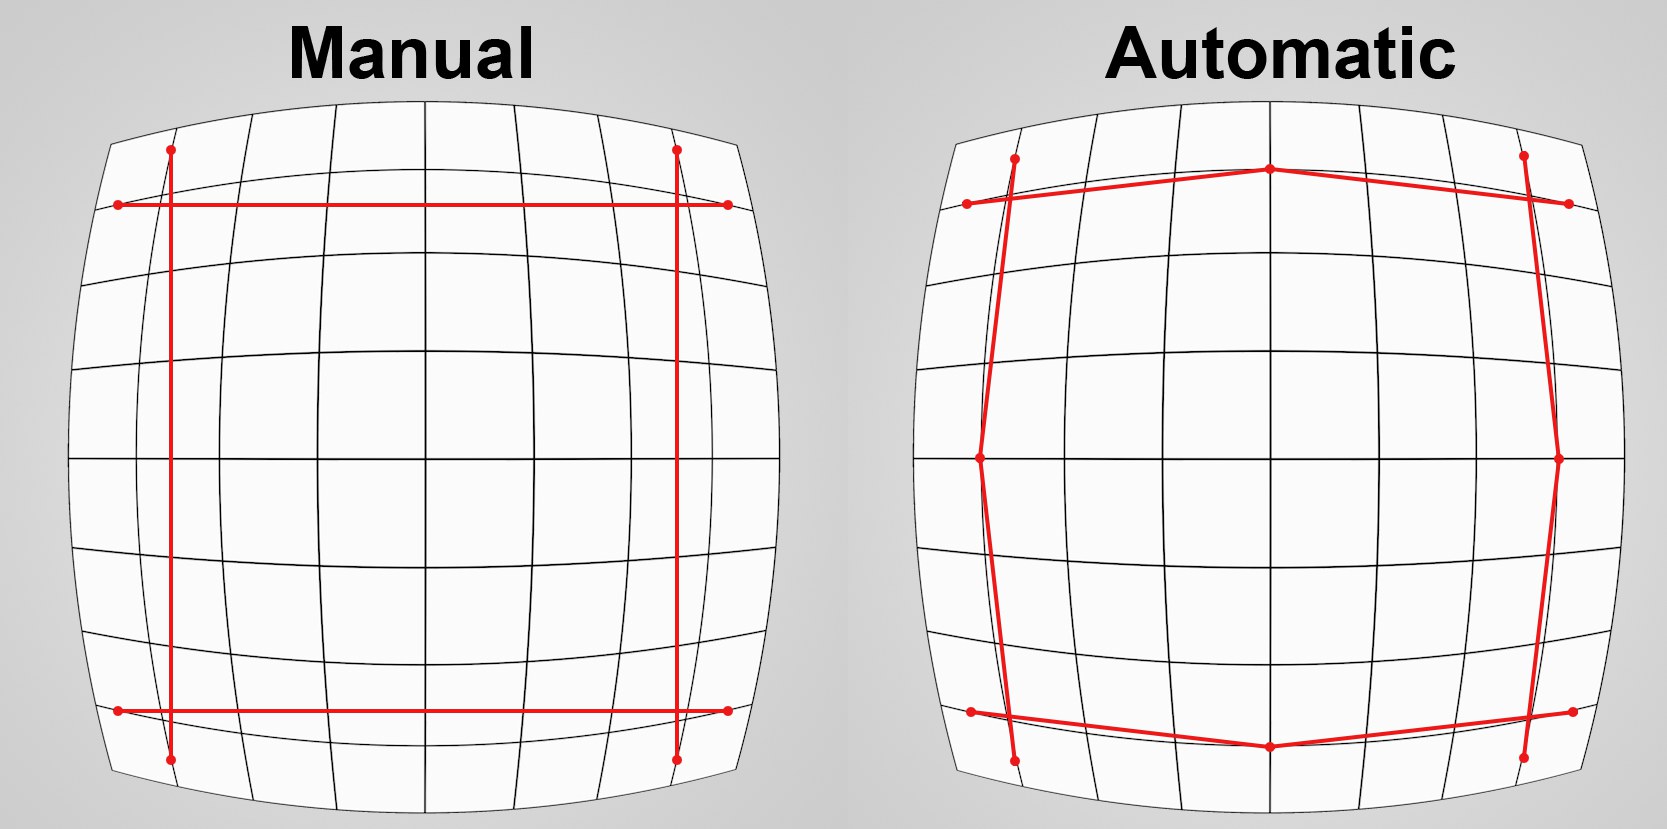
- Manual: This is actually the alternative method if Automatic fails. With this method you create guides along the straight image edges and then adjust the Lens Distortion model’s settings until the guides match the image edges. For this you need a good eye and knowledge of how (complicated) lens distortion settings work. However, this method can work if you simply want to remove distortion using the Quadratic settings without additional guides.
- Automatic: This method is much easier and is also the recommended method. Guides are positioned with several points on distorted, i.e., curved, image edges. Once enough guides have been positioned the image can be undistorted. All respective lens distortion settings will be modified accordingly.
Depending on the method selected, these settings can be used to create interactive guides that must be positioned as accurately as possible along the straight (but displayed as distorted) edges. The Manual method lets you create 2-point lines and the Automatic method lets you create 3-point lines. Additional points can be added to 3-point lines at any time via
How to best position guides is explained in the example above.
Delete Selected Line
Delete Selected Line
Deletes the selected guide.
Click on this button after guides have been created in Automatic mode (note that you must first have the proper Lens Distortion Model selected). Cinema 4D will then "straighten" the bent lines and create a set of lens profile settings that will automatically be defined and can subsequently be saved.
Not all guides have to be created before clicking the Auto Solve button. This can also be done with only one or two guides but the result will most likely not be satisfying. Simply add more guides and further undistort the image until you’re satisfied with the result.
 Determine which Lens Distortion Model to use based on the distortion.
You can select from five different models.
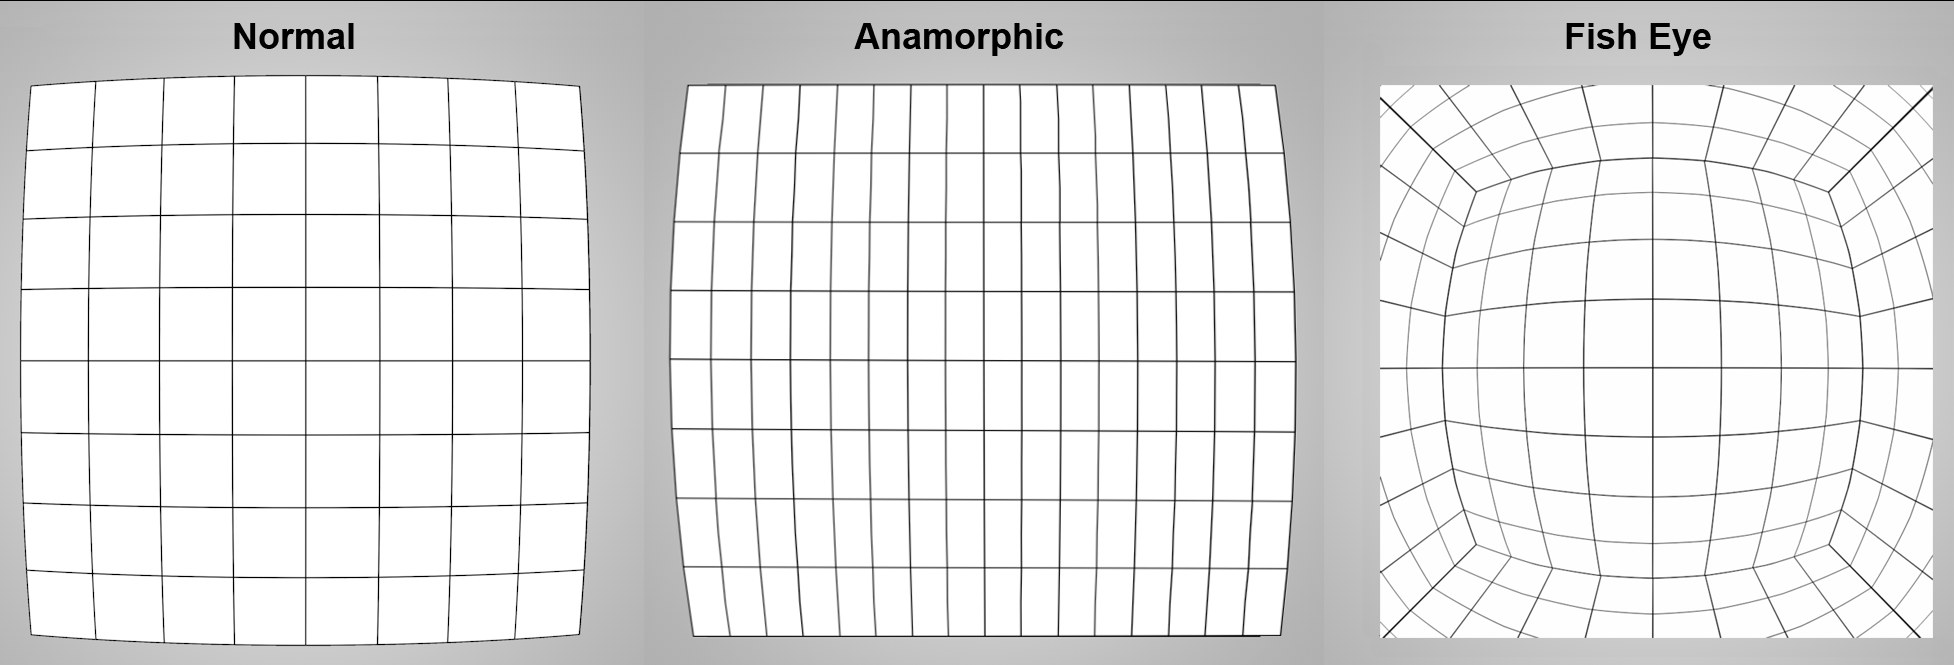
Select the Lens Distortion Model based on the type of image or video footage:
- 3DE Radial Standard Degree 4 or 3DE Standard Classic for ,normal’ material with little distortion (the difference between the two is explained below)
- 3DE Radial Fisheye Degree 8 for fisheye distortions
- 3DE Anamorphic Standard Degree 4 for anamorphic (horizontally squeezed) material
If these names sound familiar it’s because they originate from the Lens Distortion Plugin Kit from Science-D-Vision (which was also used for the lens distortion functionality) and their names were not changed to eliminate any possible confusion.
The difference between the most commonly used models:
- 3DE Radial Standard Degree 4: This is the more technically sophisticated model that can work with decentralized (not all lying on the optical axis) lenses. This model also has two settings (Phi Cylindric Direction and B Cylindric Bending) that takes into consideration the effect known as ,beam splitting’ for stereo takes. These values should always be set to 0% for normal takes.
- 3DE Standard Classic: This is a simplified model compared to 3DE Radial Standard Degree 4 and can achieve good results with few guides. This model is also better suited for use with Manual mode because you have fewer settings with which you have to work (which can be a great relief due to the other model’s large number of similar settings).
The 3DE Anamorphic Degree 6 model is only included for the sake of completeness (in case you created a corresponding lens profile in another application). Its use is otherwise not recommended.
The Lens Distortion Models’ various settings
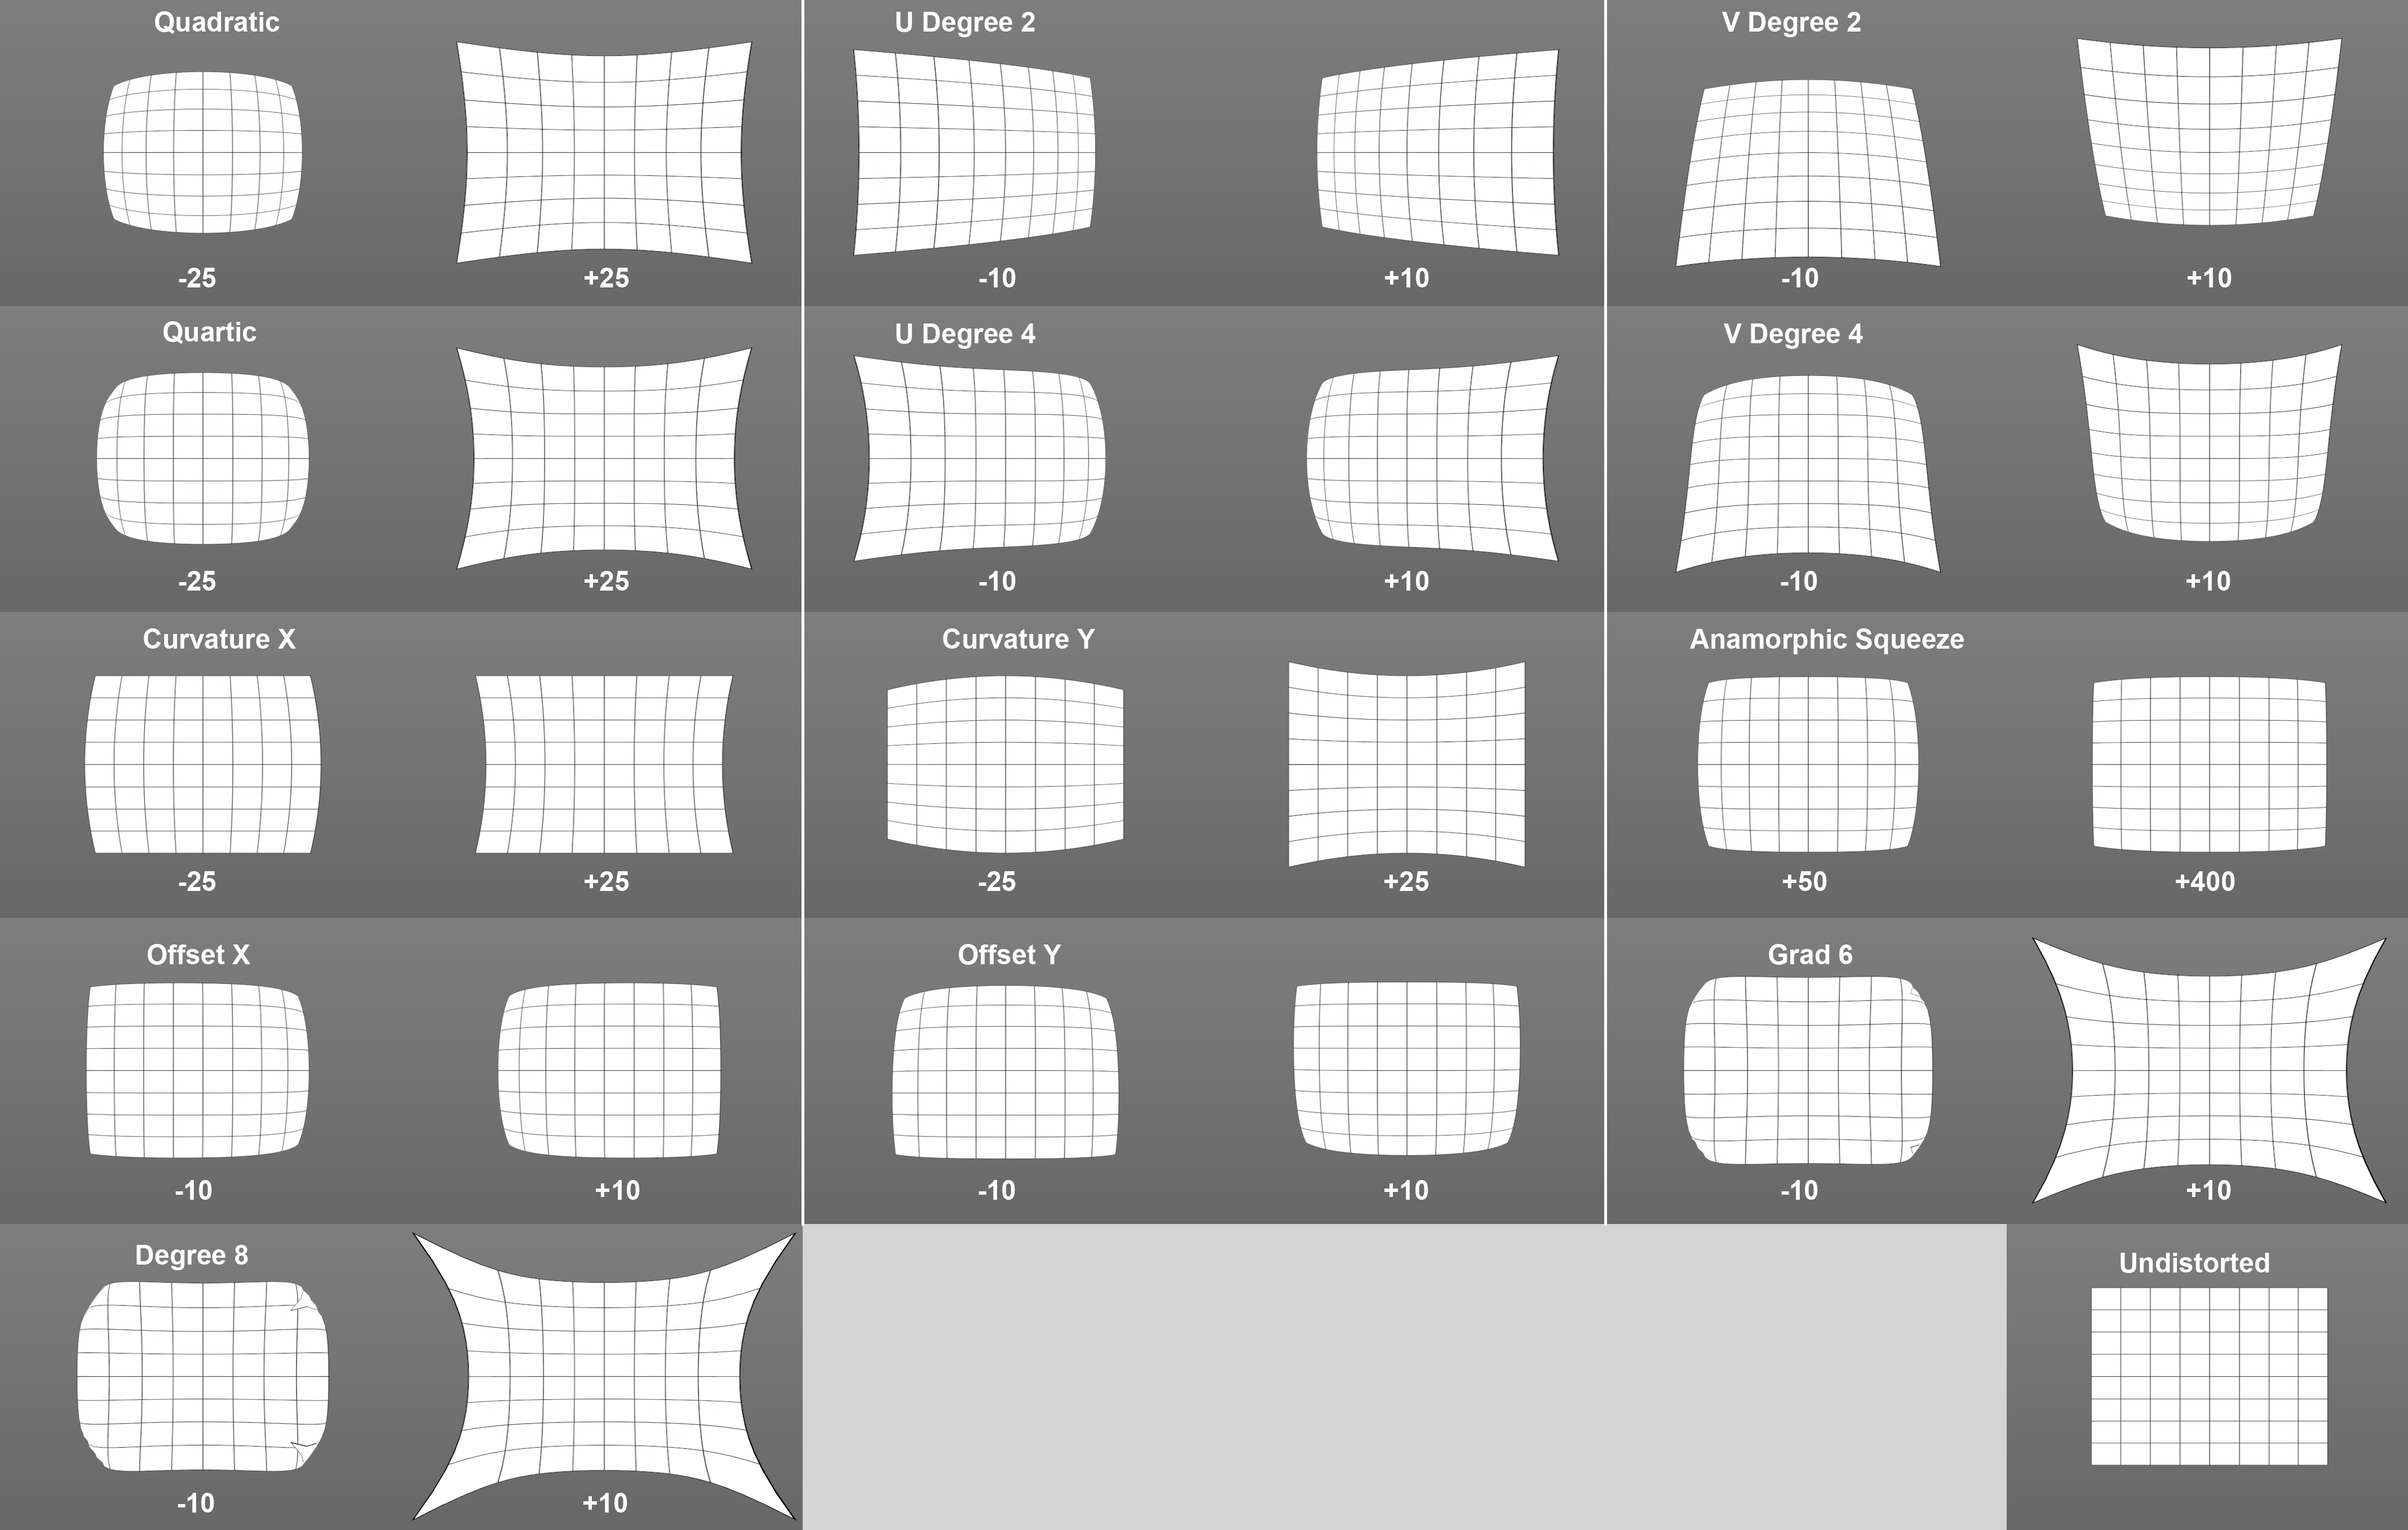
The settings for each Lens Distortion Model will not be described individually. They are variables within complex formulas that we will not bog you down with. These are defined automatically by Cinema 4D anyway. Instead, we have depicted the most important settings, each with a positive and a negative value, in the image below. This gives you an impression of the effect that these settings have.

You can view these settings as shape controllers - regions of the image will be distorted or undistorted differently, depending on which setting is modified.
Quadratic [-500..500%]
Cubic [-500..500%]
X Offset [-100..100%]
Y Offset [-100..100%]
Quadratic [-100..100%]
U Degree 2 [-100..100%]
V Degree 2 [-100..100%]
Quartic [-100..100%]
U Degree 4 [-100..100%]
V Degree 4 [-100..100%]
Phi Cylindric Direction [-180..180]
B Cylindric Bending [-20..20%]
X Offset [-100..100%]
Y Offset [-100..100%]
Quadratic [-100..100%]
Quartic [-100..100%]
Curvature X [-100..100%]
Curvature Y [-100..100%]
Anamorphic Squeeze [12..800%]
X Offset [-100..100%]
Y Offset [-100..100%]
Cx02 [-100..100%]
Cy02 [-100..100%]
Cx22 [-100..100%]
Cy22 [-100..100%]
Cx04 [-100..100%]
Cy04 [-100..100%]
Cx24 [-100..100%]
Cy24 [-100..100%]
Cx44 [-100..100%]
Cy44 [-100..100%]
Lens Rotation [-4..4]
Squeeze-X [80..120%]
Squeeze-Y [80..120%]
X Offset [-100..100%]
Y Offset [-100..100%]
Cx02 [-100..100%]
Cy02 [-100..100%]
Cx22 [-100..100%]
Cy22 [-100..100%]
Cx04 [-100..100%]
Cy04 [-100..100%]
Cx24 [-100..100%]
Cy24 [-100..100%]
Cx44 [-100..100%]
Cy44 [-100..100%]
Cx06 [-100..100%]
Cy06 [-100..100%]
Cx26 [-100..100%]
Cy26 [-100..100%]
Cx46 [-100..100%]
Cy46 [-100..100%]
Cx66 [-100..100%]
Cy66 [-100..100%]
X Offset [-100..100%]
Y Offset [-100..100%]
Quadratic [-100..100%]
Quartic [-100..100%]
Degree 6 [-100..100%]
Degree 8 [-100..100%]
Load Lens Profile
Save Lens Profile
Once the footage has been undistorted, manually or automatically, this particular profile should be saved. This profile can be loaded at these locations or using the corresponding tool in Cinema 4D. These files (with the suffix *.lns) contain the Lens Distortion Model created here with all its settings.
Images, videos and guides will NOT be saved (to do so, the Project file must be saved).