Shader Properties
Use this setting if you want to color the thin film reflection. The color defined here is multiplied with the reflection. However, only a pure white would be physically correct (without a shader loaded into the Texture field).
Texture
Mix Strength [0..100%]
The Mix Strength setting can be used to steplessly mix a shader in the Texture field with the defined Color.
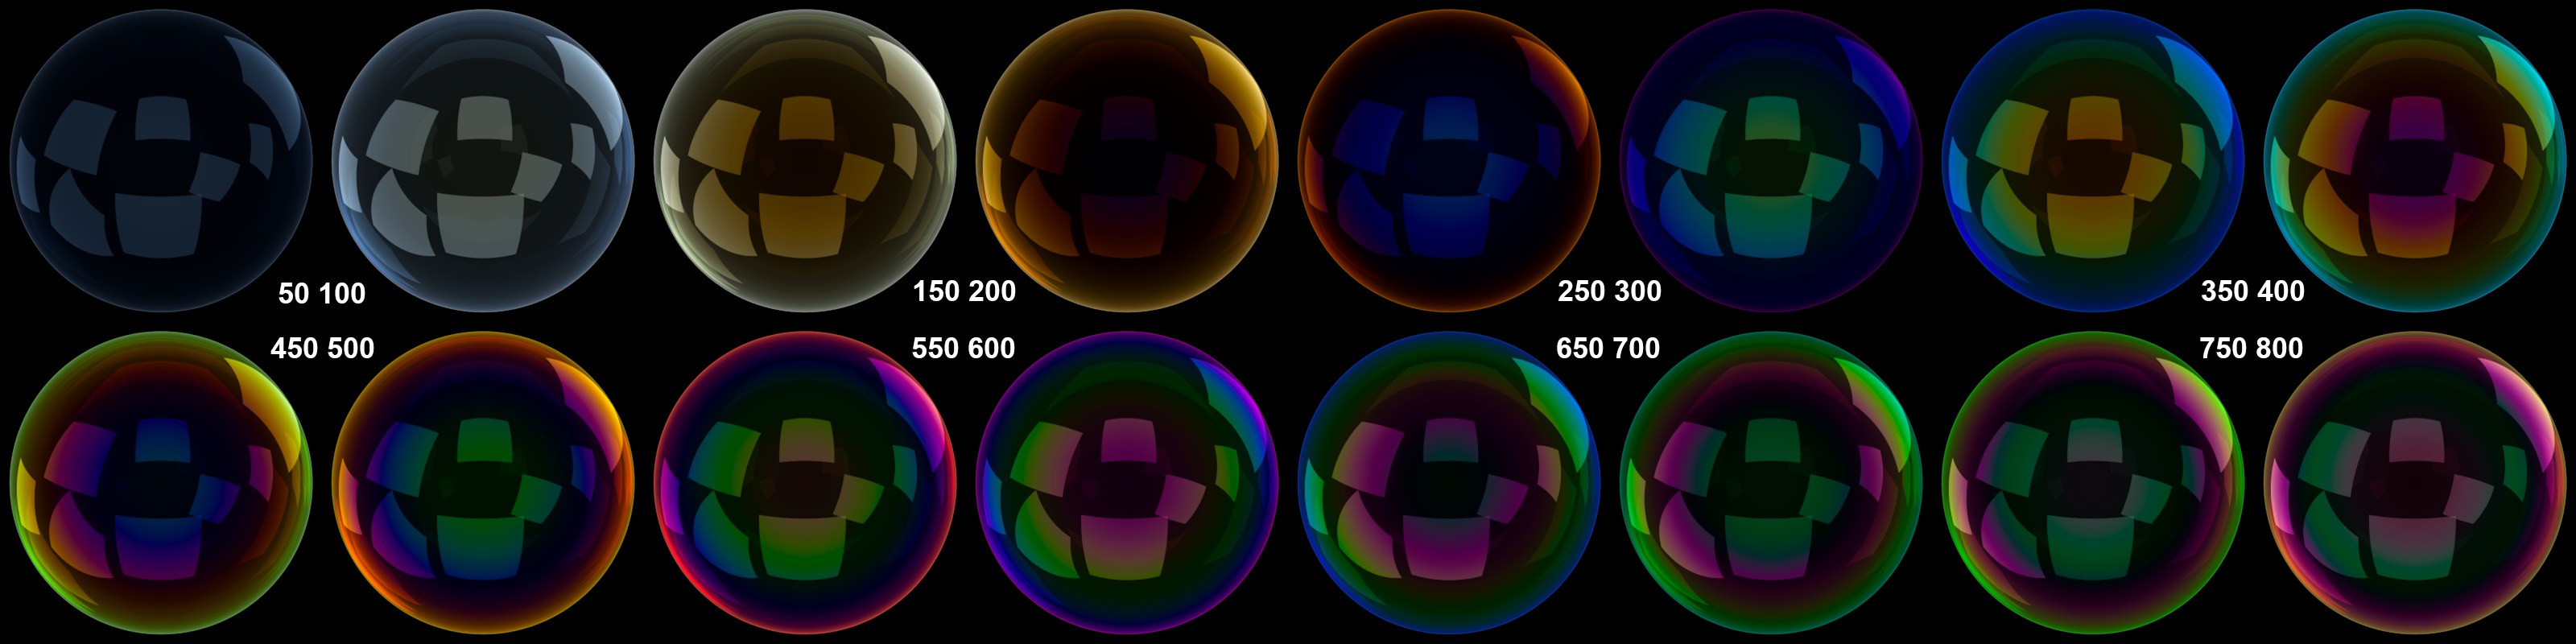 Varying Thickness values for a perfect soap bubble.
This setting defines the thickness of the thin film in nanometers (nm). The default value of 500nm represents an approximate median wave length for visible white light. To achieve realistic-looking results, values should be used that reflect those in the real world.
As you can see in the image above, colors change greatly within a thickness of 800, while greater values increasingly diminish the violet/green share until the reflection is completely white. A Thickness value of 0 will not produce any reflection at all.
In the real world, the thin film’s thickness will vary. This can be defined using the following Variation setting.
Variation (nm) [0..5000]
Texture
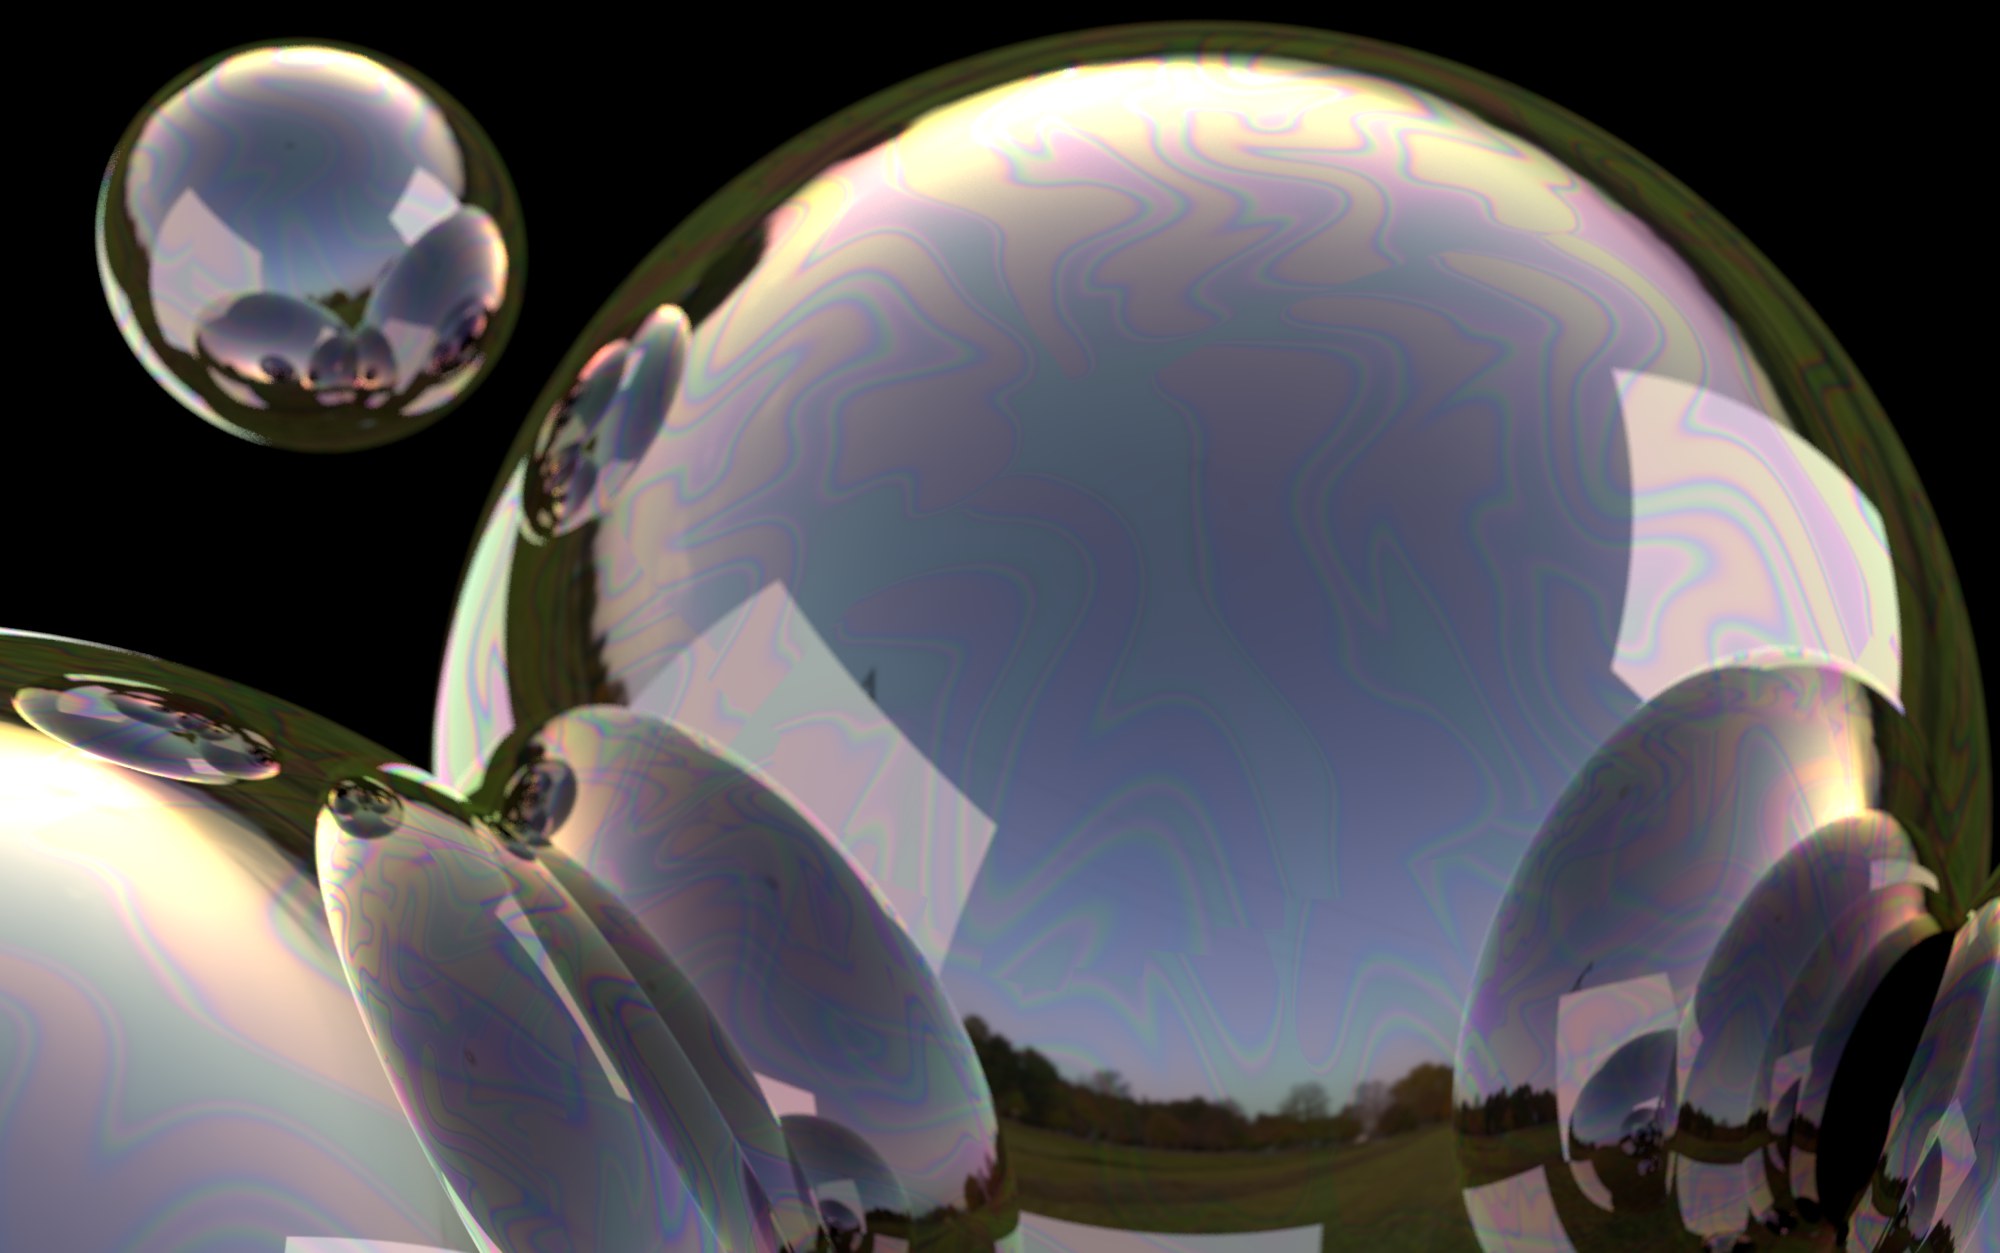
The vibrantly shimmering effect of soap bubbles or oil film on water is caused by variations in the thin film’s thickness.
The Variation (nm) value defines the variation of the thin film’s thickness from top to bottom. If, for example, a Thickness value of 400 and a Variation value of 100 are defined, the thin film’s thickness will vary between 300nm and 500nm. The exact distribution is defined using the grayscale values of the image in the Texture field.
The following applies:
- Black = minimum thickness
- White = maximum thickness
Gray tones will generate a correspondingly greater or lesser thickness.
The values above applied to a texture would produce the following result:
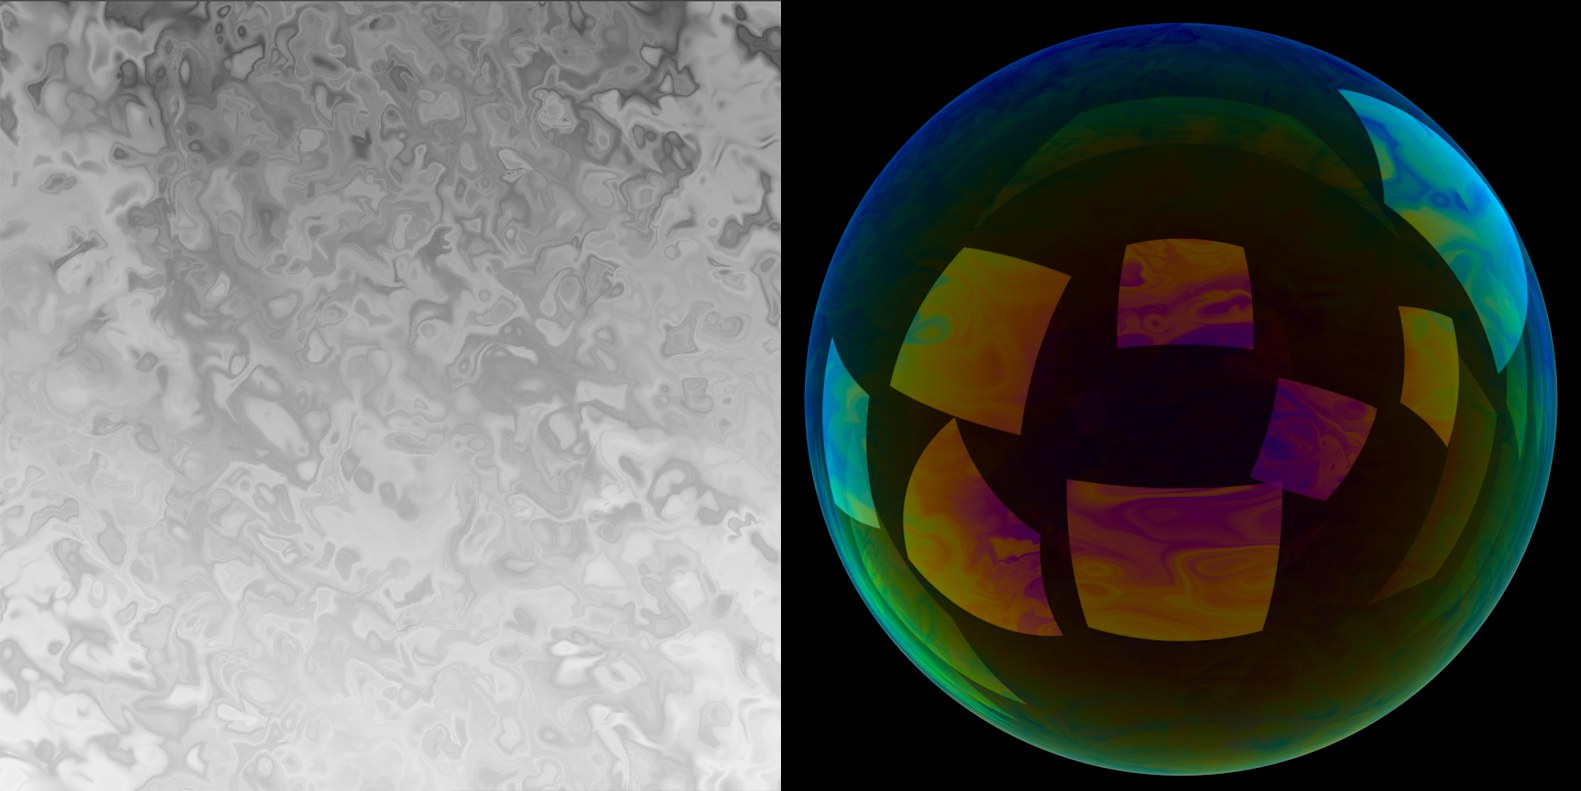
Since a soap bubble’s thickness increases towards the bottom (gravity causes the water to run downwards), a light-to-dark gradient should always be integrated into the shader.
If light hits the thin film it will be refracted differently, depending on the material (see also s.a. Refraction). This value can be defined here. The selection menu contains several default materials whose values will be set automatically when selected.
Generally speaking, smaller values will produce more colorful results and larger values will produce correspondingly less colorful results. The best results are achieved when realistic values are used. Select the thin film’s material (not the material on which the thin film lies) from the drop-down menu. Note that this refraction index is only used to calculate the coloration of the thin film - real-world calculations such as the divergence of render rays are not made!
This setting can be used to fine-tune the overall quality. Lower values will produce correspondingly less realistic results while higher values will produce better results. As always, the better the quality, the longer the render time will be.
Note that very high values will at some point not improve quality to the same degree.
A somewhat more technical explanation: Internally, the shader uses spectral colors in its calculations (takes different behavior into account (e.g., the varied refraction strength of different spectral colors)). If an RGB value should be generated from these spectral colors, the total number of samples defined here will be taken from the entire visible spectrum and averaged from this RGB value.