Brush
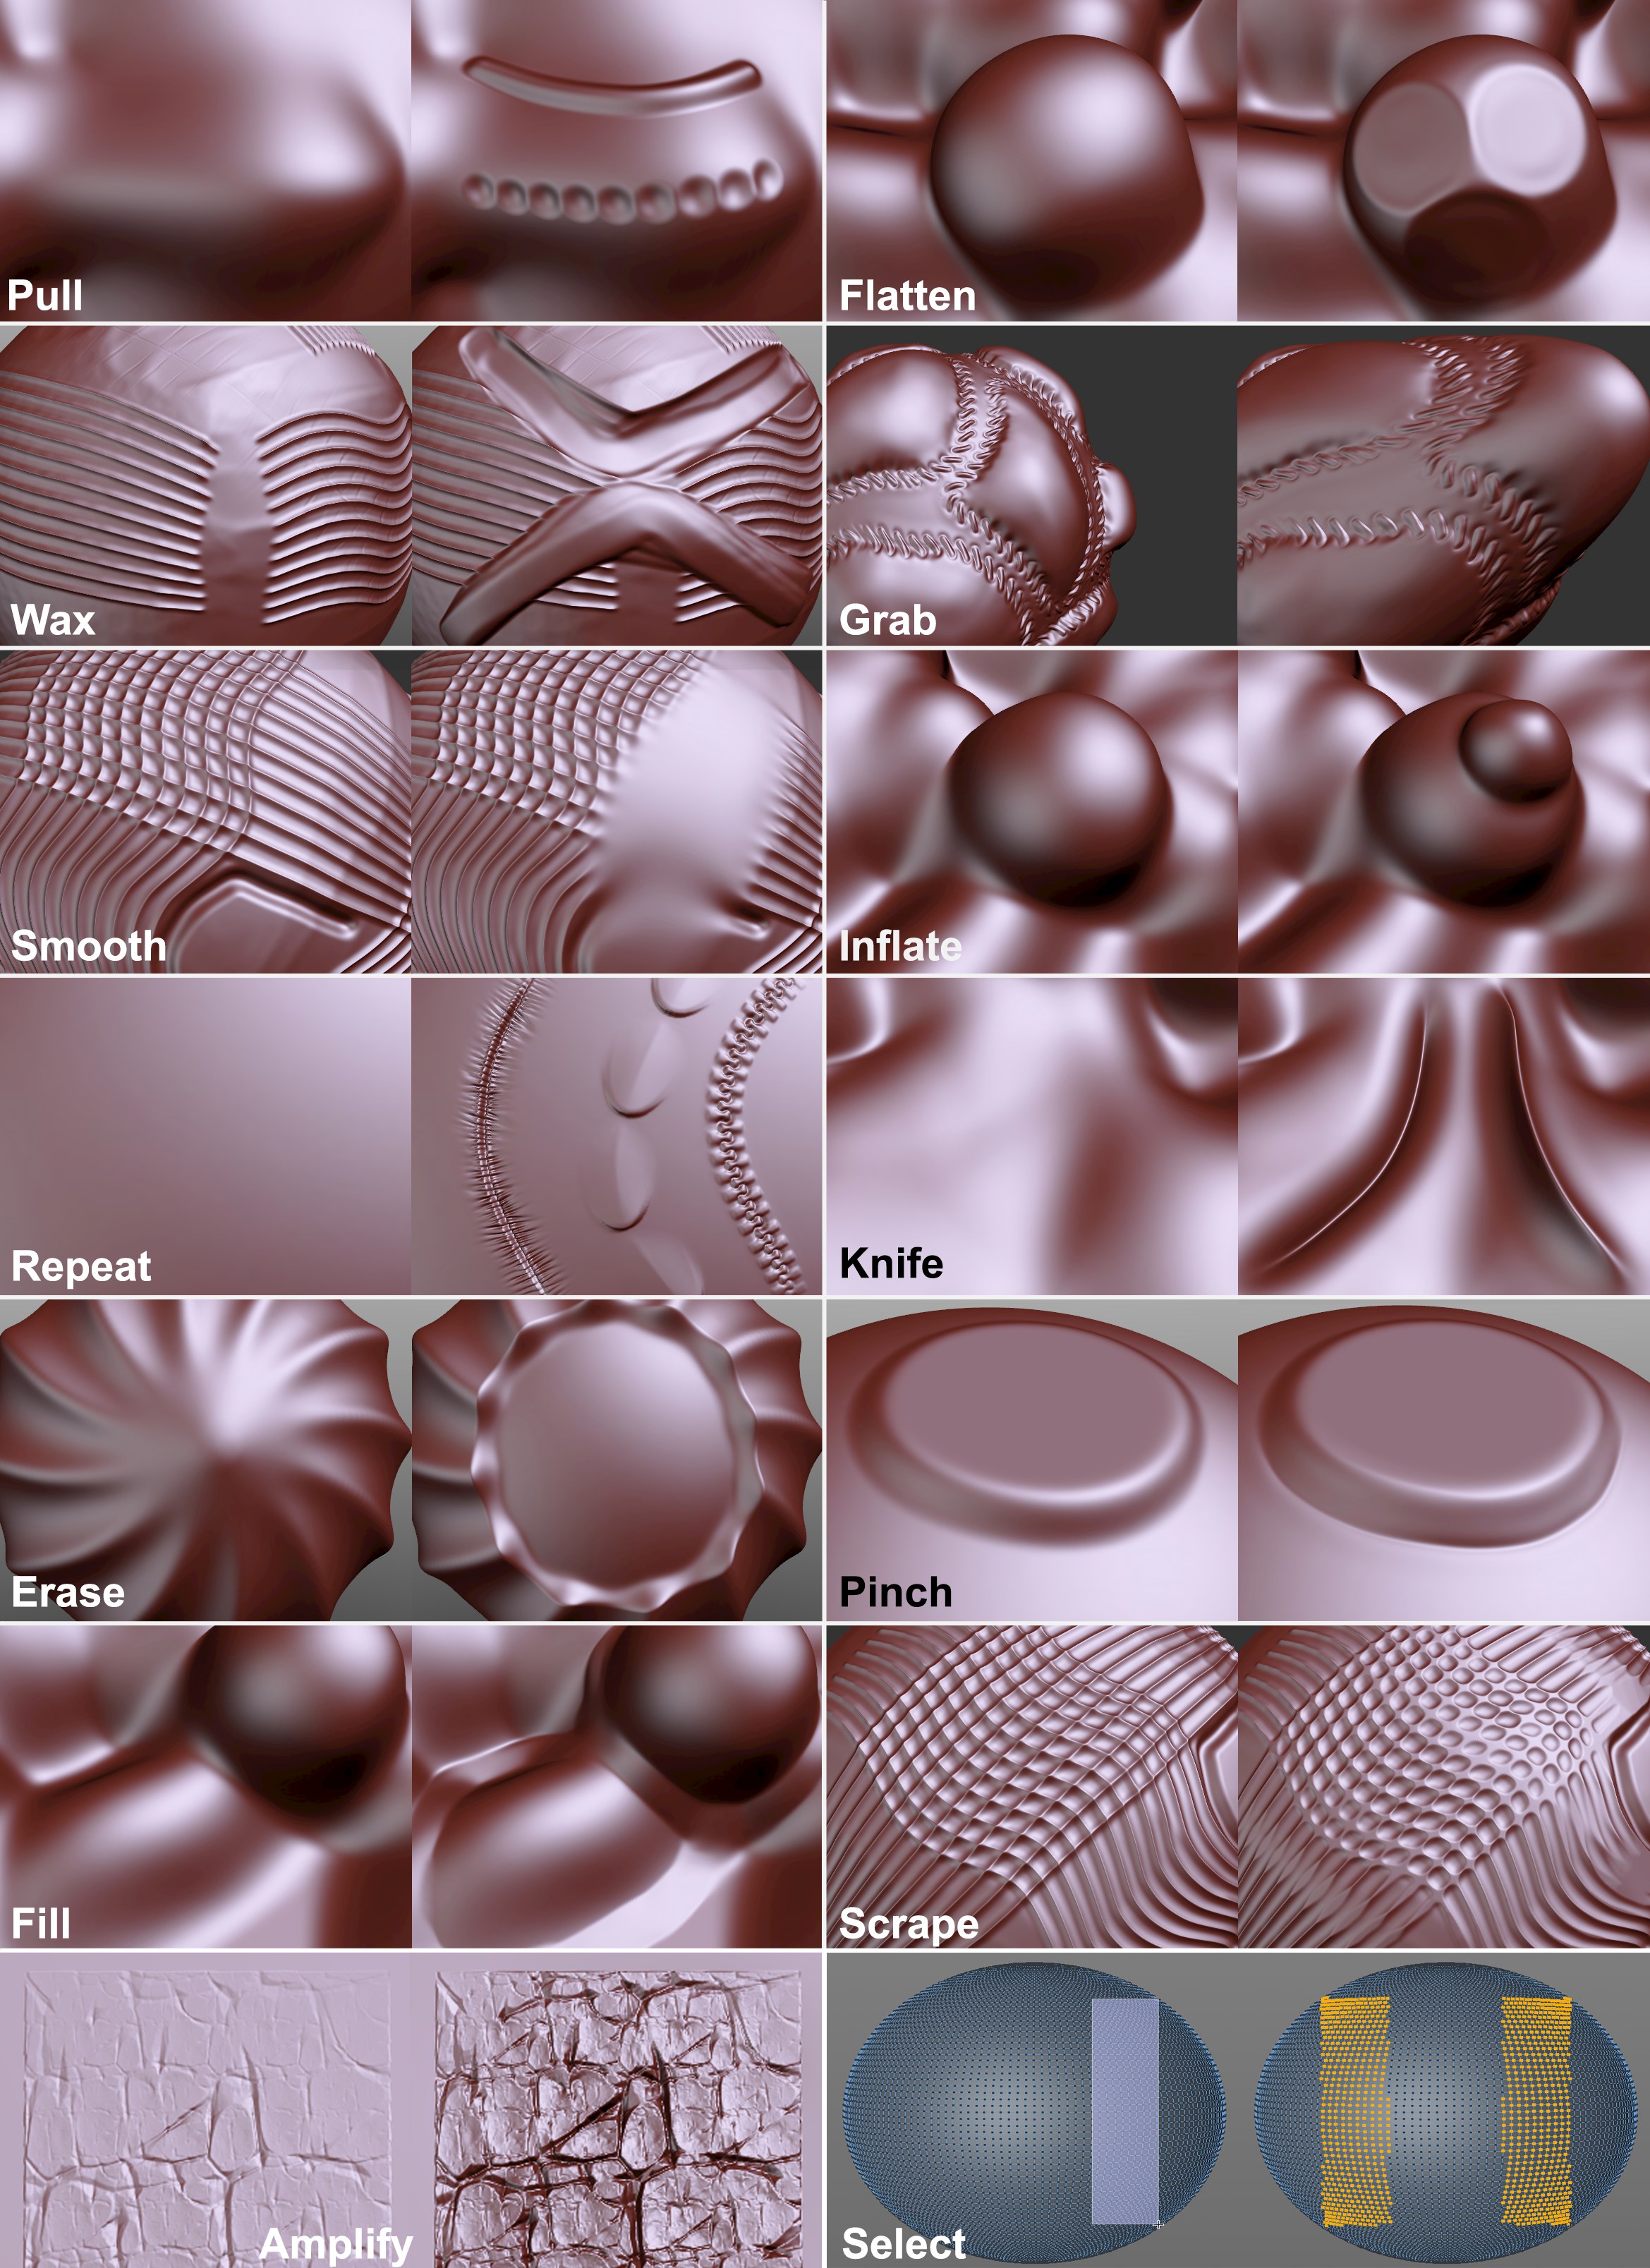
There are several Sculpting brushes available, designed for different purposes and with numerous shared parameters (which you might already be familiar with from using BodyPaint 3D). For example, each brush offers Size and Strength settings, among others. The settings can be defined individually or globally and can be saved in Sculpting brushes for later retrieval from the Content Browser.
Point, edge and polygon selections will be observed, i.e., only selected elements will be moved by the brush.
All brushes work with only a few exceptions (which are of little use in this regard anyway: e.g., Erase, Repeat, Amplify, Mask). In very few cases, some brush modes are not supported (e.g., all three Fill Draw Modes).
Furthermore, Sculpt brushes can be used to modify some Deformation objects and objects:
 Camera
 Correction object
 Muscle object
Note also that the Sculpt brushes now offer spline snapping (enable the Spline Snap option in the main Snap menu):
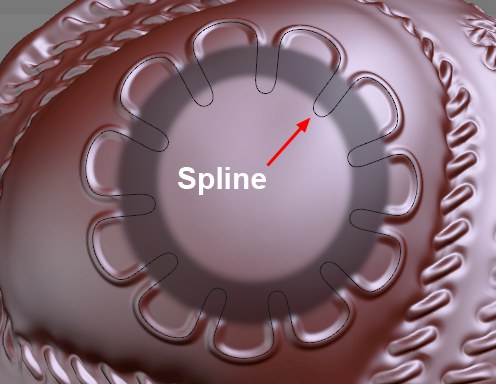
The splines to not have to lie on the surface of the Sculpt object: move and rotate the spline so it lies correctly over the object. Then roughly follow the spline with the brush (note also the Snap Radius option). The brush stroke will follow the spline exactly.
Brushes also snap to the Guide object (the Guide Snapping option must be enabled in the Snap settings).
Interactivity
 Sculpt brushes can be modified interactively using hotkeys.
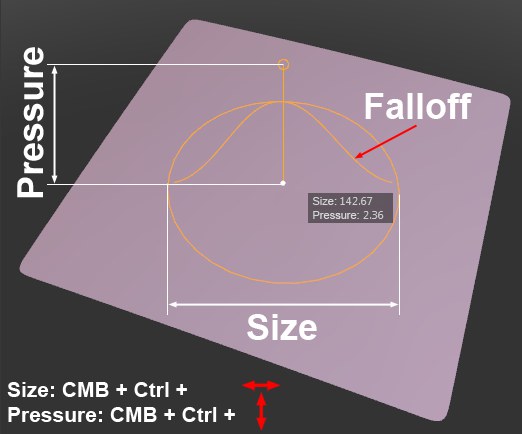
Sculpt brushes are displayed in the Viewport according to their hardness, strength and falloff when the cursor is placed over objects that can be sculpted.
The following combinations (the first two points work for all brushes in Cinema 4D) can be used:
- Middle mouse button + drag left/right (or Shift+Ctrl): Adjust brush size
- Middle mouse button + drag up/down (or Shift+Ctrl): Adjust brush pressure
Otherwise the following key combinations can prove to be very useful:
- Shift + left click: This works for every brush and switches it temporarily to Smooth mode (using the Pressure value defined for the Smooth brush); the Mask brush will switch to blurry mode.
- Ctrl: Switches the respective brush to an inverted mode (mesh will be raised instead of lowered and vice-versa).
- Alt + X, Y, Z switches the respective Symmetry mode on or off.
- W switches the wireframe view on or off.
- T + left mouse button moves,
T + middle mouse button rotates and
T + right mouse button zooms a stencil in the Viewport. - Q switches the stencil’s view on or off in the Viewport.
- If you conduct a search in the Command Manager you will see both described commands and several more. You can then assign various unique key combinations.
You can also find these options in the "Base" tab of each Sculpting brush; these 4 commands can be used to switch them. You can find details under Link Size.