Volume Mesh
![]()
It can happen that an object’s mesh flow is a little bent out of shape due to an excessive use of sculpting, for example. Some regions can end up running out of "deformable" points, which can produce artefacting when the object is sculpted.
It’s now possible to repeatedly shape an object and subsequently apply the Volume Mesh to create just about any shape from a sphere or cube, for example.
Good results can also be achieved with this function in conjunction with Deformers (deformation effect is taken into account when the function is called up): deform, Volume Mesh, deform, Volume Mesh and so on. There will always be enough points.
Note, however, that the original mesh flow will be lost and the quads that are generated will not necessarily be level.
With the help of OpenVDB, a new object with approximately the same (if desired) point density can be created from a voluminous object.
Objects to which a Volume Mesh are applied look for the most part as follows:
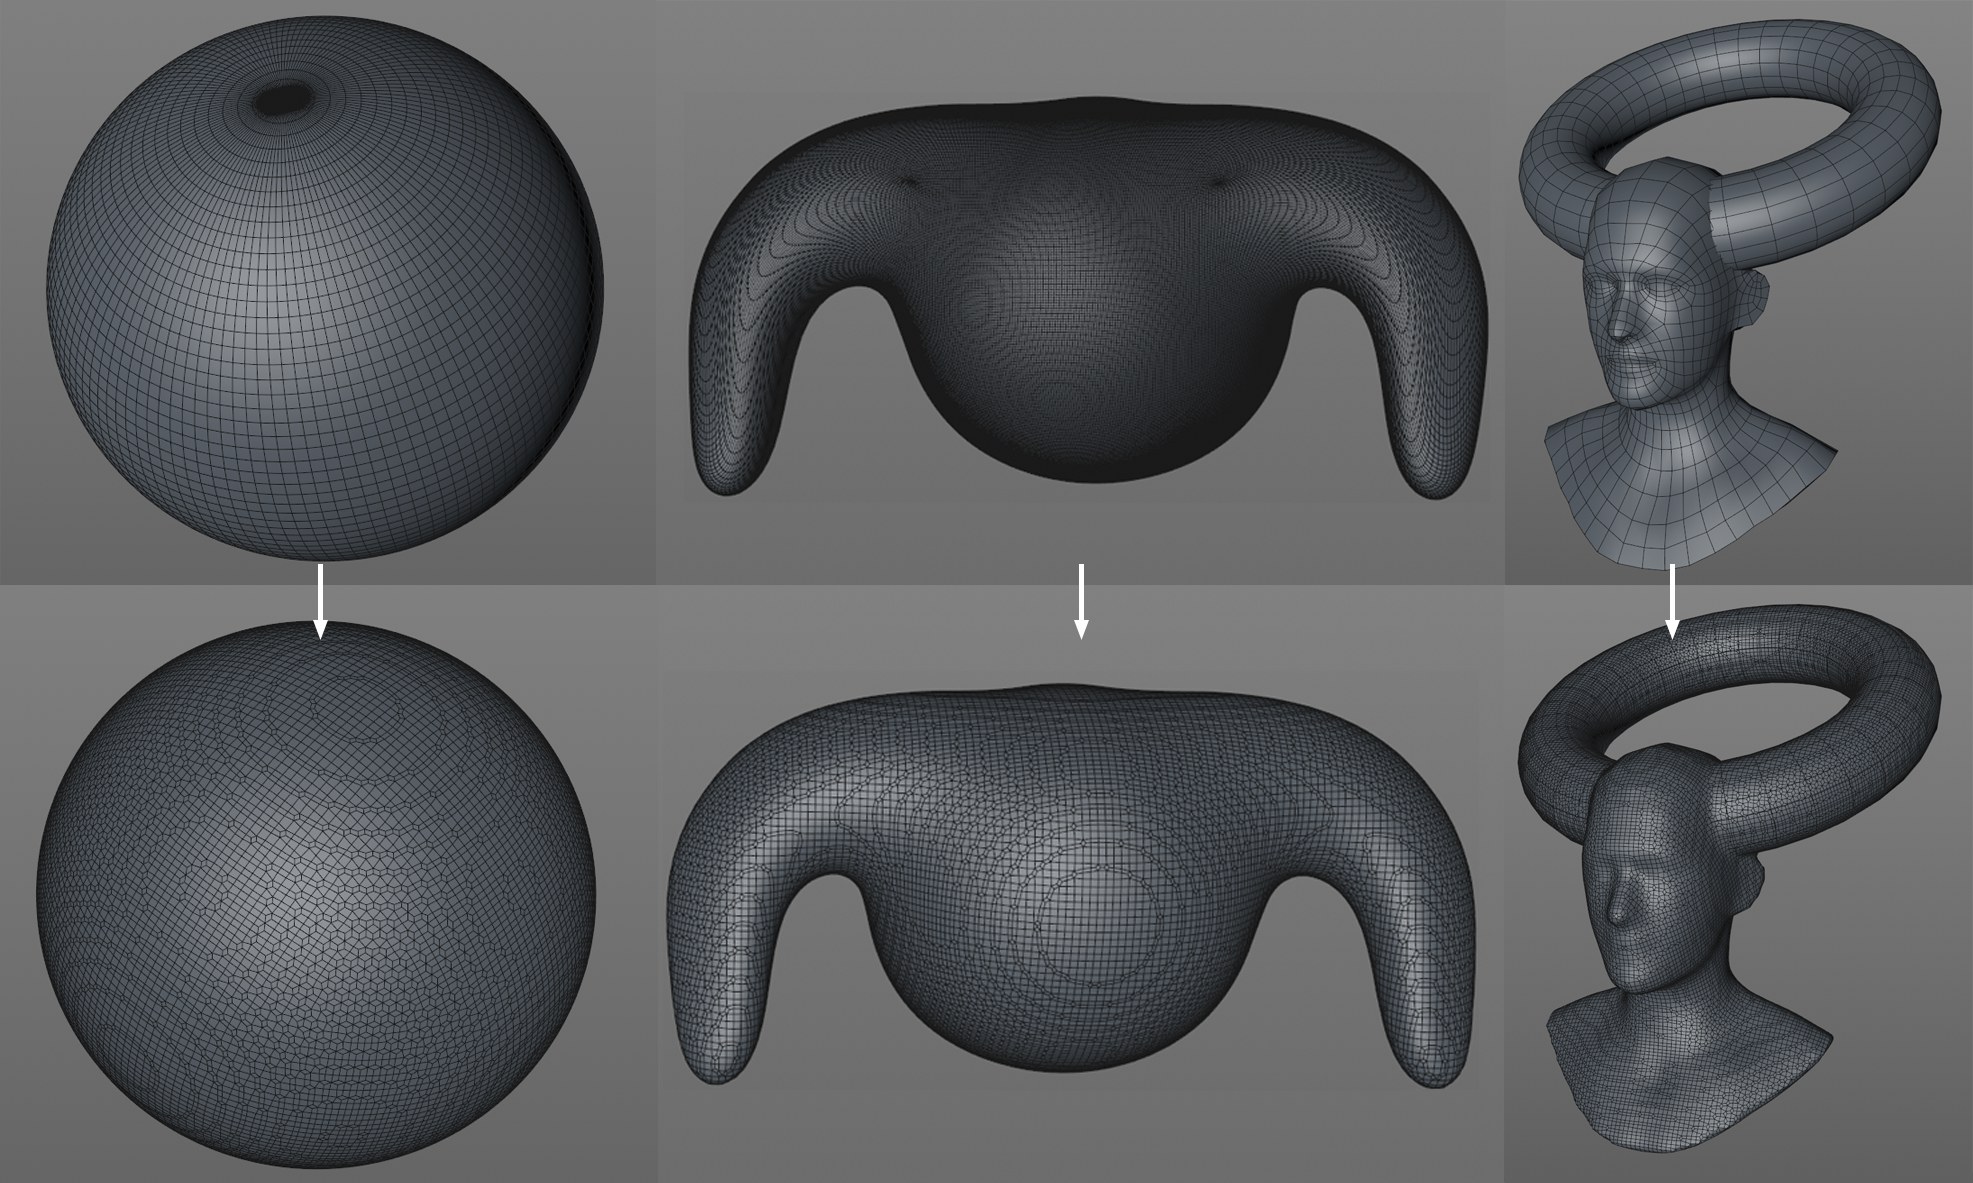 Each original object at top and each object with a Volume Mesh applied below.
Another use would be to connect objects in order to edit them using the Sculpt function:
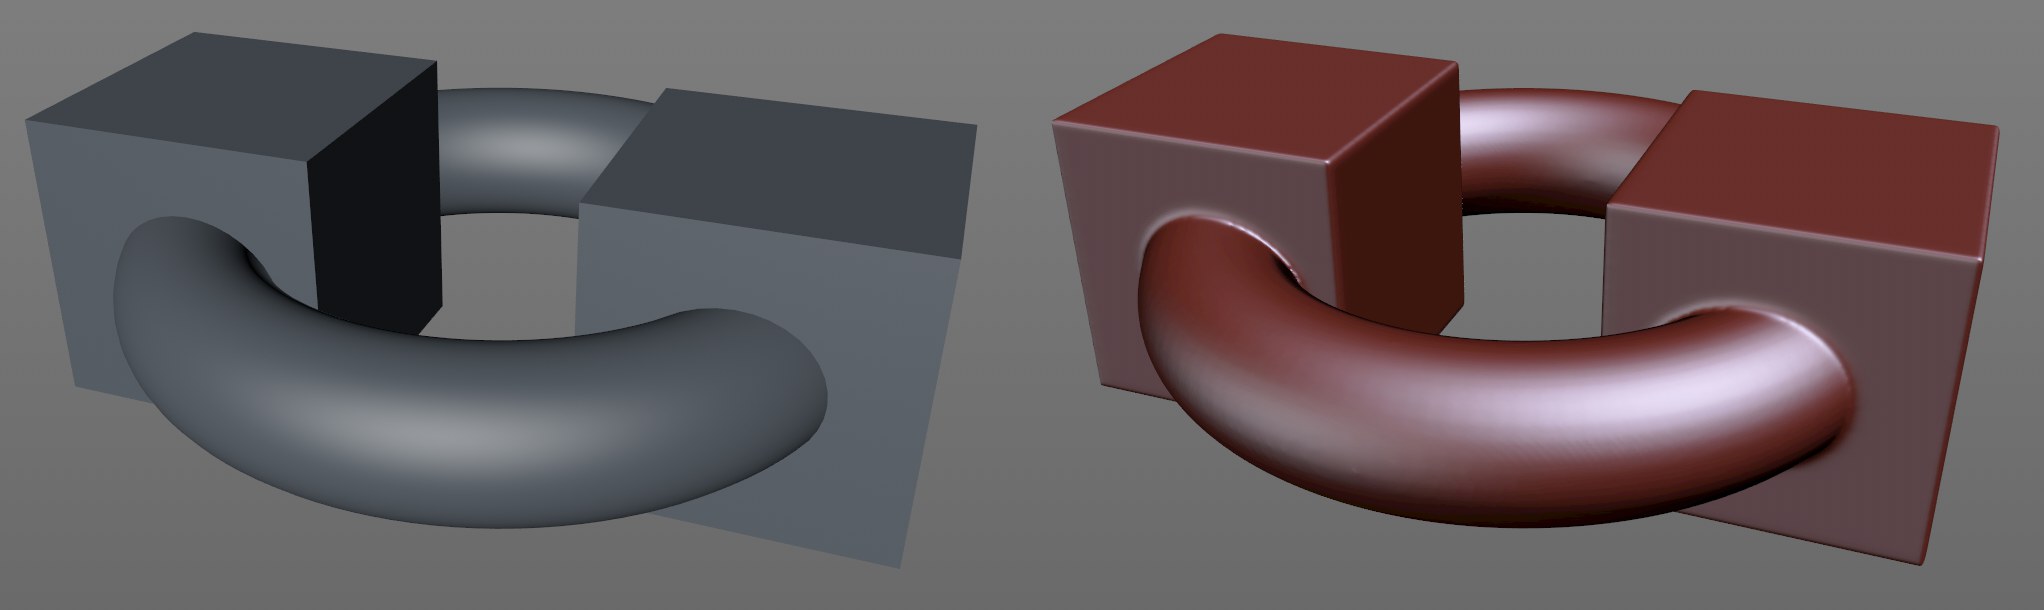 A torus and two cubes were combined to a single object, which can now be edited using the Sculpt function (a Boolean operation hollows the interior of all objects out).
Use
- Select the objects to which you want to apply the Volume Mesh (this can also be Generators or objects to which a Sculpt tag is assigned) or objects that you want to combine.
- Call up the command
If the Preserve Objects option is enabled, you can see exactly what this command does: a series of OpenVDB functions take effect. Depending on the settings defined, the following will happen:
- The selected objects will be made Child objects of SDS objects and unified
- A Volume Builder will make Voxels out of these objects
- The Gaussian Volume Filter will be applied
- The entire hierarchy will be made a Child of a Volume Mesher, which in turn generates a mesh
Settings
Voxel Size
This setting correspond to the Volume Builder’s Voxel Size setting: the larger the value, the more coarse the internal Voxels and in turn the final mesh will be.
Subdivide First
If this option is enabled, the following will happen, depending on whether or not Create Hierarchy is enabled:
- Option enabled: The object will be made a Child object of an SDS object (with the subdivision defined here) and subdivided and smoothed
-
Option disabled: The object will be subdivided softly using the
 Subdivide... command (the Angle Limit will be defined by the respective Phong tag)
This means that the respective object will be rounded prior to being converted to Voxels. This will, for example, result in facetting on an undulating surface not being visible.
Smooth
Enter a value greater than 0 if a Smooth Filter will be applied. The higher the value, the greater the degree of rounding on edges and corners will be.
This setting smooths after the Voxel generation (in contrast to the previous function).
Preserve Object
Enable this option If not only new objects should be created but also - as described here - be placed in a hierarchy so they can be adjusted interactively. Select the Volume Mesher and call up the ![]() Current State to Object to create an editable polygon object.
Current State to Object to create an editable polygon object.
If this option is disabled, objects that have no closed surfaces will be closed.