Alpha
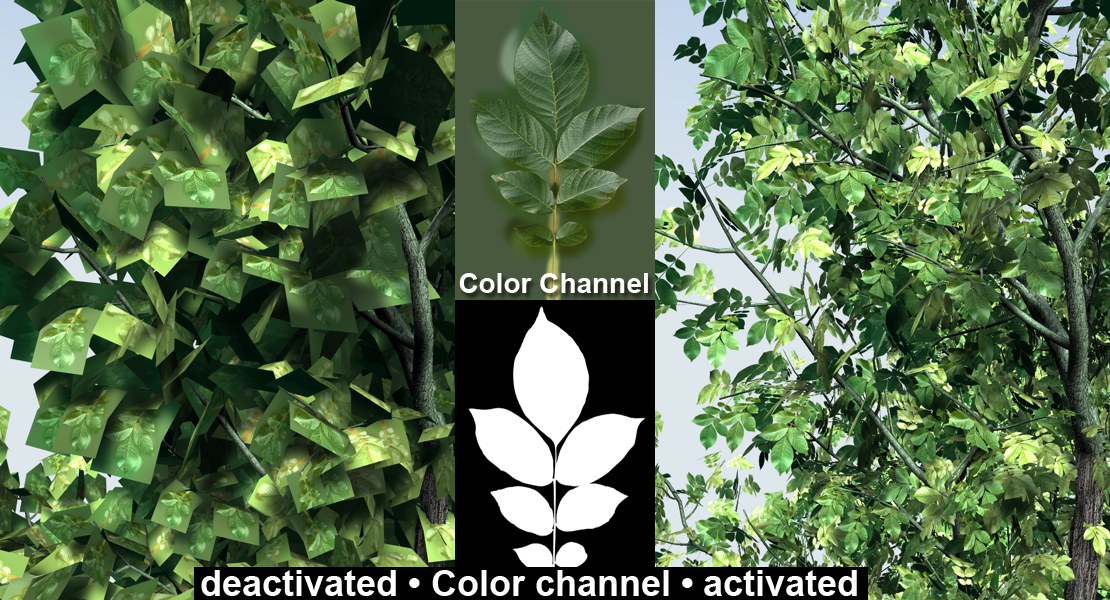 The image on the left was created by projecting a leaf texture onto a slightly uneven polygon surface. In the image on the right, the Alpha channel was activated, which "stamped" out the leaf surface. Scene © Milan Soukup
An alpha channel enables you to use an image to mask out areas of the material, allowing any background to show through. This is useful for faking detail in 3D. The idea is to define areas of the material that effectively become non-existent so that any underlying materials or objects show through. A classic example would be a 3D tree. Rather than modeling the individual tree, a picture of a tree can be added to an object and an alpha used to cut out the shape of the tree.
If you notice black areas when rendering objects that have multiple alpha materials, increase the Ray Depth value on the Options page of the render settings.
If you apply a material with a Cinema 4D Alpha channel to an object and the object has no underlying material, the object will be non-existent at the points where the alpha allows the underlying material to show through.
Suppose you want to place a scanned picture of a tree into a scene. First, you should create a material, enable the Color channel, choose a picture of a tree as the color texture and then assign this material to, perhaps, a rectangular polygon.
If you render this scene, you should see the tree on the rectangle polygon. However, the area around the tree is probably not transparent, but blue if the scanned picture has a blue sky background (Figure 1).
 Figure 1.
Now edit the tree material, enable the Alpha channel, switch to the Alpha page and load the Tree texture there. First, disable the Soft option. Ctrl+click on the area you want to mask — in our case, the blue sky around the tree (Figure 2).
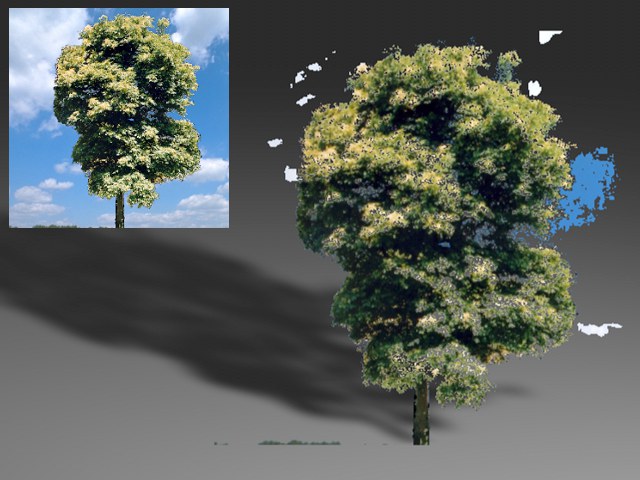 Figure 2.
Cinema 4D sets the color sliders to this color and masks according to the picture. The tree is now shown without the surrounding background (provided that you have Gouraud Shading or Quick Shading on). You can now select a slightly different color on the Alpha page and see the effect immediately. However, some background may be left around the leaves, branches and the trunk. So the result is not quite right yet.
For a more accurate result, create an alpha channel in your image editor and integrate this into the tree image; for details on how to do this, consult you image editor’s help. Load this picture into the Alpha channel and enable Soft and Image Alpha. The texture is now masked cleanly (Figure 3).
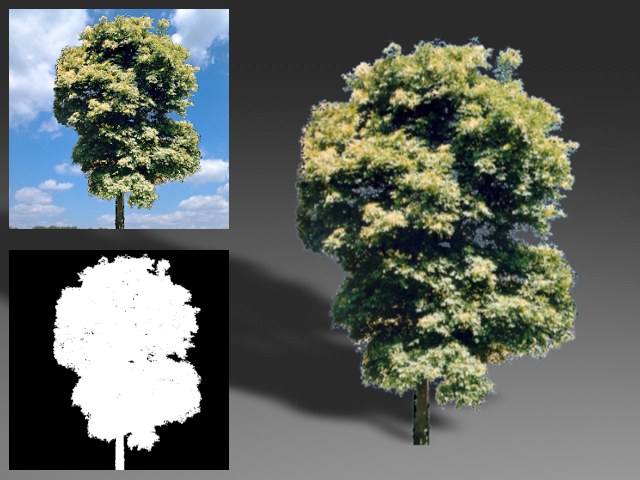 Figure 3.
Two materials were used to create the intricate box below: A reflective gold material and a matt wood. To make the wood visible, one of the two colors was cut out from a scanned black-and-white picture.

Alpha Channel and Antialiasing Filter
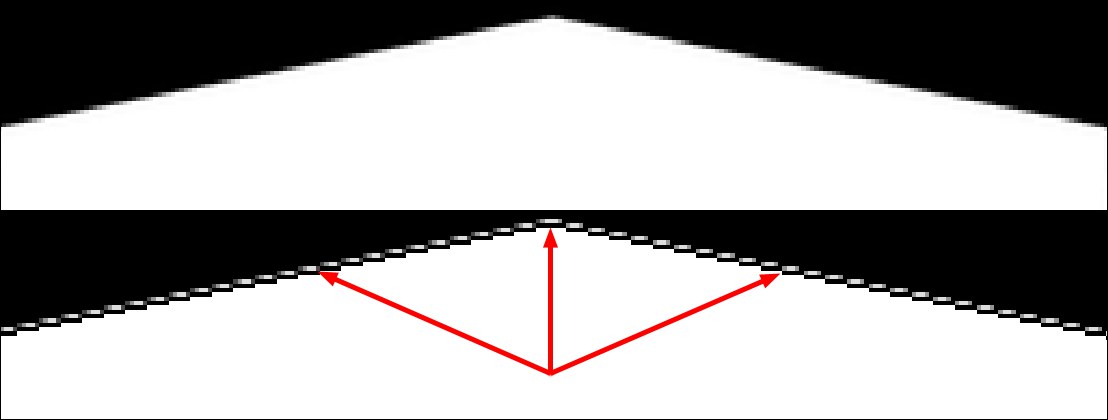 The Sinc antialiasing filter enlarged to make over-exposed areas visible.
Depending on the Filter Antialias settings, the Alpha channel can end up being smoothed as well. This can result in problems in subsequent compositing, especially when the Sinc filter, which can - as pictured above - "overshoot", i.e., generate an edge, is used. Antialiasing filters can, depending on their settings, extend their effect beyond the edge of an object. This can be minimized by either selecting a different filter or by using smaller Filter Width and Filter Height values.
Clipping is often attempted with texture images that are antialiased; this produces a bright border around an object caused by the antialiasing of colors between the main texture and the alpha color; you can remove this border by adjusting the deviation sliders.
You can use clip mapping (also sometimes called genlocking) to mask particular areas with a Color value. Using this method, you pick the color from the selected image that you wish to become transparent. The downside is that often the areas you wish to become transparent contain several colors and the resulting alpha can leave a seam around the object. However, by setting the Delta color, you can define by how much the color may deviate; this can help to reduce the seam.
Use alpha channels built in to the texture to mask areas softly and more accurately (see Image Alpha below).
This option simply inverts the alpha, so transparent and solid areas are reversed. This works for both clipped images and images with built-in alpha channels.
This enables you to fade textures and materials from one to another, which gives you even more ways of creating realistic-looking objects. With Soft enabled (the default setting), the Color and Delta settings lose their meaning. The texture map is now used to decide which ranges should be faded. A white texture pixel in the image means that here the material is to be 100% opaque. If the texture pixel is black, the underlying material shines through 100%.
With Image Alpha enabled, you can use any existing alpha channel of the loaded image. A list of supported formats can be found here. If no alpha channel is present in the image, the Image Alpha option will be ignored. Use the Invert function to invert the alpha channel without having to rework the texture in your image editor.
Enable this option if you are using a texture with a premultiplied alpha channel. Certain graphics applications only produce this type of alpha channel.
Here an image texture or a 2D shader can be defined. Refer to the Textures chapter for details.