Viewport
When active, animated textures, shaders or videos will be displayed when the animation is played. Note that this can require quite a bit of memory for very complex shaders.
Here you will find a range of entries, relative to the graphics card being used. The value controls the internal resolution of the texture (for the unrendered Viewport display) — the higher you set this value, the more detailed the texture will be in the viewport. The value has no effect on the rendered result.
This menu makes a series of material channels available that display the loaded texture or shader in the form of a projected RGB texture, however without any channel-specific effects. This does not have an effect on the final rendered result. The default Combined option reflects the normal viewport display (material channels will be combined for display).
Note that this functionality as well as the one described in the following section are only fully supported by the default materials (New Standard Material).
All material channels are listed above that can be displayed in the Viewport. Each of these channels can be turned on and off as desired.
If you don’t want to use the Sky object or the Physical Sky in the scene for the "reflections" you can load your own texture here, which will then only apply for this material.
This setting can be used to rotate the texture loaded in the aforementioned setting (that is mirrored internally with a hidden Sky object) in any direction.
Viewport tessellation
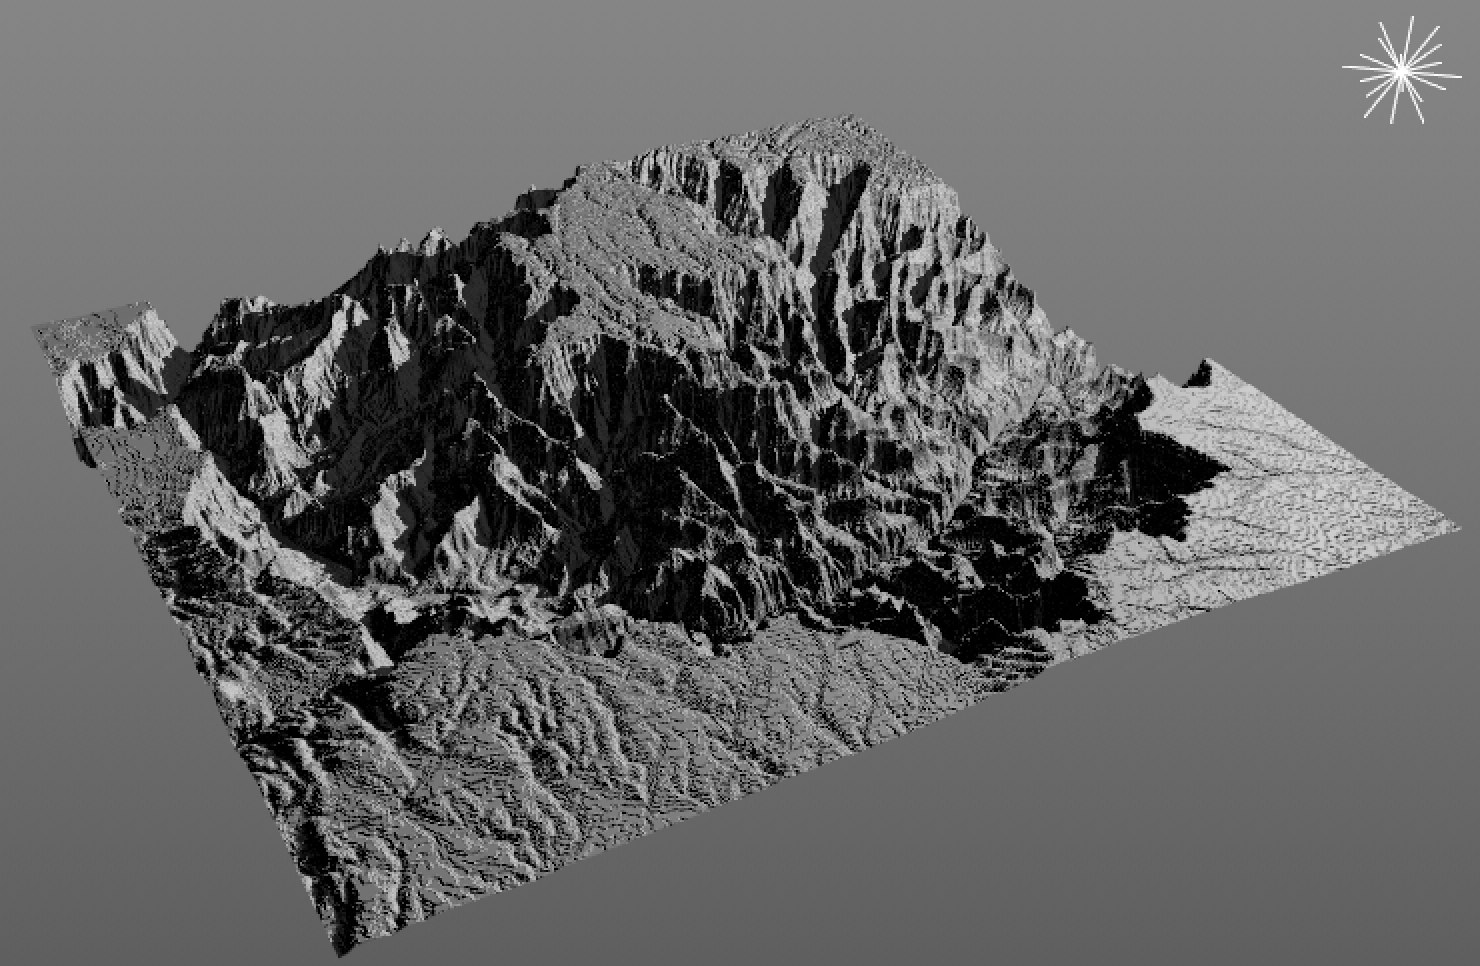 The Grand Canyon created using a Displacement texture displayed unrendered in the Viewport thanks to Viewport Tessellation.
With the help of the graphics card, Cinema 4D can tesselate object for the Viewport (only!). Polygons will be broken down into small triangles.
The tessellation cannot be rendered (unless you enable Viewport Renderer as the Renderer).
The tessellation is used to show displacement directly in the Viewport as a preview (which can, however, differ from the rendered result (see below)) for the actual displacement. This means you don’t have to use a Displacement Deformer.
The Viewport Tessellation is, for example, helpful when animating with displacement effects (it would be very useful if you animated a camera motion around the canyon in the image above).
For tessellation to work correctly:
- Tessellation must be enabled in the Viewport (Options menu)
- In the material’s Viewport menu, Mode must be set to Uniform (the Displacement channel must, of course, also be enabled).
Artefacting can occur if Texture Preview Size (at the top of the menu) is too small.
Limitations
- Note that the quality of the displacement shown can deviate from the rendered result. For example, faulty shading or holes in meshes, etc. can occur.
- Viewport Tessellation cannot be used in conjunction with several Subpolygon Displacement features such as Round Geometry.
- Stacked displacement materials on a single object will not be displayed correctly (both displacement effects will be visible).
- 32-bit textures are converted internally to 8-bit, which means that stepping may be visible.
 Viewport Tessellation
Select here if and how the Viewport Tessellation should be enabled for the selected texture. The following options are available:
Viewport Tessellation is disabled.
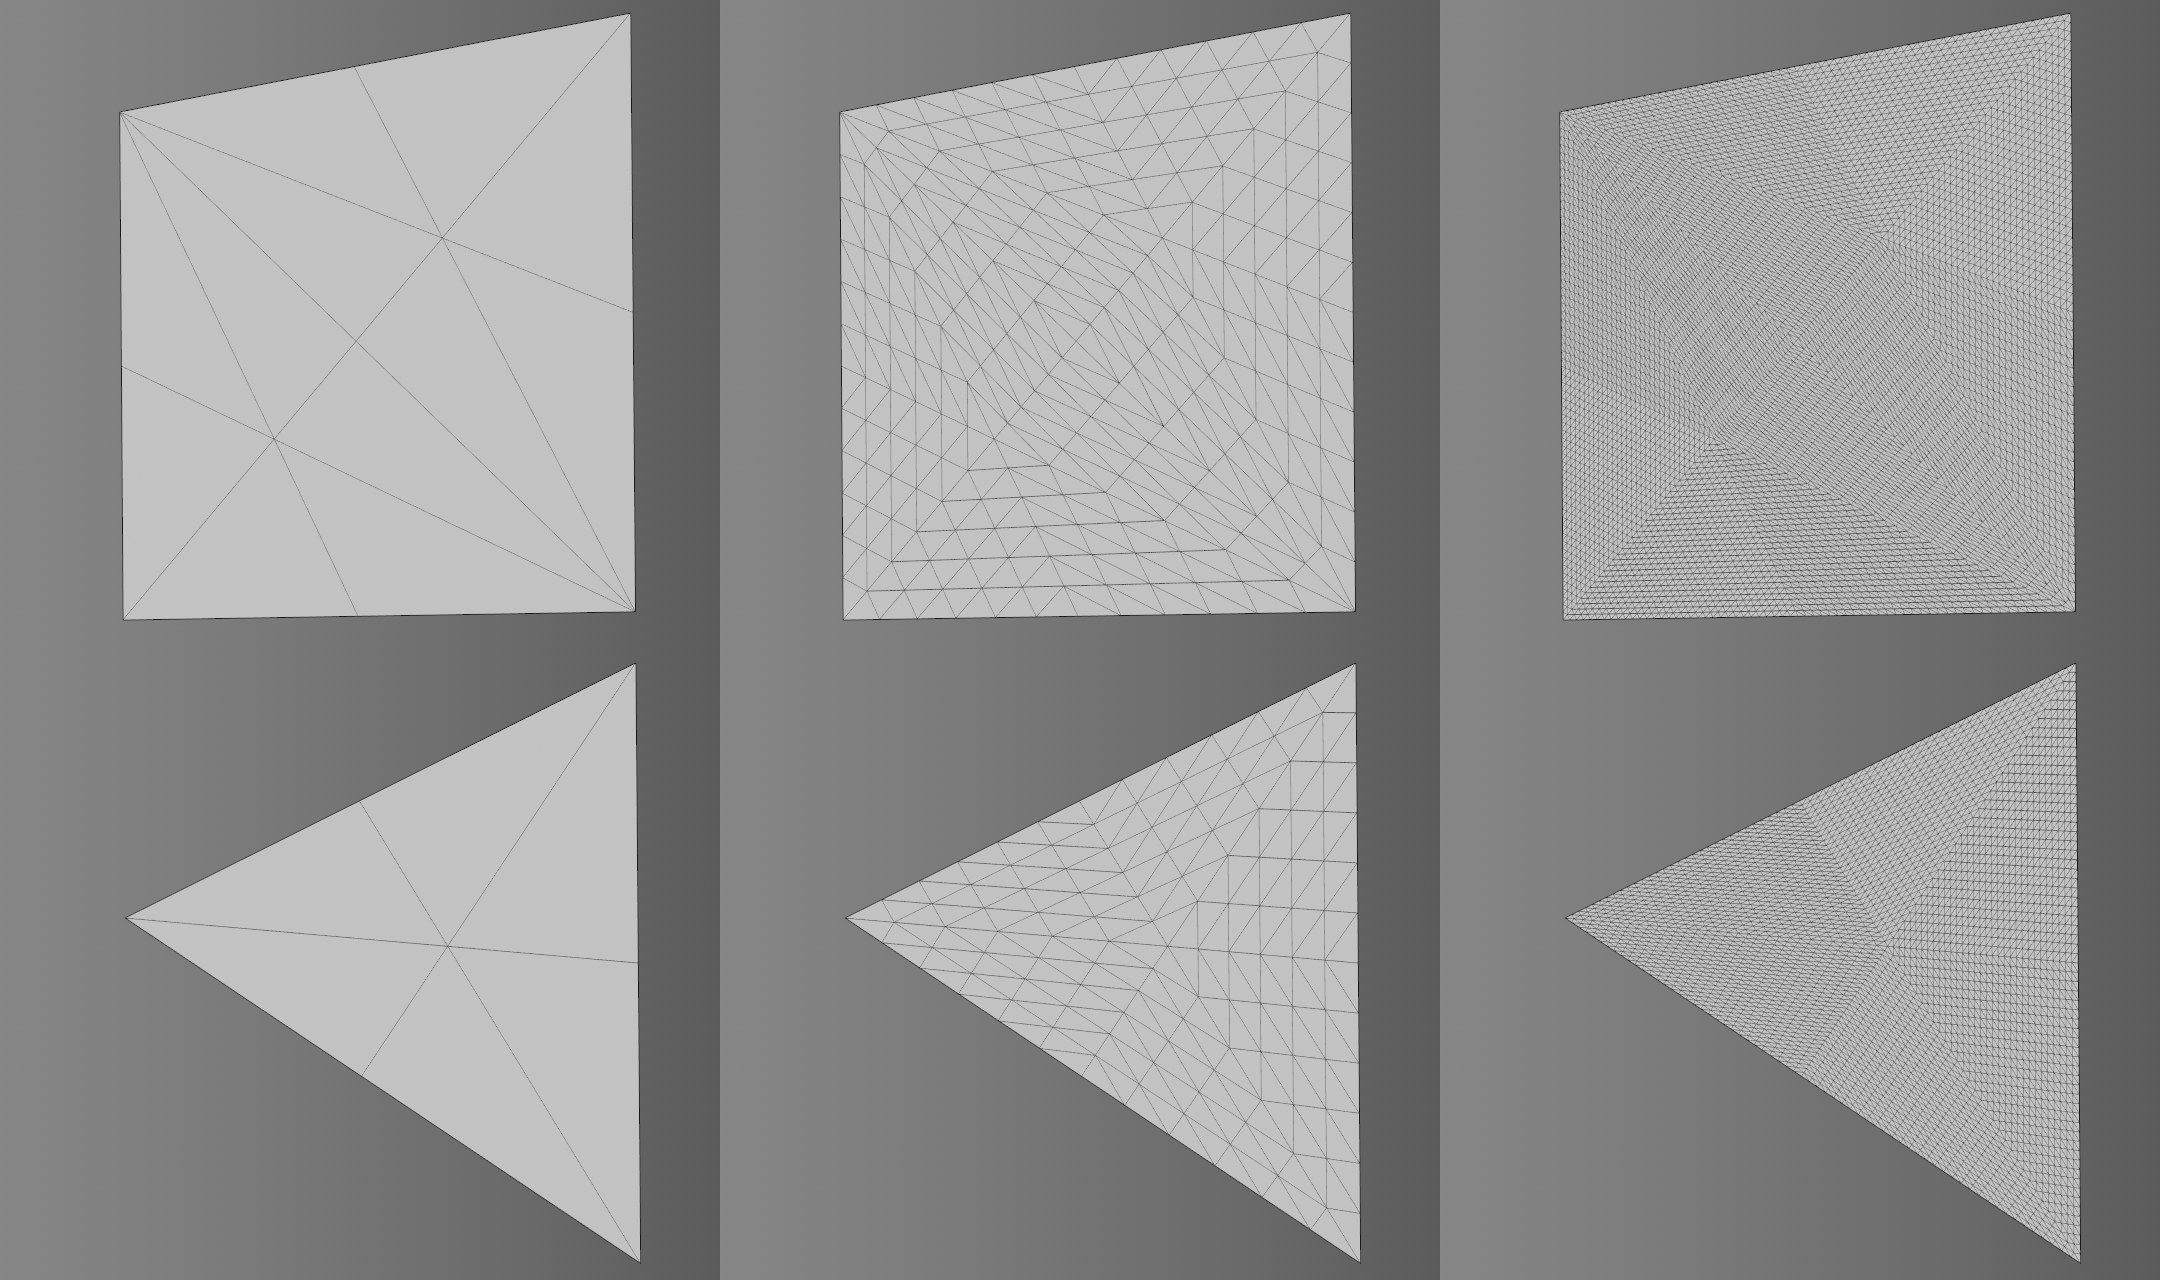 From left to right: 1, 12 and 64 for Uniform Level.
The object to which the material is applied will be tesselated uniformly - i.e., independent of the camera’s distance from the object. Uniform Level is the measure for the number of subdivisions.
Note that the value that can be defined here depends on the graphics card used (a common value is 64. This value is not enough if your object is made up of just a few polygons (e.g., a cube with 1x1x1 segments). Therefore, it can be necessary to subdivide such objects in advance.
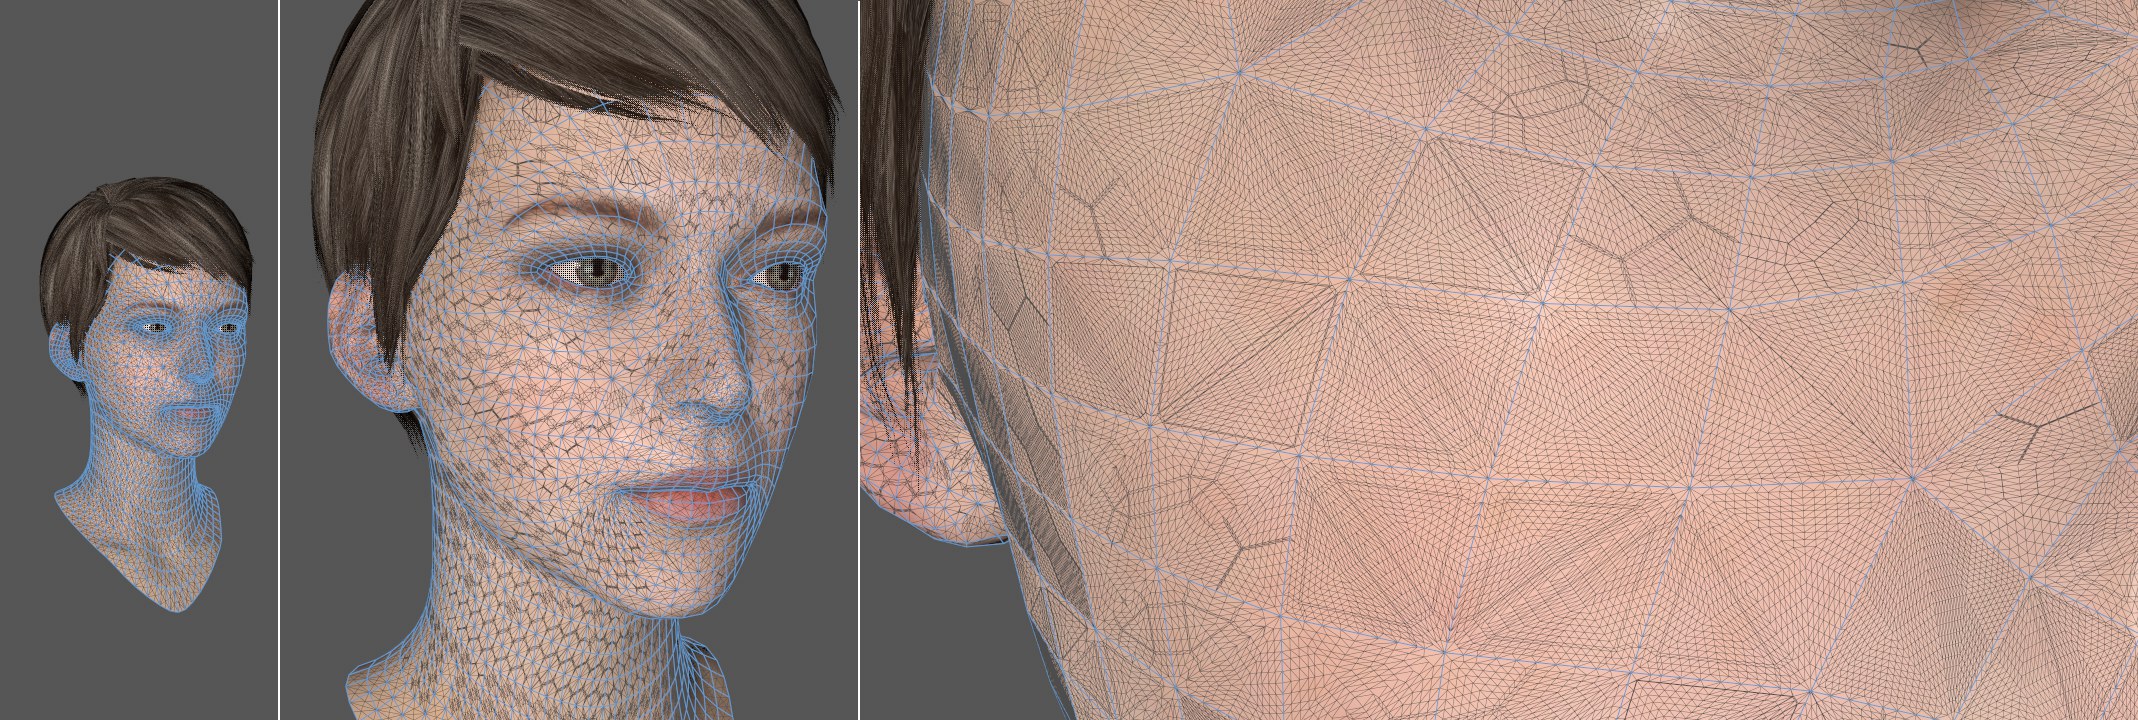 The closer the camera is to the object, the finer the subdivision will be.
In this mode you define a maximum number of subdivisions (Projective Level) that should be calculated when the camera is nearest to the object. The farther the camera moves away from the object, the less that will be subdivided. This will take place dynamically and steplessly.
This is a very practical function: If an object lies far away from the camera, a high subdivision would be useless because these details cannot be seen at such a distance anyway. Therefore, this function speeds up display speed.
Here the level value is displayed that your graphics card can calculate.