Illumination
The following parameters (with the exception of Model and beyond) can be used to include or exclude individual materials from GI or GI and Photon caustics, or to adjust settings that control the strength of the effects. If, for example, you have a Project with many transparent objects it would be very laborious to calculate caustics for each object. Here you can define the objects for which caustics should be calculated.
On this page, you will find settings that adjust the diffuse falloff, level and roughness of the material, as well as the general illumination mode setting (this greatly affects how highlights react to the light in the scene and can make a big difference when it comes to making a material look more like, say, brick instead of like plastic). Some of these parameters apply to Oren-Nayar mode only and will be ghosted when you use Blinn or Phong mode.
Deactivate this setting if a given material should not have an effect on other objects.
Use this setting to define how strong a given material will emit. The default value is 100% and values up to 10000% can be entered.
Deactivate this option if a given material should not receive brightness or color from other objects.
When active you can define to what degree a given material will receive color and brightness of other materials.
Use this setting to fine-tune the saturation of textures used for GI. Contrary to the previously described Saturation, this setting affects only the receiving of GI, not the radiation of it.
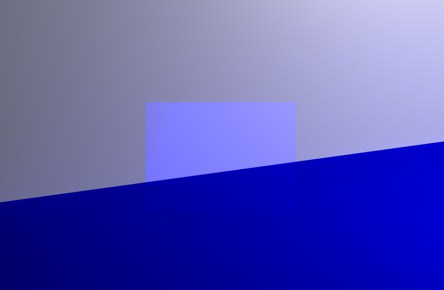 An area of high saturation is in the center.
GI Portals, Polygon Lights
The following six parameters only pertain to GI calculation.
By defining GI Portals or Polygon Lights (objects with an active Luminance material channel) as light emitting elements (i.e. not normal Cinema 4D light sources but luminous areas: GI Portals (e.g., for a light emitting sky), Polygon Lights (any geometry)) - these are especially important for the calculation of light and shadow - the light shadow quality will be improved. The use of GI Portals and GI Area Lights is described here.
If this option is enabled, the way in which a (luminous) object is included in the GI calculation will be optimized. This option should be enabled if the object serves as an Area light. Additional information can be found under GI Portals and Polygon Lights: Function and Placement and Sampling.
Note that, despite its name, this function has a positive effect even on matte reflections.
Generaly speaking, the following applies to the Uber material and the Node Material:
If the material has an active Emission channel, enabling this option will produce a targeted sampling during GI calculation. This can prevent GI artefacting. Enabling this option can also be beneficial when displaying this material in rough reflections. Rendering the material reflection on other surfaces will take a little longer but the quality will be better.
Activating this option will define the object to which it is assigned as a GI Portal (make sure you also activate the Transparency channel).
GI Portals are usually single-polygon surfaces (e.g., primitive Plane) that are placed where light passes through relatively narrow openings. The direction in which the Normals show is irrelevant. Further details can be found here.
If you do not want to make corresponding changes to the light-reflecting object itself, you can influence the light passing through the GI Portal by changing the Color or Brightness settings in the Transparency channel.
Generally speaking, the following helps for the Uber material or the Node Materials:
If the material uses a Transparency channel, enabling this option will lead to a simultaneous sampling from the angle of view of the camera behind the environment that lies behind the scene if Global Illumination is used for rendering. This is primarily designed for the optimized rendering of window glass through which light falls into a room. In such cases, the use of a simple plane as the pane of glass will be sufficient. Note that in such a case, no refraction in the transparency should be used. A refraction index of 1.0 is sufficient to render relatively thin glass.
Enable this option to activate Photon caustics generation for the active material. Make sure that either the Transparency (for caustics that result from light breaking through water in a glass) or Reflection (for caustics resulting from light reflecting from a curved object) material channels is active.
Use the input box to set the strength of the effect.
This enables/disables the reception of surface Photon caustics for the material.
Use the input box to set the strength of the effect.
This specifies how close photons must be to one another in order to be interpolated. Higher values tend to produce better results but they also take longer to render.
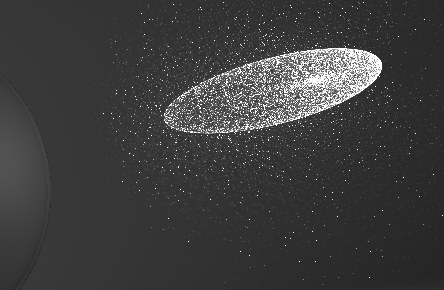 Radius = 1; individual photons can be seen as points of light because they are not interpolated together.
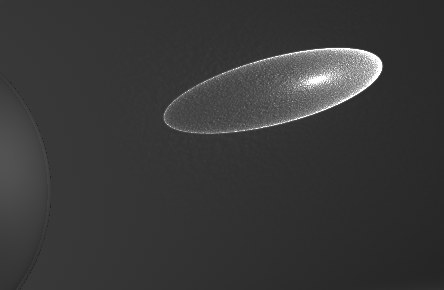 Radius = 10.
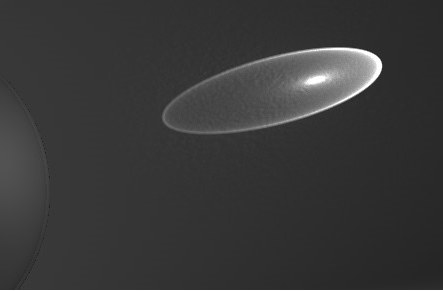 Radius = 100.
Larger values would only make the Photon Caustics appear more blurred.
If the defined value is too small, individual photons will become visible. This might make for an interesting visual effect but is not suited for realistic renderings. Larger values will combine and interpolate photons accordingly, which produces a realistic caustics effect.
This defines the maximum number of photons within the Radius that are used to calculate the effect. For example, if you enter a value of 100, up to 100 photons will be evaluated — any photons in excess of this number are ignored. Samples and Radius both affect the quality of the effect.
To summarize: more samples per radius means a more accurate image. Increasing the Radius means more blur but a longer render time also.
This makes Blinn a better choice for metals and other materials where you need more accurate highlights.