Physical Renderer
Here you will find the settings for the Physical Camera (see also How does a real camera work?). Most of the following parameters will only be made available if the Physical Renderer is selected in the Edit Render Settings menu.
Also note that several parameters will be grayed out depending on the type of projection selected (e.g., Lens Distortion, which does not work in conjunction with orthographic projection).
Enabling this option will make several additional camera settings (Shutter Angle, etc.) available with which the motion blur of a rotating shutter can be simulated.
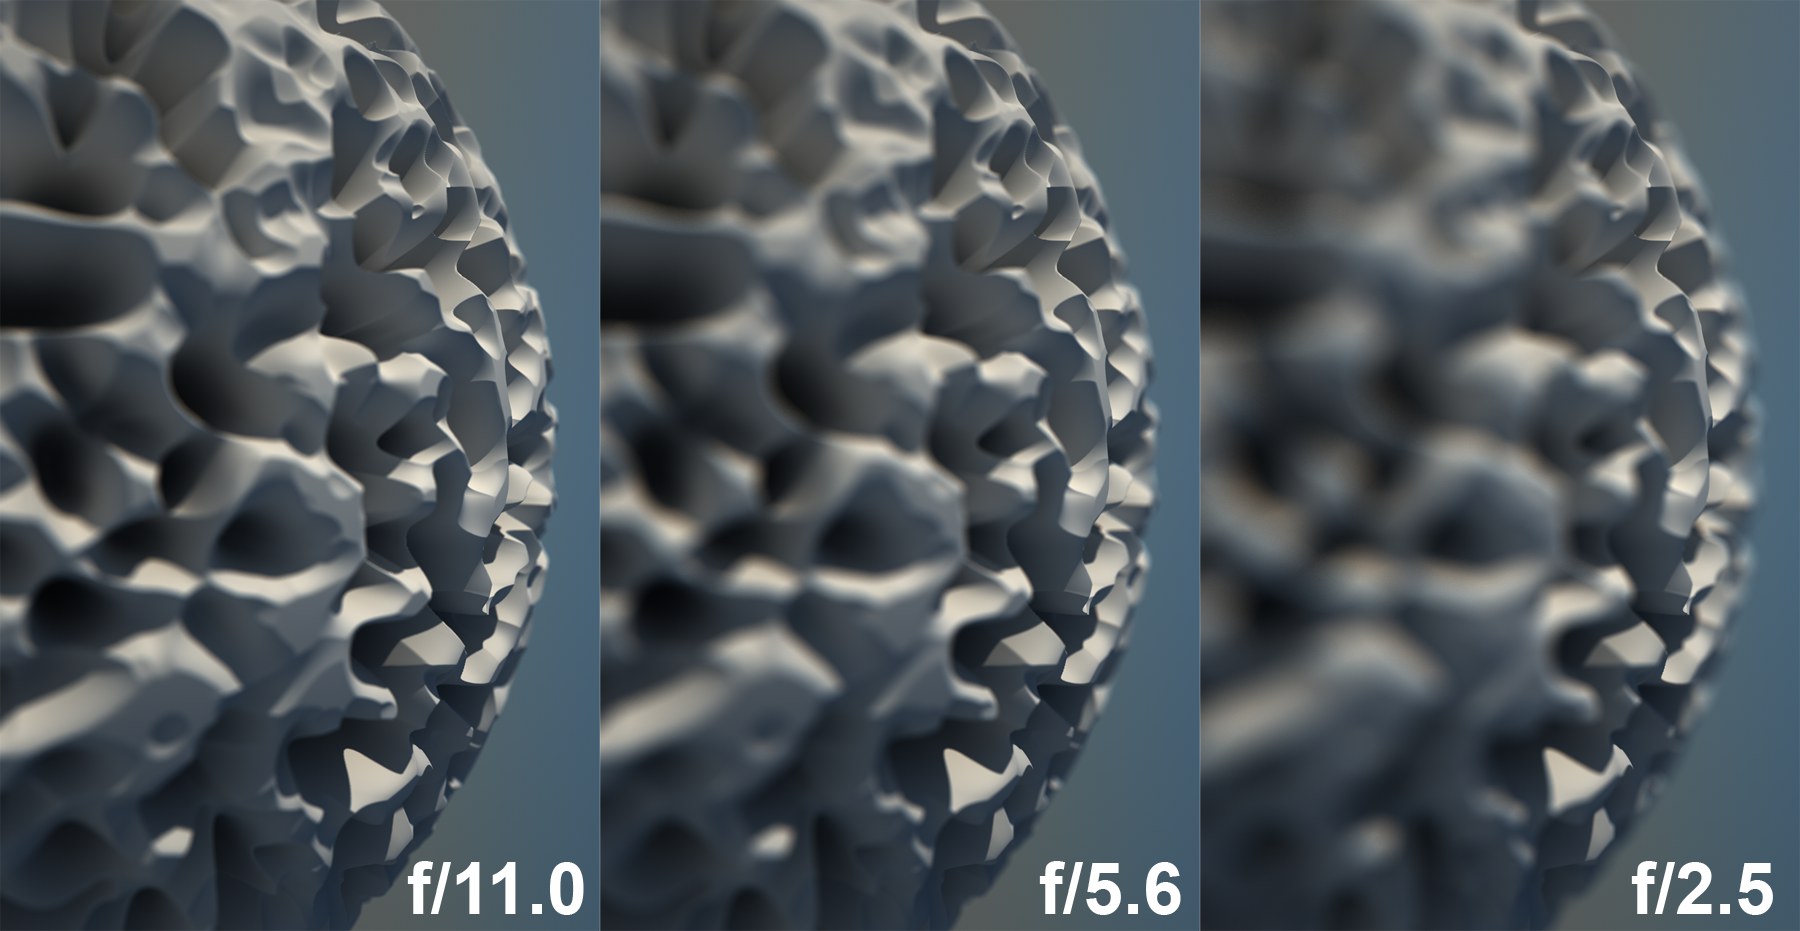 Various focal aperture (F-Stop) settings.
The F-Stop value is used to adjust the focal aperture. The larger the focal aperture (i.e. the smaller the F-Stop value), the smaller the depth of field will be and vice-versa. F-Stop is the most important setting for adjusting the depth of field. Small values result in correspondingly small depth of field. If Exposure is enabled, F-Stop will also define the amount of light that can enter the camera.
If enabled, the camera will simulate the exposure process, i.e., the rendered image will vary in its brightness in correspondence with the ISO, Gain (movie camera), F-Stop and Shutter Speed settings.
In a real camera, the amount of light to which the film is exposed determines how bright the film will be. The more light to which the film is exposed (the aperture is farther open or the shutter speed is slower), the brighter the film will turn out and vice-versa.
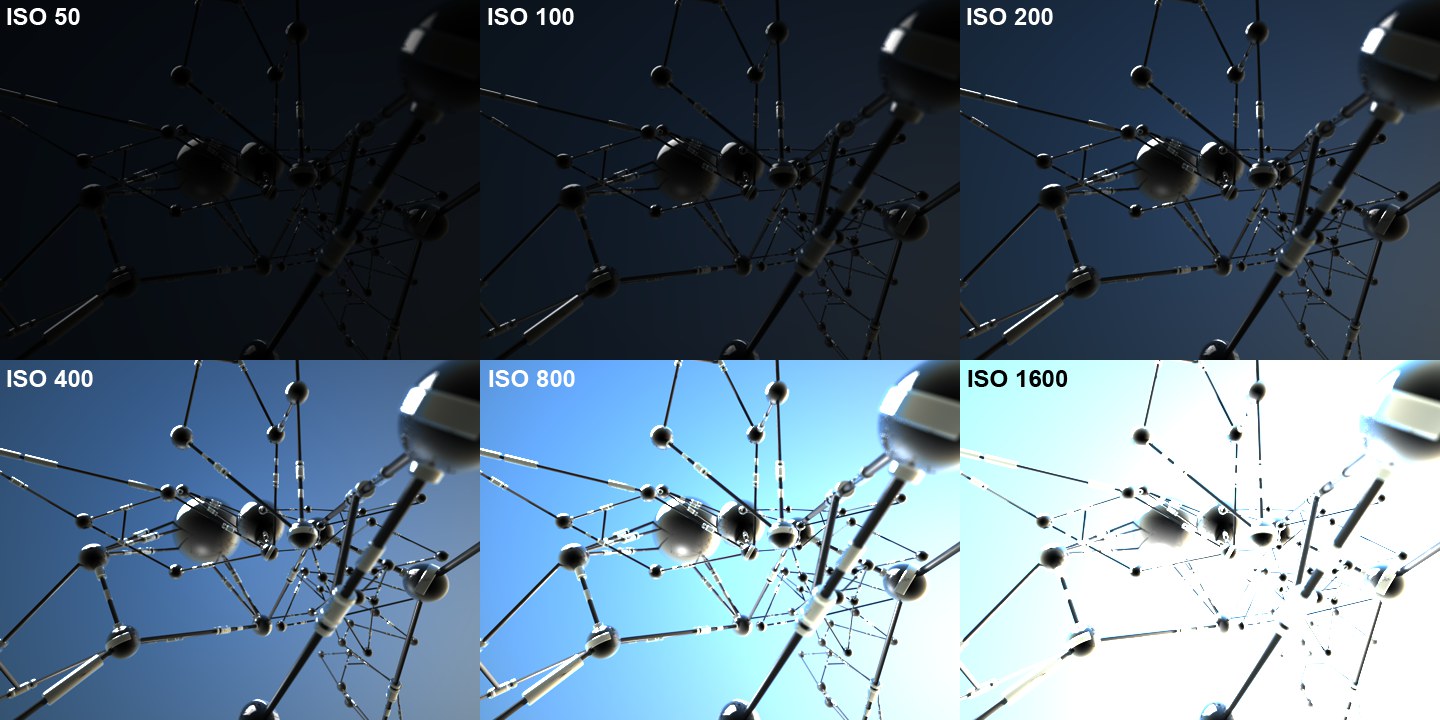 Various ISO values and their effect.
ISO is used to define the film’s sensitivity to light. Higher ISO values make the film more sensitive and thus the images brighter. The increased color noise that occurs in reality has been removed in Cinema 4D.
If the Movie Camera option has been enabled, the same effect can be achieved using the Gain setting. Gain is basically the same as ISO only that it is used in conjunction with electronic light sensors and video cameras (and is measured in dB = decibel). Negative values can be entered as well. Smaller values produce correspondingly darker images.
Shutter Speed (s)[0.00..100.00]
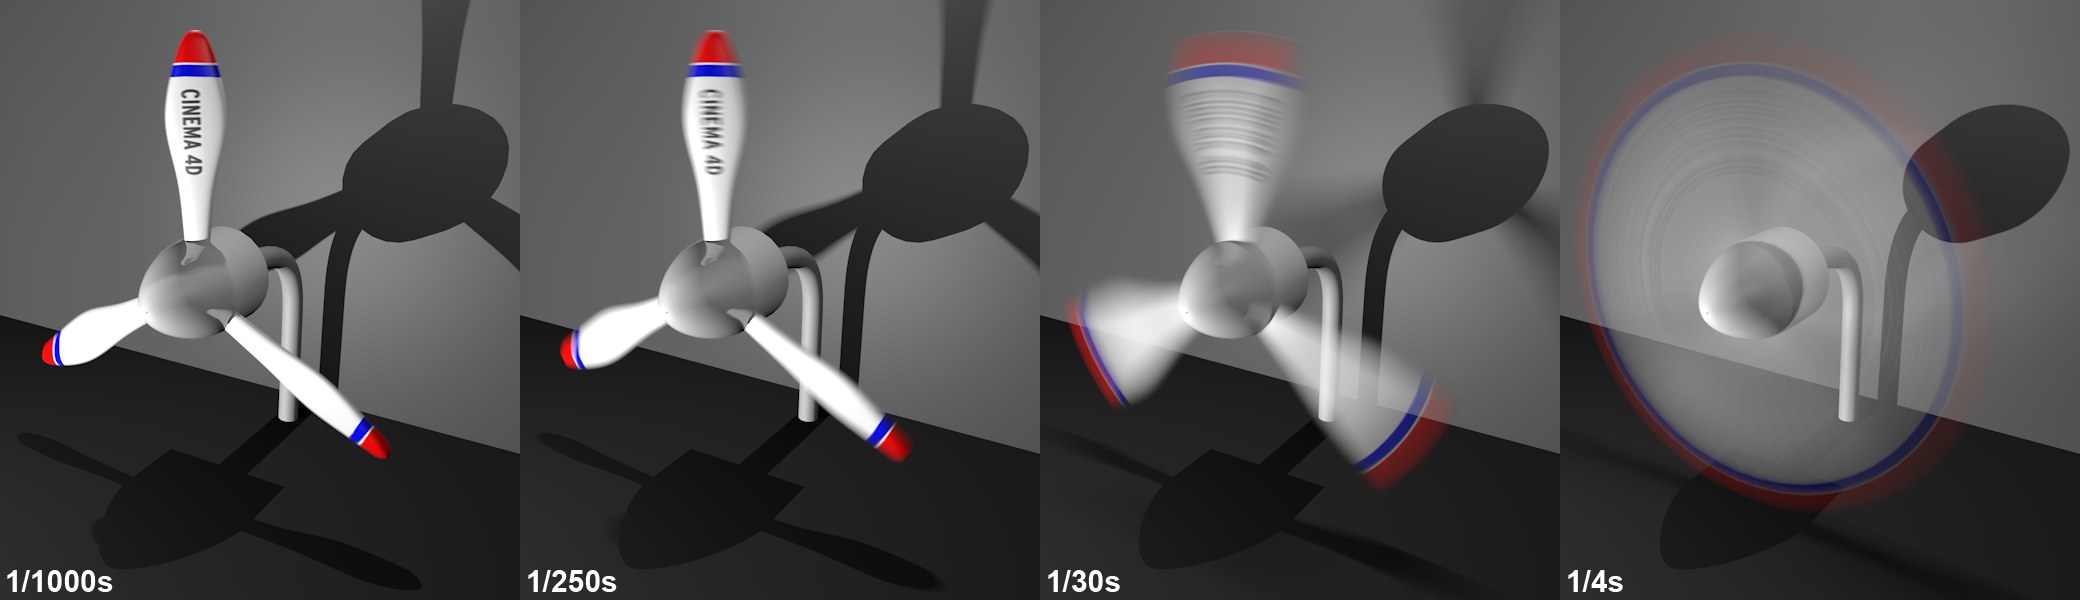 Increasing Shutter Speed values from left to right, which produces correspondingly more motion blur (the propeller rotates with about 3 rotations per second).
The shutter speed defines how long the shutter will remain open when a picture is taken. This setting defines the following:
- The amount of light that reaches the film (only relevant if Exposure is enabled). Slower shutter speeds produce brighter images.
- The amount of motion blur (only relevant if Motion Blur is enabled). Slower shutter speeds produce greater motion blur.
If you don’t use Exposure or Motion Blur, this setting has no relevance for the rendered image.
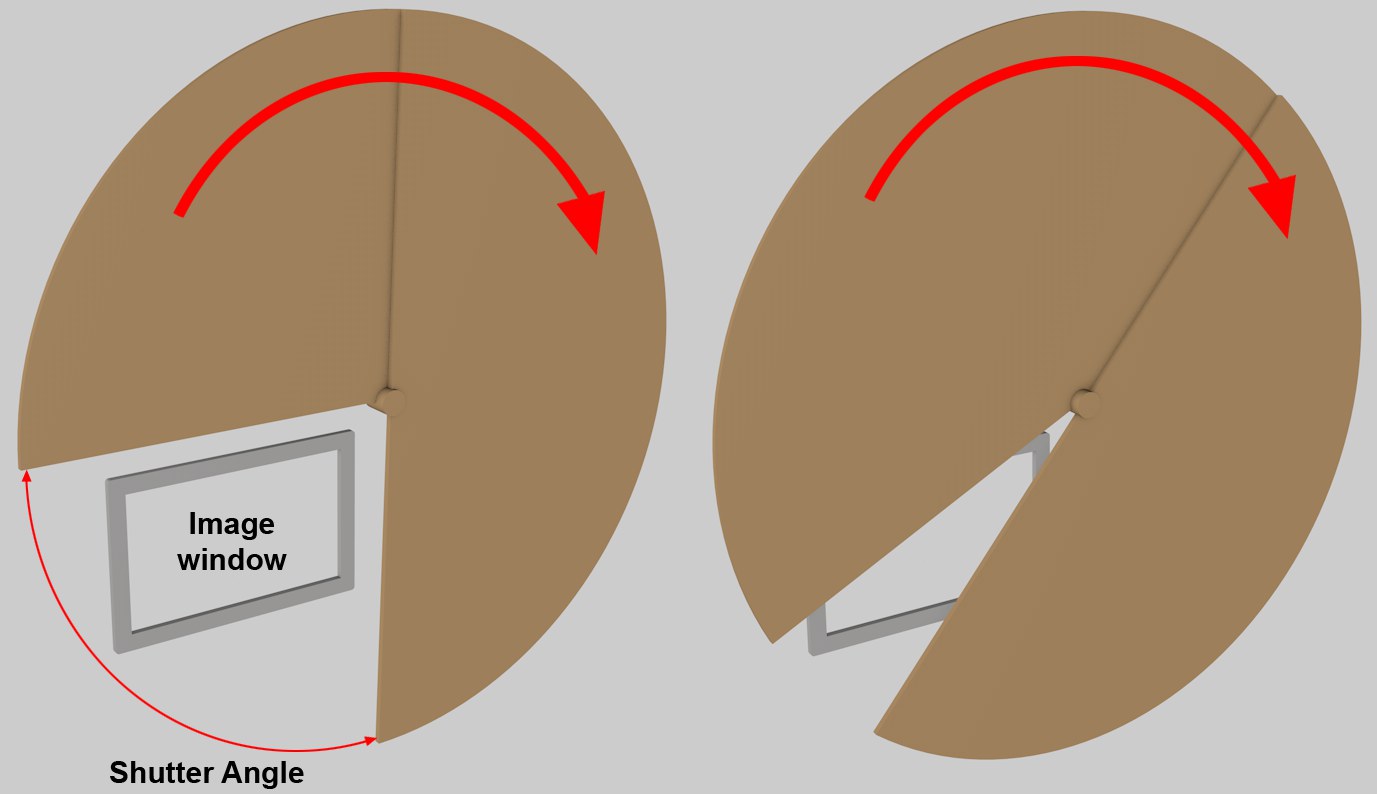 The rotating shutter normally rotates with 24 rotations per second. At left a larger shutter angle (= longer exposure time), at right a smaller shutter angle (= shorter exposure time).
This setting and the next only apply to the simulation of a movie camera with a rotating shutter. These cameras have 2 rotating shutters that are positioned in front of image aperture with the film to be exposed and can be adjusted in opposing directions to leave a gap of a given size between them. A section is left open between the shutters through which the film is exposed at a rate of about 24 times a second as it passes by behind the image aperture. The film is advanced one frame every time the shutters are in front of the image aperture.
The Shutter Angle setting (normally set to 180°) is used to define the shutter speed. The smaller the angle, the less light that the shutter will allow through (this is relative in Cinema 4D only if Exposure is enabled) and the less motion blur that will be recorded (which is currently a growing trend in action movies). Cinema 4D also lets you define extremely large shutter angles of for example 1000°, which is not possible with real-world cameras, which is used to create extreme motion blur.
Use this value to offset the blur effect (with increasing values) in the direction of the next animation frame.
 Increasing Shutter Efficiency value from left to right.
In reality, a shutter needs "time" to close. For motion blur, the smaller the value is, the softer the motion blur will be (the blurry effect will appear for a shorter period of time). The maximum value of 100% will cause an immediate closing, which will result in motion blur being calculated during almost the entire time the image is rendered (the blurry effect will then be larger).
Lens Distortion - Quadratic[-100..100%]
Lens Distortion - Cubic[-100..100%]
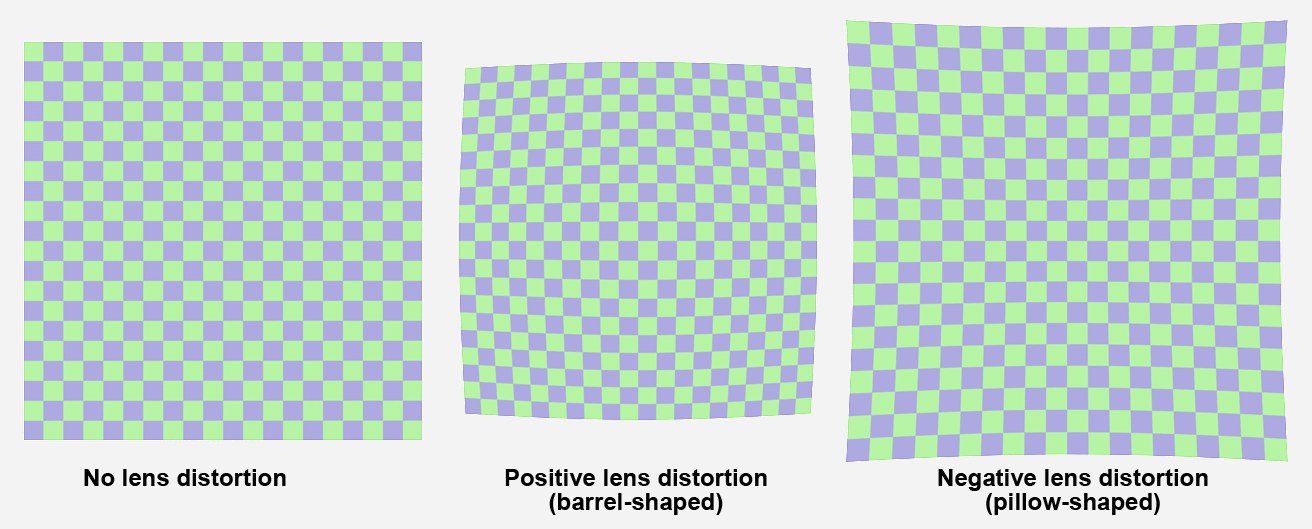 The same plane is rendered using various lens distortion.
Lens distortion (different magnifications with regard to distance from the lens axis) causes straight lines at the image’s edge to appear curved. Don’t mix this effect up with the perspective distortion of a wide-angle lens (low Focal Length setting).
In photography, wide-angle lenses (short Focal Lengths) tend to produce barrel-shaped and tele-focus lenses (long Focal Lengths) pillow-shaped distortions. These effects can be simulated using the Lens Distortion settings.
These values define the degree of lens distortion. Positive values result in a barrel-shaped and negative in a pillow-shaped distortion.
Use real-world tests and your camera’s tracking program to determine if you should use Quadratic or Cubic, or a combination of both (these differ only slightly visually from the center of view outward).
Vignetting
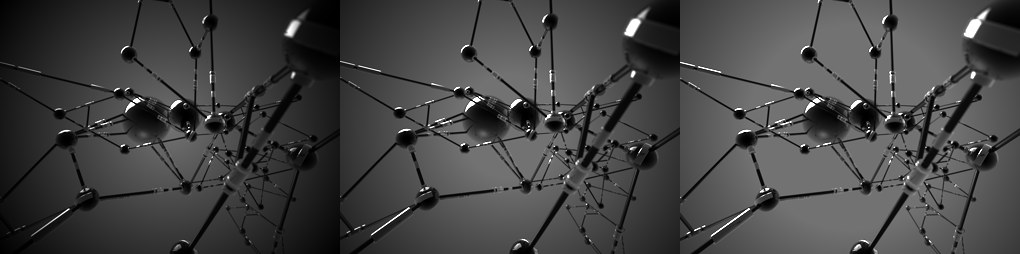
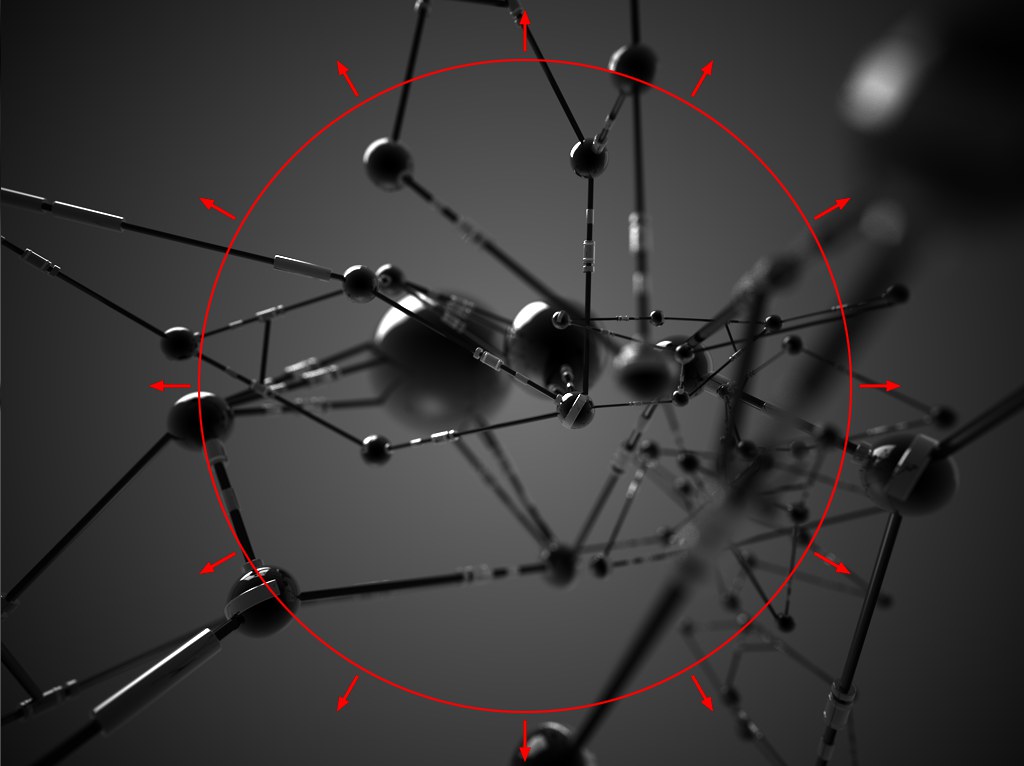 Vignetting darkens the image towards its edges (scene courtesy of Mike Winkelmann).
Vignetting is the effect of darkening an image to its edges (light that hits the lens axis at an angle do not fill the shutter opening entirely due to the way the shutter is constructed).
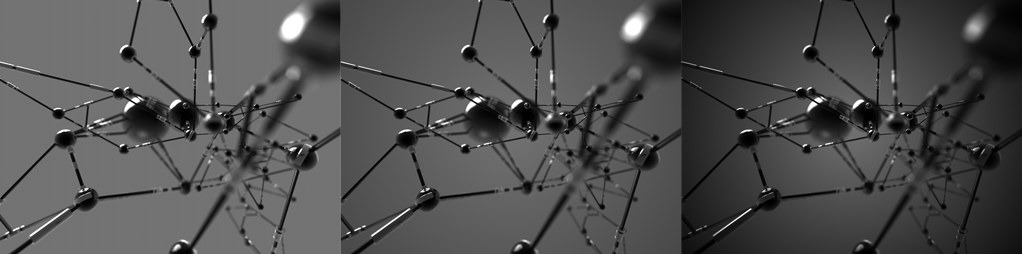 Increasing Vignetting Intensity values from left to right.
A value of 0 turns vignetting off. Increasing values will darken the edge of the image accordingly. Extremely high values will leave only a small visible area at the center of the image.
 Increasing Vignetting Offset values from left to right.
A value of 0 will create an even darkening from the center of the image to its edges. Increasing values will increase the radius of the circular region at the center of the image from which the darkening effect takes place. The circular region itself remains unaffected by the darkening effect.
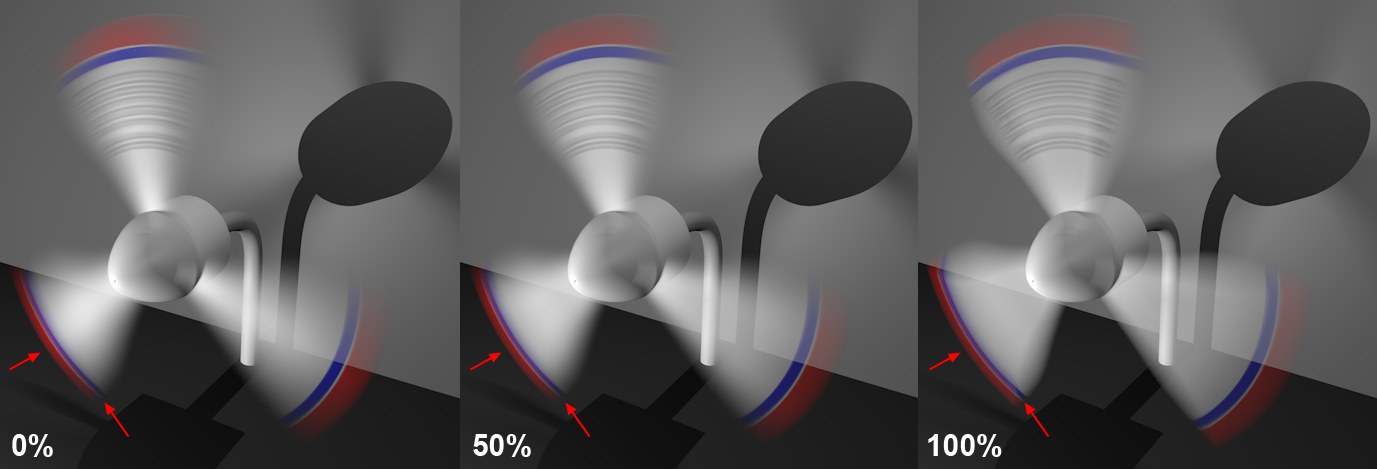
Chromatic Aberration[-1000..1000%]
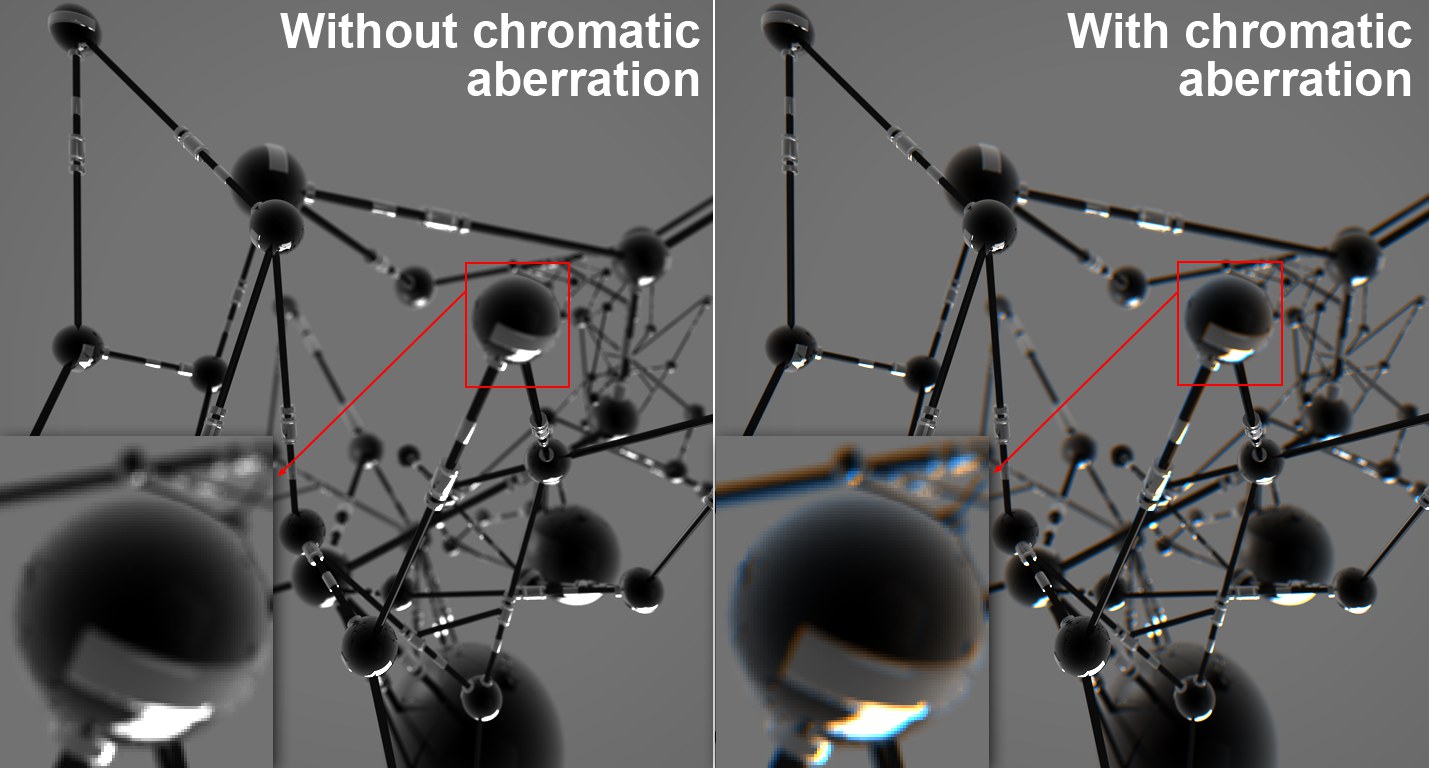
Chromatic aberration occurs in lenses when differently colored parts of light (depending on the wavelength) are refracted with varying intensities. In the image above, this effect is noticeable due to the blue-red colored seams in the high-contrast regions. Chromatic aberration only occurs in blurred image regions, i.e., without blur, no chromatic aberration will take place.
The value that can be defined here defines how strong the "color offset" will be rendered. It can also be described as the degree of saturation in the blue-red regions.
A value of 0 turns chromatic aberration off.
Remember that enabling this effect also increases render times accordingly.
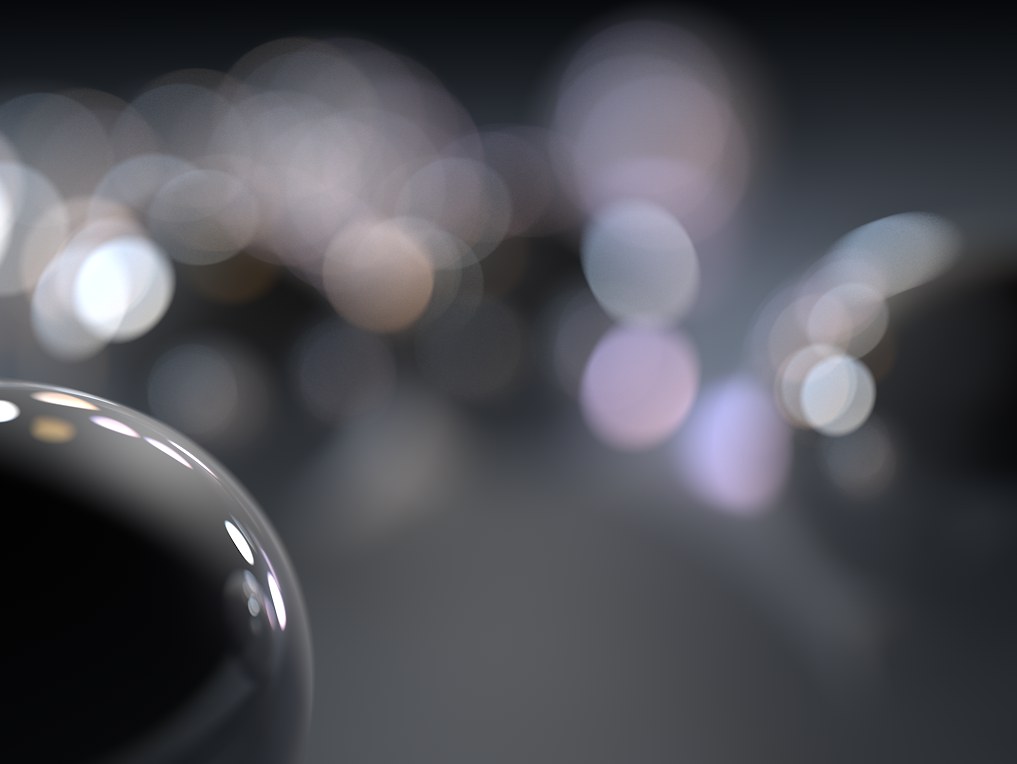 Regions not in focus create the bokeh regions.
The following settings are used to create the bokeh regions. These are regions that lie outside of the camera’s area of focus and are therefore displayed as blurred. Small, bright regions are displayed on the shape of the aperture. Bokehs can have a strong effect on the "impact" an image has because blurred regions can have very different shapes depending on the shape of the aperture. In general, the best looking bokeh (i.e. the softest and most flowing) can be achieved with a circular aperture (Diaphragm Shape option disabled).
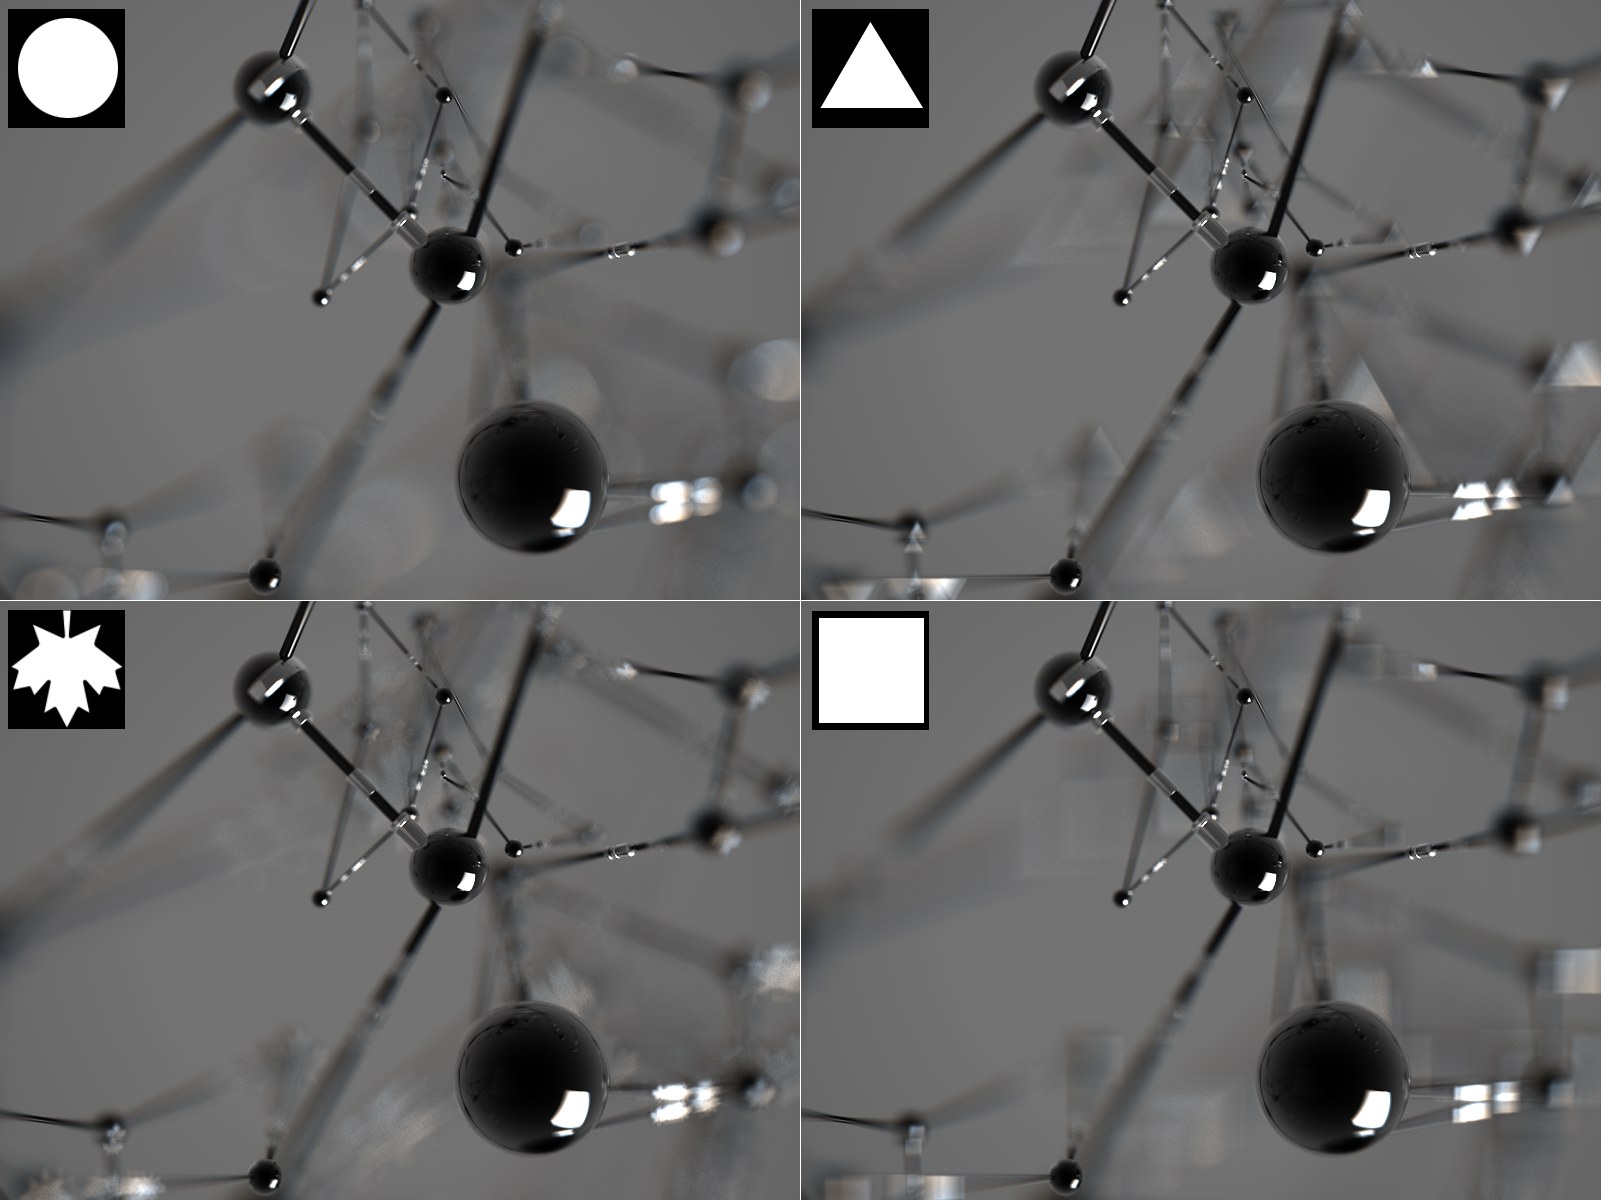 Different diaphragm shapes result in different bokehs.
Note also how the bokeh can be inverted, depending on whether the given object lies in front of or behind the focal plane (is in particular noticeable with triangular shapes).
The Diaphragm Shape option is either circular (when disabled) or can be given a different shape using the various settings when the option is enabled.
Note that rendering high-contrast bokeh effects is a complex procedure and takes correspondingly long to render (note that you can set Sampler set to Progressive to render a preview of what the bokeh effect will later look like).
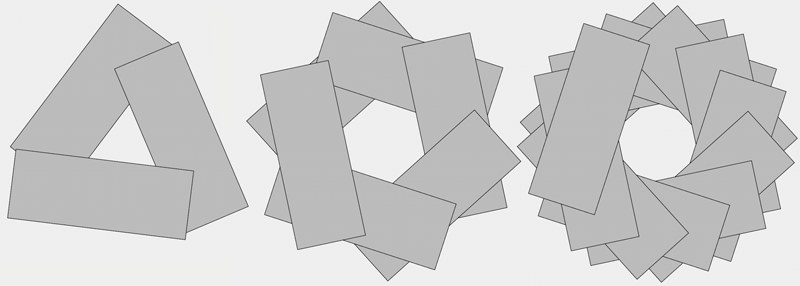 Number of Blades from left to right: 3, 6, 12.
The bokeh is defined primarily via a diaphragm shape. The (iris)diaphragm shape in turn is dependent upon the defined number of Blades. The more blades that are defined here, the more round your diaphragm shape will be. The least number that can be defined is 3. What effect the Blade value has can be seen under Diaphragm Shape.
The blade shape used by Cinema 4D is somewhat simplified – real cameras have a sickle shape and no straight edges, as in the image above. The Shader option, however, lets you define any type of diaphragm shape (in which case the Blade setting will no longer apply).
Use this value to rotate the diaphragm shape (bokeh).
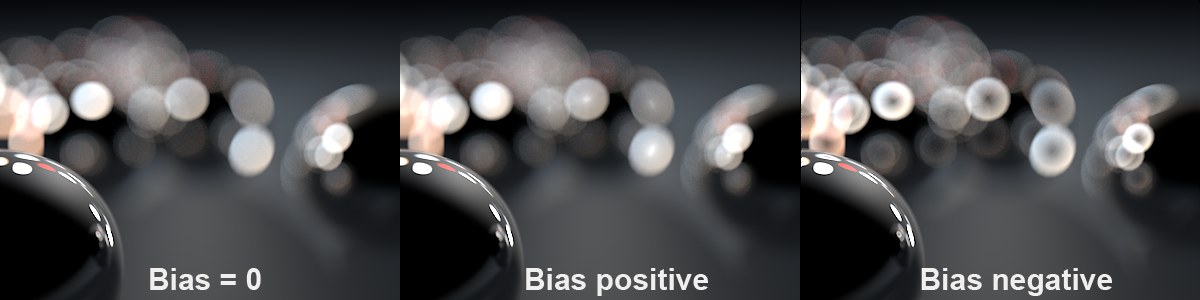
This value can be used to concentrate the brightness of an otherwise homogenous radial bokeh at its edge (negative values) or its center (positive values).
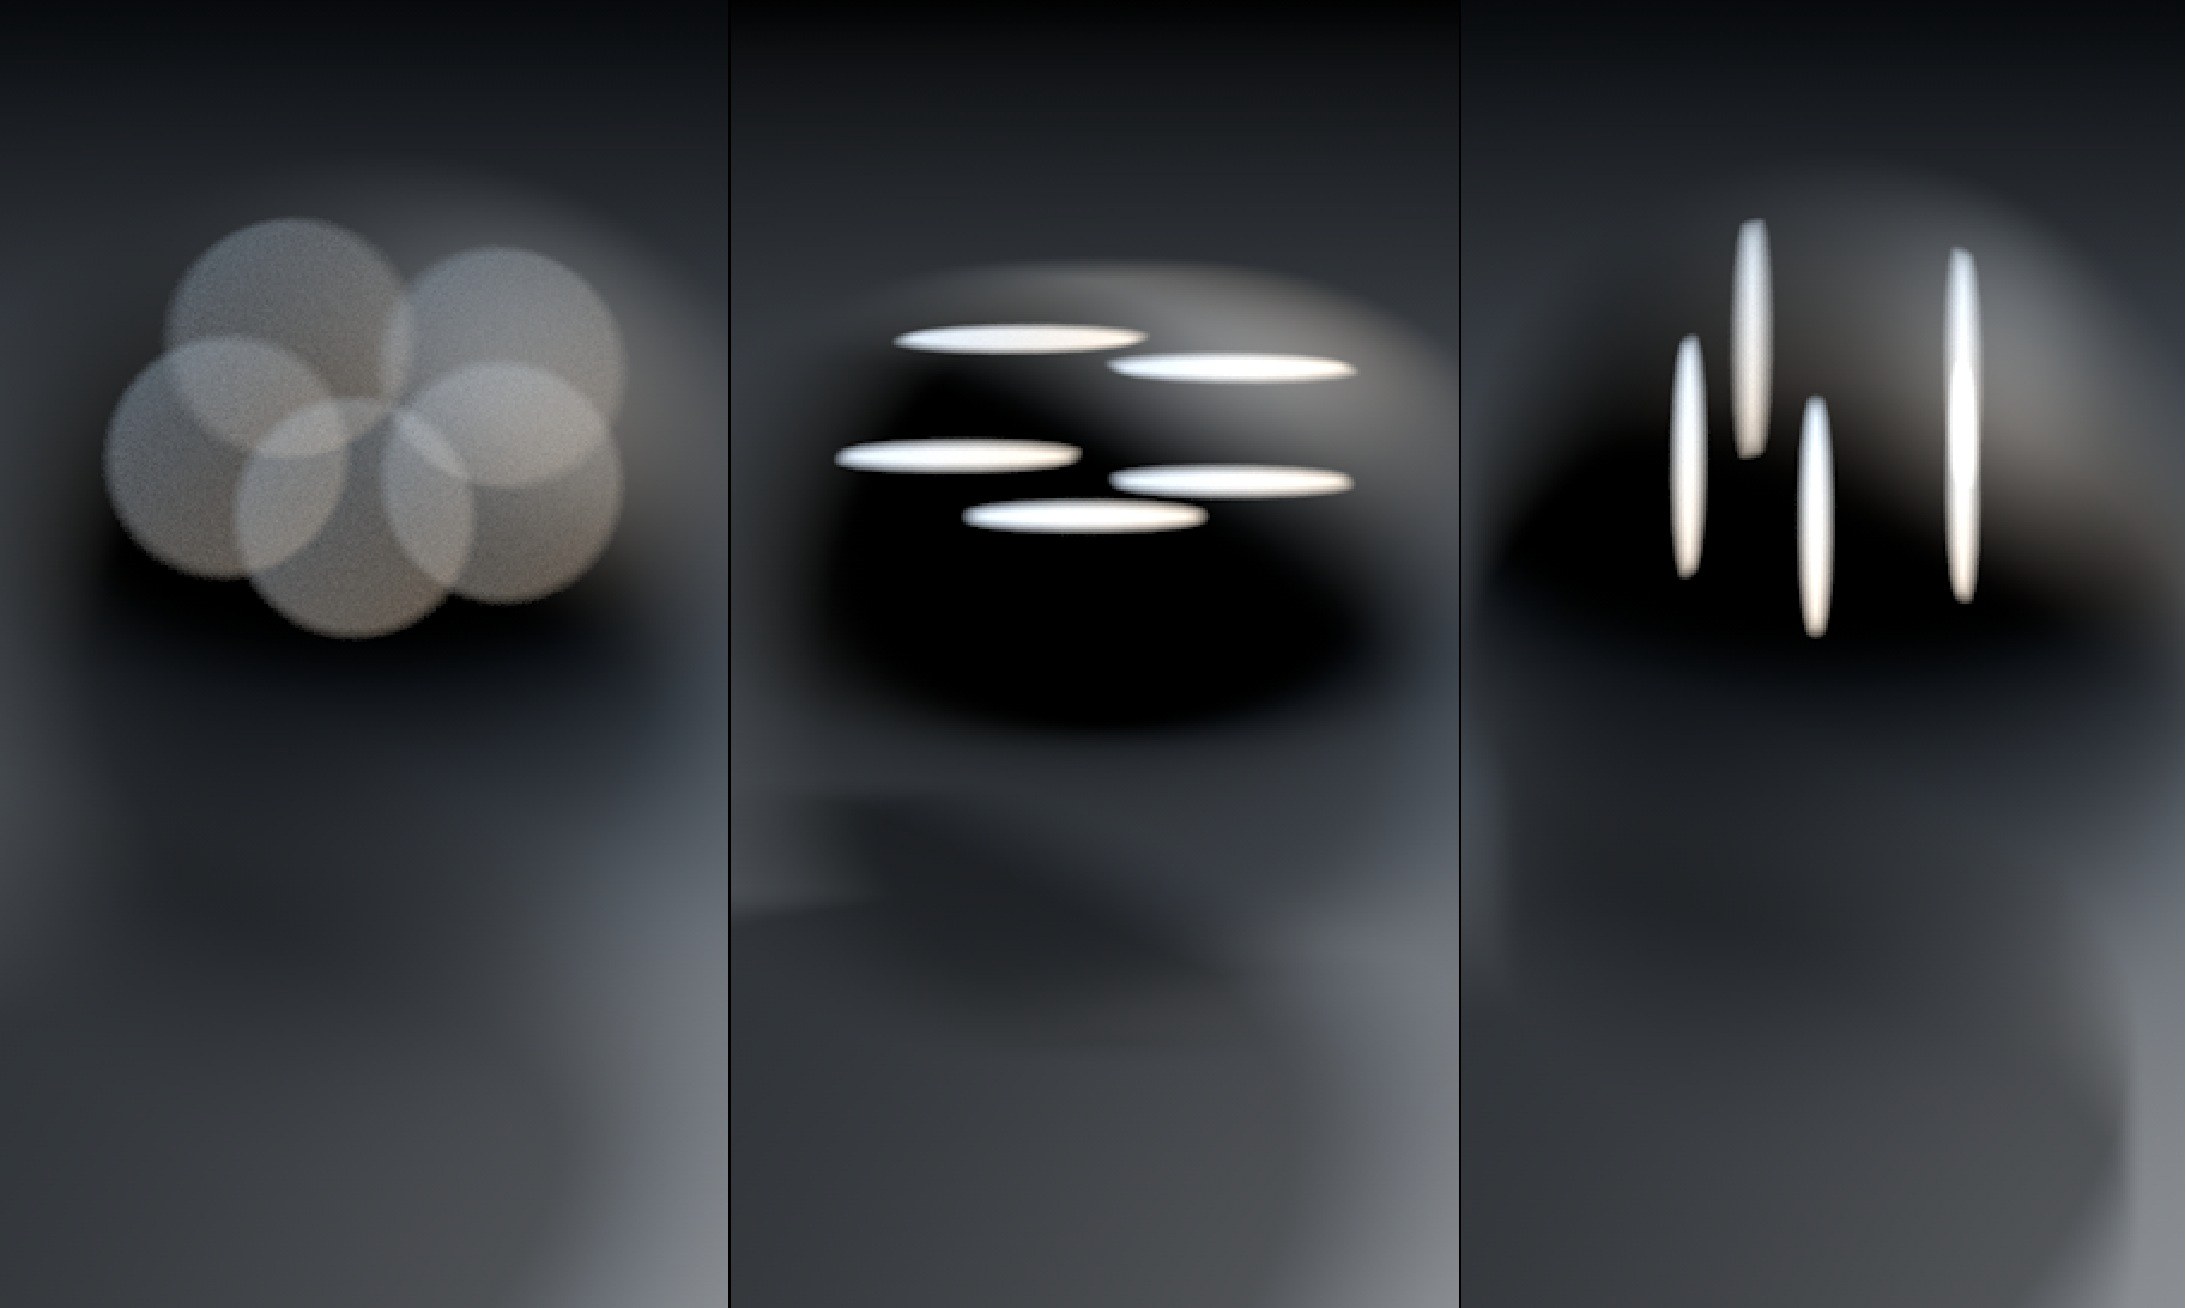 Anisotropy squeezes the bokehs together.
Use this value to stretch the bokeh horizontally (positive values) or vertically (negative values). The bokehs will be rendered brighter than usual under certain circumstances. You can, however, enable the Exposure option to ensure correct calculation.
 Custom shapes produce unusual bokehs.
Here you can define a custom diaphragm shape. Simply use black-and-white masks. White areas will represent the transparent part of the aperture. Note that the bokeh shape might be inverted depending on where the bokeh-generating object is located (in front of or behind the focal plane).