Camera Object
![]()
![]()
General
Cameras are one of the essential elements of any 3D application. Cameras define how the 2D Viewport scene will be displayed spatially. If you take a look at the 4-Panel view in Cinema 4D: each of the views has its own camera (the default camera), whose settings are maintained if Camera is enabled in the Attribute Manager’s[ [Mode menu. These cameras will not be shown as individual objects in the Object Manager.
In addition to the default cameras you can create as many cameras as you like with which you can view or render the scene from any angle.
When a camera is created, all parameters of the currently active Viewport camera will be assumed, i.e., the camera will basically be cloned.
Cameras have their own coordinate system, just like objects. The direction of view is defined by the Z axis.
In the Viewport, cameras are displayed as a green cube with 2 film rolls, a lens and the interactive cone.
The other interactive camera functions are described farther below.
You will find a description of how you can switch between multiple scene cameras here. With the Stage Object you can control all cameras (as well as light sources, Environment objects, etc.). The Camera Morph tag, however, can be used to do this steplessly and also offers more options.
How can a camera be linked to a view
After a camera has been created the scene will be displayed from its angle of view. The following steps can be taken to link a camera to a specific view:
-
The camera icon can be double-clicked in the Object Manager
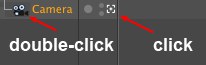
The camera view will then be assumed in the view that is defined as the render view. - The button highlighted at the right in the image above can be clicked upon. The camera view that is defined as the render view will be assumed (clicking on the icon again will revert to the default camera).
-
In any of the views’ menus, the desired camera view can be selected from the menu.
To switch back to a camera’s default view, select .
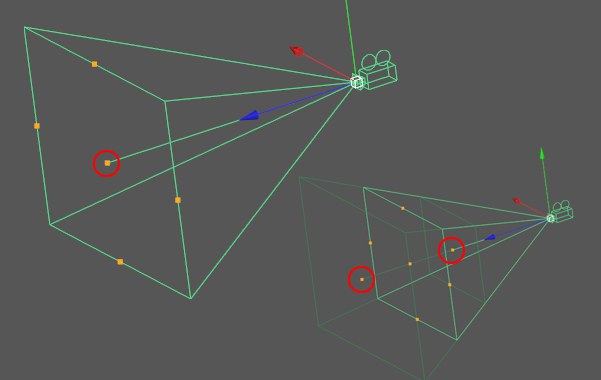
If the camera is linked to a view (of course the same applies to the default camera), it can be controlled interactively using the icons at the top right of the respective view:
Using these icons you can change the position and rotational angle of your camera. Right-clicking and dragging on the center icon you can adjust the camera’s focal length (zoom).
You can create any number of new cameras, including corresponding Viewports (main menu: Window / New View Panel).
It is also possible to use any object as a camera (angle of view: Z axis). . This, for example, makes it possible to precisely position Spot light sources without having to render the scene.
Controlling the camera interactively
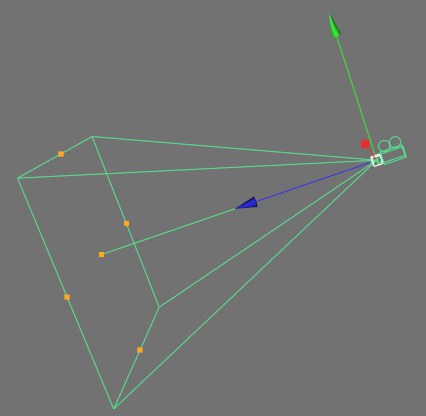
When a camera is selected, several handles are made available:
 At left the Focus Distance (focal plane) is marked; at right the locations of the depth of field planes are marked (when selected and no Physical Camera is used).
A line runs from the camera’s origin outward and has a handle at its end. This is also the point at which the Focus Distance of the Physical Camera lies (all objects that lie on this plane will be rendered in focus). This point can be dragged in the Z direction. If you simultaneously press the Shift key, the camera can be rotated around its origin.
4 handles are located on the focal plane. With these handles, the Focal Length can be modified (and the corresponding fields of view).
If you want to render a depth of field pass (DOF Map Front Blur or DOF Map Rear Blur must be enabled in the Details tab), both points marked in the image above will be displayed, which can then also be modified interactively.
A Target camera is basically nothing more than a camera like the ones described above. With a Target camera, though, a Target tag is automatically generated. In addition, a Target object will be generated – a Null Object to which the camera is targeted. This entire setup is interactive, i.e., if the camera is moved in the Viewport it will remain targeted to the Target object and vice versa – if the Target object is moved, the camera will follow.
A Stereo camera is a normal camera, as described above, with Mode set to Symmetrical.
Animating camera movements
In this section, you will find a few tips on how to go about animating camera movements in Cinema 4D.
First, as a general rule, avoid using a single camera path for your entire movie. A single camera path tends to bore the viewer!
Cinema 4D gives you several methods to animate cameras. For methods you must first link the camera to the viewport — in the perspective view, choose the camera’s name from the Cameras / Use Camera sub-menu.
-
The simplest method is to record keyframes for the camera’s position and rotation. This is achieved by moving and rotating the camera and recording keys at different times of the animation. Once the keys have been recorded, you can fine-tune the camera movements using the F-Curves for the tracks. Occasionally, this method can become tedious because you may need to edit multiple sequences (for the X, Y and Z components).
-
A more refined method is to use a spline that acts as a path along which the camera is moved. To make the camera follow the spline, assign an Align To Spine tag to the camera, then Drag & drop the spline into the tag’s Spine Path box. Next, animate the tag’s Position parameter.
A flexible variant of the second method involves the use of two splines and a target camera that points at a null object. One spline is used for the camera path, and the other spline acts as a path that the null moves along (two Align To Spline tags will be needed this time, one for the camera and the other for the null). Naturally, the null must keep still at the times when the camera should look at the same position over a period of time.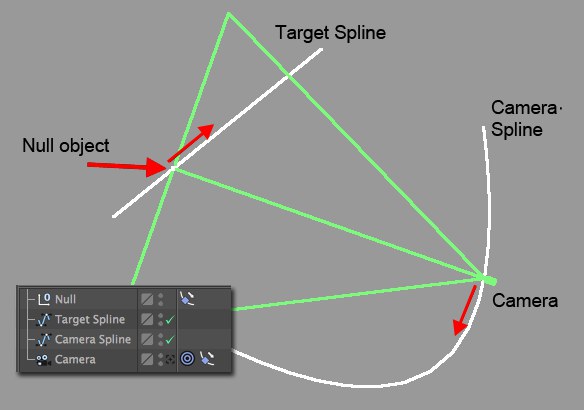 Animated camera and target.
These two splines give you a very precise way to control the camera position and orientation. You can fine-tune the animation using the F-Curves of the two Position parameters (Align To Spline tags). - Using the Motion Camera tag and the Morph Camera tag you have simplified and comprehensive parameters for controlling cameras (dynamic and realistic camera behavior; blending between multiple cameras).
How does a real camera work?
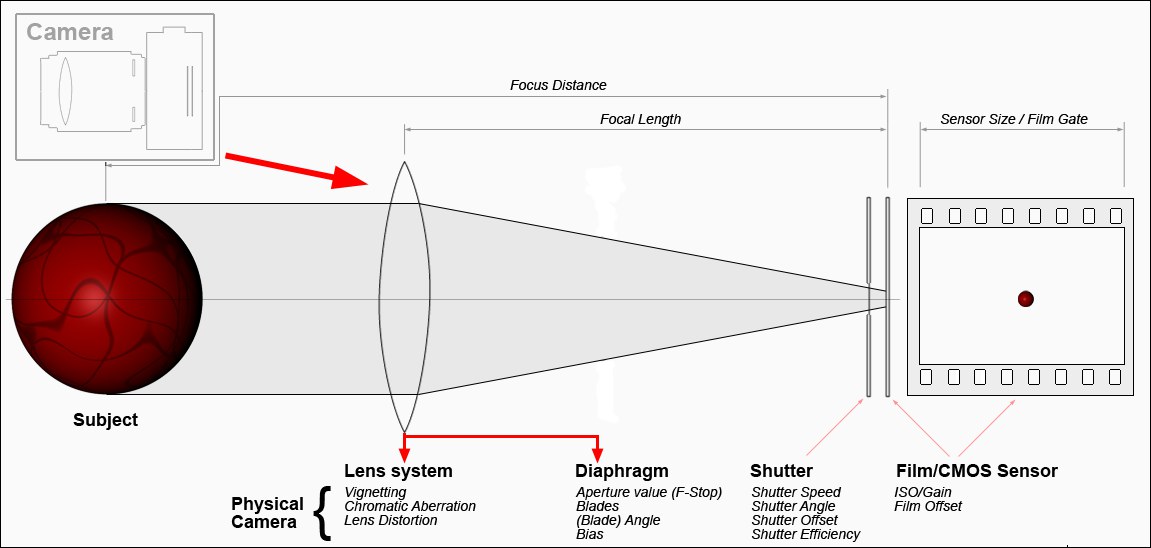 The most important parts of a camera. Several of the corresponding Cinema 4D functions are listed in italics (below the Physical Camera, which is used for the Physical Renderer).
Simply stated, a camera works as follows: Light enters the camera through a lens setup (which is arranged within the camera lens). The lens’ main job is to focus the incident light on the film/sensor. In most cases, one of the lenses can be adjusted horizontally to adjust the focal length (zoom).
A diaphragm is integrated into the lens. This diaphragm controls the amount of incident light (has no effect on the field of view) and controls the depth of field as well as the bokeh effect (both only with a Physical Camera). The diaphragm is always open, contrary to the next component, the shutter.
In photography, the shutter opens for a brief, defined span of time. This timespan primarily controls the amount of motion blur (only for Physical Camera) but also the amount of incident light that is allowed to pass through.
Finally, the light passes through the open shutter onto the film or CMOS sensor (digital cameras) where it creates an image of the objects at which the camera is aimed.
This camera setup is reproduced in Cinema 4D in order to create a two-dimensional pixel image of the contents of a three-dimensional scene.
The Physical Camera in Cinema 4D
If Physical is enabled in the Render Settings’ Renderer menu, numerous additional parameters (Physical menu) will be made available, all of which serve to render real-world camera effects. Among these effects are:
- Rendered depth of field
- Rendered motion blur
- Vignetting (darkening towards the image’s edge)
- Chromatic aberration (color seams and edges), etc.
With the Physical Camera you can render even more realistic images (with regard to "real" photos/movies) than with the traditional Cinema 4D camera (which "merely" represents a camera obscura). A complete, authentic (physical) camera was recreated in Cinema 4D, including all typical parameters such as focal length, shutter speed, f-stop, ISO, etc. Depth of field and motion blur are also controlled using these parameters. This makes it possible to easily integrate rendered images into filmed or photographed source material. Perspective, depth of field, etc. correspond if the values are the same.
Elements are included in the Physical Camera that are, strictly speaking, a step back in the display quality compared to the previous Cinema 4D camera, which, for example, possessed no lens distortion filter, vignetting, etc. The human eye has gotten used to these minor errors in photos/movies that the absence of these features does not minder the observer’s subjective realism of this imagery whereas computer generated images are often considered too "clean" or even artificial.
In short, the Physical Camera is a further step to photorealistic depictions in the truest sense of the word. Less suited for use of the Physical Camera would, for example, be the rendering of technical illustrations or similar imagery.
Those of you who have experience with photography will feel at home right away. Everyone else should be aware of the fact that operating a real camera is somewhat complicated due to the fact that a great deal of theoretical know-how and experience is required to get the most out of a real camera. Fortunately, software is able to take advantage of a few tricks. Depth of field can, for example, simply be disabled in Cinema 4D so the entire scene is rendered in focus. This can be a very useful feature at times.
The Physical Camera, which only works in conjunction with the Physical Renderer (which itself has a number of drawbacks) should be used if you want to render photo effects as described above. To make sure the result is realistic (e.g., uniform depth of field) you should scale your scene using units (see Project Scale) to actual relative size, e.g., a real-world element that is 1.86m long should also be 1.86m long in Cinema 4D.