Phong Tag
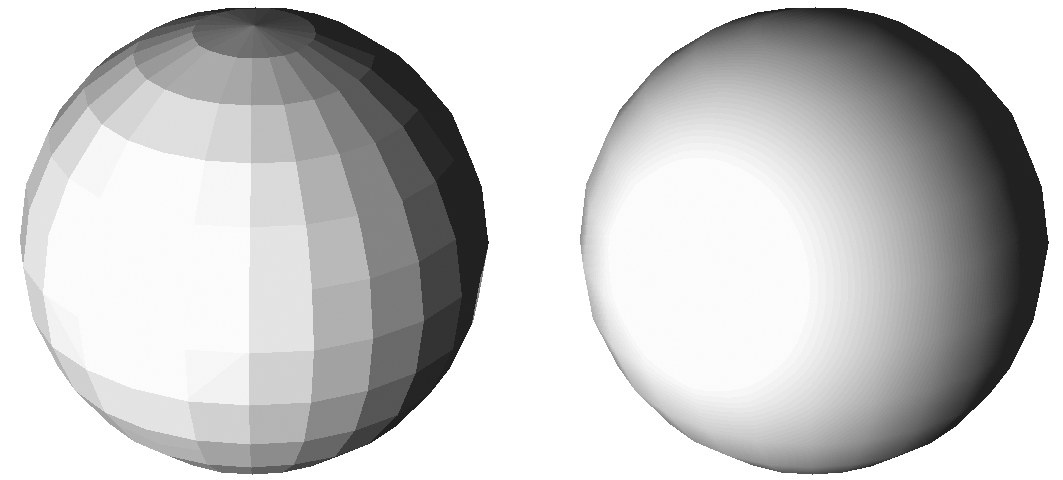
This tag gives objects a smooth appearance. The picture below left shows a sphere before and after a Phong tag is applied. Look closely at the right sphere and you will notice straight lines around its silhouette. Phong shading does not increase the number of polygons. Rather, think of it as an illusion that loses its effect around the silhouette.
If you need to smooth the silhouette region, you must use more subdivisions. To specify the maximum smoothing angle, enable Angle Limit and enter the desired angle into the text box.
When CINEMA 4D calculates the Phong shading, it assumes that the surface Normals are aligned. If this is not the case, shading anomalies may appear. All primitive objects are aligned by default.
Smoothing is a good way to reduce render time and save on memory. Without the Phong tag, an object would require a far greater number of polygons in order to appear smooth. Note that smoothing can only take place across connected surfaces (surfaces that share points).
How Phong shading works
Shading requires so-called Vertex Normals. Each polygon has its own Vertex Normals at each of its corner points. Without adding a Phong or Normal tag, these Vertex Normals initially have the same orientation as the polygon Normals. Polygon corner points, which are part of other adjacent polygons, each have an additional Vertex Normal, depending on the number of neighboring polygons, as you can see on the left side of the image below:
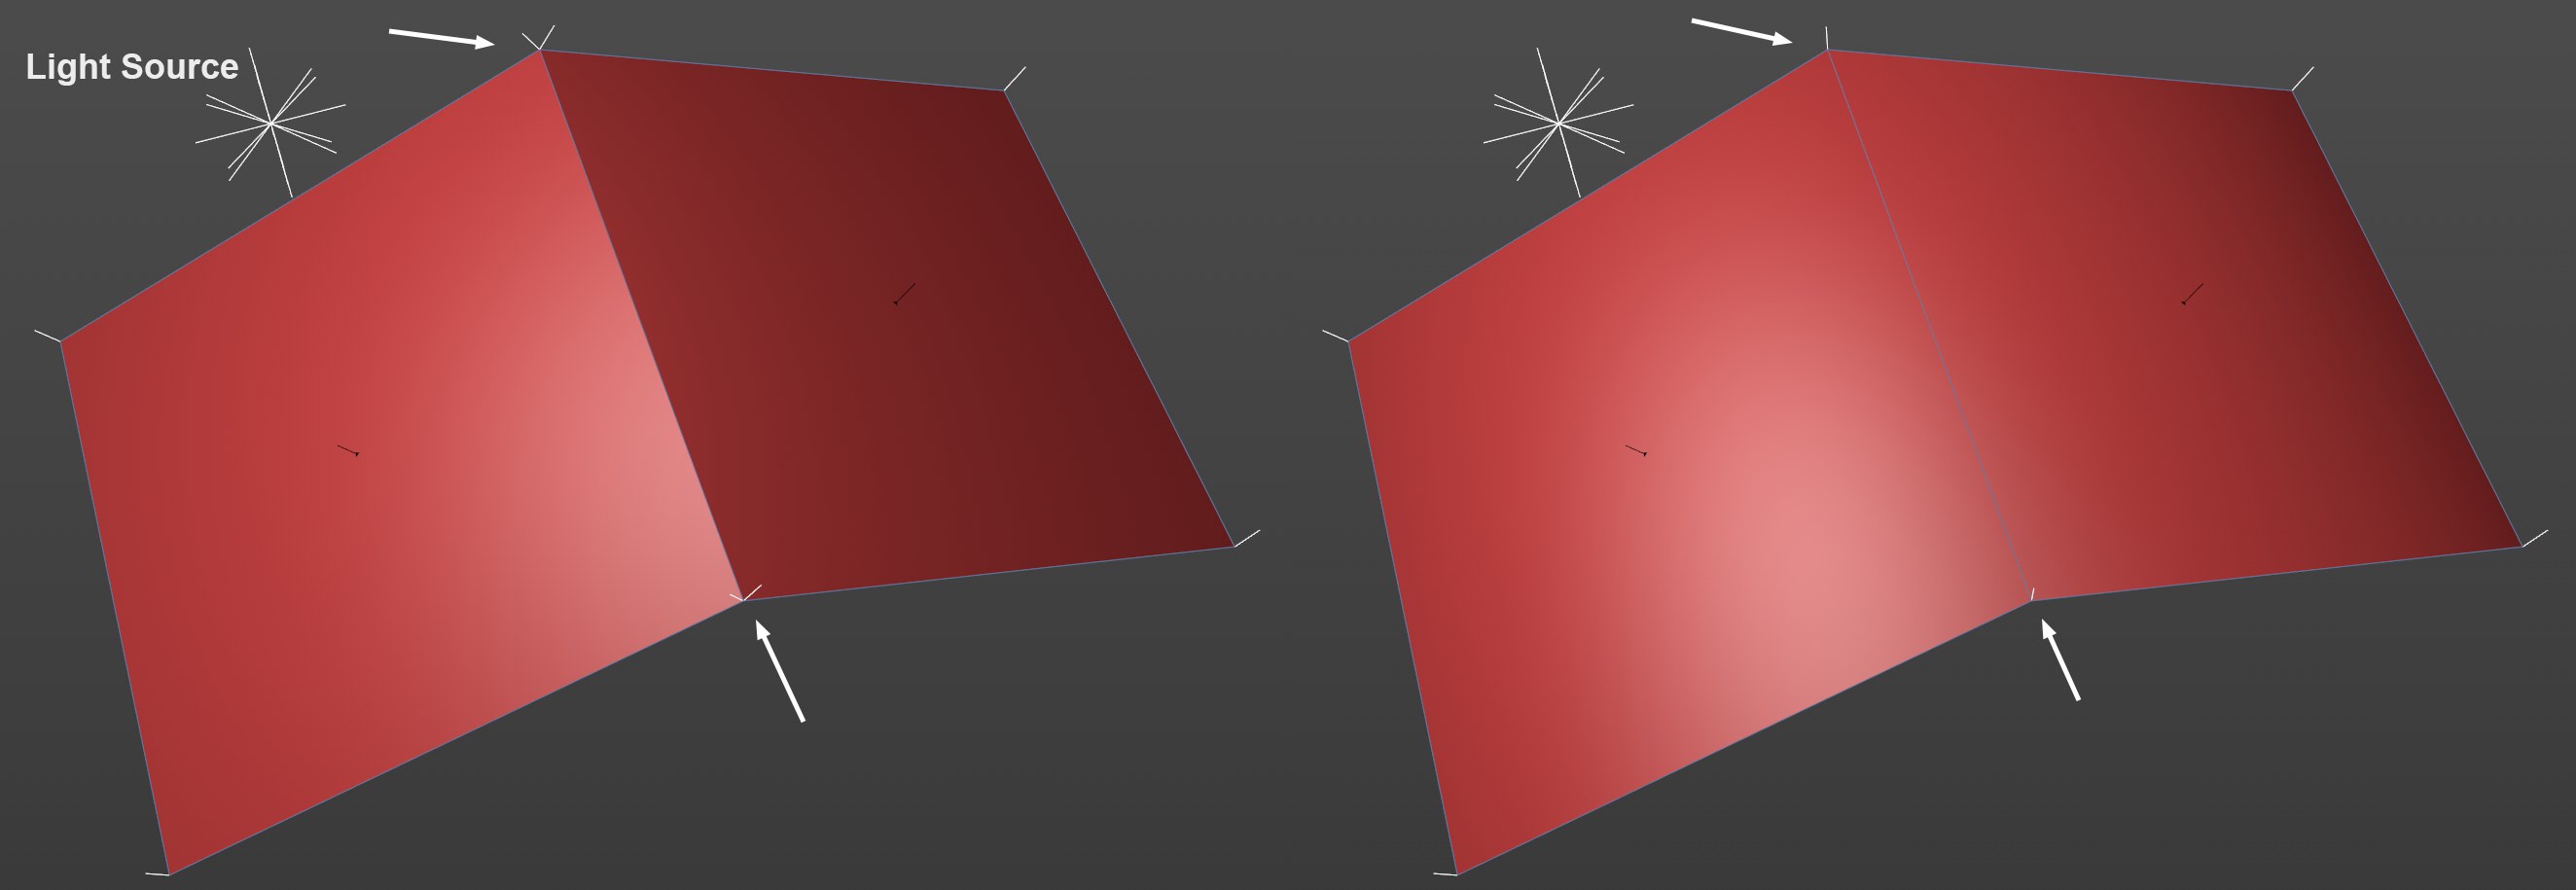
The white Vertex Normals in the image initially point in the direction of the polygon Normals (left without a Phong tag). For shading, a Normal (the Shading Normal) interpolated between the polygon’s own Vertex Normals is used within a polygon to calculate the brightness. It’s immediately obvious that a hard edge between both polygons will be created: both Vertex Normals whose center points differ greatly - a jump in brightness will result, which is not wanted in most cases.
How can this difference in brightness be avoided? Imagine the orientation of both Vertex Normals would align. No jump in brightness would then occur at the edge when the Shading Normals are interpolated.
This is exactly what the Phong tag does. Depending on the threshold value - the angle between 2 adjacent polygons - the Vertex Normals will be set to a mean value of the adjacent polygons if they fall short of this value: This can be seen in the image above, i.e., both Vertex Normals lie per point on top of one another, which ensures a constant brightness gradient over the edges.
Another minor note: Imagine that these Shading Normals are not interpolated between the object points but could instead be oriented in any direction. This is exactly what the Normal Map, which can be loaded into the Normal material channel does.
A further Cinema 4D element that can be used to affect the Vertex Normals is the Normal tag.
Note that the polygon Normals of adjacent polygons are not oriented in opposint directions but are oriented uniformly outwardly or to one side. Otherwise the shading cannot work correctly.
To do so, select the object and switch to Use Polygon mode, then select polygons using the Selection tool (or select Select All from the Selection menu).