Texture Paint
Enable this option if you want to paint textures on the object. You can use the eyedropper tool to pick the texture:
- Select the eyedropper tool.
- In the Active Tool manager, select Texture.
- Click in the Texture view or 3D view to use the active layer as the texture.
You can use the eyedropper between all open scenes.
You can select a preset pattern by clicking on the triangle to the right of the material preview.
You will also find two commands on the drop-down list:
This enables you to load a texture from a storage medium.
Load From Selection/Texture
Defines the texture in whole or in part (appies to selections) that is currently visible in the Texture view as a pattern.
Edit in BodyPaint 3D
The texture currently serving as the pattern will be loaded into the Texture view where it can be modified. Executing the Load From Selection/Texture command will load the modified texture as the new pattern.
If you picked the texture using the eyedropper tool, these values define the position on the texture where you clicked.
This defines which pixel in the texture will be painted first. For example, if the values are set to 0 and 0, the texture’s top-left pixel will be painted first.
If this option is enabled, the pattern will be tiled.
Dest. stands for Destination. You can enter values only if the painting mode is locked (see below); otherwise, the boxes are grayed out. If you set the Dest. X/Y values to the same values as Source X/Y, the pattern will be painted without an offset — enter different values to offset the texture. For example, to offset the texture 20 pixels lower, subtract 20 pixels from the second box.
This mode paints the texture with an offset as defined by the Source X/Y and Dest. X/Y settings. This enables you to clone a texture and paint it to another position with an offset. For example, if you paint using the Fill Bitmap tool, the texture will be offset over the entire layer — or if you use a brush, the texture will be offset in the areas where you paint.
This mode is similar to Locked but with the following difference: if you release the mouse button and start to paint from a new position, the texture is painted starting from the texture pixel defined by Source X/Y. This is similar to the rubber stamp tool which you will find in most paint programs.
This stands for Brush Position. Each movement during the brush stroke paints the texture on top of all previous movements in the stroke. This tends to create fragments of the texture that are very close to each other. If you select rotation (select the Rot. option) and couple its effector (see below) with the Draw Direction method, the pattern will rotate according to the direction in which you are painting. This is useful for painting curved textures such as fur and wool.


Enable this option if you want to scale the painting pattern. For example, if the original texture size is 300x300 pixels, you can resize it to 150x150 pixels by entering a value of 50%. A value of 200% would resize 300x300 pixels to 600x600 pixels (although keep in mind that scaling up is likely to cause pixelation).
This stands for Rotation. It lets you rotate the painting pattern by any angle from -180˚ to 180˚. This can be useful, for example, if you have imported a texture and picked it using the eyedropper tool — sometimes the texture is rotated by 90˚ in the process. In this case, use Rot. to correct the texture’s orientation.

To access the effectors for Scale or Rot:
Enable and then click on Scale or Rot.
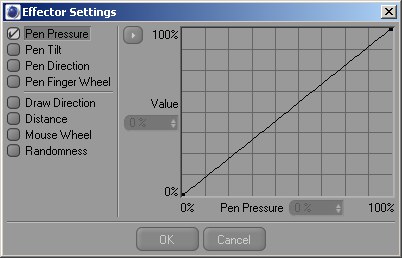
An effector enables you to change a parameter dynamically using an input method. For example, you can rotate the mouse wheel to change a texture’s Scale while you paint.
Most input methods have a graph which lets you fine-tune the effect. Eight different input methods are available. You can assign as many methods as you wish to the same effector. For example, you can change the texture’s Scale value using the mouse wheel or the draw distance. Also, you can link the same input method to more than one effector. For example, you can rotate the mouse wheel to change both the Size and Rot. values for the texture.