Icon Palettes
An undocked palette is a window in its own right. For example, it can contain several icon palettes and windows. This is especially useful if you are using more than one monitor.
Icon palettes, also known as toolbars, may contain any command that can be selected from a menu. Commands in palettes can be displayed as icons, text or as icons and text. Icon palettes help you to reach important commands quickly. You can edit the existing palettes and you can create new palettes and dock them into the layout.
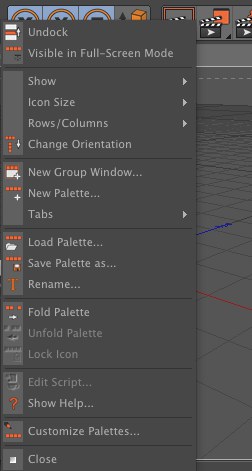
Commands for saving, loading and changing the appearance of icon palettes are available from the icon palette’s context menu. To access the icon palette’s context menu, right-click (Windows) or Command-click (macOS) on the icon palette.
This function rips the active manager from the Cinema 4Dmenu and places it in its own, separate window.
If several Managers/Viewports are in a group window and you call up the ![]() Full-Screen Mode
Full-Screen Mode
 Possible combinations.
Enable the Icons option to display the commands as icons; enable the Text option to display the commands as text; enable both options to display text and icons for the commands. Enable the Vertical option to display text below each icon instead of to the right (provided Icons and Text are enabled).

If an icon is displayed at a different pixel size from its original size, it must be resampled. This may lead to a visible reduction in picture quality.
Choose the size of icons from the Icon Size sub-menu: Large (36x36 pixels), Medium (26x26 pixels) or Small (18x18 pixels).
THE ORIGINAL ICON SIZES ARE DEFINED IN THE ICON RESOURCE FILE (Resource/icns/c4d_icons.res). The original sizes usually correspond to Large icons.
The value you select for Rows/Columns defines the number of rows or columns used for a palette. If Transpose is set to Vertical, this setting refers to the number of columns or, if Transpose is set to Horizontal, the number of rows.
Think of this as the number of lines. For example, if you have 20 icons, setting this value to 2 will create two lines with ten icons in each line. A value of 3 would create three lines, this time with seven icons in the first two lines and six in the third line.
This command is only relevant for the Arabic-language layout (s.a. Switch R2L) in which Palettes are arranged opposite to that of other layouts. Enabling this option will prevent the given Palette from being mirrored when the Arabic-language layout is activated.
Choose Transpose to toggle between vertical and horizontal alignment of commands.
Use this command to create a new group window into which several scalable windows can in turn be placed.
To create a new, empty icon palette, do one of the following:
- Choose Window / Customize / New Icon Palette (main window).
- Click any window’s Grasp icon (top-left corner of window) and choose New Icon Palette from the pin’s menu.
- Right-click (Windows) or Command-click (macOS) an existing icon palette to open the icon palette’s context menu. From this menu, choose New Icon Palette.
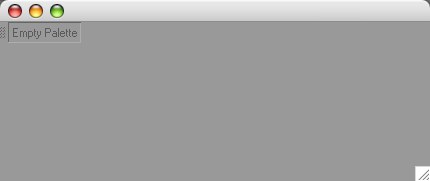 A new, empty icon palette.
Commands can only be added when the Edit Palettes option is enabled. You can add commands to the palette in two ways: drag commands from an existing palette into the new palette (to do so you must right-click on an existing Palette and select the Customize Palettes … command), or drag commands from the Customize Commands Manager into the new palette. Once the Edit Palettes option is enabled, drag the first command onto the Empty Palette box of the new palette. When you drag further commands onto the palette, a dark line appears indicate the insertion position.
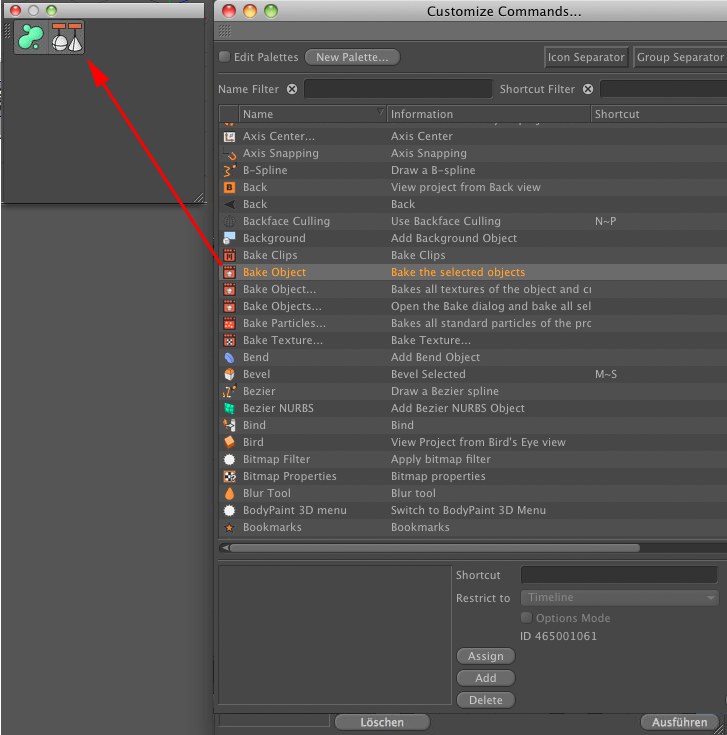 Add a command to the new palette
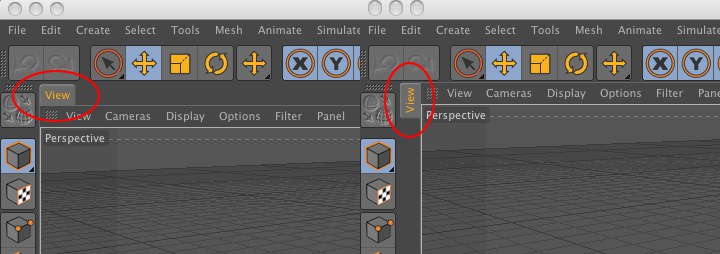 Tabs can be arranged vertically or horizontally
Windows and Managers with tabs can have these arranged vertically (left, right) or horizontally (top).
Use the Load Toolbar command to load a previously saved icon palette. The toolbar appears as a freestanding window that can be integrated into the layout.
Save Toolbar As saves an individual palette. The file extension .l4d is added automatically.
To save the entire layout instead including the toolbar, choose Save Layout As or Save As Startup Layout from the
To save the layout and custom palettes automatically when you quit Cinema 4D, enable Save Layout At Program End in the preferences (Common page).
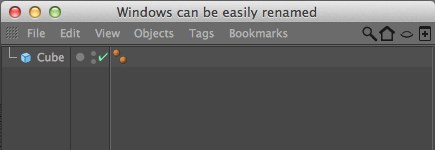
Use this function to rename the active window.
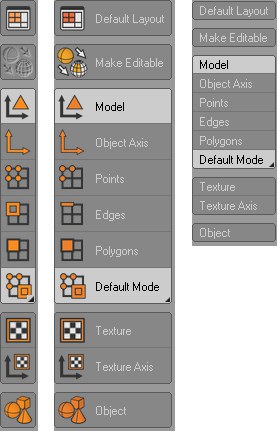
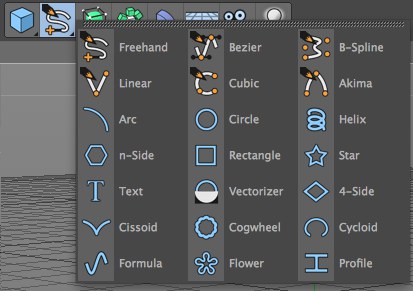
You can group commands to form a folded palette. Position the mouse pointer over a command palette and right-click (Windows) or Command-click (macOS) to open the context menu. From this menu, choose Fold Palette. Now only one command is visible. This is called the visible command. The small arrow in the icon’s bottom right corner indicates that it contains other commands.
Next, disable the Edit Palettes option. Click and hold down the mouse button on the visible command. The folded palette appears. Either release the mouse button and select the desired command or position the mouse pointer over the desired command before you release the mouse button. Note that the visible command is also a hidden command.
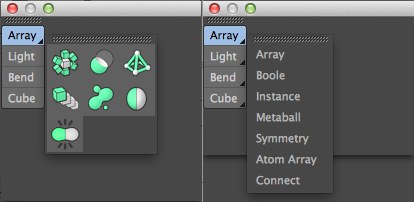
If the Lock Icon command of the context menu is disabled, the visible command will be the most recently selected command. For example, if the visible command is Cube and you select the Cone command, the Cone command becomes the visible command. The order of the commands in the folded palette corresponds to their order at fold time. Therefore, arrange the commands before you fold them.
You can Drag & drop a visible command onto another palette. This enables you to use several folded command groups within the same palette. To create a palette with several folded command groups, first create two empty icon palettes. Use the first palette to create a folded command group. Drag & drop the folded commands (i.e. the visible command) onto the second palette. Create the second folded group in the first palette, Drag & drop it onto the second palette, and so on.
Once you have finished creating and adding the folded commands, close the redundant palette.

You can also use text-only display with folded palettes.
You can unfold a command group into a palette of individual commands. Right-click (Windows) or Command-click (macOS) the visible command to open its context menu. From this menu, choose Unfold Palette.
If the Lock Icon option in the context menu is disabled, the visible command for a folded group of commands is the most recently selected command. For example, if the visible command is Cube and you select the hidden Cone command, the Cone command becomes the visible command. If this option is enabled, the current visible icon will be locked, meaning that no matter which tools you then use from the folded palette the visible command remains the same.
Scripts that have been created in the Script Manager and have their own icon in the Icon Palette can be opened and modified using this command.
Jumps to the corresponding help for a given palette command. Alternately, you can press the corresponding keyboard shortcut for Show Help (Customize Commands… Manager).
Commands can only be added when the Edit Palettes option is enabled.
To do so, call up the Customize Commands… Manager using the next command. Commands can be dragged directly from the Customize Commands… Manager into the palette.
Use this function to switch the active manager to full-screen mode and back.
The Manager beneath the cursor will be switched to fullscreen mode with
Other Managers can be switch to full-screen mode by using the previous shortcuts (e.g.,
You can, of course assign the full-screen mode a different keyboard combination in the Customize Commands… Manager.
Note the Independent Window option described farther below on this page when working with two monitors.
Sometimes it can be quite practical to display a manager window palette in ![]() Full-Screen Mode
Full-Screen Mode
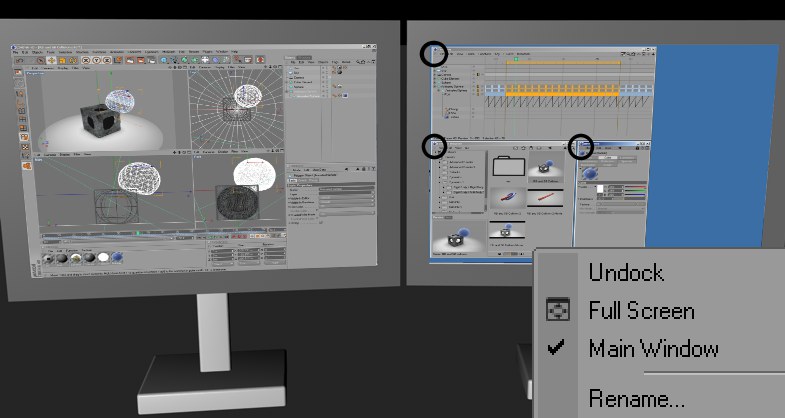
This option lets you make any free-floating window (which is not anchored to a main window itself) to a main window. This window will be recognized by all operating systems as such. In Windows use ALT + tab to toggle between windows.
This is necessary in order to ensure the Full Screen functionality works when using two monitors at once. Otherwise a Window can get lost when switching back to normal mode.
Activate the Independent Window function for the second monitor (not necessary for macOS).You can also place all windows in the second monitor in a common window by dragging them via the Grasp icon into a single window. Subsequently activate Independent Window in the Grasp Icon menu.
Leave this option disabled in order to save a little space in your layout. Otherwise an additional (and basically non-essential) bar approx. 15 pixels high will be displayed on each window. This command is only made available for selection if the Manager or Viewport are part of the group window.
Closes the respective Palette or Manager. A Manager can be opened again via the Window menu in the main menu.