HUD
 You can record keys directly in the HUD using the circles next to the parameter names. You can drag the Frame element (bottom right) to move forwards or backwards through the animation.
The term Head-Up Display (HUD) has its origins in aviation. In an aircraft, the HUD refers to the projection of readings onto a windscreen that enables the pilot to see them without looking down.
The HUD does a similar job in Cinema 4D, displaying parameters directly in the view, where you can also edit or animate them.
The HUD can display four types of information:
- Object parameters. You can add any object parameters displayed in the Attribute Manager to the HUD. You can adjust these parameters directly in the HUD with real-time optical feedback (drag the value). You can also record keys directly in the HUD.
- General information. You can instruct the HUD to display a variety of general information, such as how far away the active object is from the camera, the number of points that are selected and so on.
- Objects can be dragged directly into the editor view from the Object Manager. A HUD element including all icons will be created for help in selecting corresponding elements.
- Commands can be dragged directly from the Customize Commands Manager into the HUD.
You can switch the HUD on and off in the Viewport menu on the Filter page. To open the view-port settings, on the view’s menu, choose Options / Configure.
HUD elements can also be included in rendered pictures and animations — in the render settings, on the Options page, enable Render HUD.
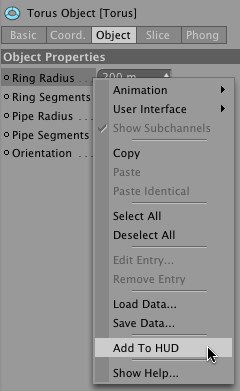
To add object parameters to the HUD:
- In the Attribute Manager, select the parameters. (To select all the parameters, choose Select All from the context menu).
- Right-click (Windows) or Command-click (Mac OS) one of the selected parameters and choose Add To HUD from the context menu.
- Individual parameters can also be placed directly into the HUD via drag & drop.
You can adjust the parameters directly in the HUD. Click-drag a parameter to adjust its value. In the case of parameters that have drop-down menus, click the parameter to open its menu. Options that have two states (on and off) are colored yellow when on — click an option to toggle its state.
You can also record animation keys directly in the HUD. This works in the same way as recording parameters in the Attribute Manager: To record a key,
You can choose to display the same parameter multiple times in the view if you wish.
You can use the following keys in the HUD:
-
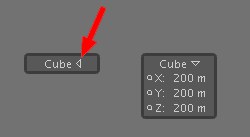
Shift +click to multiple select HUD elements. Selected HUD elements are highlighted with yellow boxes. - Double-click on a HUD element (name or value) to open a text box that allows you to enter a new name or value for the element.
- Ctrl-drag to move a HUD element.
When an object is dragged from the Object Manager into the editor view, a HUD element will be automatically created. This serves as a selection assistant and also makes a selectable 4D command available (right-click on the Action HUD element). Click on the HUD element to select the respective object or command.
For character animators, this is an especially effective way of working since most of the Visual Selector’s functions can be integrated into the HUD.
Double-click the Selection Object to select all child objects
The HUD tab in the viewport settings allows you to choose which types of information will be displayed in the HUD. To access the viewport settings, from the viewport’s menu, choose Edit / Configure.
You can change some of the general information parameters directly in the view. To do this, double-click the parameter (while simultaneously pressing the Ctrl-key) and enter a new value into the text box that appears.
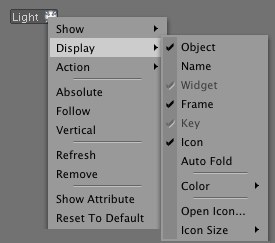
Right-click (Windows) or Command-click (macOS) on a HUD element to access the following settings (the settings that appear may differ depending on which type of element you clicked on):
These settings primarily control when an object’s HUD elements will be displayed:
Object Active: when the object is active.
Same Active: when any object of the same type is selected. For example, a light’s HUD elements will be displayed when you activate any light in the scene. This allows you to adjust the parameters of multiple objects — such as the brightness of multiple lights — using a single HUD element.
Parent Active: if any object higher up in the same hierarchy chain is active.
Chain Active: if any object in the hierarchy chain is active.
Always: always.
Parameter Active, Set Parameter: These settings can be used to show or hide individual HUD elements using check boxes (see below for value fields) in the Attribute Manager (but only for the corresponding object, tag or tool, i.e., you cannot use a sphere’s HUD setting to affect a cube). Select the Set Parameter command for the given HUD element and enter the exact option name in the text field, making sure upper and lower case match.
Example:
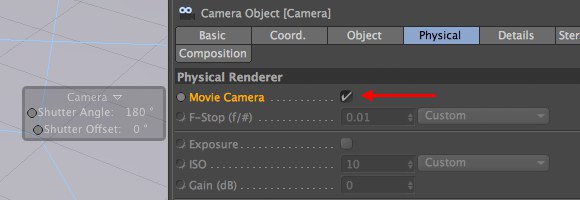 Using this check box, the Motion Camera option in the HUD group can be hidden or unhidden.
Value fields can also be used instead of check boxes. A value 0 will hide the HUD element. If you want to reverse the effect for a value field or check box simply place a ~ (tilde) at the beginning of the text field (e.g., ~Motion Camera for the example above).
This function can be enabled or disabled using the Parameter Active option.
Lock To View: in the window from which this option was enabled.
Render: in the rendered image (provided that Render HUD is enabled in the render settings, on the Options page).
Object: Displays the object name in front of each parameter.
Name: Displays the parameter name (original object name + your entry).
Widget: Displays a triangle that you can click to open or close parameter groups. In the case of individual sliders, the triangle displays or hides the slider.
Frame: Displays a frame around the parameter group.
Key: Displays the circles that allow you to record animation keys for parameters.
Icon: Hides or displays a parameter’s or HUD element’s icon.
Auto Fold:
If this option is enabled (done individually per HUD element), an element can be folded (closed) or unfolded (displayed in full) by placing the cursor over the small triangle to the right of the element’s name. When the element is deselected it will automatically fold.
Color: This option contains a menu with additional options for giving an element a unique color. Separate colors can be assigned to the text, background and frame. The Reset to Defaults option will do the obvious.
Open Icon: When an object is dragged directly into the editor view from the Object Manager a HUD element will be displayed. The object’s icon will also be displayed. This object icon can be replaced with your own custom icon. All image formats that Cinema 4D can read can be used. Any alpha channels in the image will be applied.
Make sure the image path is relative (with regard to the scene file). This means that the images should lie within the respective scene’s directory.
Icon Size: You can select from; Small; Medium; Large; Original (exact size in pixels as the original image); Fit (fit to text line height).
The following commands only affect the aforementioned selection assistants (as well as the objects dragged & dropped into the editor view from the Object Manager). Use this option to define with Cinema 4D command should be executed or which mode should be switched to when the option is selected.
Enable: Defines whether or not a command should be executed when the HUD element is clicked on. If this option is not enabled the corresponding object will merely be selected.
Move, Scale, Rotate: Clicking on this selection assistant will call up the corresponding tool.
Command: When this selection assistant
is clicked, a Cinema 4D command (or script) of your choosing will be executed in addition to the element being selected. Refer to the Customize Commands Manager for available command IDs (enter the ID-number into the ID field):
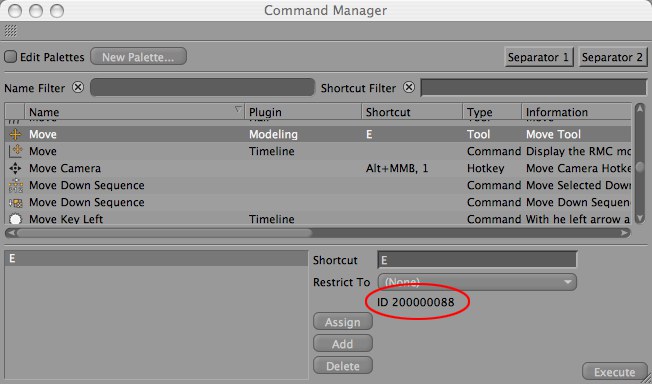
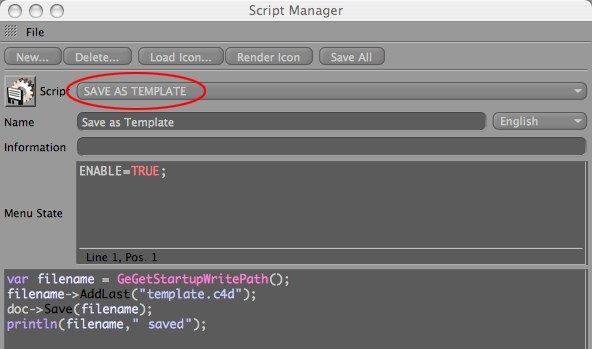
In addition to commands, scripts can also be executed. Simply enter the name of the script that should be executed:
If a HUD element has been defined with 2D Vector Field, the Symbol menu will be made available, from which you can select the shape of the small cross.
These options control the look of the slider.
Here you will find numerous options that control the arrangement of multiple selected parameters within a parameter group.
Removes the selected parameter from a HUD group. This parameter will then be treated as a separate HUD element.
Removes the selected elements from the HUD.
Displays the attributes of the object to which the parameter belongs in the Attribute Manager.
Sets the parameter on which was right-clicked (can also be a multiple selection) back to the object’s original state, i.e., the state of the object when it was created.
For individual parameters, not located in a parameter group, the following three options are available:
Absolute: If you have added a parameter group to the HUD, this option will determine if the distance between the parameters should remain the same (option disabled) or change proportionally (option enabled) during scaling.
Rename: If the
Follow: Locks the HUD element relative to the object’s position, i.e., the HUD element will move with the object.
Vertical: Rotates the HUD element by 90° counterclockwise.
A brief description of how to create a HUD command group containing the Animation Toolbar’s playback options:
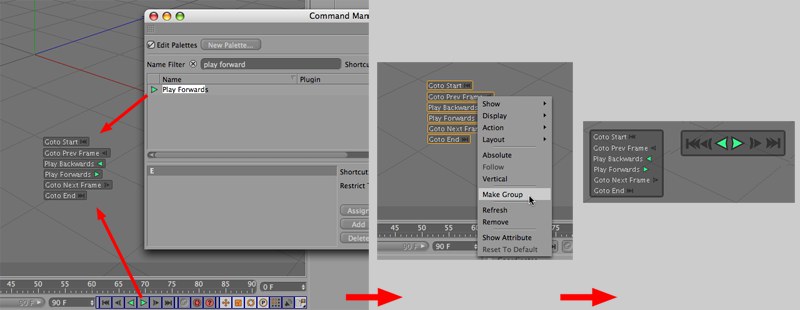
- Open the Customize Commands Manger and activate the Edit Palettes option. Drag the icons from the palette, or the commands from the Customize Commands Manager, into the editor view (for the latter the Edit Palettes command must not be active).
- Deactivate the Edit Palette command and select all HUD commands using the
Shift key. Once all are selected, right-click on one of them and select Make Group. - If only the icons should be displayed, select all commands again and right-click again. Select the option Display / Object. Now only each command’s respective icon will be displayed. The icons can be arranged within the group window by pressing the Ctrl-key and moving them to the desired location. The same menu also offers options for removing the group name or the arrow with which the group is opened and closed, etc.
Refresh: Choose this command if you notice a discrepancy between the display in the Attribute Manager and the display in the HUD.
Rename: If the
Make Group: A group can be made of several commands selected in the editor view (i.e. commands dragged into the editor view from the Command or Object Managers, respectively).