Using BodyPaint 3D with Maya
This exchange plugin enables you to texture Maya objects in BodyPaint 3D. The objects are transferred directly from Maya to BodyPaint 3D — geometry, material, light and UV data are all sent over. Once you have painted the object in BodyPaint 3D, the texture and material data is sent back to Maya and the scene is updated in Maya. The exchange plugin works with Maya Versions 2012 or newer.
First things first. You need to do the following to get up and running:
- Start Cinema 4D and enter your serial number. The exchange plugin will only work if you have entered your serial number.
- Check that the following file is in Maya’s plugins folder: - BodyPaintExchange.mll (Windows) or
- BodyPaintExchange.bundle (Mac):
Right-click on the Maya executable and select Show Packet Contents. The path will be the following: Contents\macOS\plugins
PC: "C\Programs\Autodesk\Maya version\bin\plugins".
The scripts:
- BodypaintExchangeLoadPlugin.mel
- BodyPaintExchangeUI.mel
- usersetup.mel
Note that BodyPaint 3D is often referred to in the following, even though this product is no longer available as such. What is being referred to is the BodyPaint 3D functionality within Cinema 4D.
Copy the scripts to the following directories, respectively:
For Windows, Maya scripts must be installed separately for each user.
Mac: Macintosh HD / Users / Shared / Autodesk / Maya / Scripts
PC (Win7 and newer): User\ Documents\ Maya \ Scripts
Make sure that these script files appear only once in the Maya paths.
Maya -> BodyPaint 3D (BodypaintExchange.mll/bundle)
First you must assign materials to the objects in Maya. Make sure the desired properties are assigned to these materials — you will not be able to change them in BodyPaint 3D. For example, if you assign a reflectivity texture to a Lambert material in BodyPaint 3D, when you return your work to Maya this texture cannot be applied to the material automatically.
The objects themselves are exported as polygon objects. The plugin converts NURBS and SubdivSurface objects to polygon objects using the following MEL commands: nurbsToPoly and subdivTOPoly.
All geometry data is scaled according to the factor chosen. Polygons with more than four points are triangulated. The exporter centers the object axis system inside the objects to help make it easier to navigate the object in BodyPaint 3D.
Selection tags are created for per-face materials and these are assigned to the appropriate material. The camera’s current position is transferred as are all lights . All material properties are transferred (see also Transfer Restrictions).
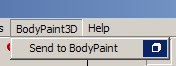
You will find the command for exporting objects — Send to BodyPaint — on the BodyPaint 3D menu. Click the icon to open the exchange dialog.
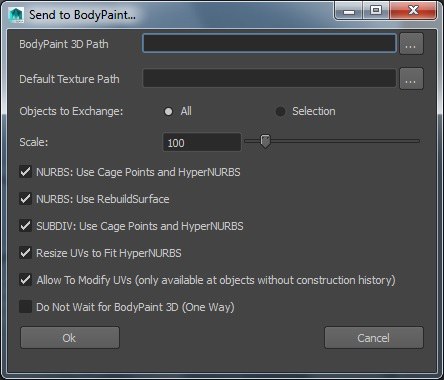
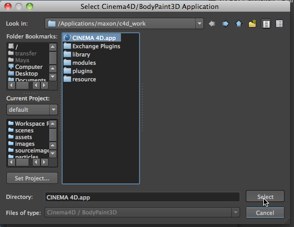
Here you must define the location of the Cinema 4D application. Define the full path.
- Cinema 4D.exe (or Cinema 4D.app)

Select the corresponding file:
In macOS, selecting Cinema 4D must be done in conjunction with the Select button. Double-clicking on the file name will not work.
This is BodyPaint 3D’s default path for new textures. Enter a valid path and make sure it’s not write-protected or the file exchange will fail!
Choose whether the entire scene or just the selected objects are transferred to BodyPaint 3D.
The object(s) will be scaled by this factor in BodyPaint 3D. Maya objects tend to be very small compared to BodyPaint 3D’s world grid. The default Object Scale of 100 usually ensures the object is a comfortable size to work with in BodyPaint 3D (the object will be 100 times larger in BodyPaint 3D than in Maya).
NURBS - Use Cage Points and Subdivision Surface
This option converts Generator objects to low poly models which are sent to BodyPaint 3D and placed inside a Subdivision Surface object.
In BodyPaint 3D, this polygon object will be made a Child of a Subdivision Surface object. The resulting object is almost the same as a NURBS object in Maya.
Only use this option if you have problems with the UV coordinates. Before the NURBS objects are sent to BodyPaint 3D, the MEL command rebuildSurface is applied to them to prevent overlapping UVs.
Resize UVs to Fit Subdivision Surface
The Use Cage Points and Subdivision Surface conversion can cause the UVs to become stretched out over too great an area. This option automatically resizes the UVs to fit the UV space (0.0,0.0 to 1.0,1.0).
SUBDIV -> Use Cage Points and Subdivision Surface
The plugin will generate low-poly models from subdivision surface objects, which can subsequently be placed into BodyPaint 3D or a Subdivision Surface.
Under certain circumstances, UV coordinates can now be modified in BodyPaint 3D and sent back to Maya (in older versions of Maya, the UV editing must be done in Maya). However, the Construction History in Maya must first be deleted. If this is not done, an error message will be displayed in Maya. The UVW tags will then be locked in BodyPaint 3D (manually unlocking them will not help – Maya will reject the UV modifications).
Do Not Wait for BodyPaint 3D (One Way)
If the transfer is one way. i.e., if you want to send objects to BodyPaint 3D but you don’t want to return them to Maya, enable this option. Maya will then stop waiting for the data to be returned.
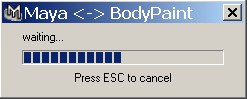
Once you click on OK, the wait window appears in Maya. The objects are transferred to BodyPaint 3D and you are ready to paint them.
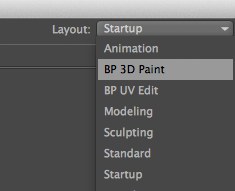
After Cinema 4D has been started, it will be placed on top of all other windows and you can start painting objects right away you might have to switch to the BodyPaint 3D layout).
After BodyPaint 3D or Cinema 4D (in this case you will have to manually switch to the BodyPaint 3D layout) has started it will automatically be placed in the foreground and you can begin painting your objects.
To return your work to Maya:
In BodyPaint 3D, choose Send back to Maya.
The textures are saved and in Maya the texture paths are updated to point to the new texture folder. All material properties are updated. The wait window closes and Maya comes to the foreground.
Maya and Cinema 4D each contain a vast number of features. Therefore, it can occur that objects, UV coordinates, materials and textures can behave differently after the transfer process. Consequently, several restrictions apply, of which you should be aware.
Basically, only texture and material data is returned to Maya.
You must assign materials to the objects in Maya before you send the objects to BodyPaint 3D — you will not be able to change them in BodyPaint 3D. For example, if you assign a reflectivity texture to a Lambert material in BodyPaint 3D, when you return your work to Maya this texture cannot be applied to the material automatically.
The plugin arranges the texture channels as follows:
| Maya | BodyPaint3D |
| Color | Color | Diffusion | Diffusion | Incandensence | Luminance | Transparency | Transparency | Reflected Color | Reflectance | Ambient Color | Environment | Bump (texture only) | Bump | Specular Color | Reflectance |
Existing textures that were assigned in Maya will be copied to the specified texture folder when the file is sent to BodyPaint 3D. Textures can be added or removed as desired in BodyPaint 3D. File nodes will be created in Maya for new textures, where their respective texture names will also be defined. File nodes for missing textures will be deleted. Special shaders or texture channels cannot be transferred. If a Color channel is present, it will be transferred. To create a texture in an unknown channel, the color channel, for example, can be used and the texture can be manually assigned to the channel after it was sent back.
The UV coordinates from all objects will be transferred to BodyPaint 3D.
Due to technical limitations, UV coordinates will only be taken into consideration to a lesser degree. Instead, use the UV tools in Maya to edit UVs.
Error: Cannot find command BodypaintExchange
The following file is missing from the ../Maya/bin/plug-ins] location: BodyPaintExchange.mll (Windows) or BodyPaintExchange.lib (macOS).
Or the plugin has not been loaded by the Plugin manager. Check if the MEL scripts are in the correct folder (see Getting Started).
The exporter cannot find Cinema 4D. Set Cinema 4D path to the correct path.
I can’t send the entire scene to BodyPaint 3D
This is due to a MEL bug with Select All, which fails to select all the objects. To remedy, select all the objects manually and transfer the selection instead of the scene.
Under certain conditions (such as low RAM on the graphics card) you may notice display errors when sending new textures from BodyPaint 3D to Maya. For example, instead of the texture being mapped to the object, the current screen is mapped. This is not BodyPaint 3D’s fault. To avoid this problem, in Maya’s Material settings, set Texture Resolution to, say, Medium.