Parameter
Connect the Effector’s Object output port to the Effector’s input port.
Time is a time offset effect that can be fed with data which will simply be added to the Effector’s result when an output port of the same name is tapped. All other input ports are basically self-explanatory and can, for the most part, be tapped by the output ports of the same name, respectively:
• Global Matrix
• Color
• UV [XYZ ]
• Weight [-∞..+∞]
The output ports read out settings modified by the attached Effector.
Worth mentioning here is Strength, a result of combining strength (as defined for a given Effector), falloff, the prevailing scale of a given Effector controlled by the value of an input port (see Effectors) and Weight (Weight will be multiplied). These two ports are perfect for modifying normal XPresso setups (see Example below).
Global Matrix, Color, UV, Visibility and Time area each values that are modified by the Effector and will only lead to meaningful results if their input ports are fed with data. Visibility is a boolean value that is generated by the Effector that will return a value of 0 when it reaches a certain threshold.
Global Matrix•
Color•
UV [XYZ ]•
Visibility•
Weight [-∞..+∞]•
Time [-∞..+∞]•
Strength [-∞..+∞]•
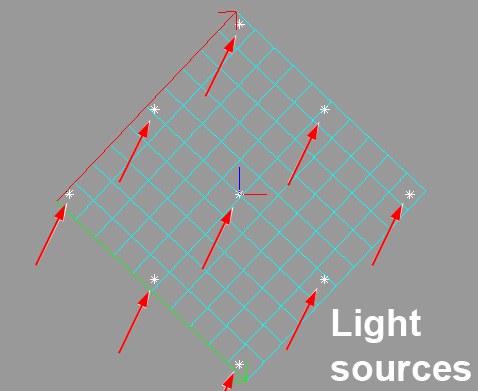
Let’s assume you have a certain number of light sources and you want to use a shader to control their intensity. This is not a problem when using the Node Effector:
- Create a Shader Effector and assign a texture to it with a Flat projection. Set Channel to Color in the Shader Effector’s Shading tab (of course the shader should be placed into the corresponding material’s color channel) and drag the Shader Effector’s Material tag into the Material tag text field. Use the texture tools to adjust the projection so that all light sources are covered by the texture.
- Using this XPresso setup, the intensity of the light sources can be adjusted using the shader shown (insert)
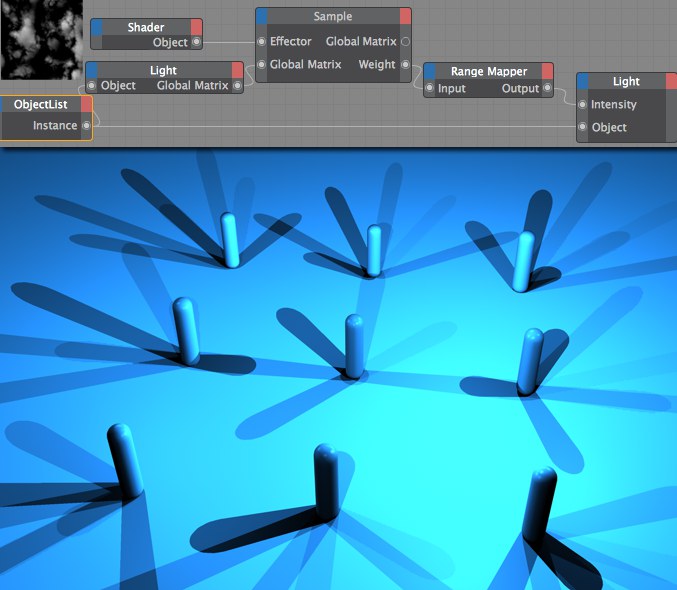
Using the Object Index Node, to which all light source have been assigned, all of the lights’ global matrices will be applied to the Effector Node. The Effector Node will calculate a Weight value for each position which, in turn, will read out a reasonable intensity for the light sources via the Range Mapper Node. There you have it: Controlling intensity of light sources using a shader. This method can also be used to control an unimaginable number of object settings.