Basic Properties
Defines the amount of hue in a given color or in the colors of an image, i.e., how brilliant a color/colors will appear. A Saturation value of 0 will result in an image being reduced to grayscale values.
Makes an image evenly brighter or darker.
Higher Contrast values will darken dark regions and brighten bright regions of an image, which will amplify the differences between regions with different brightness values.
Lower Contrast values will lighten dark regions and darken lighter regions of an image, which will result in a optical "flattening" of the image.
Exposure is used to adjust the brightness of HDR and also normal images.
The Gamma value defines how the brightness values will be displayed (e.g., a bright pixel can be made much brighter or darkened). Basically the Gamma value is used to adjust brightness values.
Use these options to enable or disable each color channel.
Inverts the image’s color values. Black regions are made white and vice versa. RGB images are inverted by subtracting the maximum pixel color value (i.e. from 255 for 8-bit color depth) for each channel (red, green, blue).
Black Point [0..100]
White Point [0..100]
These values define the darkest and brightest points, respectively. If one of the values is modified the tonal value will be scaled accordingly.
 The gradient curves can be used to brighten, darken or color specific brightness regions.
The gradient curves can be used to precisely modify brightness and color regions of original image. For example, only the dark regions of an image can be brightened or brighter regions can be colored.
This can also be done for individual color channels using the separate red, green and blue gradient curves.
In the Picture Viewer’s filter settings you will find a color correction setting that can be used to affect the image interactively.
Here you can steplessly define the intensity of the Color Correction effect during rendering. A value of 0% disables the effect; a value of 100% maximizes the effect.
Curve Min [-∞..+∞]
Curve Max [-∞..+∞]
Use these settings to define the brightness region within which the gradient curves should unfold their effect. This is not important for 8-bit or 16-bit images since they have a range of 0 - 255 and 0 - 65535, respectively, and therefore use the default values of 0 and 1.
These settings are, however, relevant for use with HDR images. As you know, HDR images can contain an almost infinite amount of brightness. Using the Min and Max values you can more precisely restrict the brightness range within which the gradient curves should unfold their effect. Brightness values less than Min and larger than Max (values greater than 1000 can be entered) will remain constant (Attention: This means that all brighter regions will be omitted if the default Max value of 1 is used! The Max value must be adjusted manually). The gradient curve will then unfold its effect within this value range.
Use this curve (in addition to the RGB curves) to define the overall brightness. How the Curve works is explained below.
![]() RGB Curves
RGB Curves
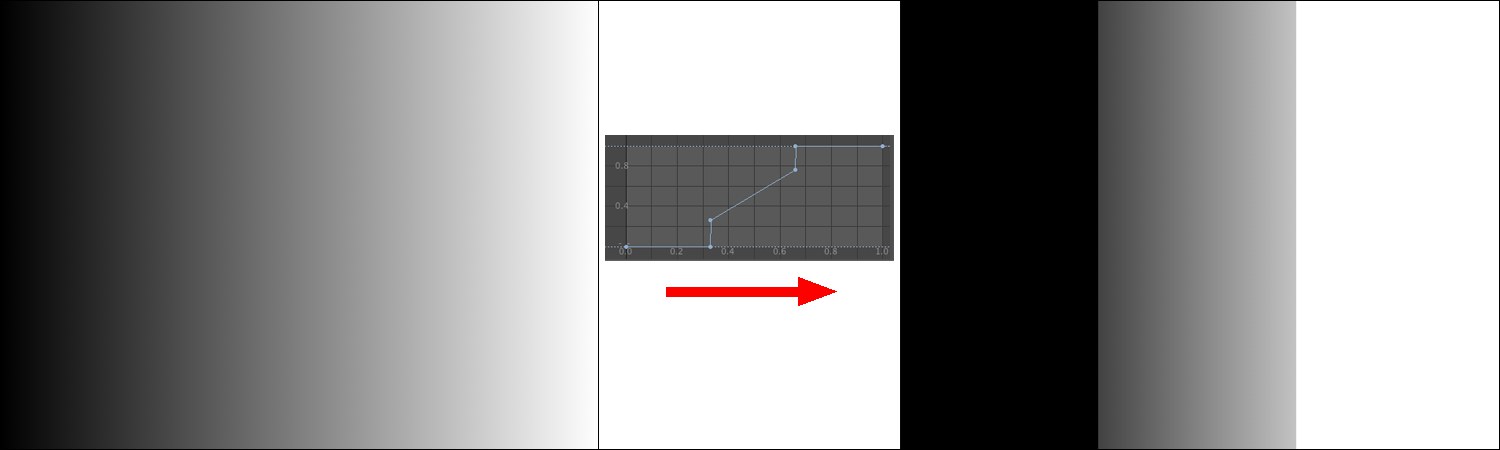 The gradient curve is applied to the linear grayscale at the left. The result is shown on the right.
A gradient curve defines where a new brightness value will be assigned along the X axis. This is easy to recognize in the image above. The Curve applies a brightness value of 0 to the first third, i.e., black. The second third has a linear gradient that assigns proportional brightness values to the region. The last third has a maximum value, which means it appears white.
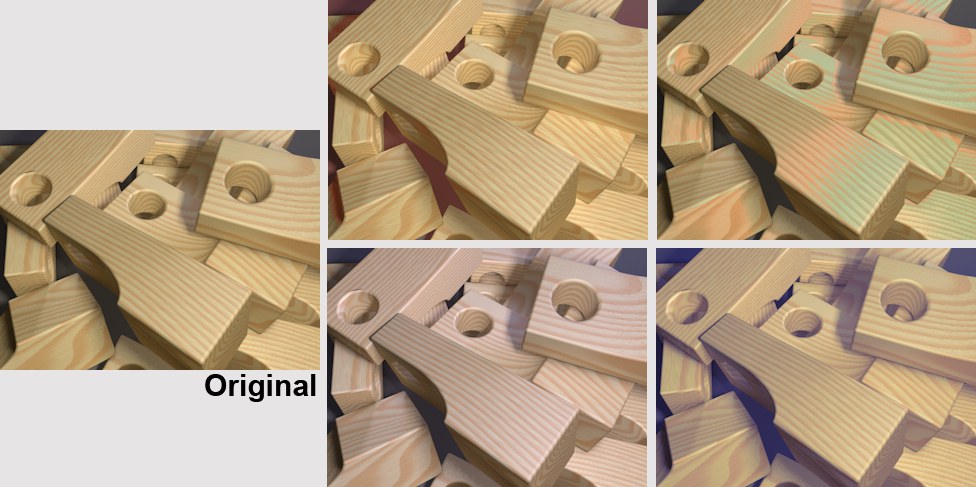
This can also be done separately for each color channel, red, green, and blue. This makes it possible to color dark or bright regions only (the histogram in the Picture Viewer shows where which color dominates in the image):
 Dark regions in the center were colored red and bright regions at the right blue.
Clicking on this button will set all color correction values back to their original states, which has the same effect as not having a post effect at all.