Tag Properties
At the top left of the Tag tab are several icons that can be use to create various types of Hotspots such as text, custom or default shapes and icons (numerous options are available in the Edit tab). Objects can also be dragged here from the Object Manager.
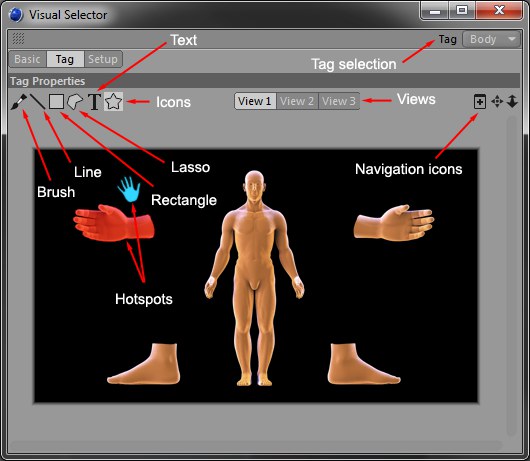
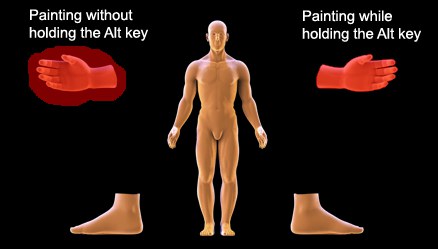
There are 4 painting modes you can use to paint your own custom shaped hotspots. All share the same behavior and key modifiers: hold
A Hotspot can be painted by setting Mode to Edit in the Setup tab and clicking on the Add Hotspot button.
The brush is used to manually paint hotspots. Select the brush, then paint over the area you wish to cover. Use the [ and ] keys to decrease or increase the brush size.
The line mode allows you to paint straight lines. Click and drag to draw a line over the background image. Hold the Shift key while drawing the line to constrain it horizontally, vertically or diagonally.
Lets you paint rectangle or square shapes. Pressing the
Lets you create a shape made up of straight lines. As soon as you click on the starting point again the shape will be created.
Use this mode to draw shapes using a polygonal or free lasso tool. There is also a rectangle mode, which is similar to the rectangle tool, except it cannot be constrained to a square using the Shift key (lassos can't be constrained using a modifier).
Text mode allows you to type text over your image background and use it as hotspot. Simply select the Text mode icon, then click where you want to place your text in the view to open the Text mode dialog. You can move each text box by holding the Shift key. You can edit a text box by right-clicking on the text and choosing the Options command.
When adding or editing a text box, you can access the text options.
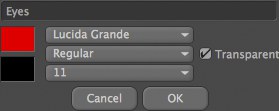
Type your text in this field.
The top color icon represents the text color.
The bottom color icon represents the color of the box/background behind the text.
The three dropdown menus are used to select your font, the type and the font size.
Enable this option to make the text box transparent, so you can see the view image through it.
Icon mode allows you to add preset or custom icons to your hotspots, but also edit objects icons when dragged from the Object Manager. Simply select the Icon mode, then click in the view to add an icon (or drag an object from the Object Manager to drop its icon into the Visual Selector view). You can move icons by holding the Shift key before clicking on the icon you wish to move. If you want to edit an icon, just right-click on the icon and select the Options command.
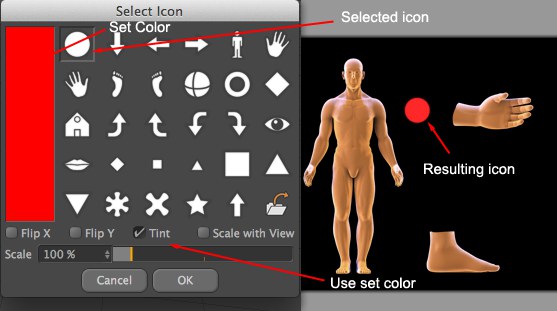
When adding or editing an icon, you can access the icon options dialog.
Click on the color thumbnail to change the color tint of an icon.
When adding or editing an icon, you can choose from a selection of preset images to use for the icon. Simply click to select the desired image.
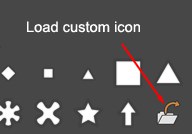
The folder icon found in the list of preset shapes is used to load your own images and use them as icons. Visual Selector supports the same file formats as Cinema 4D and layer transparency will be taken into account as well.
When creating custom icons, it is recommended to use a white color, to take full advantage of the tint option (so they can use the exact color selected, in the icons options dialog).
Enable this option to flip horizontally the selected icon image.
Enable this option to flip vertically the selected icon image.
Enable this option to overlay the set color on top of the selected icon. This option works best with white icons, to avoid color mix. Using the Tint option on icons that already have a color will result in a mix of both colors. For example, adding a yellow tint to a blue icon will result in a green icon.
Enable this option if you wish the icons to scale automatically whenever you zoom in or out of the view.
Use this option to change the scale of the selected or custom icon.
Click this icon to open a new Visual Selector window. Useful if you want to open have several views opened at the same time, or a view and the setup options, and so on …
Use this icon to pan the view. You can also use the
Use this icon to zoom in or out of the view. You can also use the
Right-click in the view to access the contextual menu.
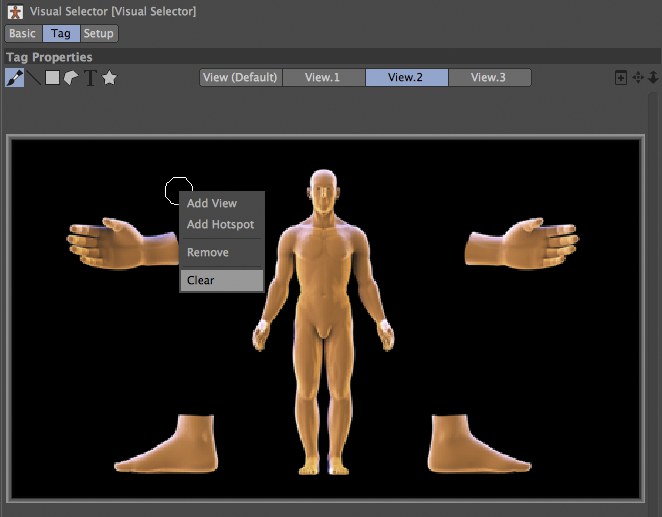
Use this command to add a new view to the current Visual Selector tag.
Use this command to add a new hotspot to the selected view. Note that new hotspots will be automatically created when dragging and dropping objects from the Object Manager in the view.
Use this command when your cursor is over an icon, paint or text object to select their respective hotspot options, in the Setup tab. You can also hold the Shift key and perform a single click on an element to select its hotspot.
Deletes the complete Hot Spot (including all corresponding buttons and/or text). Click on a hotspot to delete it or click in an empty region to delete an already selected hotspot.
Use this command to open the options dialog. Only works with icons and text items.
Deletes all painted elements (excluding text) of a given hotspot’s selected area. Click on an empty region to delete all of a hotspot’s painted elements.