Tag Properties

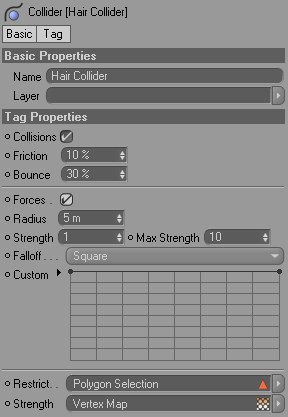
Use this setting to switch collision on or off for the corresponding object.
Imagine dynamically-controlled guides falling onto a sphere with a Hair Collider tag assigned to it. If the Friction value is set high, the guides will more or less remain on the sphere, or slowly slide down its side. A low Friction value will let the guides slide quickly off the sphere.
Use this setting to define if and to what degree guides that fall onto a surface will bounce off that surface. If Bounce is set to 0%, the guides will not bounce at all. The larger the value, though, the more the guides will bounce.
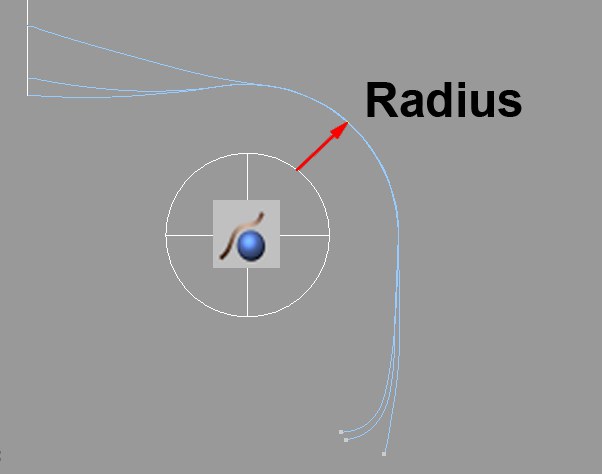
 The cylinder in the center exerts a repelling force on the guides (in this case, Falloff is set to Constant, i.e., the radius remains constant).
Activate this option if objects should exert forces on guides or splines. Make sure that the Surface to Hair option is activated in the Hair object’s Forces tab.
Use this setting to define the radius (originates from the surface of the object - see image above) of the effect. A square or cubic falloff gives the impression that the radius only has a minimal effect. This is simply due to the nature of the effect: The force is exerted at its maximum at the object’s surface and weakens rapidly the further away it is.
Use this setting to define how strongly the force that is being exerted by the object’s surface on the guides or splines should be. This strength will weaken in accordance with the Falloff option that was selected, and will have no effect outside of the given Radius value.
This setting limits the effect the Collider tag has and prevents the guides or splines from exploding. For example, a Square falloff would have an infinite strength at a radius of 0 – this would overwhelm the dynamics. Max Strength makes sure these forces are limited in order to prevent the dynamics from being overwhelmed.
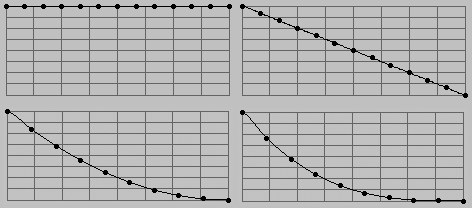
 Falloff from left to right: Constant, Linear, Square, Cubic.
Use these graphs to define the falloff between the object surface and the radius defined in the Radius setting.
Use Manual to create your very own falloff.
If you want to restrict the collision to a selected area of the collision object, you can drag the corresponding polygon selection tag into this field.
This can save a lot of time when working with very complex objects. Only those areas necessary for the collision effect can be selected.
You can drag the collision object’s vertex map into this field. You can define point-by-point how strong the effect should be. You can set the maximum strength for the effect in the Strength setting above.