Tag Properties
This setting determines whether or not the hair constraints should be shown in the editor window.
Clicking this button will connect the selected guide points or spline points with hair constraints, which in turn are connected to geometry points on the other side.
Click this button to free the selected guide points or spline points from the hair constraints.
Click this button to delete all hair constraints.
Drag a polygon object from the Object Manager into this field. Hair constraints will be added between the object’s points and the selected guide points or spline points.
Use this setting to define the strength of the hair constraints. A value of 0% will turn the constraints off, 100% will allow no movement at all and the points will actually be fixed. Influence can be viewed as springs that are placed between the fixed points and the constrained points.
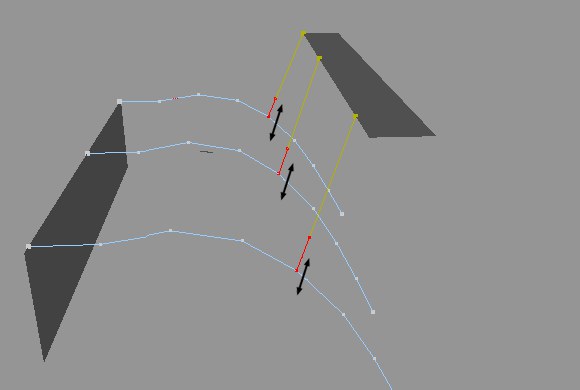
Offset lets you move the fixed points in the direction of the hair constraint lines. This offset will be displayed in the editor. An Offset value of 0 will fix the points directly on the object.
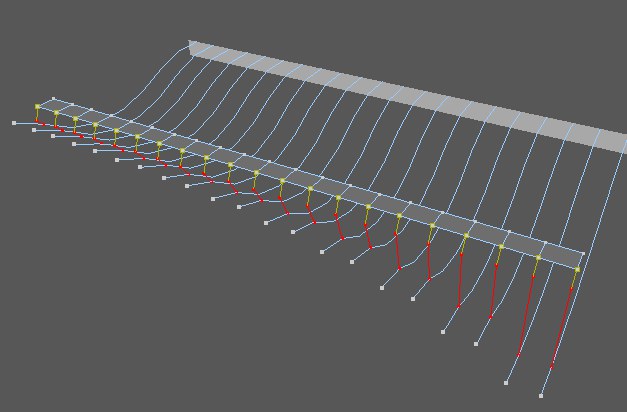 A vertex map is used to define the influence: Left 100% (yellow) to right, 0% (red).
Vertex Tags can be placed into each of these fields. A vertex map can be used to define the amount of Influence and Offset on any hair constraint attached to the surface of an object. The Influence and Offset percentage settings above define limits for each of these parameters.