Painting
If this option is enabled, the tool's cursor will be projected onto the mesh parallel to the computer screen. If the option is disabled, the cursor will follow the direction of the geometry's surface starting from the point where you begin to paint. This makes it easy to modify difficult to reach points.
Also reduces the risk of inadvertently painting Points that lie behind Points to be painted.
If this option is enabled, the brush will affect selected points or polygons only (e.g., for Vertex Color).
For vertex colors, a crisp color edge can be created (if Polygon Points is defined in the Vertex Colors tag).
Here you can only paint when in Vertex Color mode if the Vertex Colors tag’s Vertex setting is set to Polygon Points.
If this option is enabled, the brush will affect visible points only.
Defines the radius of the brush's cursor.
Alternately you can use your mouse’s scroll wheel to change the size of the brush.
Use this slider to adjust the number of steps required to apply weighting. The higher the value, the less color that will be painted at one time, allowing the weighting to be applied more precisely.
Here you can choose from various types of falloff that define how the tool's strength weakens from the cursor’s center to its edge. These are the same types of falloff that are available for various other tools, including the weight tool and the magnet. The following options are available:
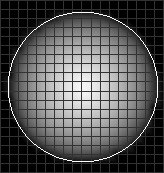
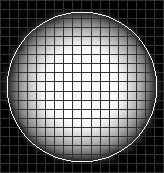
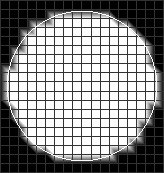
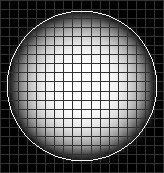
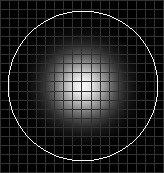
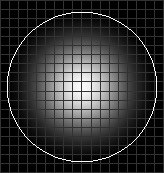
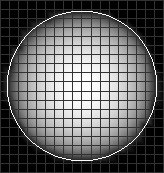
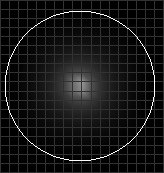
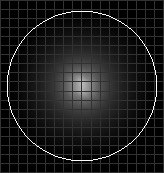
If selected, an additional Hardness slider will be made available. In the examples below the results of 0%, 50% and 100%, respectively, are shown.
 |  |  |
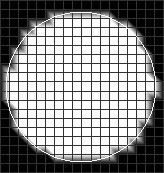
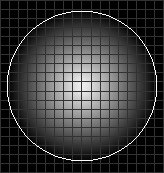
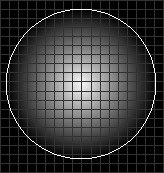
If selected, an additional Width slider will be made available. In the examples below the results of 0%, 50% and 100%, respectively, are shown.
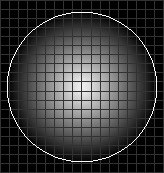 |  |  |
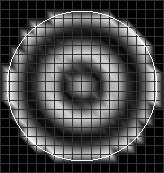
If selected, an additional Width slider will be made available. In the examples below the results of 0%, 50% and 100%, respectively, are shown.
 |  |  |
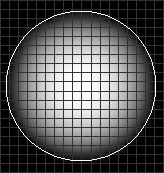
If selected, an additional Width slider will be made available. In the examples below the results of 0%, 50% and 100%, respectively, are shown.
 |  |  |
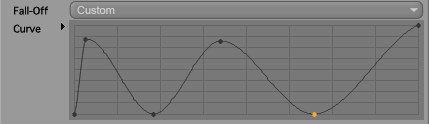
Use this option to create a custom falloff using a curve. Examples of curves used to create a falloff are shown below.
Defines the width of the falloff, measured from the center.
Defines how the tool's strength weakens from the cursor's center to its edge.
Here you can create your own profile for the falloff if Fall-Off is set to Curve.
Select which tool property the pressure applied to a pressure-sensitive input device, such as a graphics tablet, should affect. The following options are available:
Disables the evaluation of the pen’s pressure.
If selected, the tool tip’s radius will increase accordingly with the pressure applied from zero to the value defined by the Radius setting.
Behaves similarly to Radius only that the application strength will increase according to the pressure applied.
If selected, the tool tip’s hardness can be adjusted according to the pressure applied.