Options
As the name suggests, this setting is used to select the direction in which the guides should be laid. You can select from the following options:
- Camera X/Y/Z: In the editor view, the hair will bend to the right (X), downwards (Y) or to the rear (Z) (away from the camera).
- World X/Y/Z: The hair will bend in the direction of the respective axis of the world coordinate system.
- Local X/Y/Z: The hair will bend in the direction of the respective axis of the hair-covered object.
- Spline: If the hair should be combed according to a particular spline, drag the spline into this field.
- Texture: If the hair should be combed in a direction defined by a bitmap, load the bitmap into this field.
Use this setting to adjust the strength of the guides that pass between the teeth of the comb. Negative values will reverse the effect.
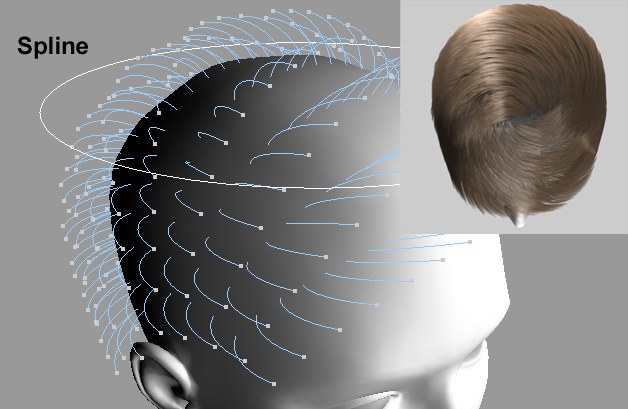 A simple circular spline over the surface of the head will create a twirl (inset).
A spline object can be dragged into this field that will more or less determine the orientation of the guides. The following applies: The tangents of the splines nearest the guides will be used to determine the orientation of the guides. You can also reverse a spline’s point sequence with the Cinema 4D Reverse Sequence tool (main menu: Mesh / Spline / Reverse Sequence), which will also reverse the direction of the tangent and subsequently the orientation of the guide.
If you select Texture in the Direction menu, you will be able to load a bitmap into this Texture field. The RGB values of the bitmap will be utilized: Red=X; green=Y; blue=Z. These colors represent the directions in which the hair will be combed.
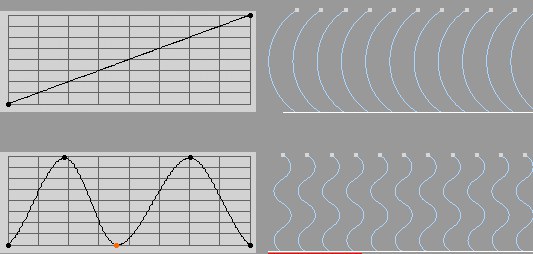
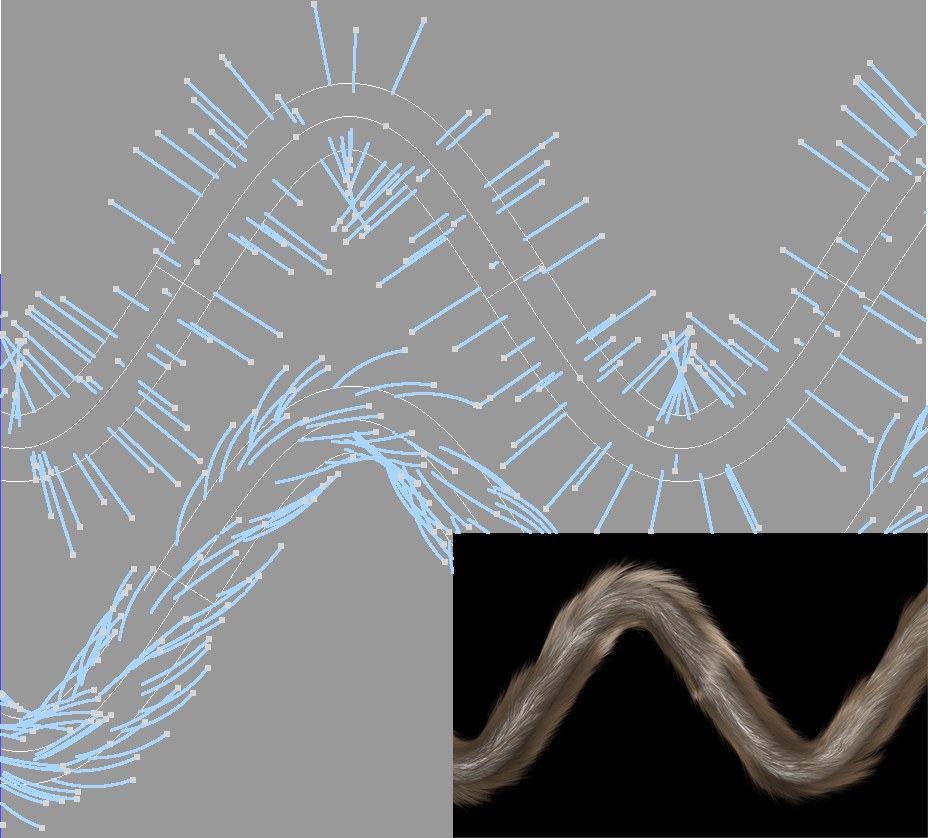
Use this curve to define the curvature along the length of the guides. A horizontal line in the center of the graph represents a neutral position.
If this option is active, only the original direction of the guide root segment can serve to bend the guides.
If the hair is growing on a polygonal surface, activating this option will prevent the hair from penetrating the surface when combed.
 Top: A hair-covered Sweep object; Below: The same curve after being combed using Geometry Weighting. The guides follow the shape of the geometry.
Geometry Weighting is a very practical function to make guides follow the shape of geometry. Hair looks ahead a certain distance and will orient the hair based on the direction of the geometry. In the example above, you can see how the hair closely follows the shape of the curve.
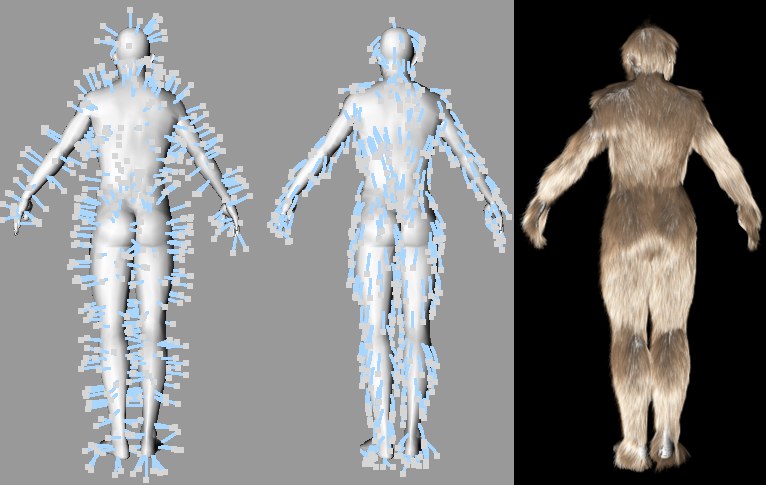
Geometry Weighting is the perfect tool to add fur to a complete character (e.g., a Bigfoot) when the fur has to follow the shape of the geometry:
Use this setting to define to what degree the hair will adhere to the geometry.
Use Limit in conjunction with Distance to define the distance to which Hair should look ahead when laying the guides.