Options
Use this value to define the tool’s radius within which it will affect the spline. This radius can also be adjusted interactively using the middle mouse button.
This setting is similar to the Sculpt brush’s Steady Stroke feature. The tool tip is dragged along as if it were attached with a string. However, the speed with which the cursor is pulled affects the result. The slower the cursor is pulled the less effect Stroke Smoothing will have. You can sketch small, delicate spline branches and these can later be smoothed if you go over them with wide-ranging strokes in the Viewport. The effect can be best seen if the value is set to 95% and start sketching slowly and then use quick strokes:
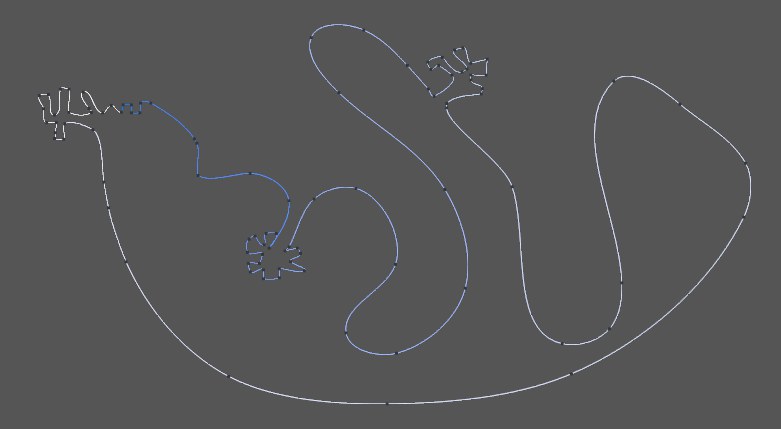 Simultaneously create details and swooping arcs.
This setting will only take effect if Radius is set to a value greater than 0. The larger the value the more the current line position will be blended in the direction of the target line’s position. This is a setting that you will rarely use.
If this option is enabled an entirely new spline will be created each time you attempt to only create a new segment for a selected spline. Otherwise the segment will be added to the currently selected spline.