![]() UV Peeler Tool
UV Peeler Tool
UV Peeler Tool
The UV Peeler can be used to apply a UV mesh to cylindrical objects - even to multiple objects at the same time. This is very useful, for example, for editing UV meshes on elongated objects (e.g., a squid’s tentacles).
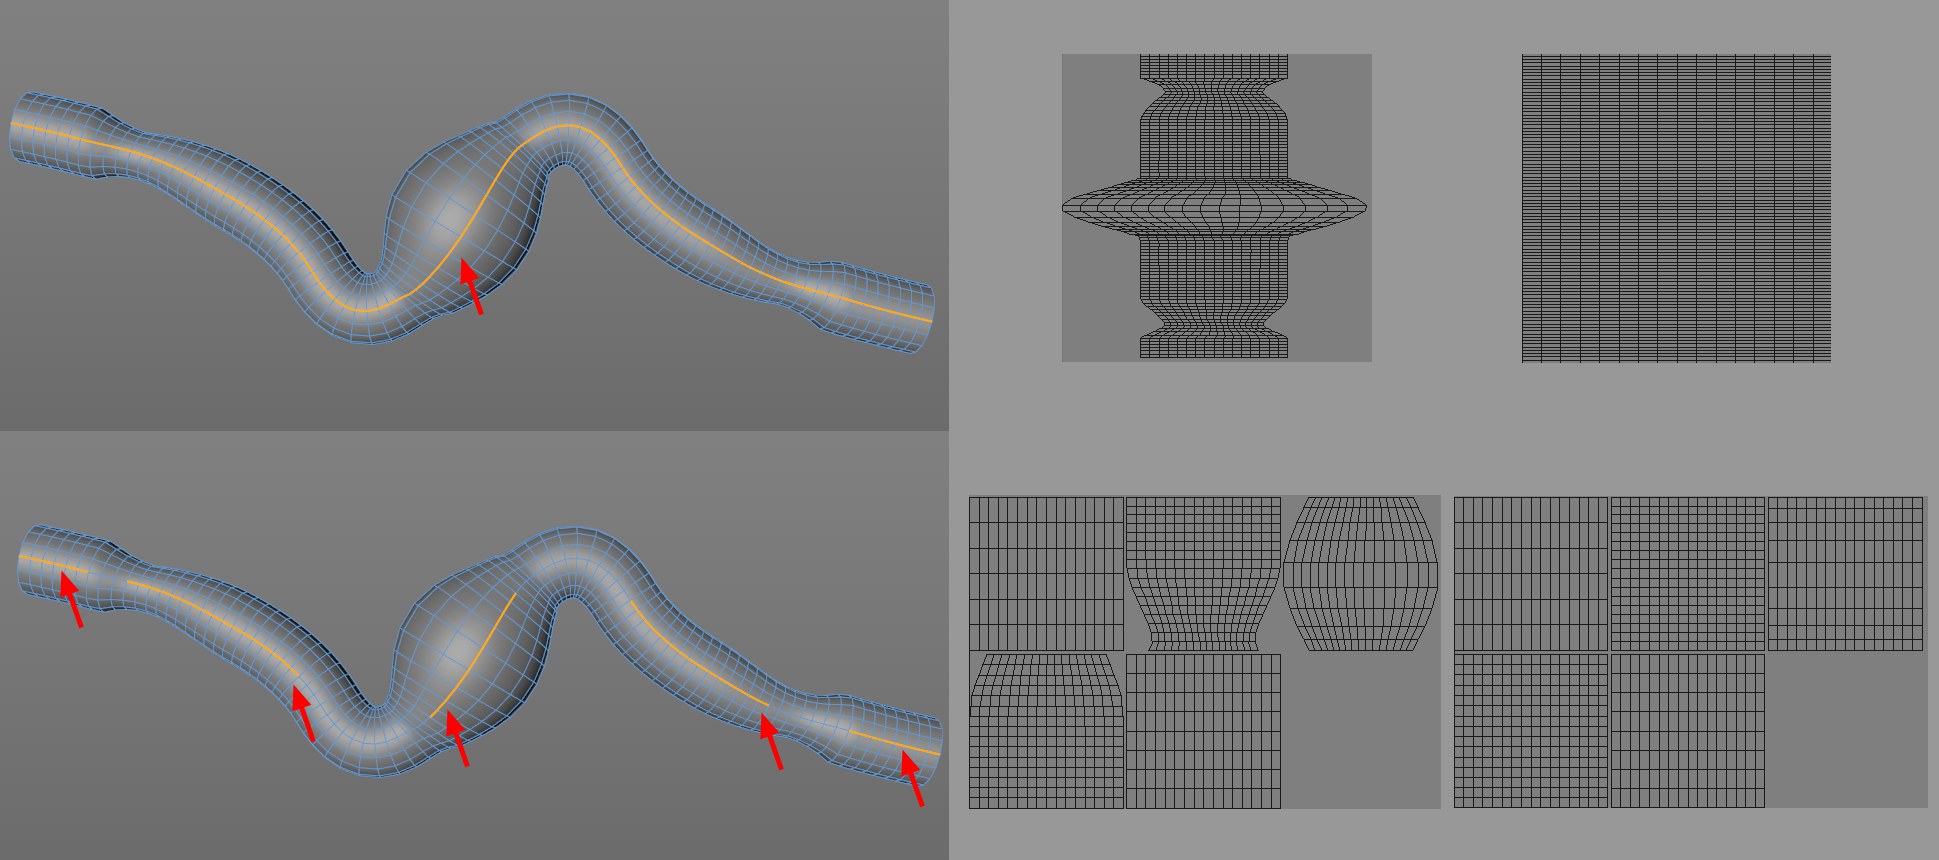 Depending on the edge selection made, clean UV wraps can be created. These can also be made completely homogenous (far right), if desired.
Please not the following for creating clean UV wraps using the UV Peeler:
- The UV Peeler only works in
 Edges
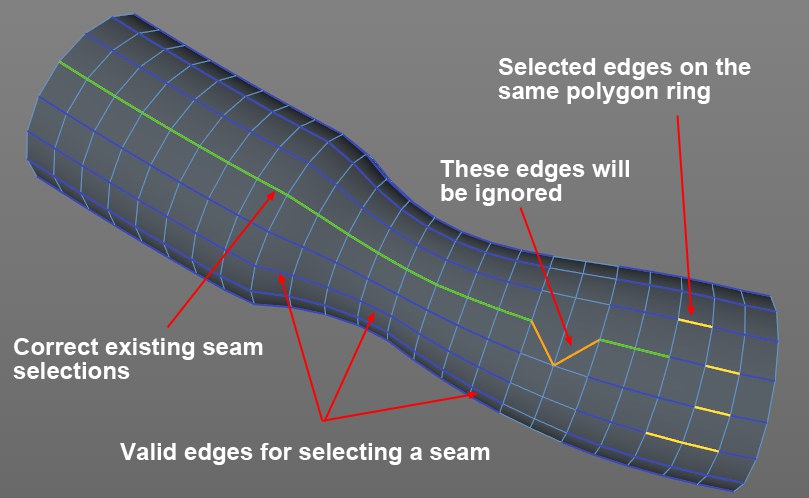
Edges - A seam must be defined (it must always run perpendicular to the edge loops, i.e., along the cylinder’s length), which is used to create the UV island (the UV mesh is opened along the seam). The seam is defined using an object edge selection and should be located on the object’s backside. The seam must consist of a series of connected selected edges that are each part of a closed polygon ring made up of quads. When the UV Peeler tool is active it will display the edges that can be selected:
 Green continuous edges are each applied as individual UV islands.
Edges will be displayed in the following colors (if the UV Peeler is active):- Dark blue: Valid seams, from which one edge loop should be selected.
- Green: Part of an existing selection that the UV Peeler can unwrap.
- Orange: Part of an existing selection that cannot be edited using the UV Peeler (e.g., N-Gons/triangles).
- Yellow: Parts of the selection that were selected multiple times within a polygon ring. These will be ignored by the UV Peeler.
- Dark blue: Valid seams, from which one edge loop should be selected.
The UV Peeler will only work when the aforementioned requirements are met. Otherwise its settings will be grayed out.
The UV Peeler can be used interactively in the panel view:
- LMB + drag left/right: modifies U uniformly; up/down modifies V uniformly.
- LMB +
Cmd/Ctrl left/right modifies Min. U; up/down modifies Min.V. - RMB +
Cmd/Ctrl left/right modifies Max. U; up/down modifies Max. V. - MMB +
Cmd/Ctrl moves UV islands (see also Restrict UV Islands to Tiles).
The following applies as long as the complete object has not been unwrapped: The UV islands that were unwrapped by the UV Peeler will first be arranged onto ,temporary’ tiles on the right next to the dark region (which represents the actual UV range from 0-1; note that if the Material tag’s Tile option is enabled, the UV regions beyond the 0-1 range will also be projected onto the object). These must subsequently be transferred to the matching texture regions.