Table Of Contents
Introduction
The Redshift domelight is an infinite, texture-mapped area light. Using HDR images you can achieve high-quality lighting results that would otherwise require several lights. Since a single dome light can reproduce the lighting of several distant lights, it can help with performance, too. Furthermore, given that the HDR image can originate from a real-world environment, the dome light is an important tool to match the lighting of cg elements with live-action elements.
Dome lights cannot be combined with environment shaders. If the scene or any material uses environment shaders, the dome light will override them.
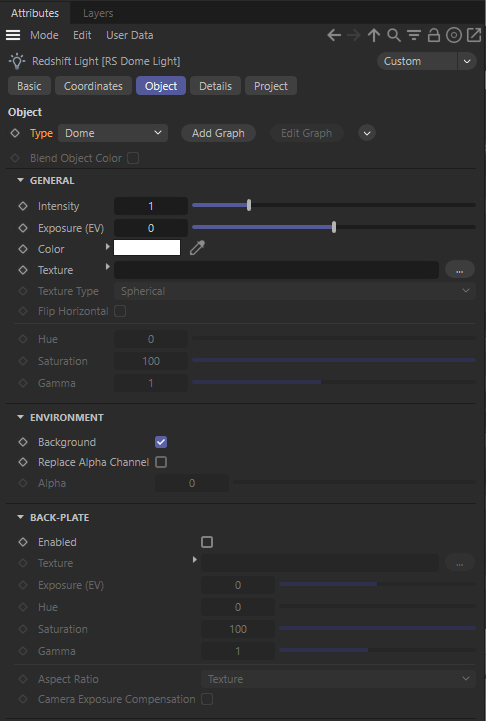
Object
Type
Specifies the light type.
- Point: A point light. Simulates a 'bare bulb' light which emits light in all directions from an infinitesimally small point in space.
- Spot: A spot light. Emits light in a cone-shape.
- Infinite: Simulates a light source which is infinitely far away from the scene. An infinite light has no position, only a direction. Therefore all light rays emitted are parallel and have no decay.
- Area: A light which has a real physical size and shape.
- Dome: Simulates light emitting from a large sphere that always surrounds the entire scene. You can think of this as a sky that illuminates your objects and that can also be mapped with an image, for example. The dome light can thus also be used like a Cinema 4D Sky object.
- Photometric IES: Allows to load an IES Profile files to control the amount and direction of emitted light.
- Portal: A special type of light source that can optimize the calculation of global illumination. Often used in window frames for interior renderings to optimize the rendering of indirect light coming through the windows.
- Physical Sun: Similar to the Infinite light, but specially designed to mimic sunlight, including a color change depending on the angle of incidence of this light source.
Add Graph
Many settings of the Redshift light object can also be set through the material node system. Using this button will create a new Redshift Shader Graph material and connect it to this light.
Light parameters controllable by a light shader include the lights Color settings, Decay, Shadow options and Attenuation.
Edit Graph
If a Shader Graph material has been asigned to the light, you can open the Redshift Shader Graph by using this button and edit the shader directly there.
Add Target Tag
Add Target Tag and Null
You can find these commands in a menu to the right of the Type menu. You can use them to add a Target expression tag to the light. By linking an object to that tag you can aim the z axis of the light to that object. Using the Add Target Tag and Null command creates an additional Null object and uses that as the Target Object with the Target expression tag.
General
Intensity
Specifies the intensity of the light or the number of physical units (see below).
Exposure (EV)
Specifies an f-stop value that allows you to intuitively increase/decrease the light's intensity when matching to a plate, or rendering large/tiny scenes without using hugh/miniscule Intensity Multiplier numbers. A value of 0.0 means the intensity does not change.
For example, an Exposure value of 1.0 means the light doubles in intensity and a value by 2.0 means the light quadruples in intensity, etc.
|
|
|
|
|
Exposure (EV): 0.0 |
1.0 |
-1.0 |

Color
You can use this color not only for the light, but also to use as a visible background color, if the Background option is active. If you decide to load a Texture this color will get multiplied with the texture.
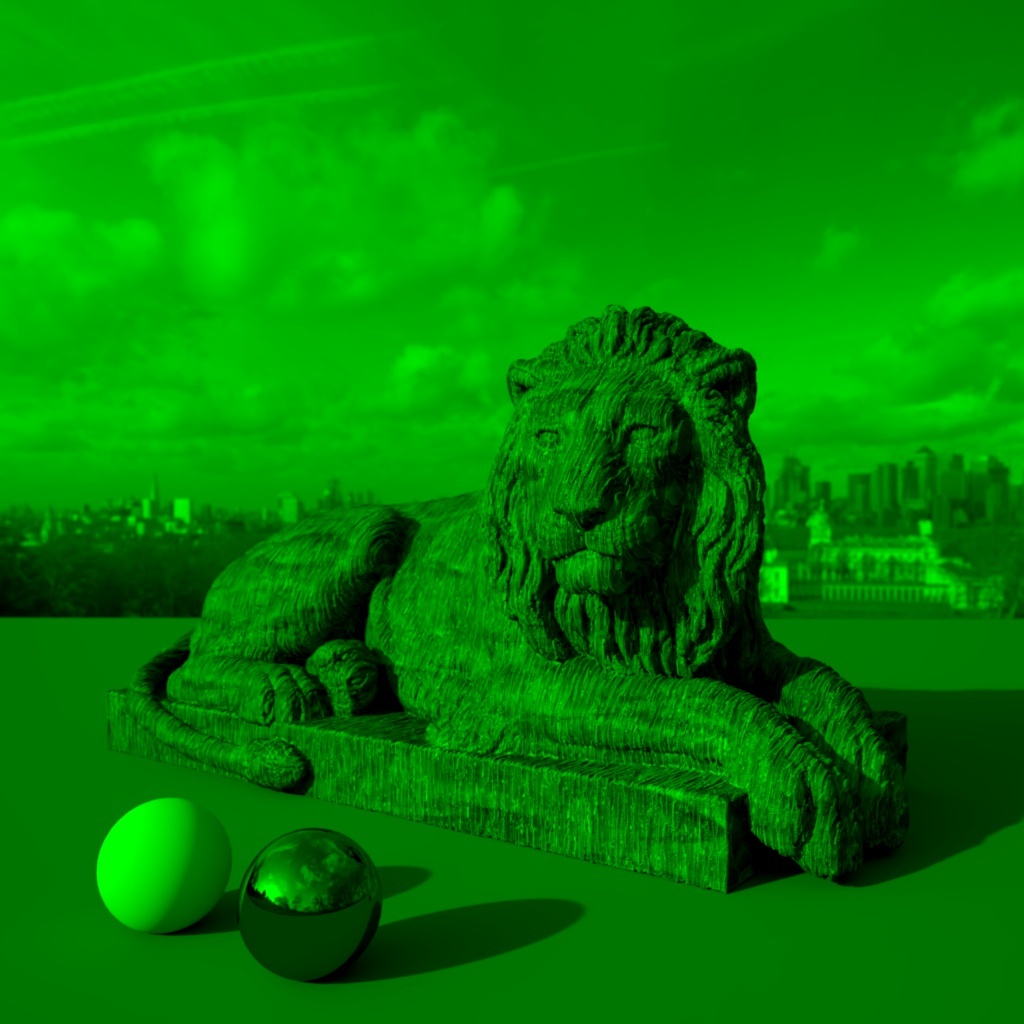
The closer your tint color is to white the less affected your light color will be. For a mild color tint be sure to use a desaturated color, a fully saturated color can fully tint all the colors in the scene as pictured below in the saturated green example.
|
|
|
|
|
Tint Color:
|
|
|

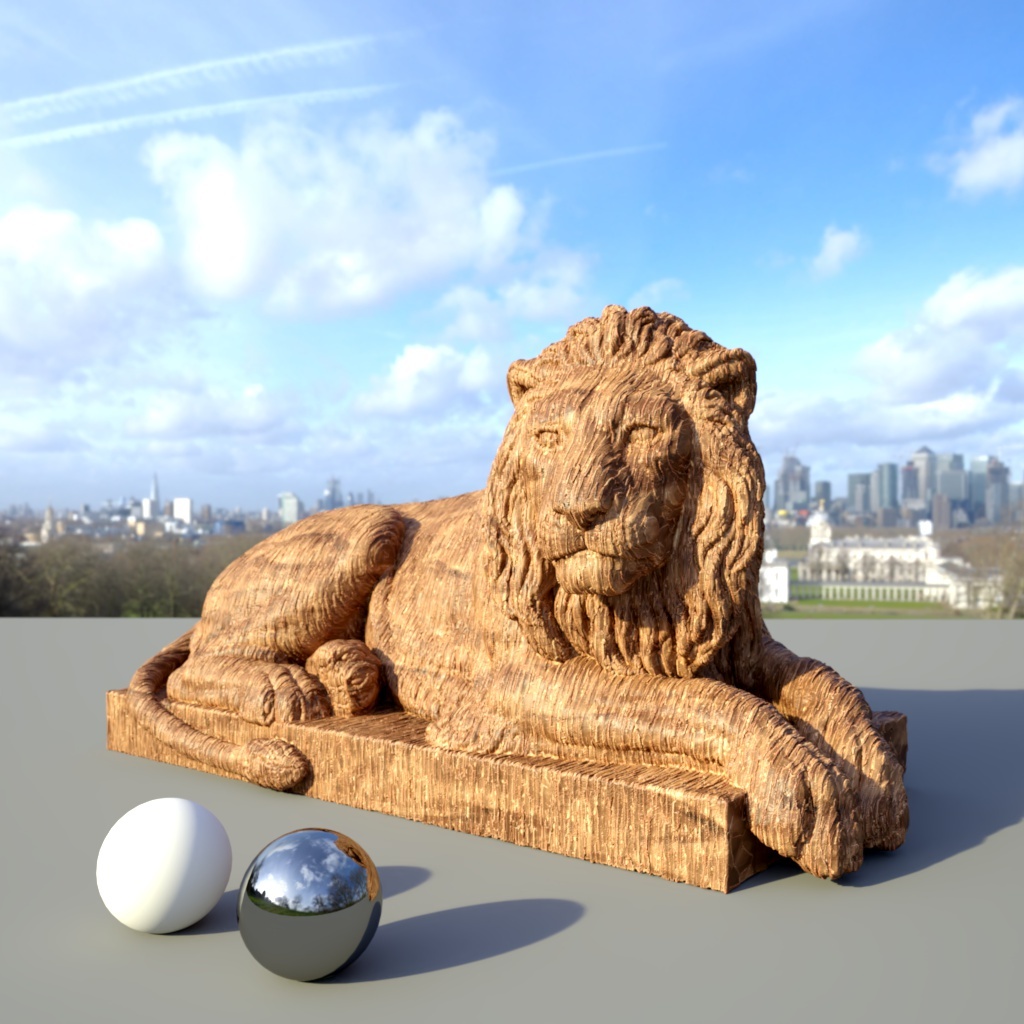
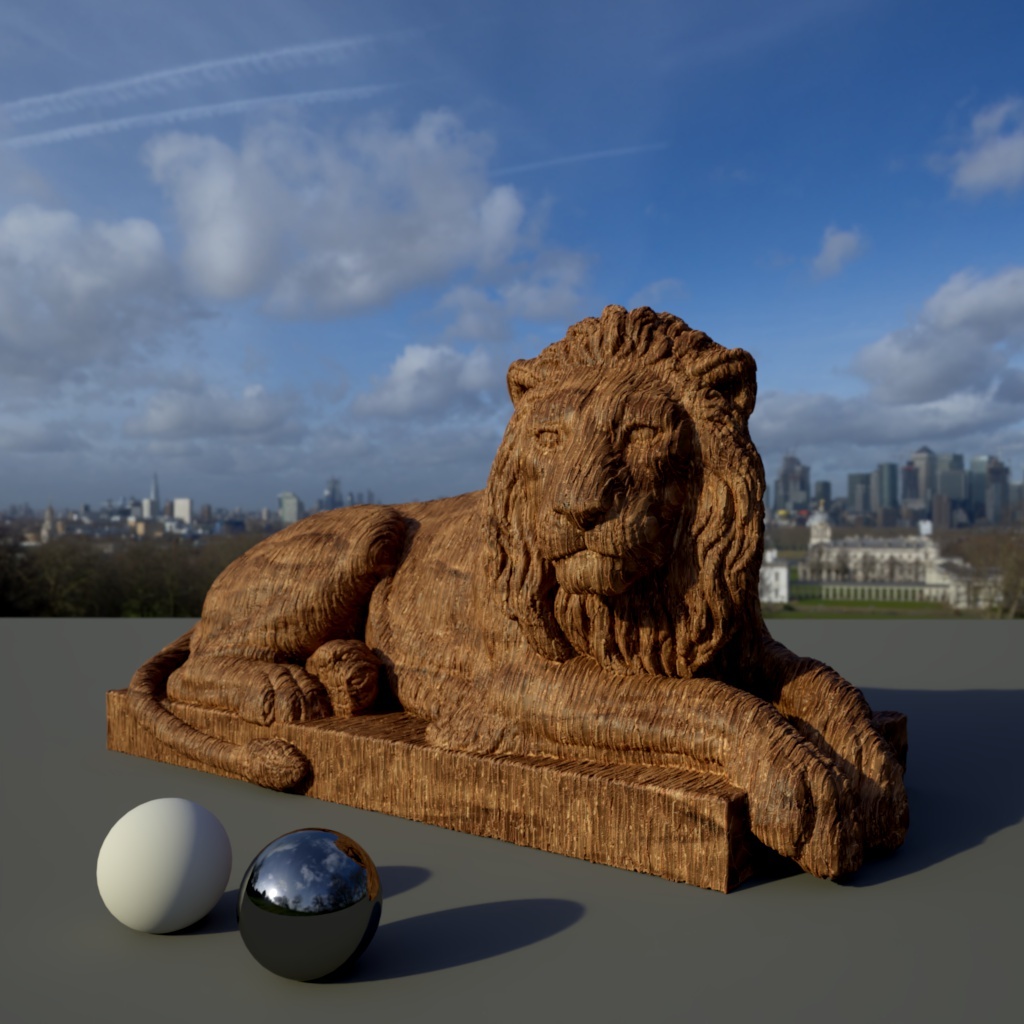
Texture
Specifies the image that will be used as a light source. The configured Color will be multiplied with this texture.
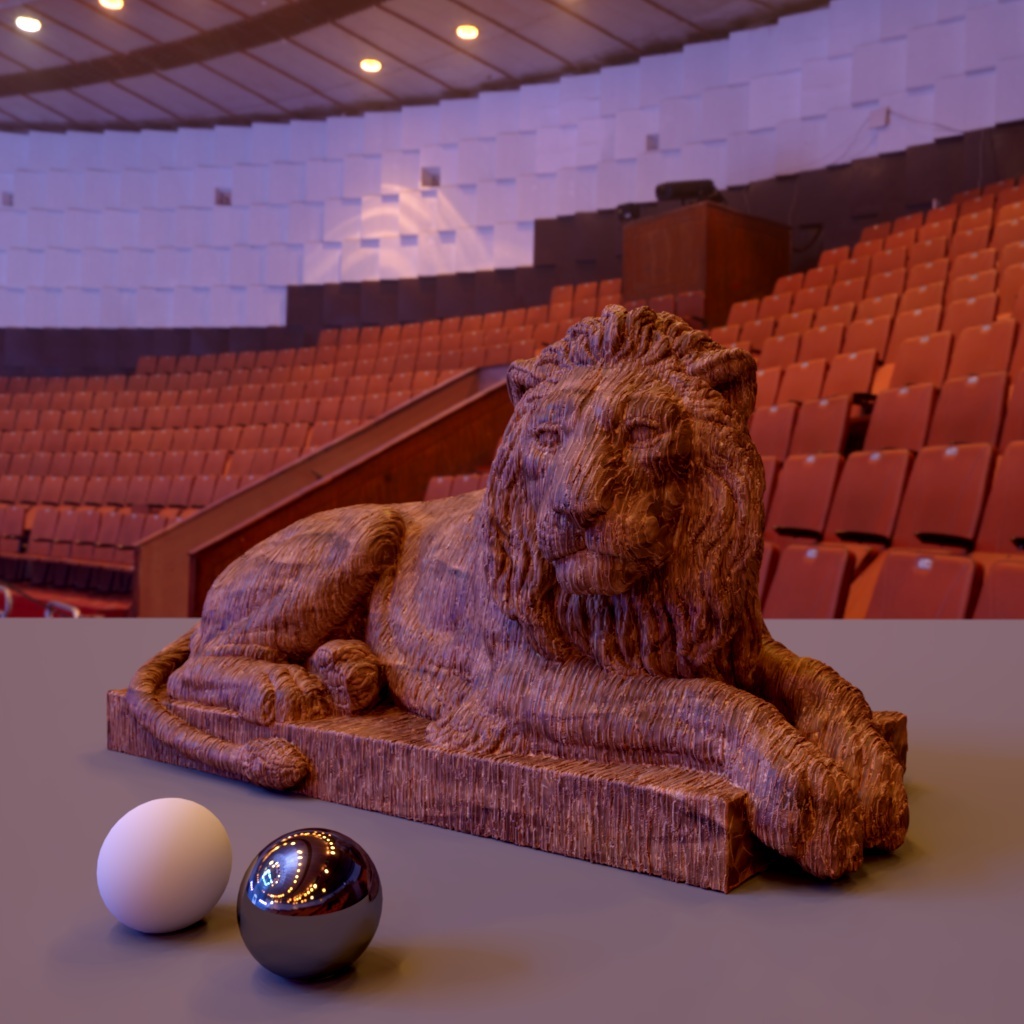
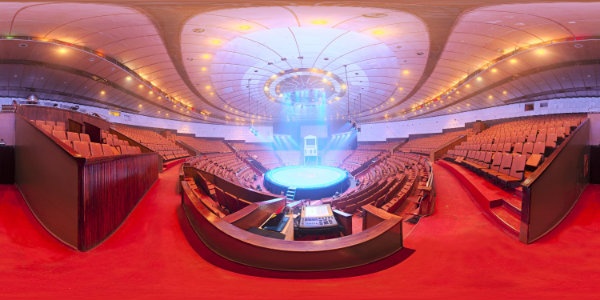
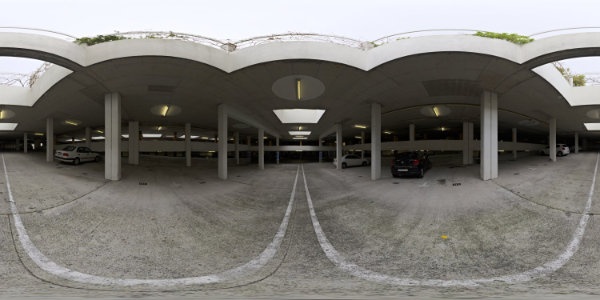
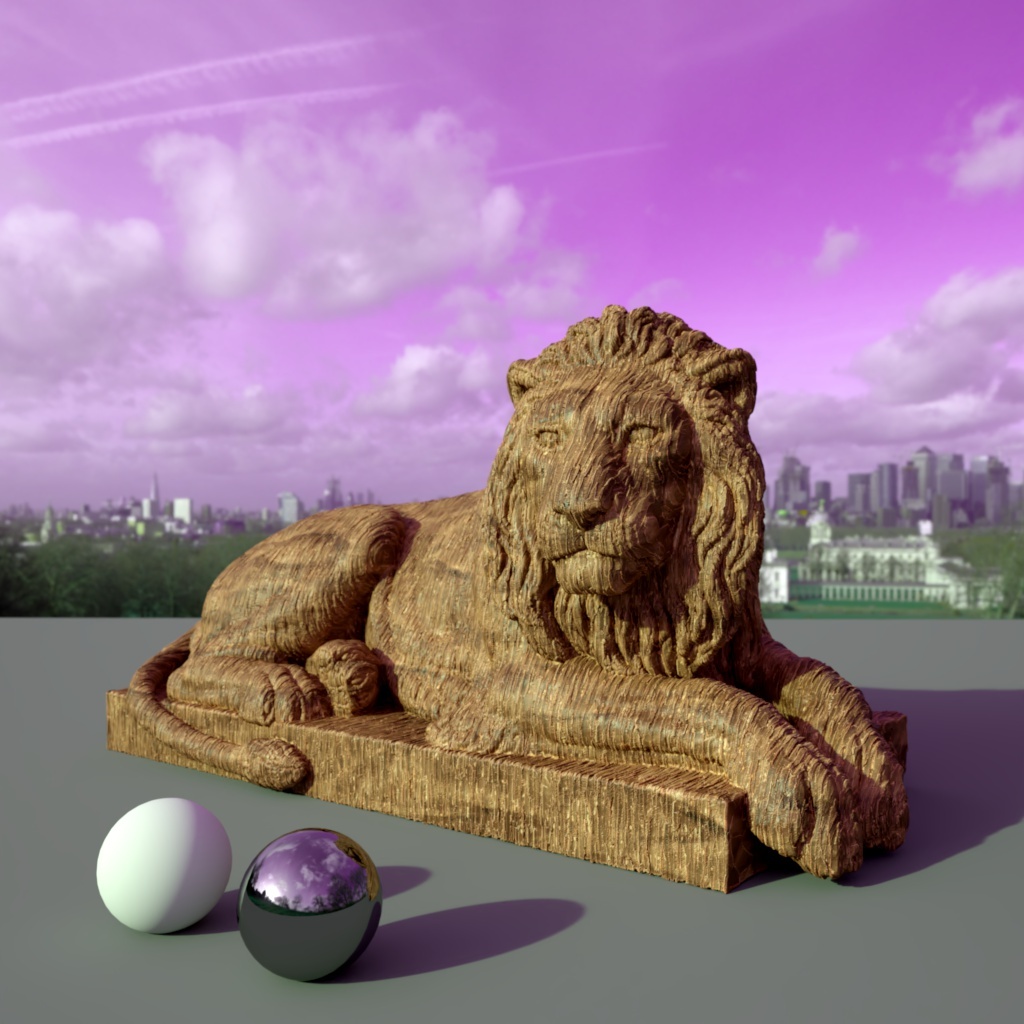
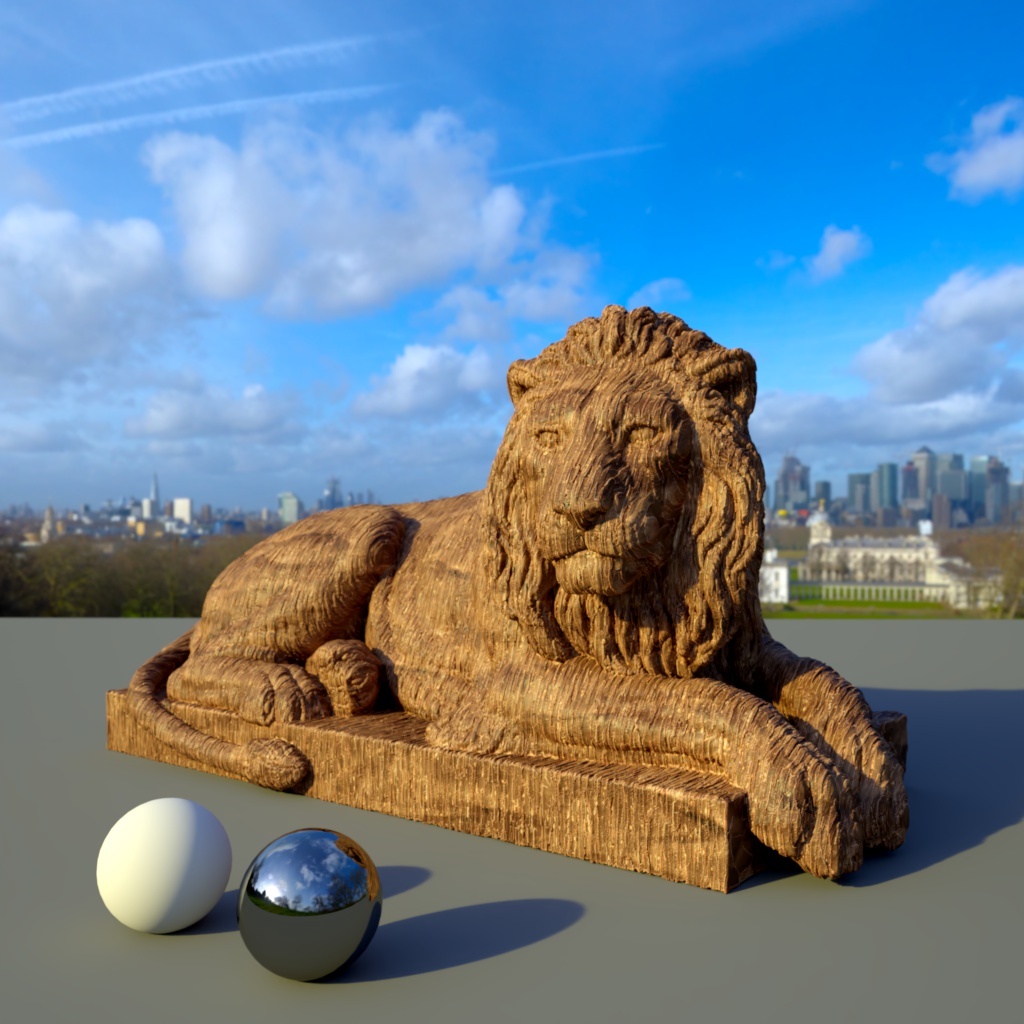
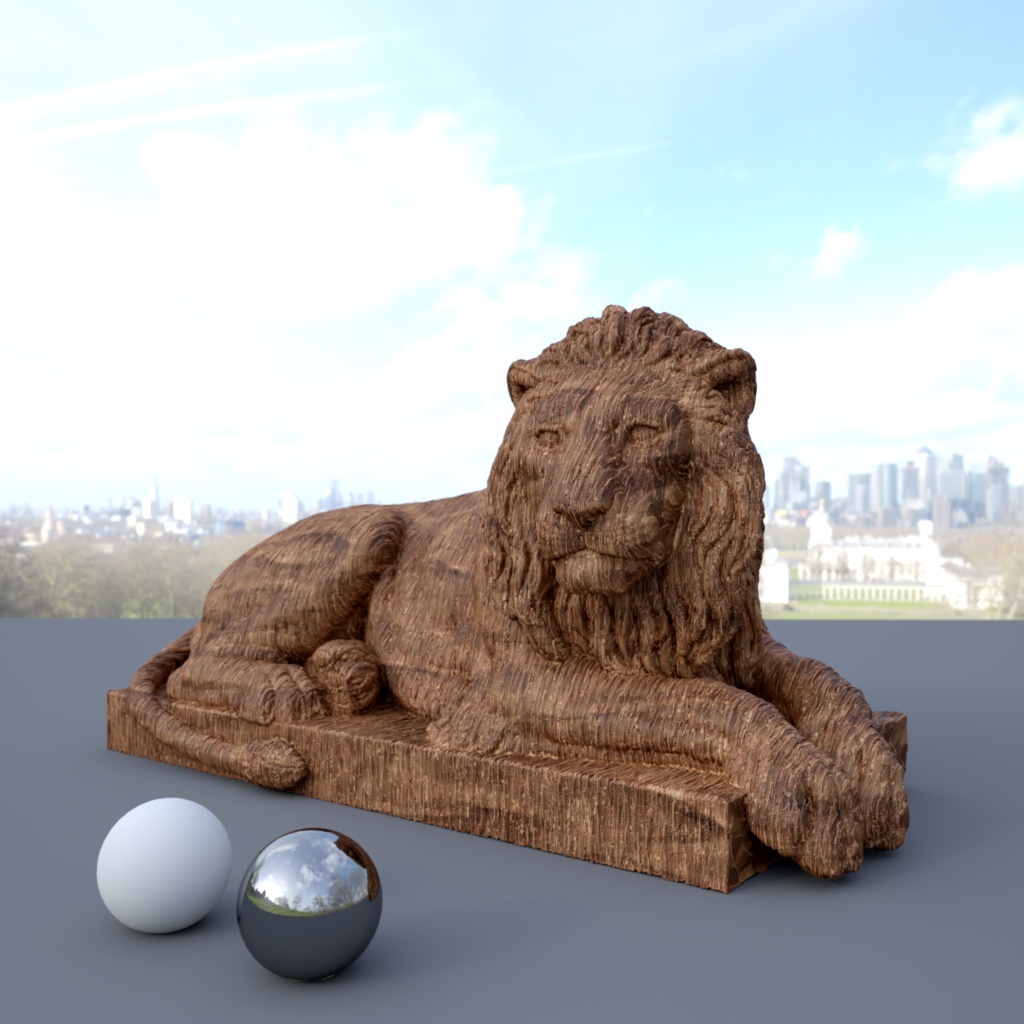
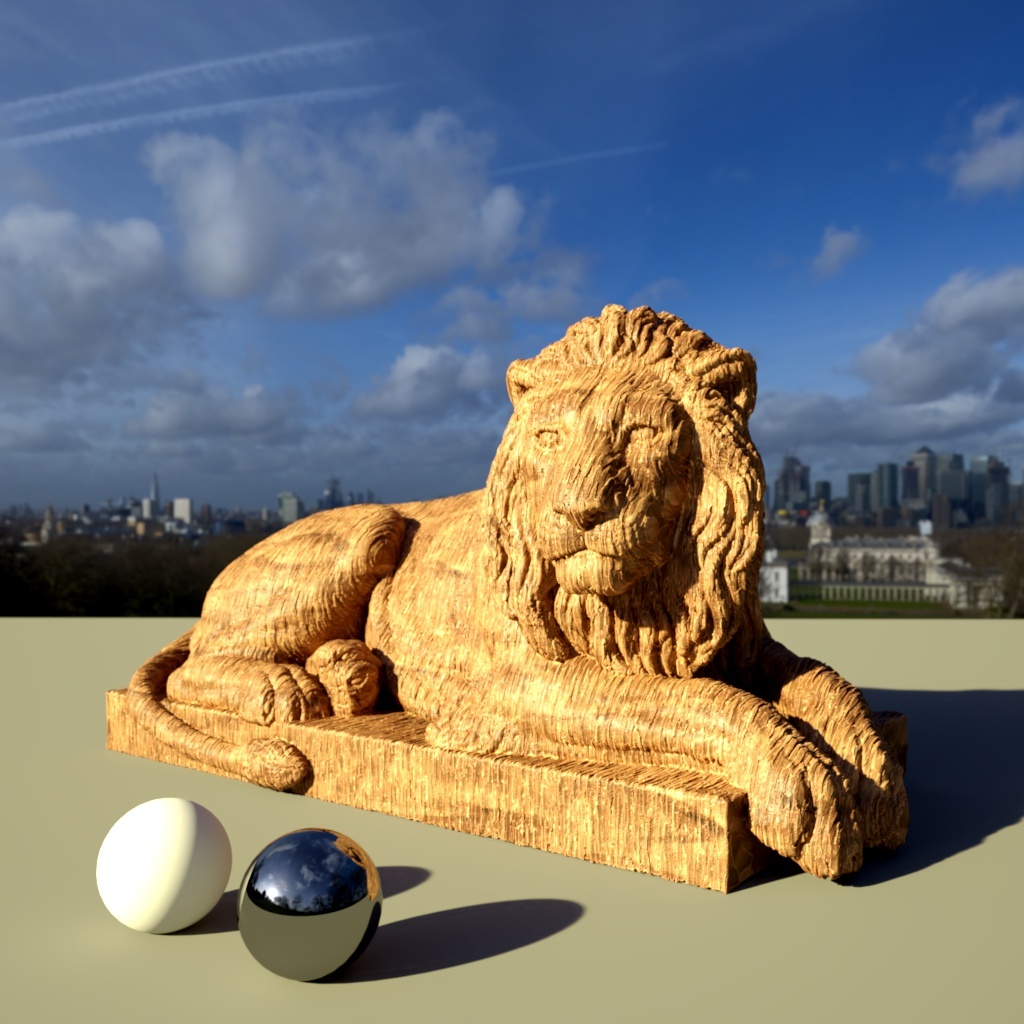
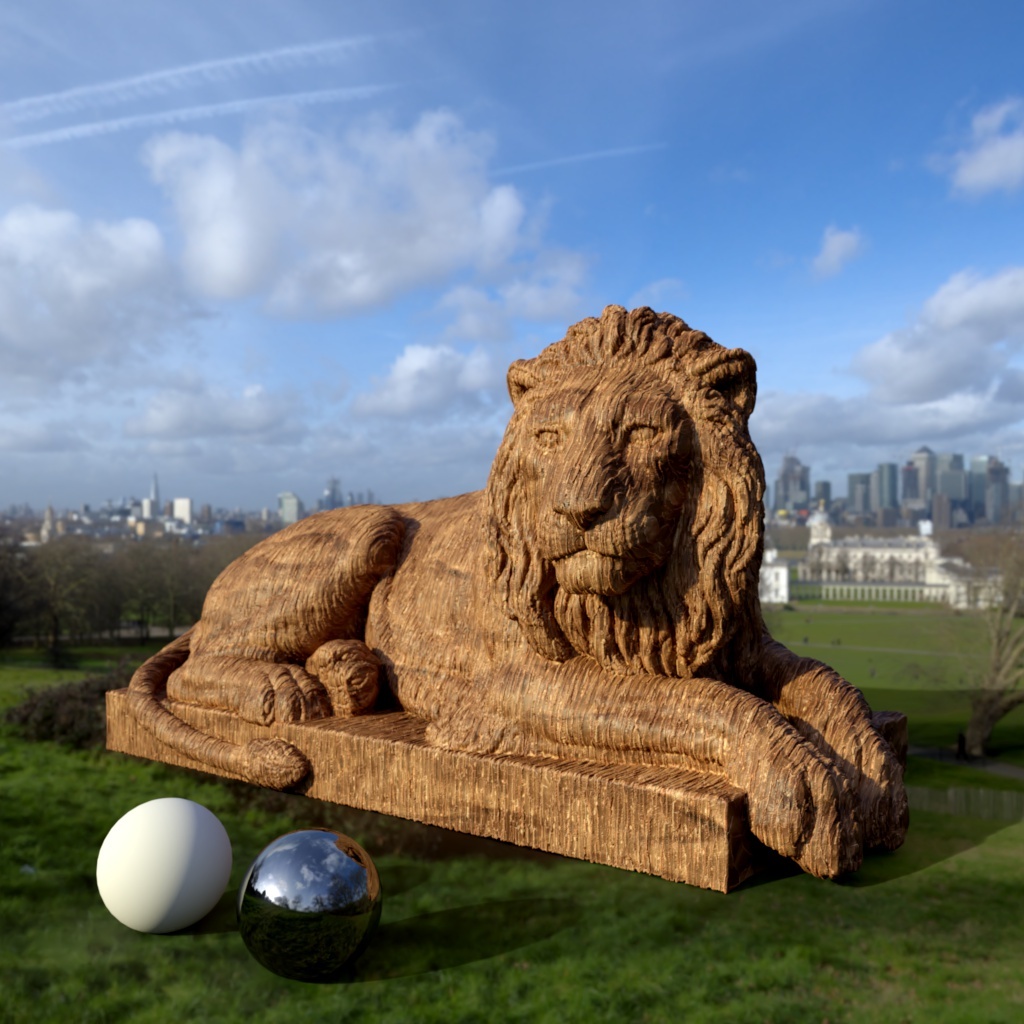
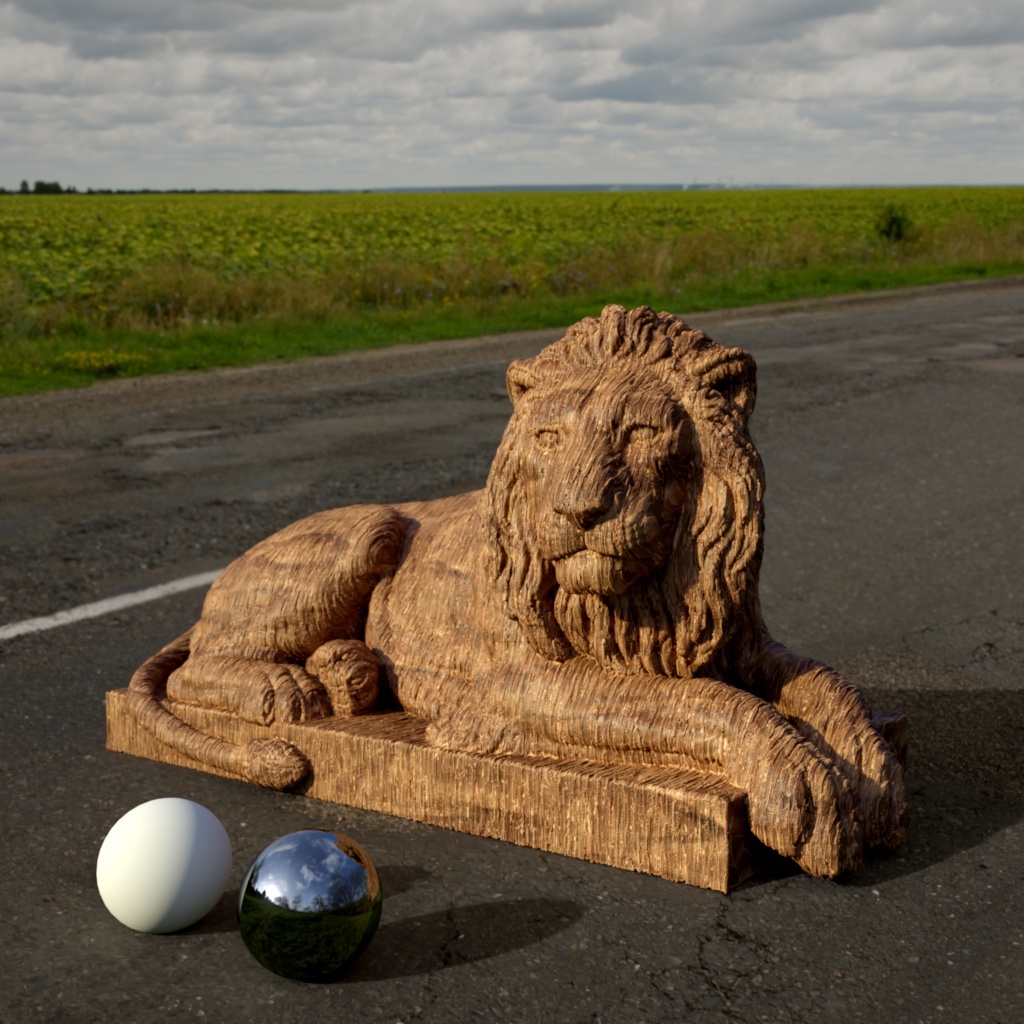
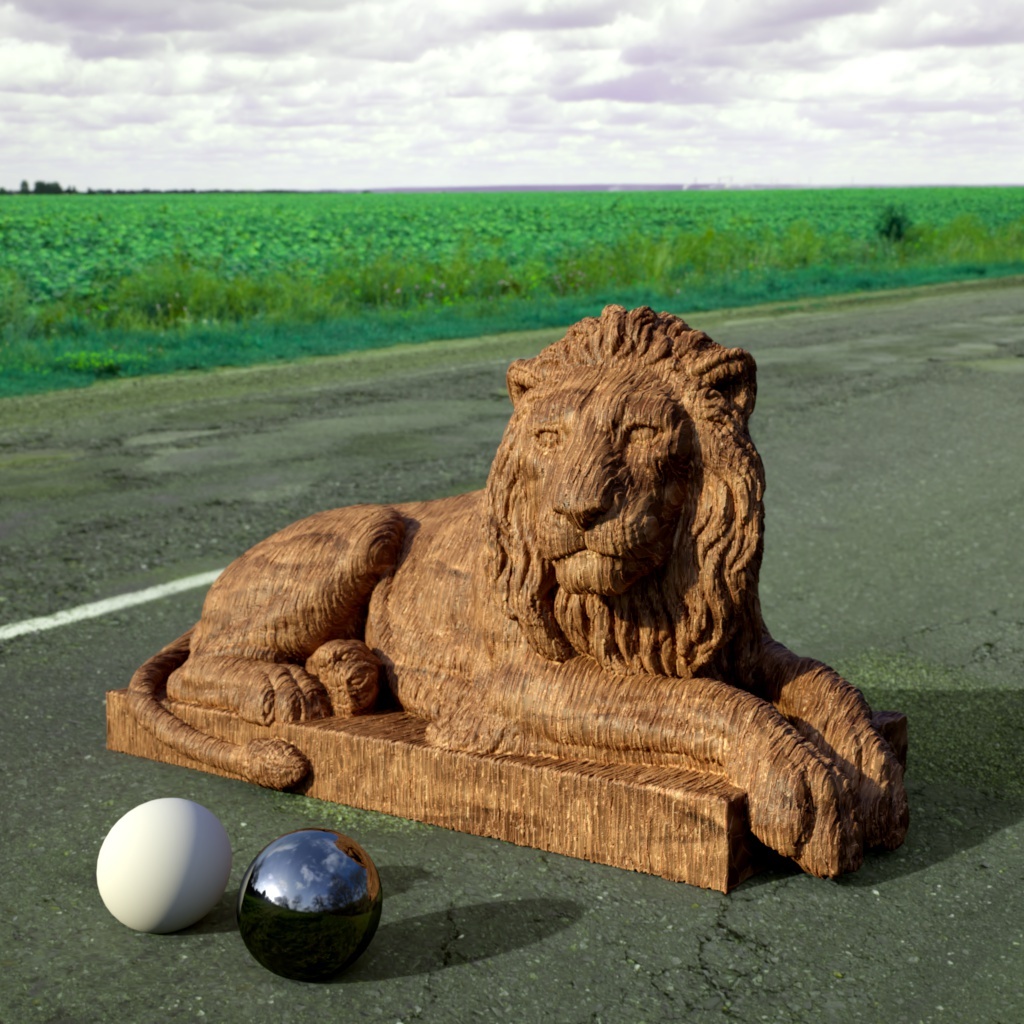
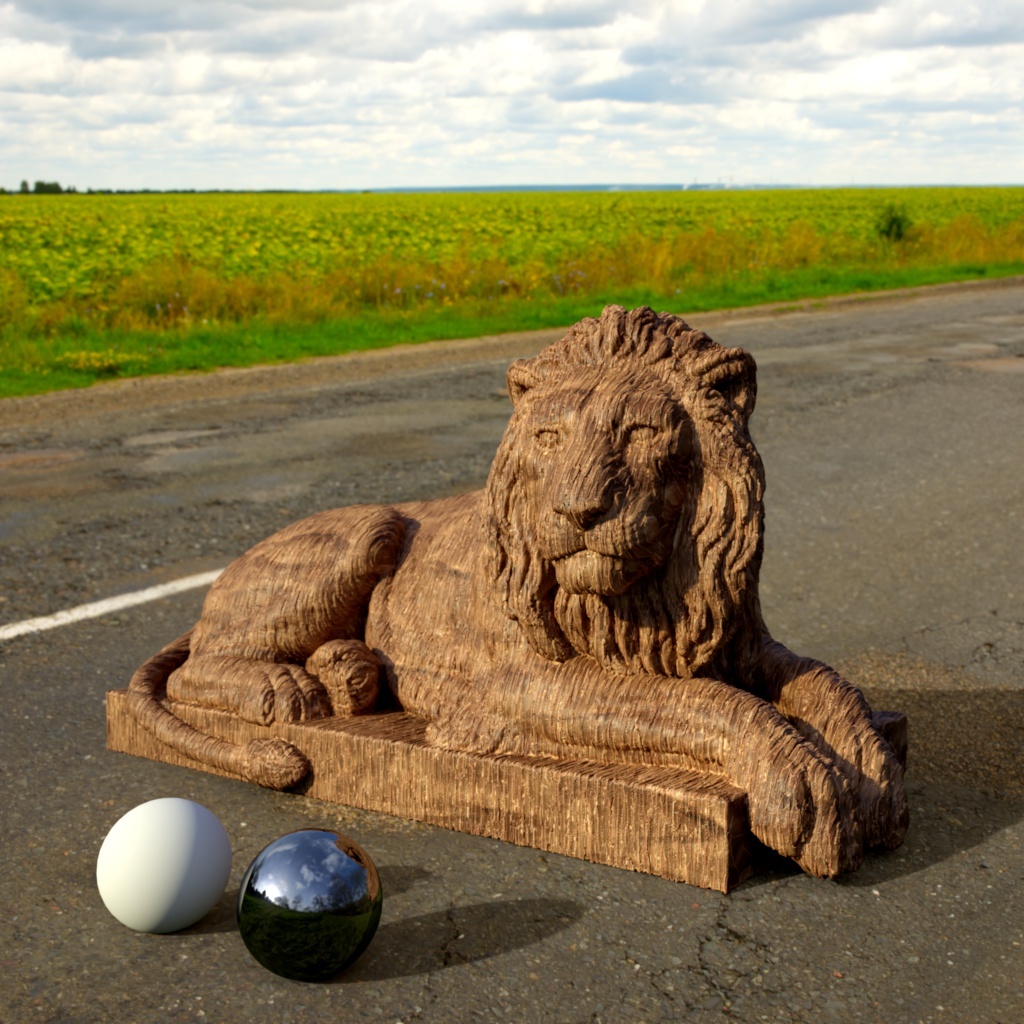
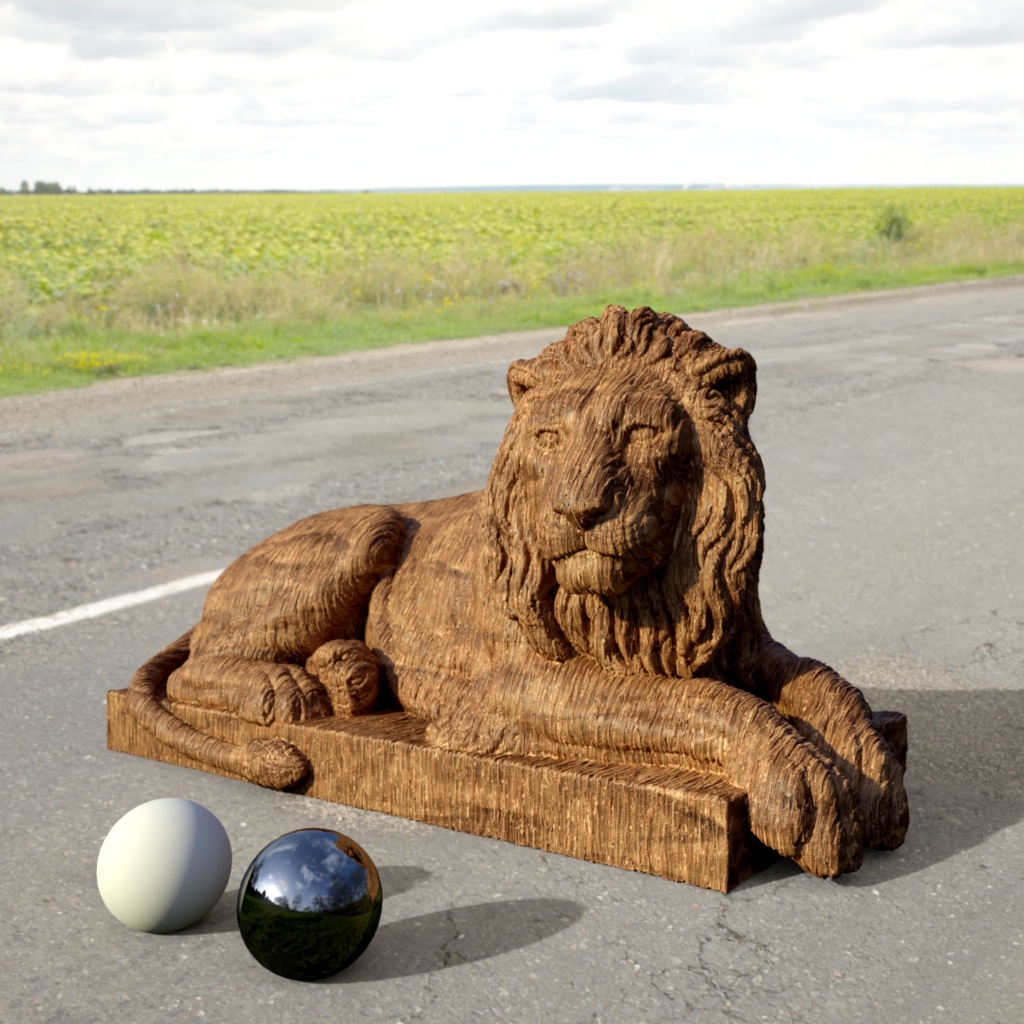
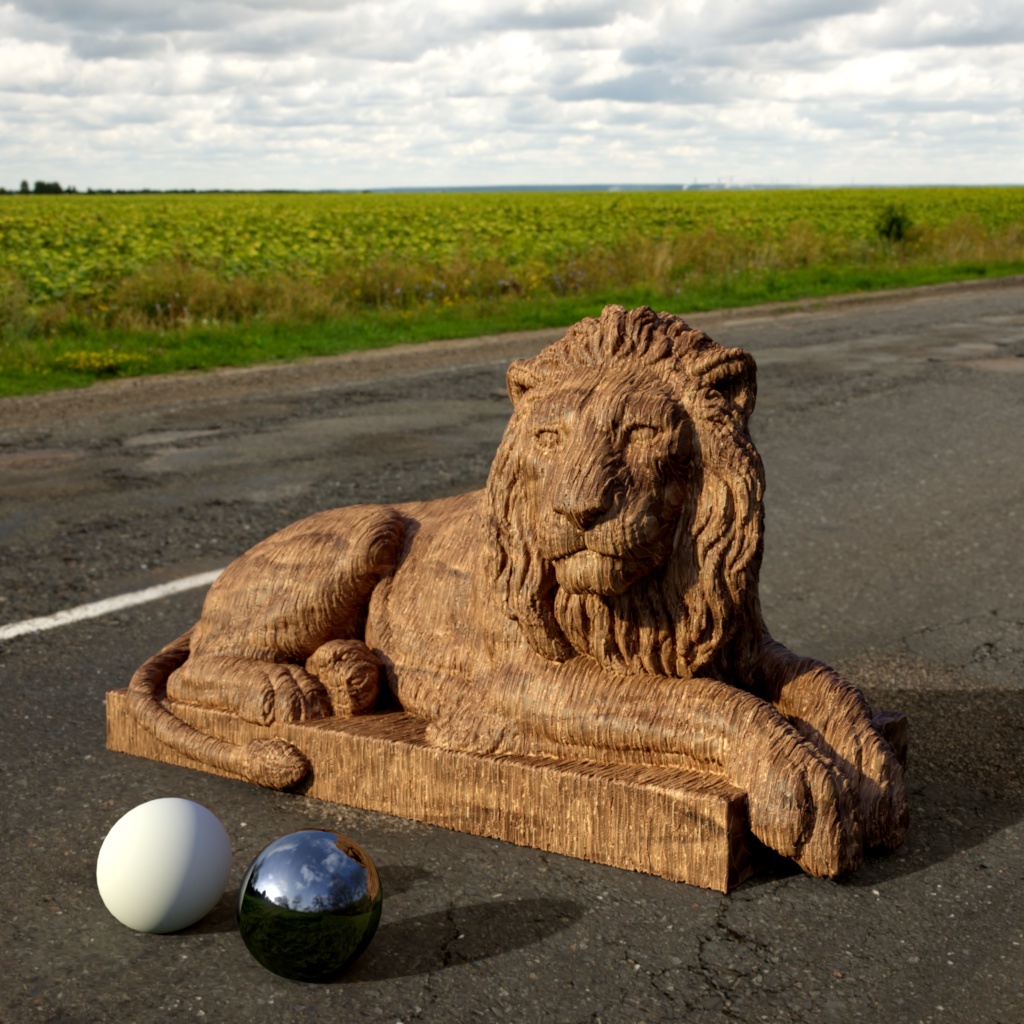
Below you can see the same scene lit with three different HDRI dome maps with Enable Background turned on.
|
|
|
|
| Texture: Greenwich Park | Circus Arena | Skylit Garage |
|
|
|
|
|
|
Example images use HDRI's from HDRI Haven.com
|
|


Perhaps the most important element of a dome light is its texture map. Ideally, HDR textures in OpenEXR format should be used because they can capture a wide range of intensities. Such HDR can textures can either be obtained in the web or an application (like "HDR light studio") can be used to author them.
Here are a couple of important things to remember regarding the texture map:
- Very small, very bright spots on the texture map will produce sharp shadows
- Large spots will produce softer shadows
In a sense, the domelight's texture features behave like area lights: large area lights produce soft shadows while small area lights produce sharper shadows.
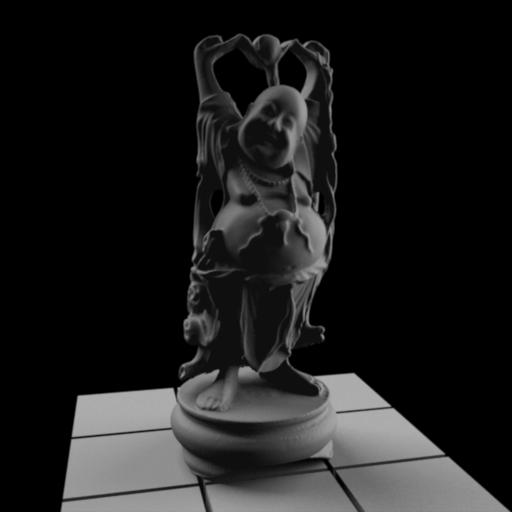
Below are a couple of shots demonstrating this. The first image of each pair is the dome light map and the second is the final rendered result.
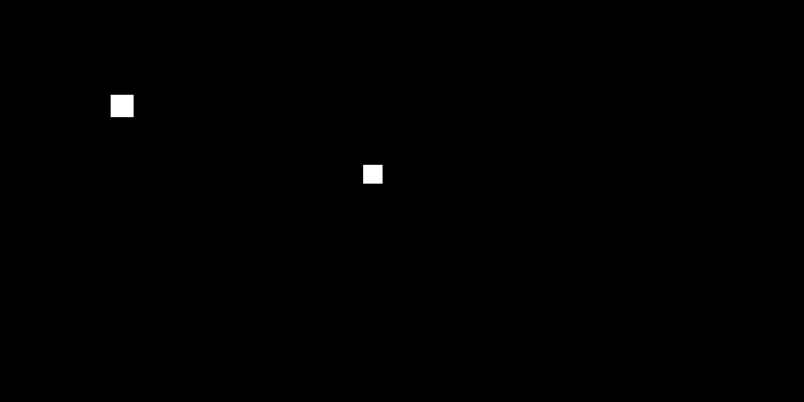
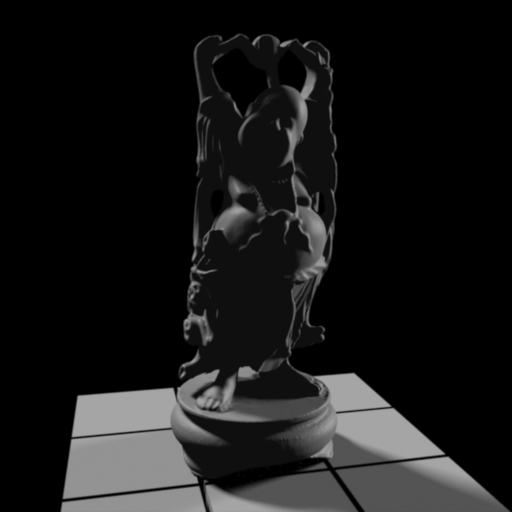
The dome light map contains only two small boxes. This is not an HDR map and, because the boxes are small, they can produce very dark lighting results by default. To fix this issue, the dome light's 'tint' parameter was set to (60, 60, 60). Because of the small bright boxes, the shadows on the final render are fairly sharp.

For the next example, the boxes were made bigger. The more brightness a dome light map contains, the brighter the lighting. For this reason the 'tint' parameter was reduced to (2, 2, 2). As it can be seen on the final render, larger boxes create softer lighting.
Texture Type
Specifies the type of image that is used as the light source:
- Spherical – sampled as a longitude/latitude full sphere map
- Hemispherical – sampled as a longitude/latitude hemisphere map
- Mirror Ball – sampled as a mirror ball map
- Angular – sampled as an angular map
Flip Horizontal
Some renderers use a different convention for how a domelight should wrap around the virtual world in the X axis. The Flip Horizontal option, as the name suggests, flips the domelight in the X axis to help match the look of a different renderer.
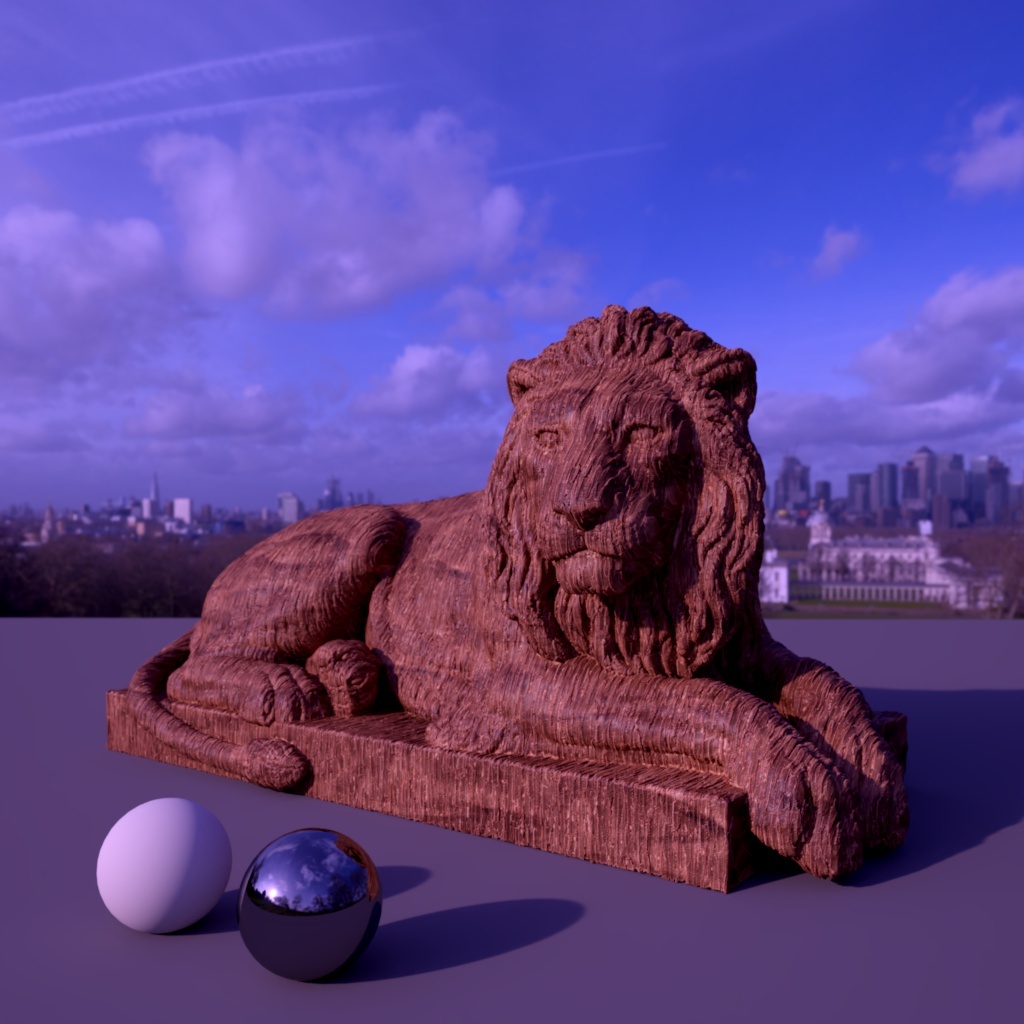
Hue
You can use this value to shift the colors used in the loaded texture. If you just like to color the loaded Texture, you can use the Color instead.
|
|
|
|
|
Hue: 0.0 |
60.0 |
180.0 |

Saturation
This is a percentage value, so 100 results in the full saturation of the loaded Texture being used. Since this Saturation only applies to the loaded Texture, you can still use the Color setting of the light.
|
|
|
|
|
Saturation: 100 |
30 |
170 |

Gamma
This setting sets the gamma value for your dome map. Higher values can help increase contrast in the dome map while lower values reduce contrast. Depending on your dome map adjusting gamma can help to adjust your scenes lighting when you want sharper or softer shadows.
In the examples below the exposure has been adjusted slightly to counteract the gamma change.
|
|
|
|
|
Gamma: 1.0 Exposure (EV): 0.0 |
0.5 1.0 |
1.2 -1.0 |
Environment
Background
When enabled this setting will render the dome light map as the background in your render.
When enabled the dome light background will render with a solid alpha value of 1. If you need alpha for the background be certain to enable Replace Alpha Channel and set the Alpha value appropriately.
|
|
|
|
Enable Background: Enabled |
Disabled |
Replace Alpha Channel
When enabled this allows you to over-ride the texture alpha values, which may be necessary if they are either non-existent or not correct.
Typically, for environment textures, the alpha value should always be 0.0, if you plan on compositing environment layers.
Alpha
This is the alpha value that will be used instead of the texture alpha values when Replace Alpha Channel is enabled.
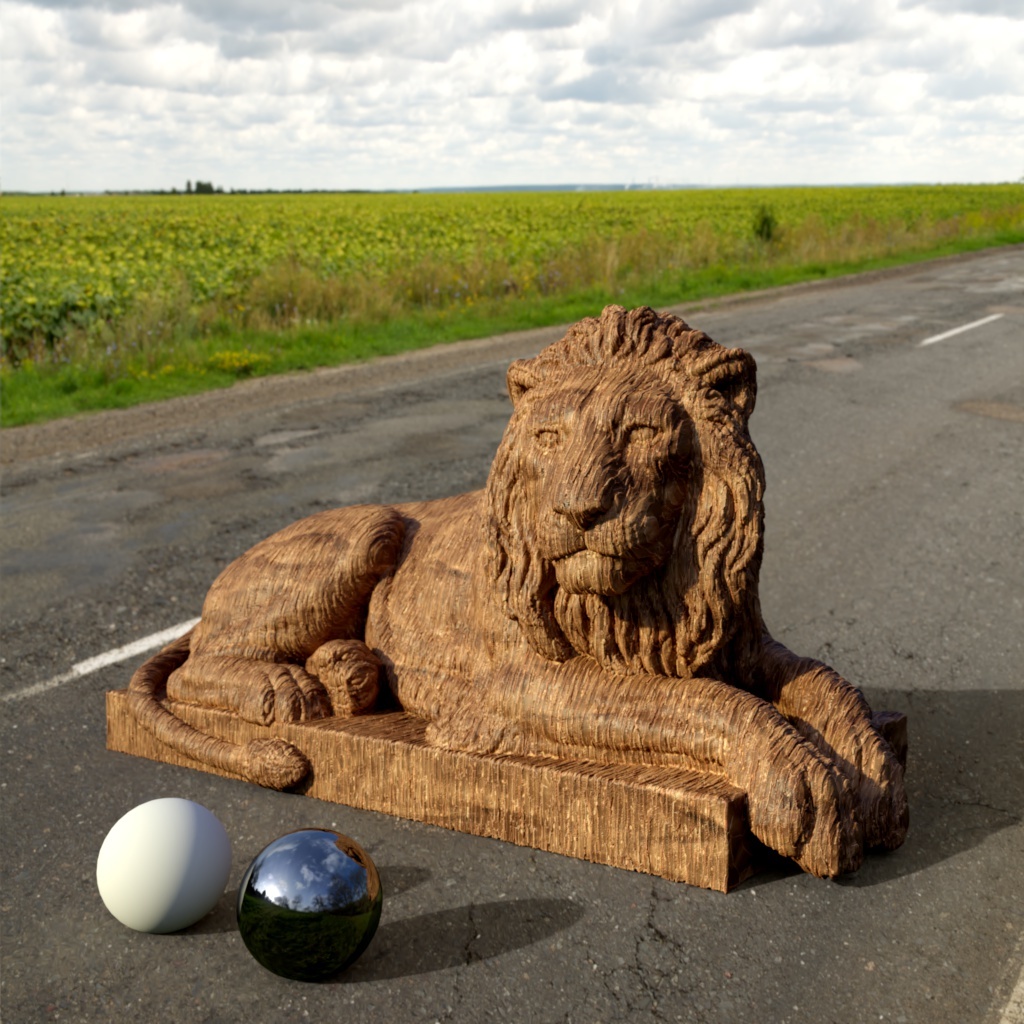
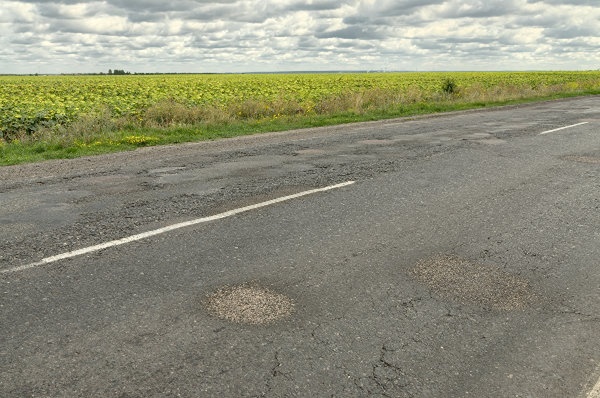
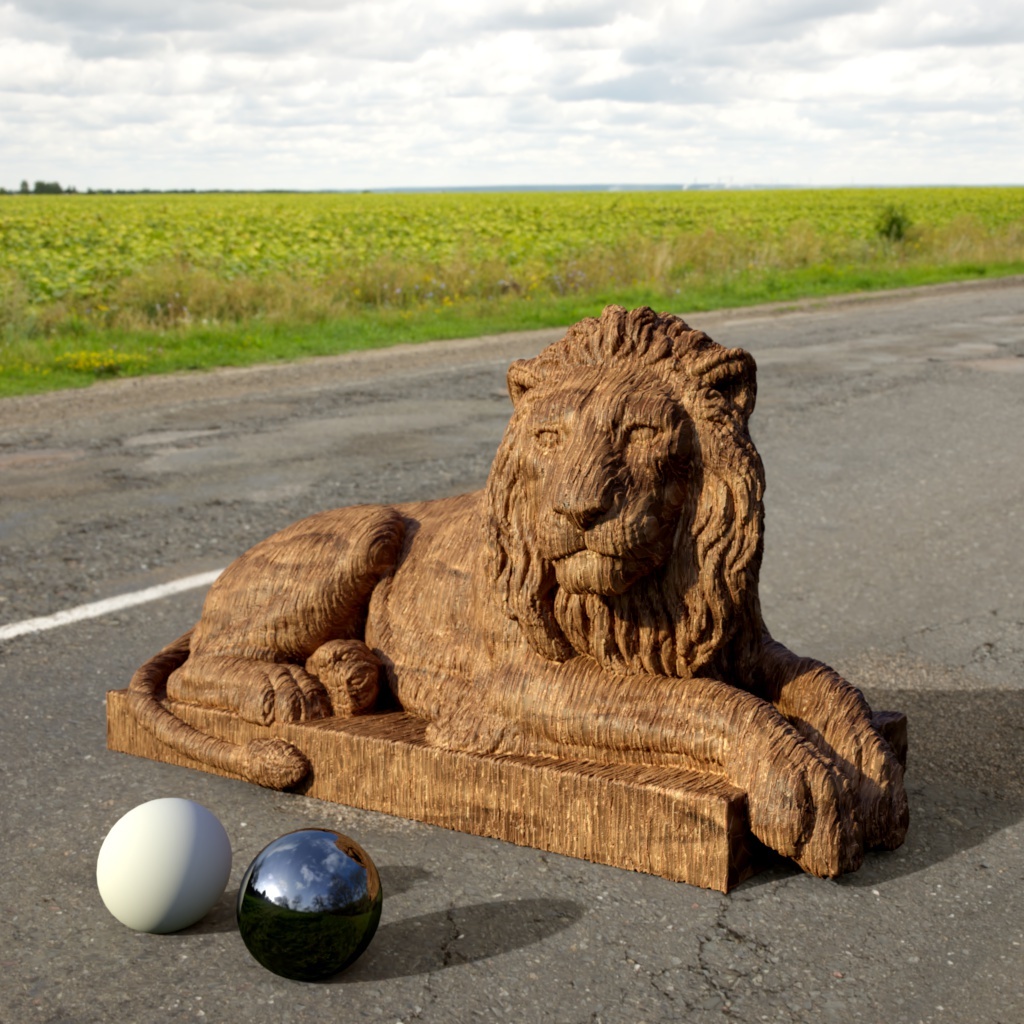
Back-Plate
Enabled
When enabled you can render a custom back-plate texture as your scene background instead of the dome Texture map.
Enable Background must be enabled in order to render with a back-plate.
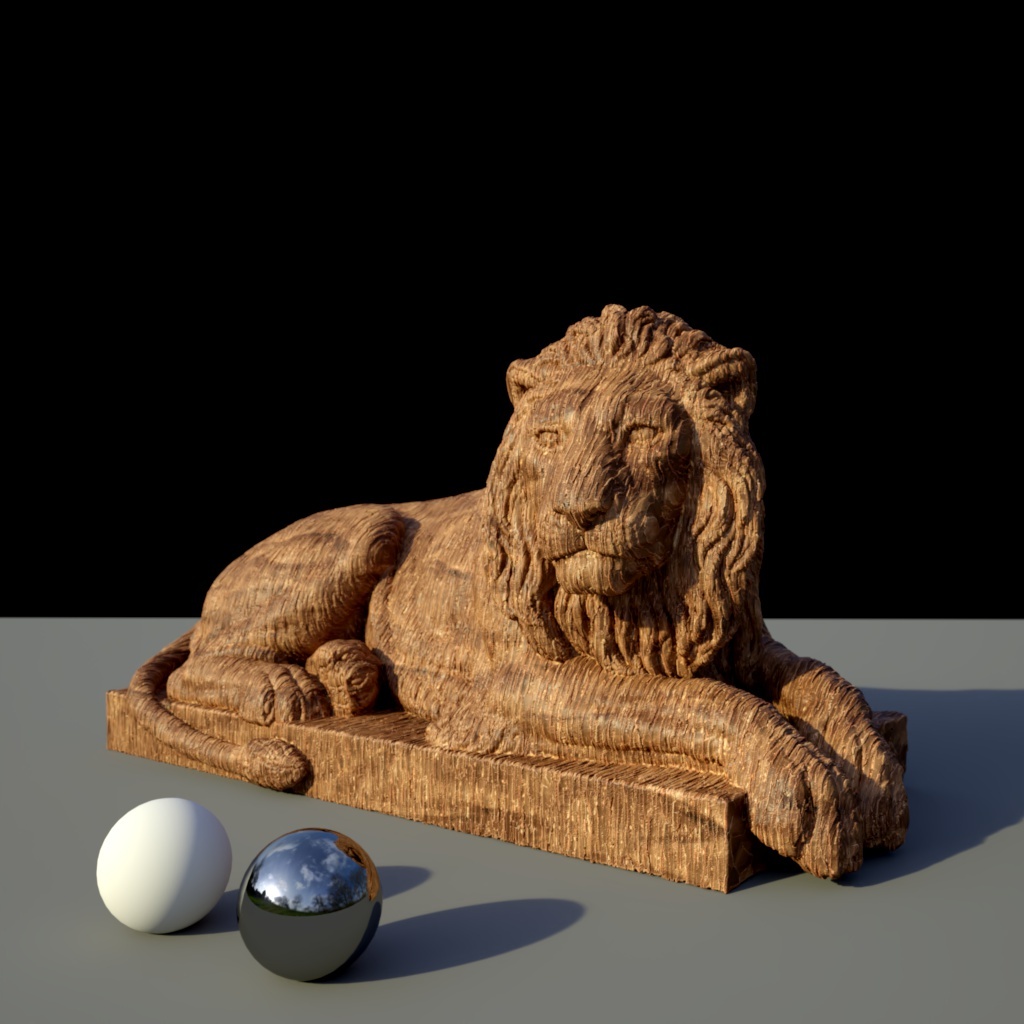
In the examples below the grey floor object has been rendered as a matte object to better demonstrate the uses of a back-plate. In the first image the you can see only the dome map as the background however once the back-plate is enabled it completely replaces it. Note that you can still see the reflections of the dome map in the reflective ball, not reflections of the back-plate.
|
|
|
|
|
Back-Plate: Disabled |
Enabled |
Back-plate from HDRI Haven |

Texture
The texture path for the back-plate.
Exposure (EV)
This setting increases or decreases the intensity of the light in "stops" for your back-plate. Therefore, a value of one means "twice as bright", a value of two means "four times as bright" and so on. A value of -1 means "half as bright", a value of -2 means "quarter bright" and so on.
|
|
|
|
|
Exposure: 0.0 |
1.0 |
-1.0 |

Hue
This setting shifts the color hues of the back-plate.
|
|
|
|
|
Hue: 0.0 |
60.0 |
180.0 |

Saturation
This setting sets the color saturation of the back-plate. Values below 100 are desaturated and values above 100 are oversaturated.
|
|
|
|
|
Saturation: 100 |
30 |
170 |

Gamma
This sets the gamma value for your back-plate.
|
|
|
|
|
Gamma: 1.0 |
0.5 |
1.2 |
Aspect Ratio
This option allows you to set the aspect ratio of the back-plate texture.
- Texture - Uses the original aspect ratio of the back-plate texture, use this preserve the look of the back-plate texture.
- Render - Uses the aspect ratio of the current render settings, use this option to squeeze the entire back-plate texture into the frame.
In the example below you can see how in the render aspect ratio version all of the back-plate texture is squeezed into the frame horizontally.
|
|
|
|
Aspect Ratio: Texture |
Render |
Back-plate from HDRI Haven
Camera Exposure Compensation
When enabled exposure compensation is applied to your back-plate.
|
|
|
|
Apply Camera Exposure Compensation: Enabled |
Disabled |
Details Tab
See common descriptions of the Redshift Light object.
Project Tab
See descriptions of Light Linking and Shadow Linking here