Table Of Contents
Overview
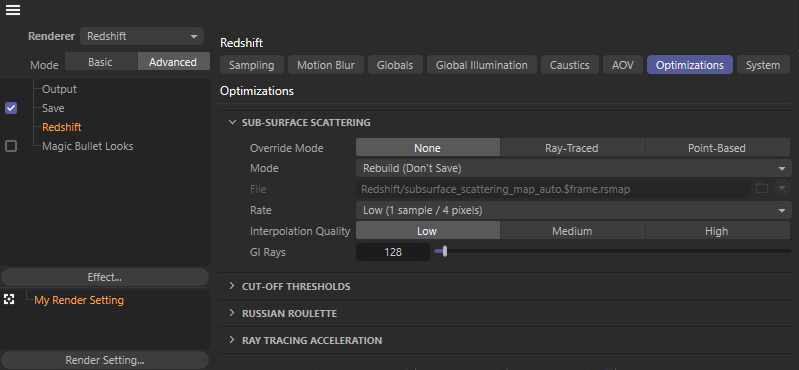
Cinema 4D Advanced Optimization Settings
Sub-Surface Scattering

Sub-Surface Scattering
This section covers Sub-Surface Scattering (SSS) across your entire scene, with options allowing you to quickly override the SSS mode and quality settings from one area.
Override Mode
Allows you to override all Sub-Surface Scattering effects in your scene from the following options:
- None - No override, use the sub-surface scattering mode specified at the material level for each shader.
- Ray-Traced - Override all materials to use Ray-Traced sub-surface scattering.
- Point-Based - Override all materials to use Point-Based sub-surface scattering.
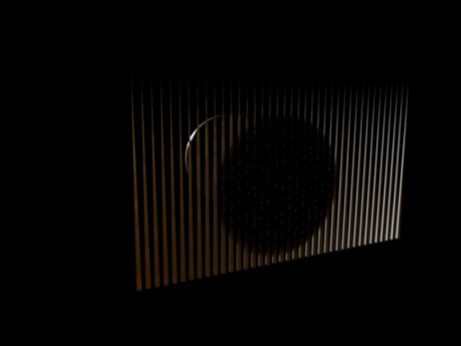
You can use either point-based or ray-traced multiple sub-surface scattering in Redshift and both have their own advantages and disadvantages. In quite a few cases the techniques should look similar to each other but there are situations where the differences will be readily apparent, this is primarily due to the normalization of light that occurs when using point-based mode. Ray-traced mode does not normalize the light which can lead to differences that are most notable on thin objects or objects with more surface detail.
Please note that due to the differences in the two modes the final result can differ when comparing progressive ray-traced SSS to bucket-rendered point-based SSS. A comparison of the pros and cons for each SSS type is provided below:
Ray-Traced SSS
- Pros
- More detailed and accurate
- Works in Progressive Mode
- Ability to isolate SSS effect between objects
- Cons
- Slower and noisier
- More samples needed for clean results
Point-Based SSS
- Pros
- Much faster and smoother
- Cons
- Less detailed and accurate
- Does not work in Progressive Mode
- Requires a "prepass" stage
- Higher chance of flickering in difficult lighting situations
- Not possible to isolate SSS effect between objects which can result in unnecessary "light bleeding" artifacts.
|
|
|
|
Mode: Point-Based Render Time: 13s |
Ray-Traced 1m 11s |


Point-Based SSS with Progressive Rendering
If your scene is set up to use point-based SSS shaders and you render in progressive mode it will automatically use ray-traced SSS during progressive renders .
This is done so you can actually preview the SSS effect in progressive mode (and not just the diffuse texture) and tweak settings interactively - Point-Based SSS will still be used for the final rendering when set to the Bucket render mode.
The enclosed parameters only apply to Point-Based Sub-Surface Scattering. Ray-Traced sub-surface scattering quality is bound exclusively by unified sampling parameters and material level ray-traced SSS settings.
Mode
Specifies the sub-surface scattering computation Mode to be used from the following options:
- Rebuild (don't save) - Redshift will compute new SSS points from scratch (for each frame) but will not save it to disk. The frame will be rendered to completion.
- Rebuild (prepass only) - Redshift will compute new SSS points from scratch (for each frame) and will save it to the user-specified file. The final rendering pass will be skipped.
- Rebuild - Redshift will compute new SSS points from scratch (for each frame) and will save it to the user-specified file. The frame will be rendered to completion.
- Load - Redshift skips the SSS computation stage and the data is loaded from the user-specified file in the parameter below. The frame will be rendered to completion.
Point-Based sub-surface scattering data is view-dependent which means that it has to be re-generated when either the camera or any objects move. It also has to be regenerated if lights change position or intensity and if materials are adjusted. However, there are a few settings that do not affect the Point-Based SSS points:
- All antialiasing settings
- Any parameter that has to do with "number of samples."
If you are making any last-minute adjustments to your frame and tweaking these kinds of parameters you can save some time by re-using the sub-surface scattering you computed last time.
File
Specifies where to save or load the sub-surface scattering data depending on the chosen sub-surface scattering mode as covered below.
- Rebuild (prepass only) - Save sub-surface scattering data to the user-specified file.
- Rebuild - Save sub-surface scattering data to the user-specified file.
- Load - Load sub-surface scattering data from the user-specified file.
Rate
Controls the spacing of the Point-Based SSS points by setting the number of samples used per pixel.
Similar to antialiasing, the more samples-per-pixel you use the more points will be created. More points can help catch small details but they also take longer to compute and use more memory.
It is recommended that if you get visual artifacts to try a setting of "Medium (1 sample per pixel)" first and if that doesn't solve the issue then raise it to "High (4 samples per pixel)."
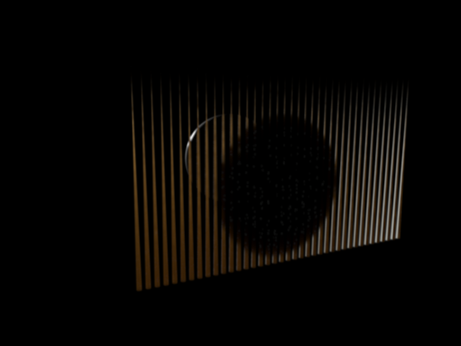
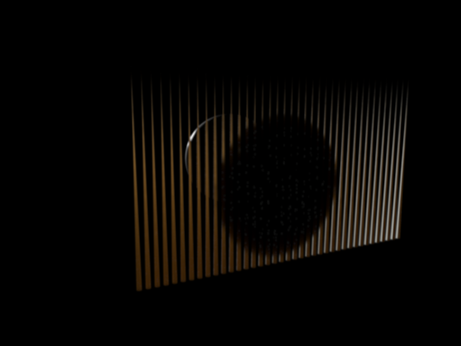
Please note that for the example images below the radius of the SSS effect was set low to exacerbate the issues of setting the Point-Based SSS Rate value too low.
|
|
|
|
|
Rate: Low Too dark and suffers from many splotchy artifacts. |
Medium The cones look brighter (this is a more correct result) but there are still splotches in the thinner parts of the geometry (the tips of the cones). |
High The splotches are improved – especially near the tips of the cones. |
Interpolation Quality
Controls the quality of the final render by determining how many SSS points are used to produce the final lighting at each pixel.
The higher the setting, the more points are used and the smaller the chance of any interpolation artifacts appearing on the surfaces of objects at the expense of slower render times.
We recommend leaving this setting to its default "Low" value and only use "Medium" or "High" if you observe SSS artifacts that look like 'lighting rings' or excessive flickering in animations.
GI Rays
Controls how many GI rays are scattered through objects using point-based SSS if global illumination is enabled.
If Global Illumination is enabled, GI lighting will also be computed for each SSS point. The "GI Rays" parameter is similar to the Brute-Force GI or Irradiance Cache GI "Rays" settings.
Since subsurface scattering is generally a soft effect, it can often work with relatively few GI rays whereas GI on hard surfaces might require several hundred (or even thousands) rays. It is, therefore, recommended that you start with fairly low numbers such as the default 128 and raise this only if you get persistent lighting artifacts on subsurface scattering surfaces.
Cut-off Thresholds
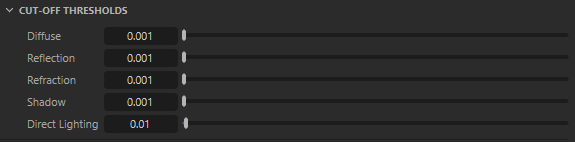
Cut-off Thresholds
For advanced users only! Incorrect settings can easily generate very noisy images or long rendering times!
The Cut-off Threshold set of parameters covered below allow the user to specify minimum values that are considered "black" and allow the renderer to terminate tracing earlier.
As rays go through reflections, refractions or shadows, they get tinted and become dimmer. For example, a ray coming from the camera might hit a very faint mirror. Whatever is reflected on that mirror will be dim. When the rays become dim, they contribute very little to the final image so there is no point for the renderer to keep bouncing them around.
The defaults should work fine for most scenes but, in some extreme cases, a very dark mirror might be reflecting an extremely bright piece of geometry. If the renderer "cuts off" the mirrored rays early, grain will appear. If you suspect this is happening to your scene, you can try lowering these numbers. To disable this optimization altogether, set the values to 0.0.
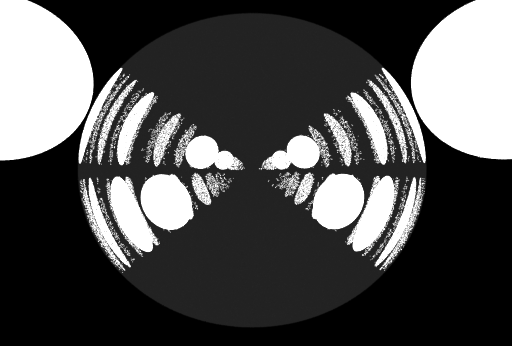
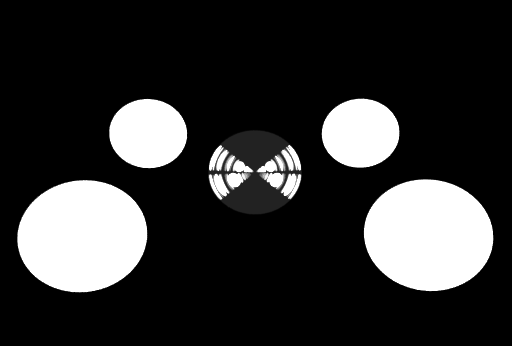
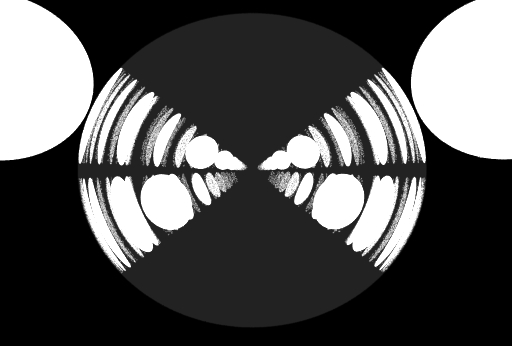
A test scene below shows what happens if there are very bright objects in the scene and the cutoff thresholds are not low enough. In the middle of the scene there is a glass reflective and refractive sphere. Around it are 4 very bright self-illuminating spheres. The reflection and refraction trace depths are set to 16 so the reflections/refractions of the self-illuminating spheres 'repeat' many times inside the glass sphere.
|
|
|
|
|
|
|
Reflection & Refraction Cut-Off: 0.1 This is an aggressive setting. Notice that several reflections/refractions are rendering very noisy. |
0.01 A big improvement over the last image, but there's still some noise in the deeper reflections. |
0.001 (default) In this case, it produces a near-identical result to the reference image. |
0 Reference image, all cut-offs disabled (best quality) |
Test scene setup |


Diffuse
Sets the minimum value for diffuse ray cut-offs.
Higher values result in more dim rays being cut-off while lower values result in fewer dim rays being cut-off.
Reflection
Sets the minimum value for reflection ray cut-offs.
Higher values result in more dim rays being cut-off while lower values result in fewer dim rays being cut-off.
Refraction
Sets the minimum value for refraction ray cut-offs.
Higher values result in more dim rays being cut-off while lower values result in fewer dim rays being cut-off.
Shadow
Sets the minimum value for shadow ray cut-offs.
Higher values result in more dim rays being cut-off while lower values result in fewer dim rays being cut-off.
Direct Lighting
Sets the minimum value for direct lighting cut-offs.
Higher values result in more dim rays being cut-off while lower values result in fewer dim rays being cut-off.
Russian Roulette

Russian Roulette
For advanced users only! Incorrect settings can easily generate very noisy images or long rendering times!
Russian-Roulette allows the renderer to shoot only one kind of ray once the importance of the ray is deemed low enough.
For example, a glass seen through a very faint mirror can often get away with sometimes shooting a reflection ray and other times shooting a refraction ray. Choosing which kind of ray to shoot (reflection or refraction) is driven by shader parameters. If a glass is very transparent and only has a very faint amount of reflection, the renderer will mostly choose refractive rays versus reflective ones.
Certain shaders need to shoot multiple different kinds of rays. For example, a glass shader needs to shoot a ray for reflection and another one for refraction. The Redshift Material shader can shoot two reflection rays (Reflection & Coating Reflection each with different roughness values) and one refraction ray. When the rays of such shaders 'see' other shaders of the same kind, the number of rays that have to be shot can grow exponentially with increasing trace depths. The initial two rays of a glass shader might become 4 rays on the next trace depth, then 8, then 16, 32, 64, and so on.
Importance Threshold
Controls the point in which Redshift will start performing the Russian-Roulette optimization.
Very low Importance Threshold values mean "start Russian-Roulette early for very dim rays" while higher values mean "start Russian-Roulette even earlier for slightly brighter rays".
Starting Russian-Roulette too early with Importance Threshold values that are too high can introduce grain artifacts. If you see grain in your glass and you are suspecting the Russian-Roulette optimization, you can try lowering this number to 0.001.
To disable this optimization completely, set it to 0.0.
|
|
|
|
|
|
|
Importance Threshold: 0.1 The renderer has to choose between reflection and refraction way too early which produces excessive noise! |
0.01 While there is less noise compared to before, it's still visible. |
0.001 (default) Russian-roulette now happens very rarely, which eliminates all noise. |
0 Reference image, Russian-Roulette disabled (best quality) |
Test scene setup |


Falloff
Controls how gradually Redshift eases into the Russian-Roulette optimization once it crosses the Importance Threshold value.
This means that once a ray's intensity crosses the "Importance Threshold" value the renderer won't abruptly go into Russian Roulette but will do it more gradually depending on the Falloff value. This improves potential noise-banding artifacts.
Higher Falloff values result in the most gradual transition into Russian-Roulette optimization while lower values result in the most abrupt transition.
Setting this parameter to 0.0 will start Russian-Roulette optimization abruptly, while 1.0 eases into it very smoothly.
It's very rare that users will need to adjust this parameter, so it is advised to leave it at 0.5.
Ray Tracing Acceleration

Ray Tracing Acceleration
Complete Construction Before Rendering
When enabled, it forces Redshift to load and process all geometry upfront before any actual rendering starts. For certain scenes this can have a positive performance impact.
By default this is disabled and Redshift loads and optimizes geometry data during the rendering process. This has the benefit of only loading/processing data that is actually visible by rays. The drawback is that, in certain cases, the CPU utilization might be less than ideal which means that geometric data processing might take longer than needed.
Max Leaf Primitives
Controls the accuracy of the ray tracing acceleration structures.
Lower values can speed up difficult-to-ray-trace scenes such as ones that contain lots of hair, leaves or grass.
Please note, lower Max Leaf Primitive values also increase the GPU memory requirements. We, therefore, advise using lower values (such as 4, instead of the default 8) on fairly lightweight scenes or if your GPU already has plenty of VRAM.
You can diagnose the ray tracing acceleration structure memory requirements by looking in the Redshift log file, at the memory usage statistics printed at the end of each frame.
Fast Preprocessing
When in use, it allows Redshift to update scenes more quickly by aggressively optimizing/limiting what is processed from the scene before starting a render. This is ideal for maintaining high interactivity during Interactive Rendering but it comes at the expense of some ray tracing performance.
- None - Never use Fast Preprocessing.
- IPR Only (default) - Only use Fast Preprocessing during Interactive Rendering.
- All - Always use Fast Preprocessing for both Interactive and Final Rendering.
By default Redshift only uses Fast Preprocessing during IPR rendering to ensure that everything is appropriately updated during Final Renders.
If you notice differences between interactive rendering and final renders try setting Fast Preprocessing to None to see if that fixes the inconsistencies at the expense of responsiveness during Interactive Rendering.