Table Of Contents
Volume Rendering Explained
Redshift can render non-homogeneous volume objects such as smoke and fire. A volume's shape can be specified either through an OpenVDB file or, in certain cases, via each individual DCC's volume creation functionality.
Volume objects have to be stored on the GPU's memory in their entirety and are not handled by Redshift's out-of-core system. Therefore, if a scene uses too many different volume objects or if these volume objects are of a particularly high resolution and do not fit on the GPU's memory, rendering will be aborted with an out-of-VRAM error message.
To define the volume's shading, a Redshift Volume Shader needs to be assigned to the Redshift Volume Object.

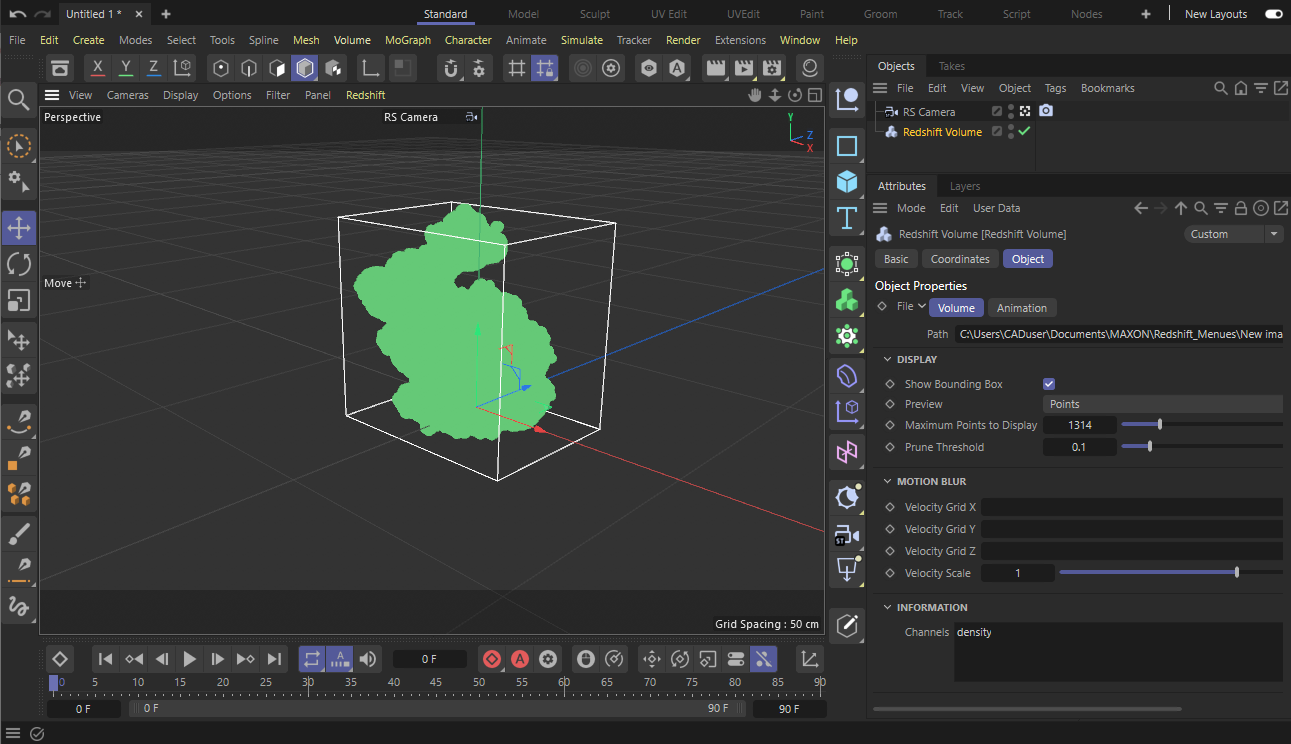
A cloud bunny in the Cornell box
OpenVDB files and channels
OpenVDB files are to volumes what EXR files are to textures. While a texture stores pixels (also called texels), an OpenVDB file stores voxels which are 3D pixels. Each voxel stores information that describes the volume at a particular XYZ point. For example, it can store a density value which tells the renderer how opaque or transparent the volume is at that point. In some ways, this is similar to the alpha channel in a PNG or EXR file.
OpenVDB organizes its voxel data in channels. As mentioned above, a typical channel is 'density'. Another channel is 'temperature' which tells us how cold or hot a voxel is. As it will be shown later, the temperature channel can be used to render fire.
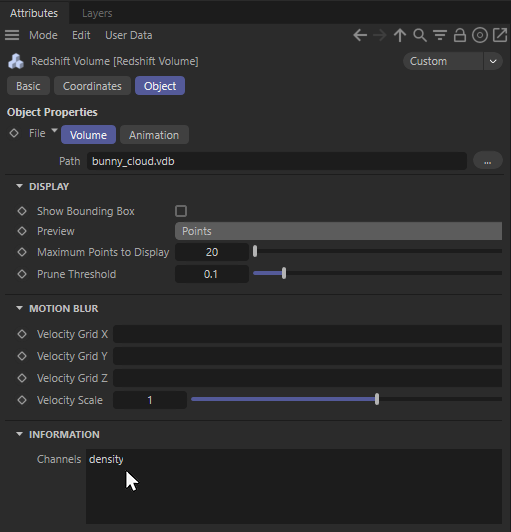
To know the names of the Channels included in a loaded VDB file is key to configure the Redshift Volume Shader, therefore you will find all loaded channel names in the Information part of the Redshift Volume Object.
Creating a volume grid
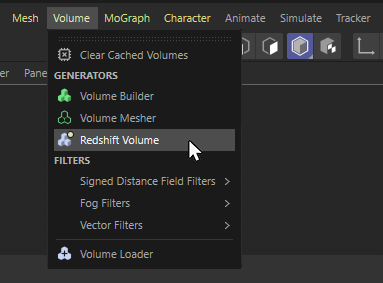
To create a Volume object, select Redshift Volume from the Cinema 4D Volume menu
You can use the Path setting to select an OpenVDB file.
In this case we pointed to the bunny_cloud.vdb file which was downloaded from http://www.openvdb.org/download
This is how it appears in Cinema 4D when the Display Preview is set to Points, with small adjustments to the Maximum Points to Display, and Prune Threshold settings.
Display
Show Bounding Box
Activating this option will draw a bounding box to your viewport to show the maximum size of your volume even if the Preview mode is switched Off.
Display Mode
Selects how the volume data will be presented in the viewport. The choices are:
- Off: No preview of the loaded volume is shown in the viewports, but you can still activate the Show Bounding Box option to see a Wireframe bounding box of the volume.
- Bounding Box: Draws a massive cube with the size of the loaded volume to the viewports.
- Points: Draws a number of representative points from the volume grid. The number of points shown is controlled by the Max Points and Prune Threshold, explained below.

Left to right: Show Bounding Box (Preview = Off), Preview = Bounding Box, Preview = Points
Max Points
Specifies the maximum number of points that would be drawn if the OpenVDB file was completely filled. This value is used only with Preview set to Points.
Prune Threshold
Any OpenVDB voxels that are lower or equal to this value won't be drawn as Points. This is useful to cut away empty space during volume data previewing.
Animated volumes
When you load a VDB file that is part of a sequence within the same folder, you have the option to display it as a static volume or to interpret the VDB sequence as an animation. The following settings let you control the timing, range, and possible repetitions of sequence playback.
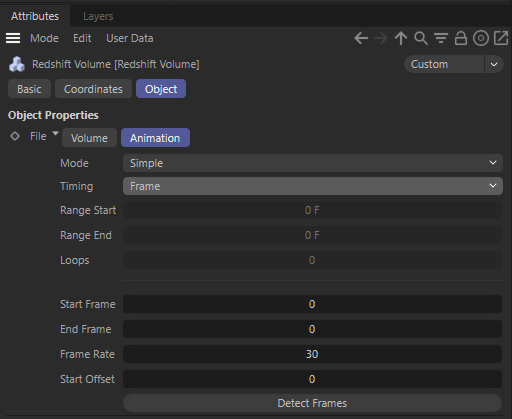
Loading a VDB sequence offers additional controls for timing, range and repetition
Mode
This menu controls the loading of the VDB files and their looping behaviour:
- Off: Only the one VDB file that is entered in the Path is loaded.
- Simple: All VDB files in the sequence will be loaded and switched if you navigate in time. The sequence will be only played once with no repetitions. Parameters such as the Frame Rate or when the playback of the sequence will start, are controlled with the following parameters.
- Loop: All VDB files will be shown as you run through time. After the last VDB file of the sequence has been shown, the sequence will start egain with the first VDB file.
- Ping-Pong: All VDB files are displayed one after the other while you scroll through the time. After the last VDB file is displayed, playback continues, but this time in reverse order, so that all files are played from last to first. When you reach the first VDB file, normal playback starts again from beginning to end.
Timing
In this menu the speed of playback is set and a range of VDB files within the sequence can be specified to be displayed and looped exclusively:
- Frame: One VDB file is loaded per frame of your animation. No frames will be dropped. If the VDB sequence and your rendered animation use a different FPS (Frames Per Second) setting, the sequence will play back at a faster or slower speed than the original speed.
- Time: Each second of the VDB sequence is matched against each second of your animation, thus ensuring that the VDB sequence will be played back at the original speed.
- Range: Cinema 4D will play the VDB Sequence over a specified frame range (Range Start and Range End) of your animation. A separate Loop value allows any number of repetitions of the VDB sequence within the given range of frames. Use this option if you do not want the VDB sequence to start playing immediately. If the range of frames is shorter than your VDB sequence, some VDB files are skipped during rendering!
Range Start
With Timing: Range you can specify at which frame of your animation the VDB sequence should start playing. All frames before Range Start will use the first VDB file of your sequence.
Range End
With Timing: Range you can specify at which frame of your animation the VDB sequence should stop playing. All frames after Range End will use the last VDB file of your sequence. Leaving this value at 0 has the same result as entering the last frame of your animation.
Loop
With Timing: Range the Loop value sets the number of repetitions for the VDB sequence within the given range of animation frames (between Range Start and Range End). Increasing the Loop value will always speed up the playback of the VDB sequence and can result in more skipped VDB files.
The following settings address the VDB sequence itself and control if the whole sequence is evaluated or just a part of it. Here you can also enter the Frame Rate for the sequence, if you know it.
Detect Frames
This button will detect the number of VDB files in the sequence automatically and fill out Start Frame and End Frame for you to include all VDB files in the sequence.
Start Frame
End Frame
Start Frame is the number of the file within the sequence, where you would like to start the playback. Normally this would be 1 to start the sequence with the first VDB file in the sequence.
End frame is the number of the last VDB file within the sequence that should be evaluated.
In short, use Start Frame and End Frame to cut off unneeded VDB files at the beginning and end of the VDB sequence.
Frame Rate
As a sequence of files doesn't have a fixed playback frame rate, you can enter your own here. Start with a Frame Rate of 30 if you don't know at which frame rate the simulation was calculated. If you feel that the Sequence runs too fast or too slow during playback, just adapt this value.
Start Offset
This value will offset the number of the VDB file within the sequence, that is used as the first file in the sequence. Using Start Offset 3 would use the third file of the sequence as a new start frame. In this case, the first two files in the sequence folder will be handled as if they are the last two files of the sequence, so in total the amount of files in the complete sequence will remain constant.
Motion Blur
Motion Blur allows you to simulate the photographic effect of a longer exposure time. Fast-moving objects or changing shapes then appear blurred or even smeared in the rendering along their direction of movement. This simulation is somewhat more difficult with VDB files stored image by image than, for example, with objects animated via keyframes, where speeds and motion curves can be accessed at any time.
The solution in this case lies in speed information, which can also be included as channels in the VDB files. What is needed for this are individual channels with floating point values, which can then be interpreted as velocities in the X, Y and Z directions.
Velocity Grid X
Velocity Grid Y
Velocity Grid Z
Enter the names of the three channels here, that include the x, y and z components of the velocity in the loaded volume. If you just have a single 3D vector based channel for the velocity available, you can add .x, .y and .z to its channel name in the matching Velocity Grid fields. So for example having a velocity channel with the name "vel" in your vdb file, you can use vel.x, vel.y and vel.z.
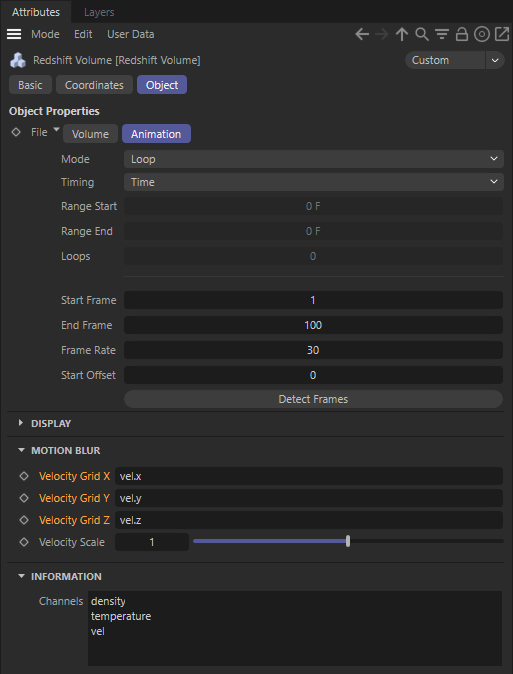
Splitting a vector channel into float values can be done by adding the suffixes .x, .y and .z to the channel name.
Velocity Scale
Use this value as a multiplicator for the Velocity Grid.