Using Cinema 4D Parameters in Unreal
Overview
Using Parameter Links
The import of a Cinema 4D scene via Datasmith described here does not offer the option of accessing the parameters, e.g., of a generator of the Cinema 4D scene, within Unreal and editing settings there. However, this is also possible and is described below. In this way, for example, the number of objects created with a MoGraph cloner can also be changed directly in the Unreal Editor. Please note, however, that such changes are only possible in the Unreal Editor environment and cannot be carried out during the runtime of your game. In addition, this option is only available when importing via Datasmith and not when using the interchange functionalities.
Preparation of the Cinema 4D Scene
To access Cinema 4D parameters directly in the Unreal Editor, at least one separate Take must first be created in Cinema 4D in order to define the parameters to be transferred there. The following images describe the necessary work steps in Cinema 4D.
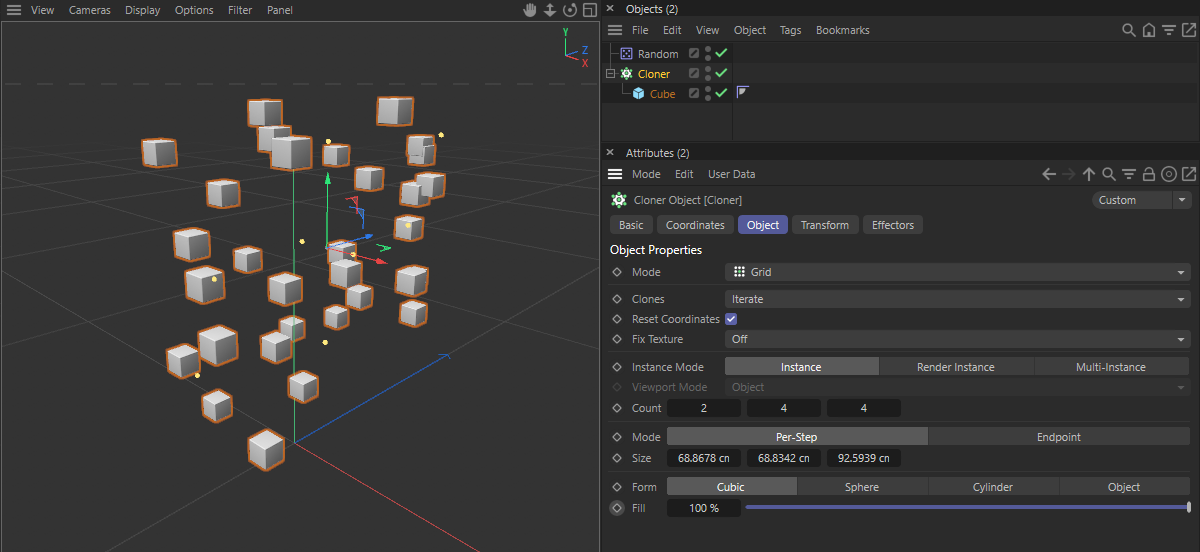
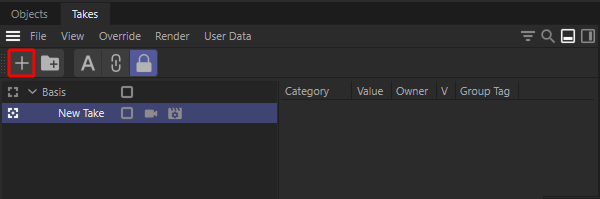
The scene shown above should serve as an example. A MoGraph Cloner object will create a grid placement of cubes that will be randomly shifted and, if necessary, rotated by a Random Effector. To be able to edit the number of cloned cubes and their random variation directly in Unreal, for example, a new Take must first be created. To do this, open the Take Manager and click on the + symbol to create a new Take, which will automatically be created under the Base Take. The new Take will thus have access to all elements of the Base Take, which always contains all materials, tags and objects of the project.
Almost any parameters can now be added to this new Take, as long as they are of the following data types and settings:
- Integer numerical values
- Floating point numerical values
- Vectors
- Colors
- Texts
- Options (Boolean values)
- Selection menus
To do this, make sure that the new Take is active (see the bright icon to the left of the new Take in the Take Manager) and then select the Material, tag or object whose parameters you want to transfer to Unreal. We will initially opt for the Cloner object.
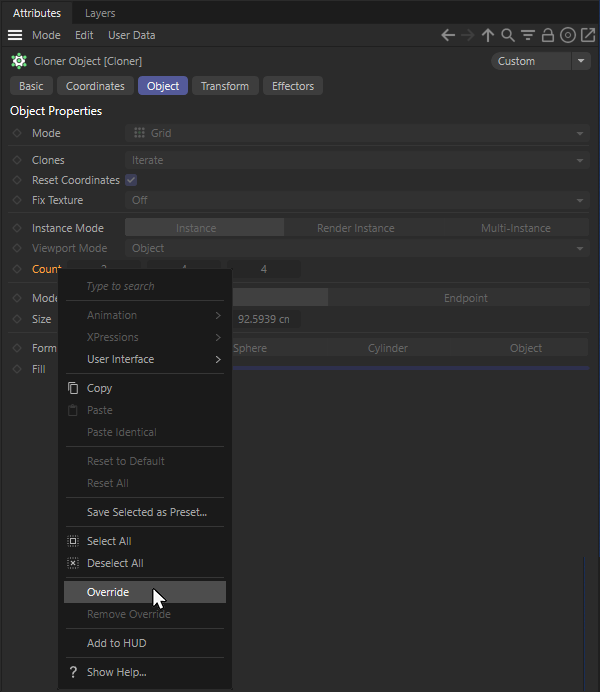
A look at the Attribute Manager shows that all parameters of the Cloner object are now grayed out. By default, the new Take will adopt all the settings of the Base Take, which is why all parameters are displayed as locked. However, by right-clicking on the name of a parameter, Overwrite can be called up in the context menu, whereby this parameter and its current value are added to the active Take. For example, we decided to use the Countvector on the Cloner object to be able to subsequently change the number of cloned cubes. The parameter will then be unlocked and can be used normally again. However, each change will only be evaluated as long as the Take remains active. Switching back to the Base Take (by activating the symbols to the left of the Take in the Take Manager) will make the original settings of all parameters visible again. In this way, any parameters can be overwritten and thus marked for changes that can later be made in Unreal.
If you want to use more than one new Take, this is also possible. All parameters for the export that were overwritten in manually created takes will be taken into account.
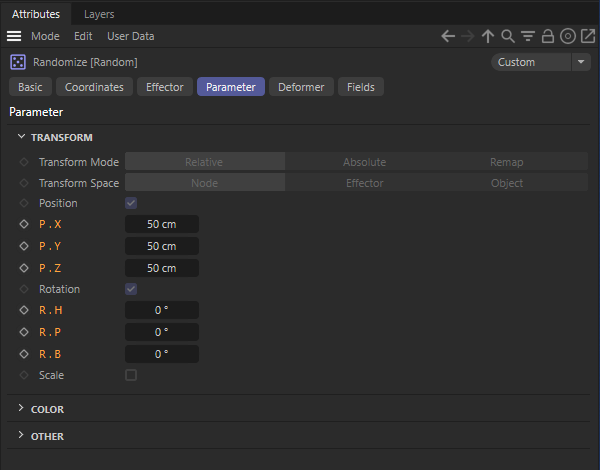
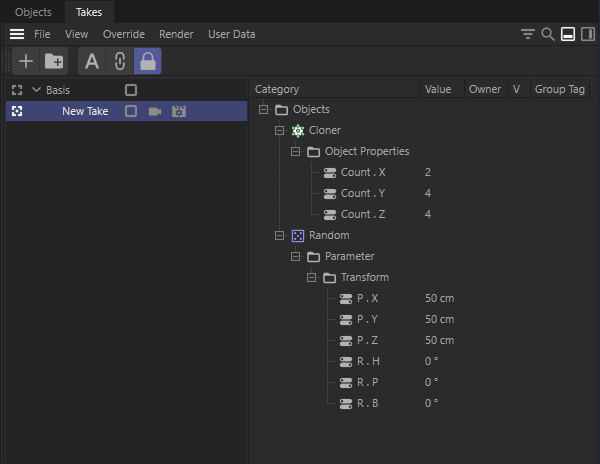
In the next step, we will again make sure that the most recently added Take is activated in the Take Manager and then select the Random Effector in the Object Manager. There we will overwrite the position and angle values in the Preferences settings in order to control the random movement and rotation of the clones (see image above). The right-hand column of the Take Manager gives you an overview of all parameters that have been released for overwriting at any time (see image below). Accidentally added parameters can be deleted simply by selecting them and pressing the Del key.
This completes all preparations for the transfer to Unreal and you can save the scene as usual, e.g., via File>Save project as....
Transfer of Parameters to Unreal
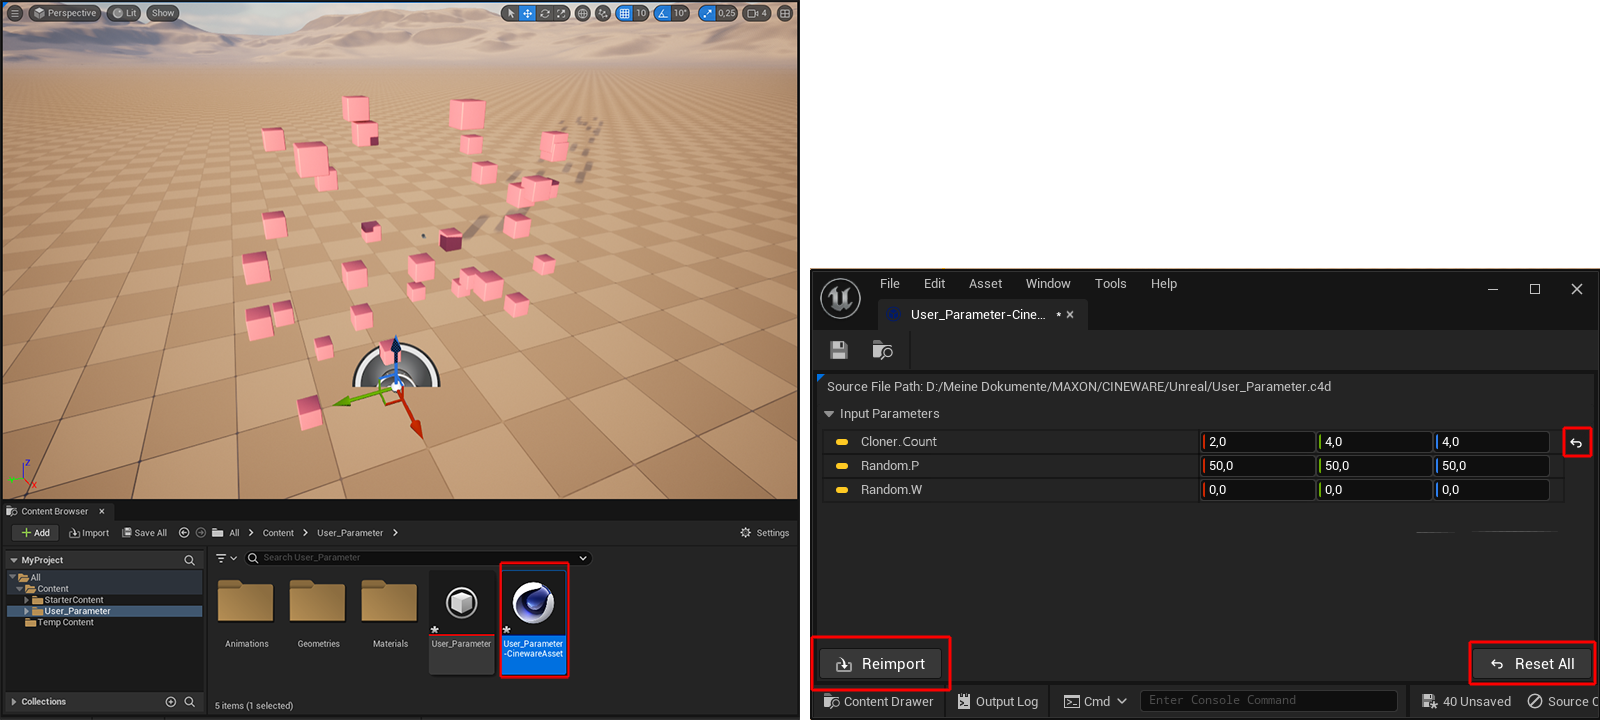
Import the Cinema 4D scene into the Unreal Editor as described here. A look into the Content Browser shows an additional component with a Cinema 4D symbol within the imported directory if the scene contains overwritten parameters. The following image shows this component marked in red at the bottom left. Double-clicking on it opens a separate settings window in which all transferred parameters are listed (see right-hand side of the following image). There you can edit the values of these parameters as required.
Clicking on the Reimport button will apply the changed values to the Cinema 4D scene, causing it to be reloaded. Otherwise, individual changes can be reset to the original value by clicking on the arrow symbol to the right of edited parameters, or you can use the Reset All button to undo all changes. You will also find these elements marked in red on the right-hand side of the following image.
Use Editor Blueprints for Parameters
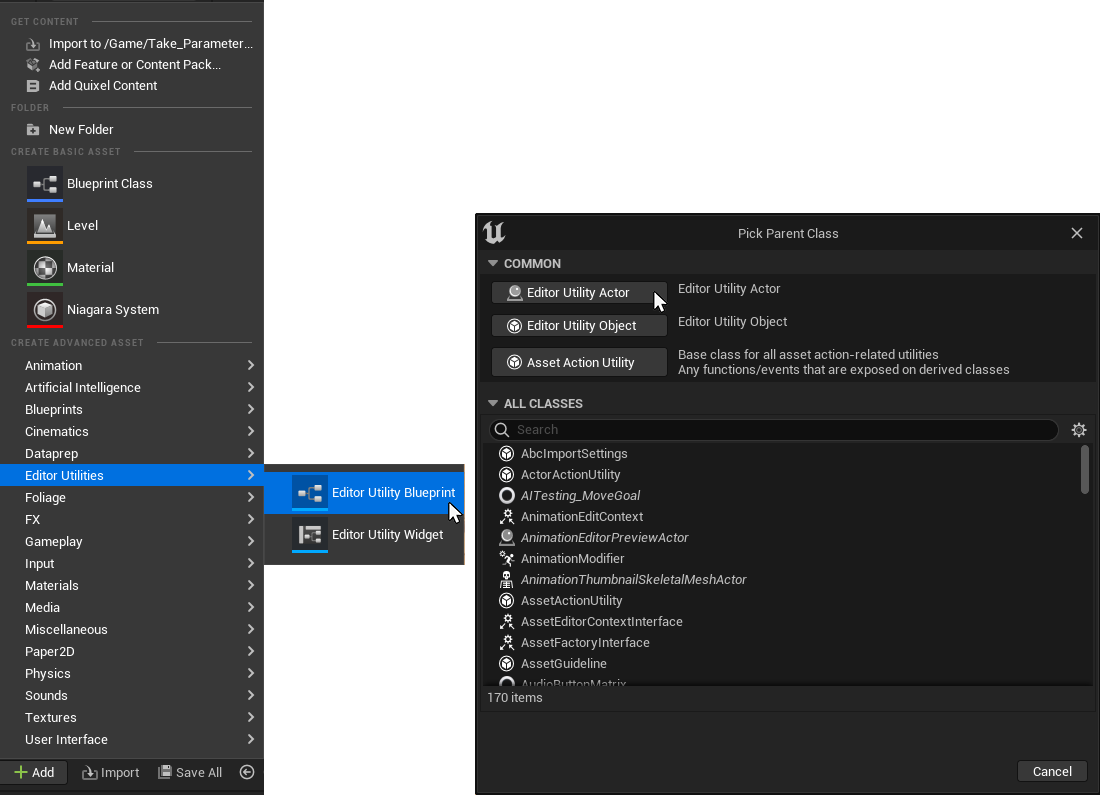
As an alternative to the output and modification of the parameters in the settings window described above, the transferred values can also be read out or overwritten in blueprint circuits. However, this only works in the editor context and not for runtime blueprints. To do this, select the entry for Editor Utilities>Editor Utility Blueprint via the + Add button of the Content Browser, for example. An additional dialog appears, which can be used to assign the superordinate class for this blueprint circuit (see image below). There you can select Editor Utility Actor, for example.
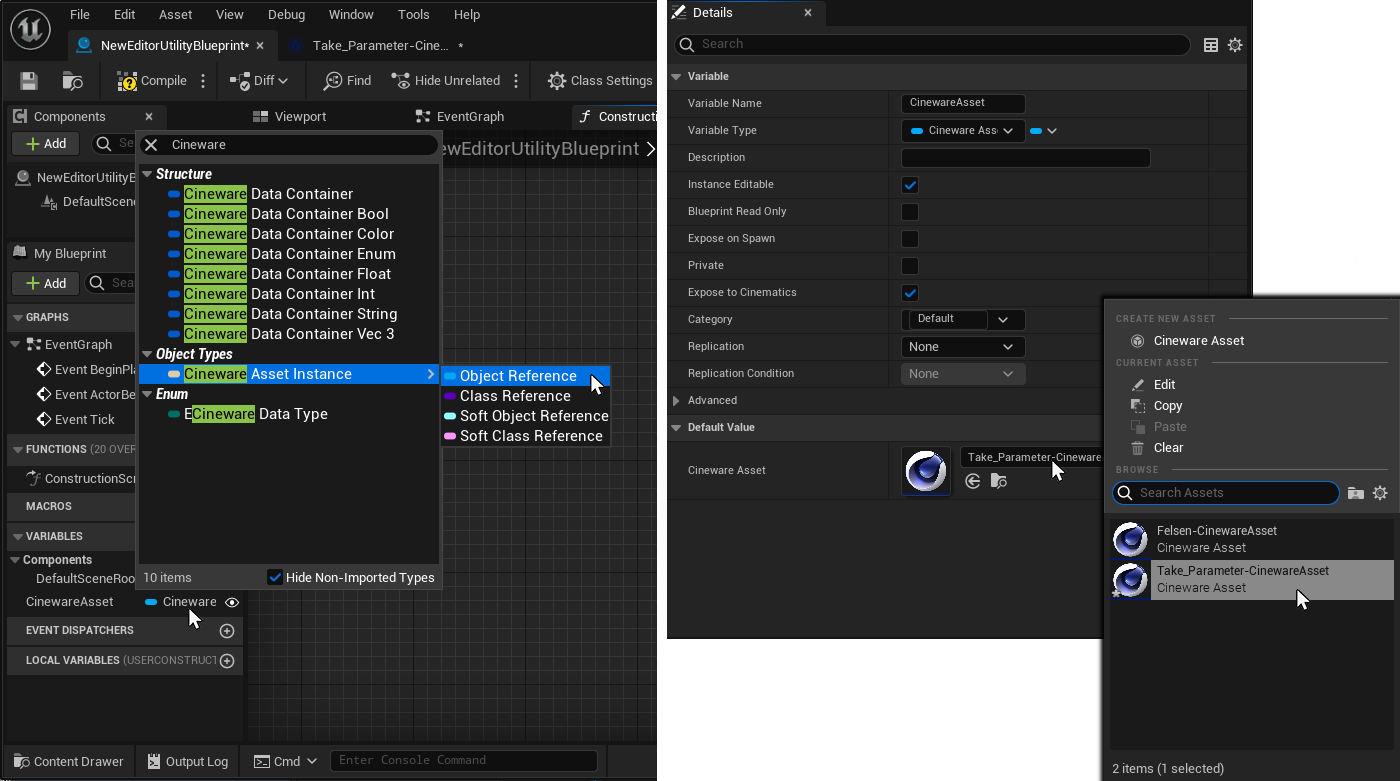
The Blueprint Editor will then open automatically. In the left-hand column you will find an option to add new variables (plus icon). The newly created variable can then be configured. The best way to do this is to search for the term Cineware to go directly to the Cineware Asset Instance category, where you can select the Object Reference. Finally, you must select the appropriate Default Value for this variable in the Details area, which can be found on the right-hand side of the Blueprint Editor by default, so that the link between the variable and the asset parameters can be established. If there are several Cinema 4D assets with transferred parameters, select the desired asset there (see image below).
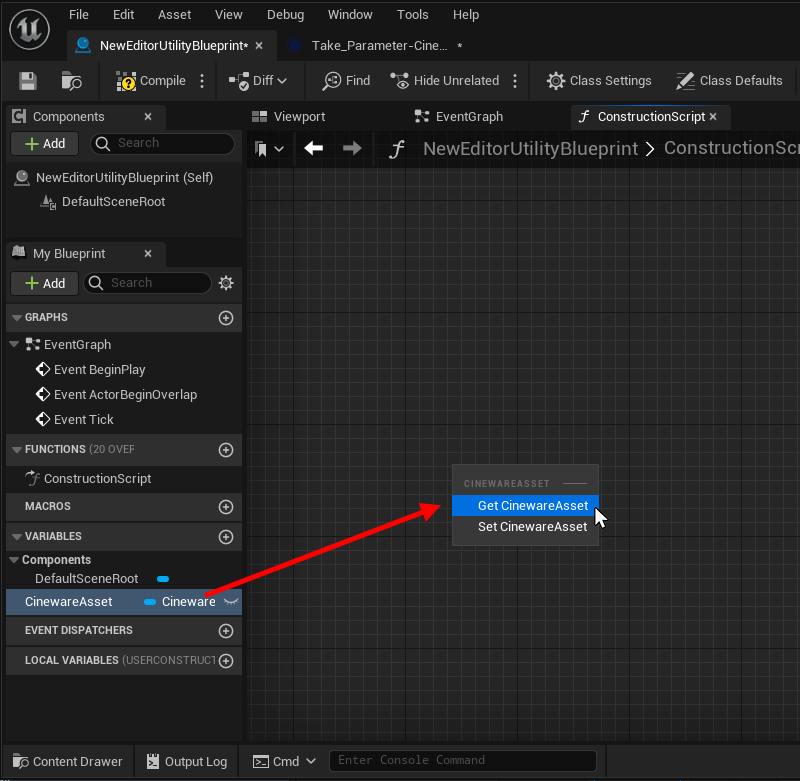
By dragging the Cineware Asset Instance variable from the right-hand column into the Blueprint Editor, an instance of this variable can be added to the circuit. This will open a context menu in which you can choose between the Get and Set methods for this variable (see image below). We chose the Get method here.
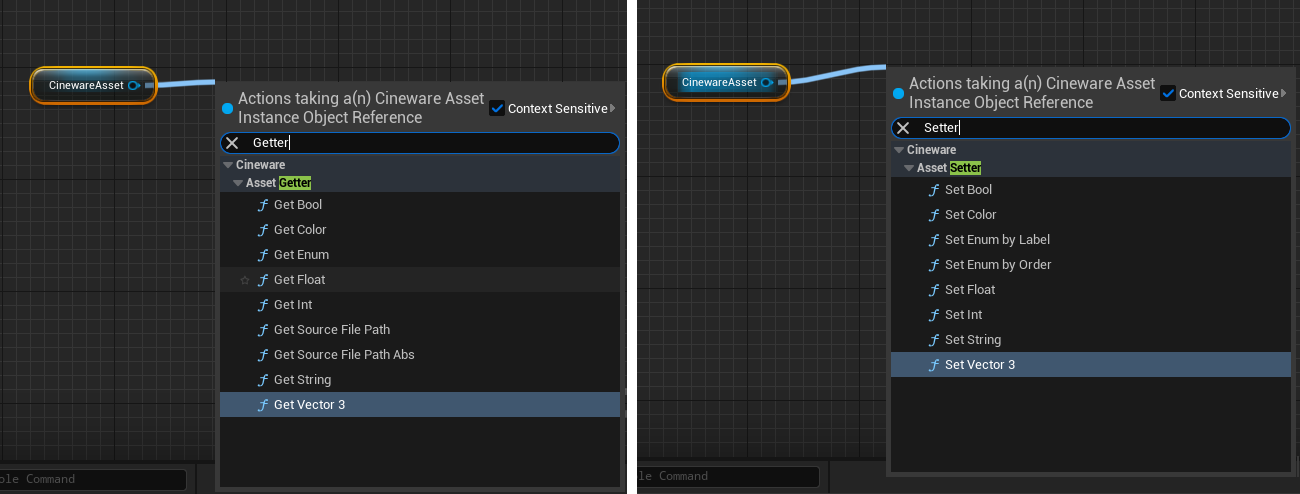
Cineware provides numerous Asset Getter and Asset Setter Nodes that can be used to read or write parameters of a specific data type. In each case, it will be necessary to know the name of the corresponding parameter and to enter it accordingly at these Nodes. The spelling must correspond to that used in the settings window already mentioned here. As confirmation that the data addressed in this way was actually found in the asset, Boole signals will generally be output as Return values at these Nodes (True for a successful operation, False for an unsuccessful one).
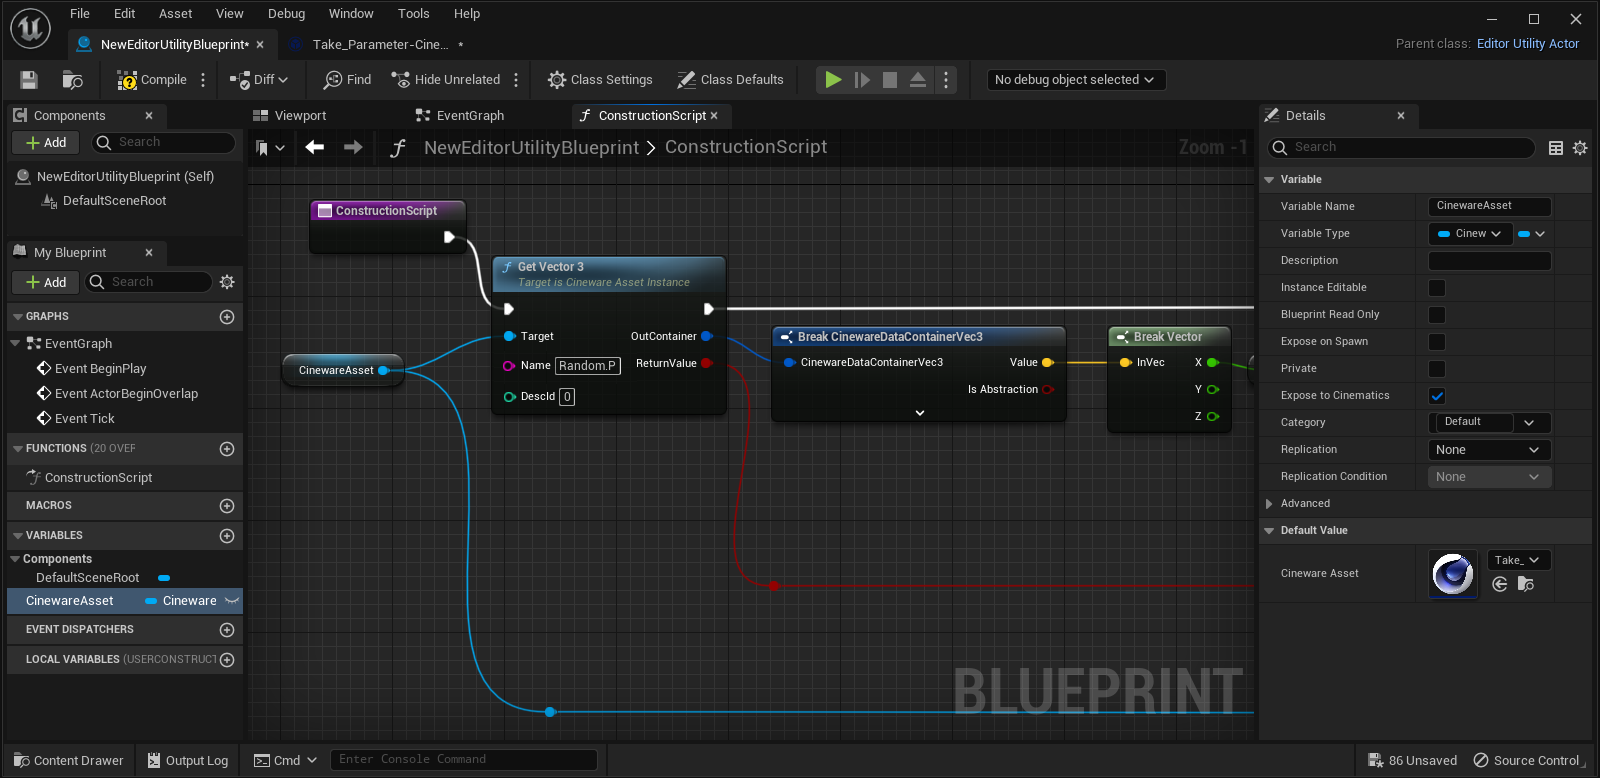
Ouput data will be made available in a special data format that can be unpacked by special Break CinewareDataContainer Nodes, as demonstrated in the following image using read-out Vector3 data as an example.
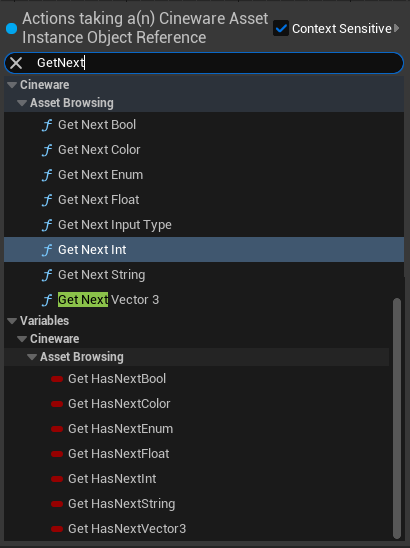
As explained above, the name of a transferred parameter must be known in order to be able to overwrite or read the corresponding value. However, if the name is not known and only its data type is known, there is also a solution for this. The existing parameters of a Cinema 4D asset can be output one after the other as part of an iteration. To do this, first use a Begin Iteration Node and follow this with the desired number of Get Next Nodes of the data type you are looking for. In addition, Get HasNext Nodes are also available, which are only suitable for checking whether or not a specific data type was found within an iteration. The following image shows the corresponding Nodes for checking and reading data types of a Cinema 4D asset within an iteration.
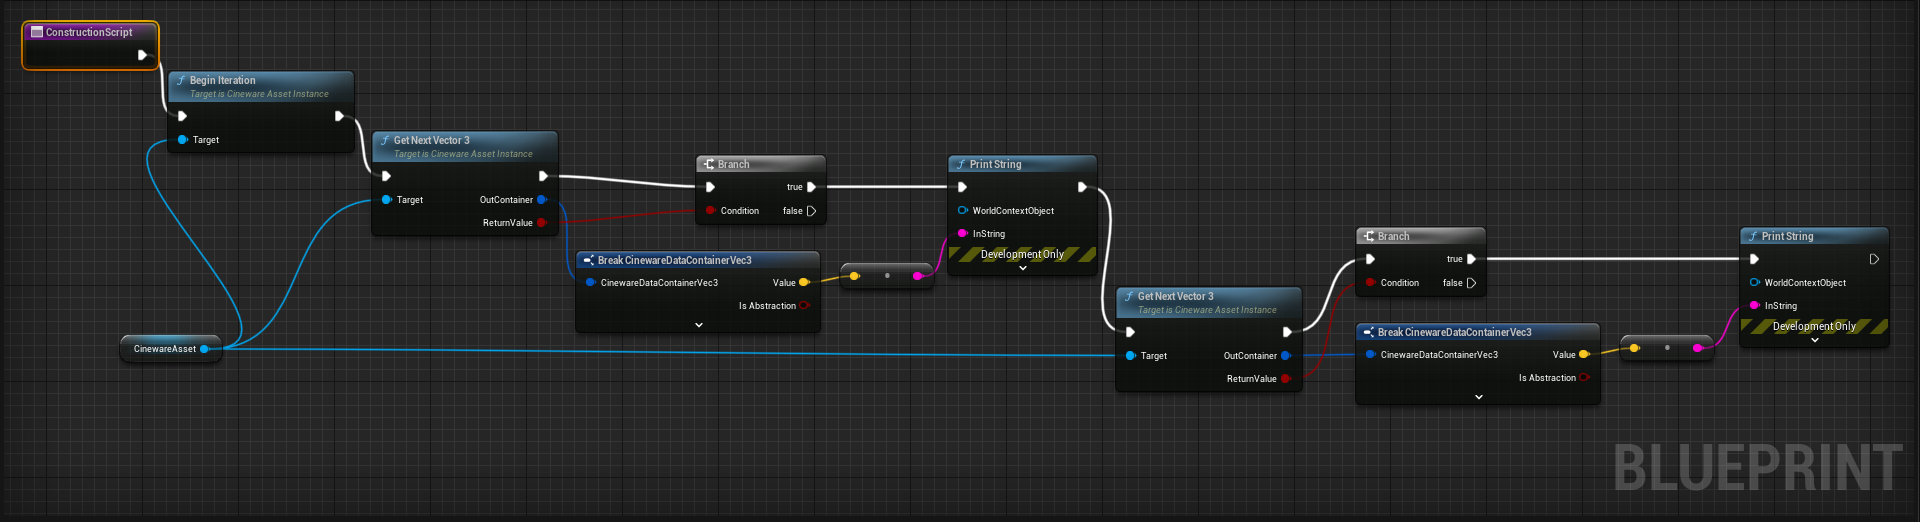
The following image gives an example of such an iterative use of Get Next Nodes within a circuit. The asset used here contains two parameters of type Vector 3, which are read out here one after the other (via Get Next Vector 3-Nodes). The corresponding values will be unpacked via Break CinewareDataContainer Vec3-Nodes and output with Print String-Nodes in the output log. However, this only happens if a positive Boole signal from the Return Value outputs is sent via the branch nodes, i.e., if vector values are actually found on the asset.
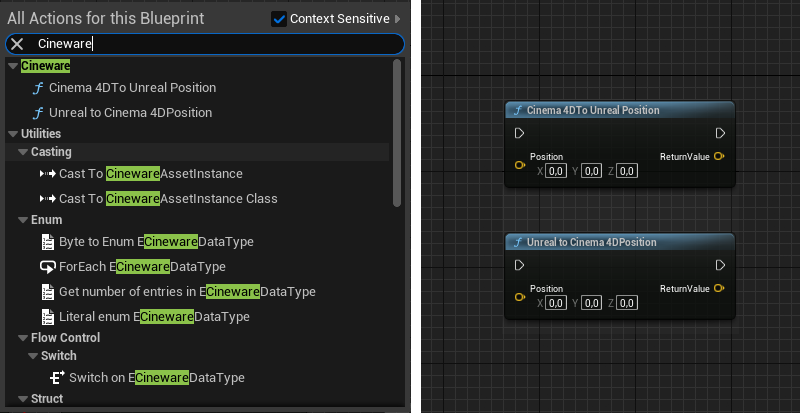
Special Node Functions
Cineware also provides two Node functions that can be used to convert position data. This can be helpful because Cinema 4D uses an axis system that differs from Unreal. In Cinema 4D, the Y-axis points upwards, in Unreal this is the Z-axis. You can find these Nodes directly in the Cineware section of the Nodes (see image below). These Nodes can also be used for runtime.