Blender Mesh Topics
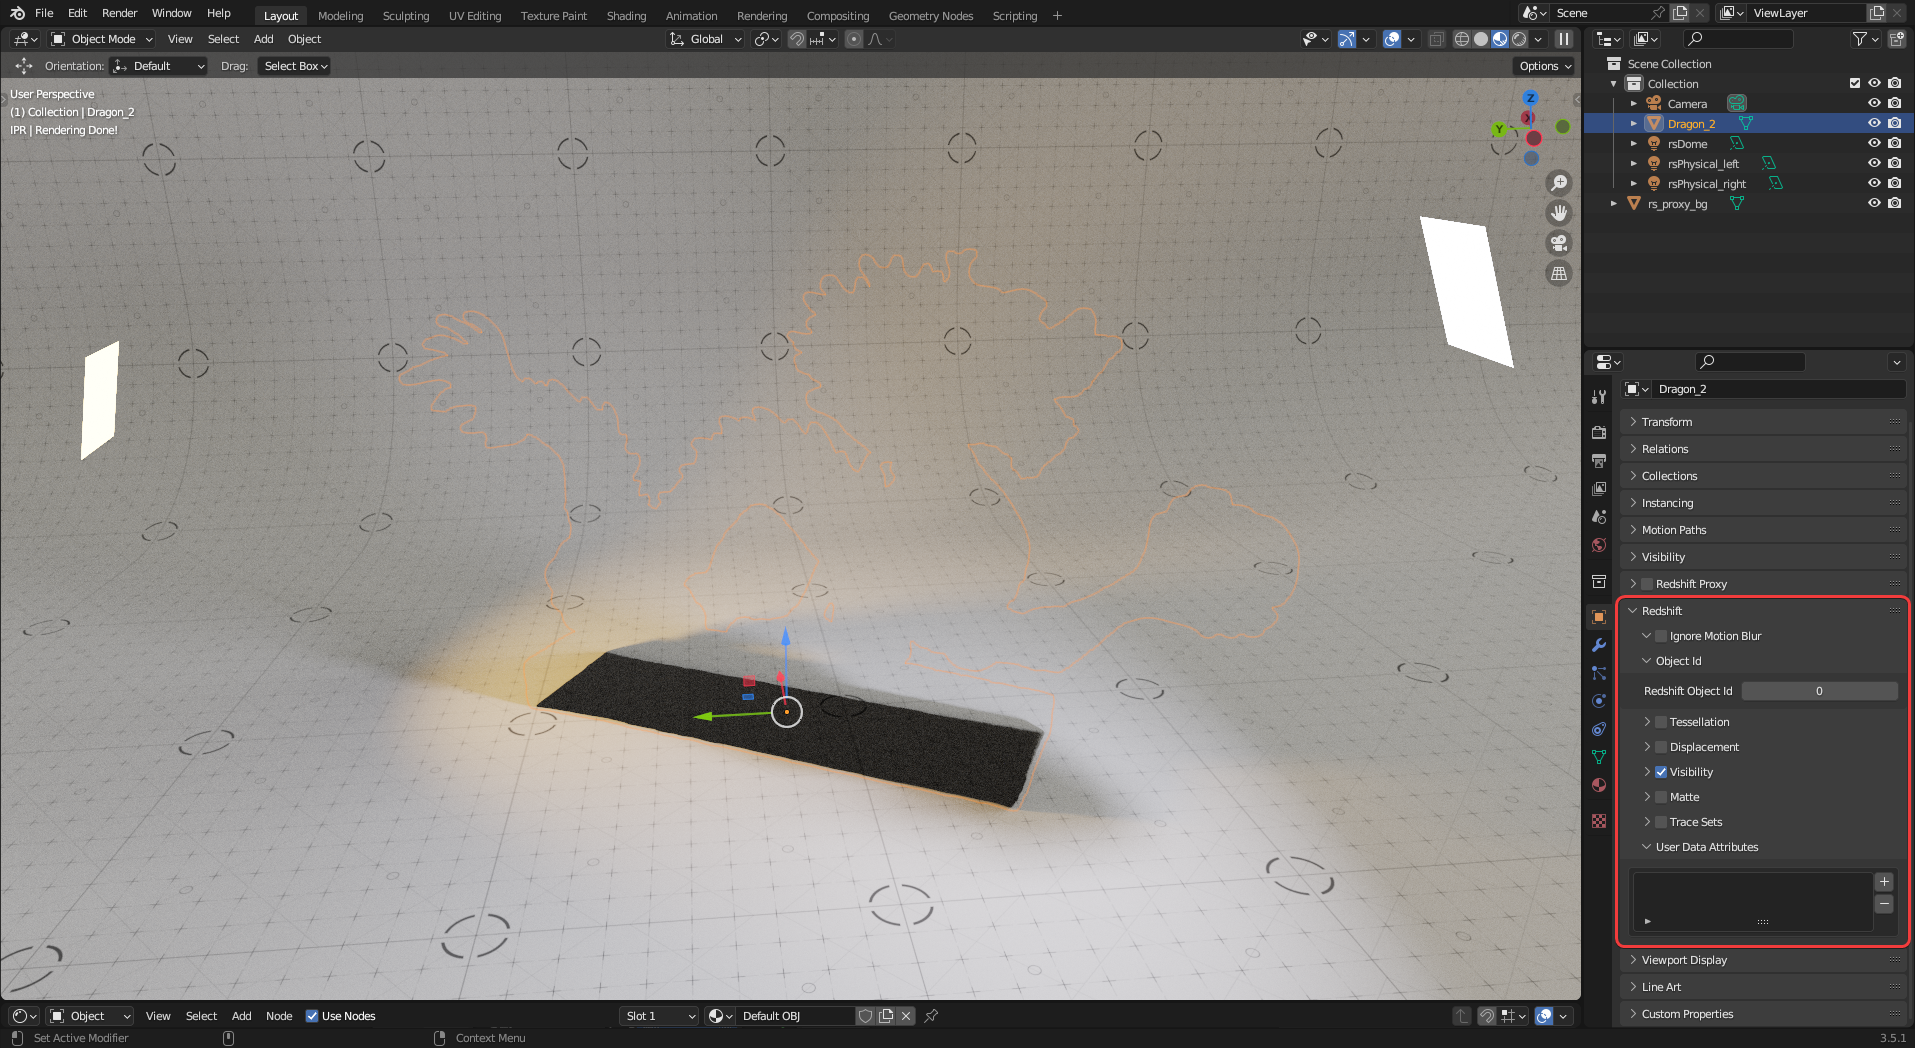
Each object in a scene has its own Redshift specific settings that can be found in the Object Properties panel as outlined below.
|
|
| Using Redshift visibility settings to disable the primary visibility of an object |
For more details on each section please see the following information or pages:
For more information please see the Proxies page.
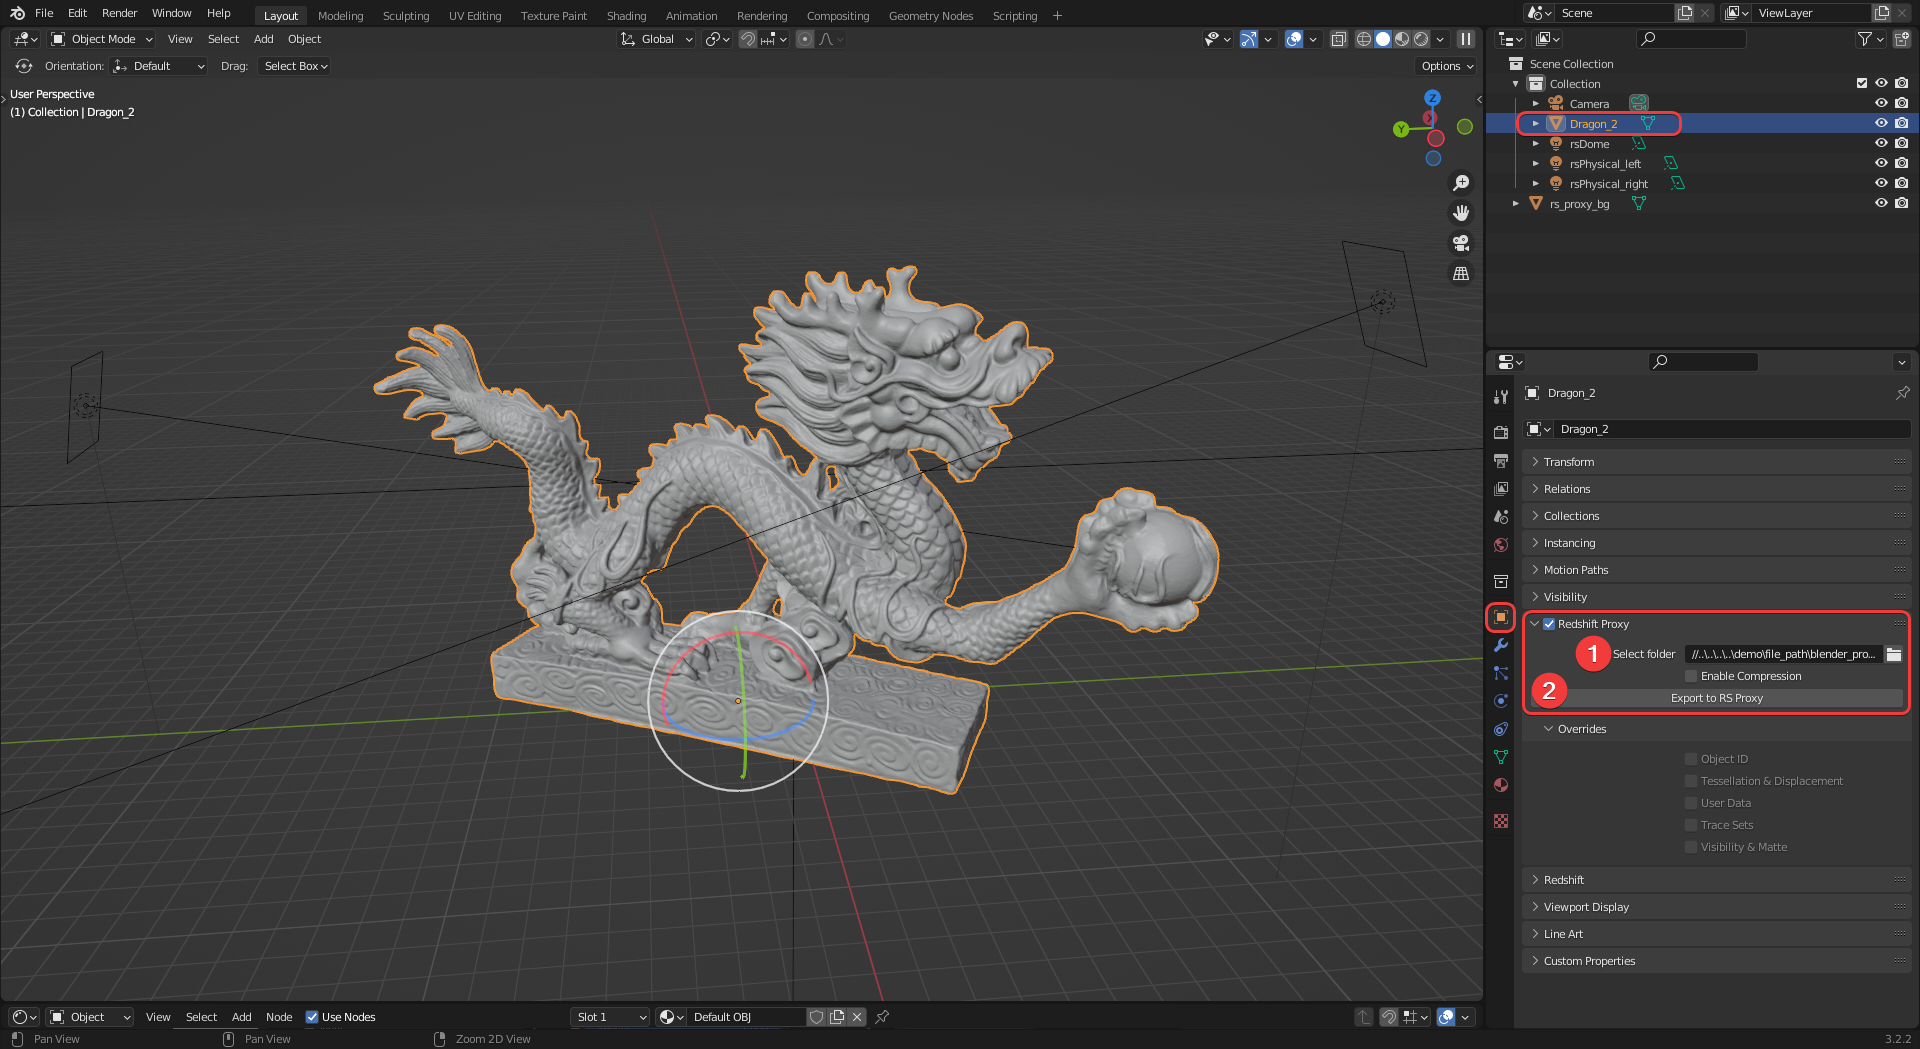
With an object selected, navigate to the Redshift Proxy section that can be found in the Object Properties panel. Then select an output folder path (1), give your proxy a name, and press the "Export to RS Proxy" button (2) as pictured in the image below.
This may take some time depending on the complexity of your proxy.
|
| Exporting a Redshift proxy file |
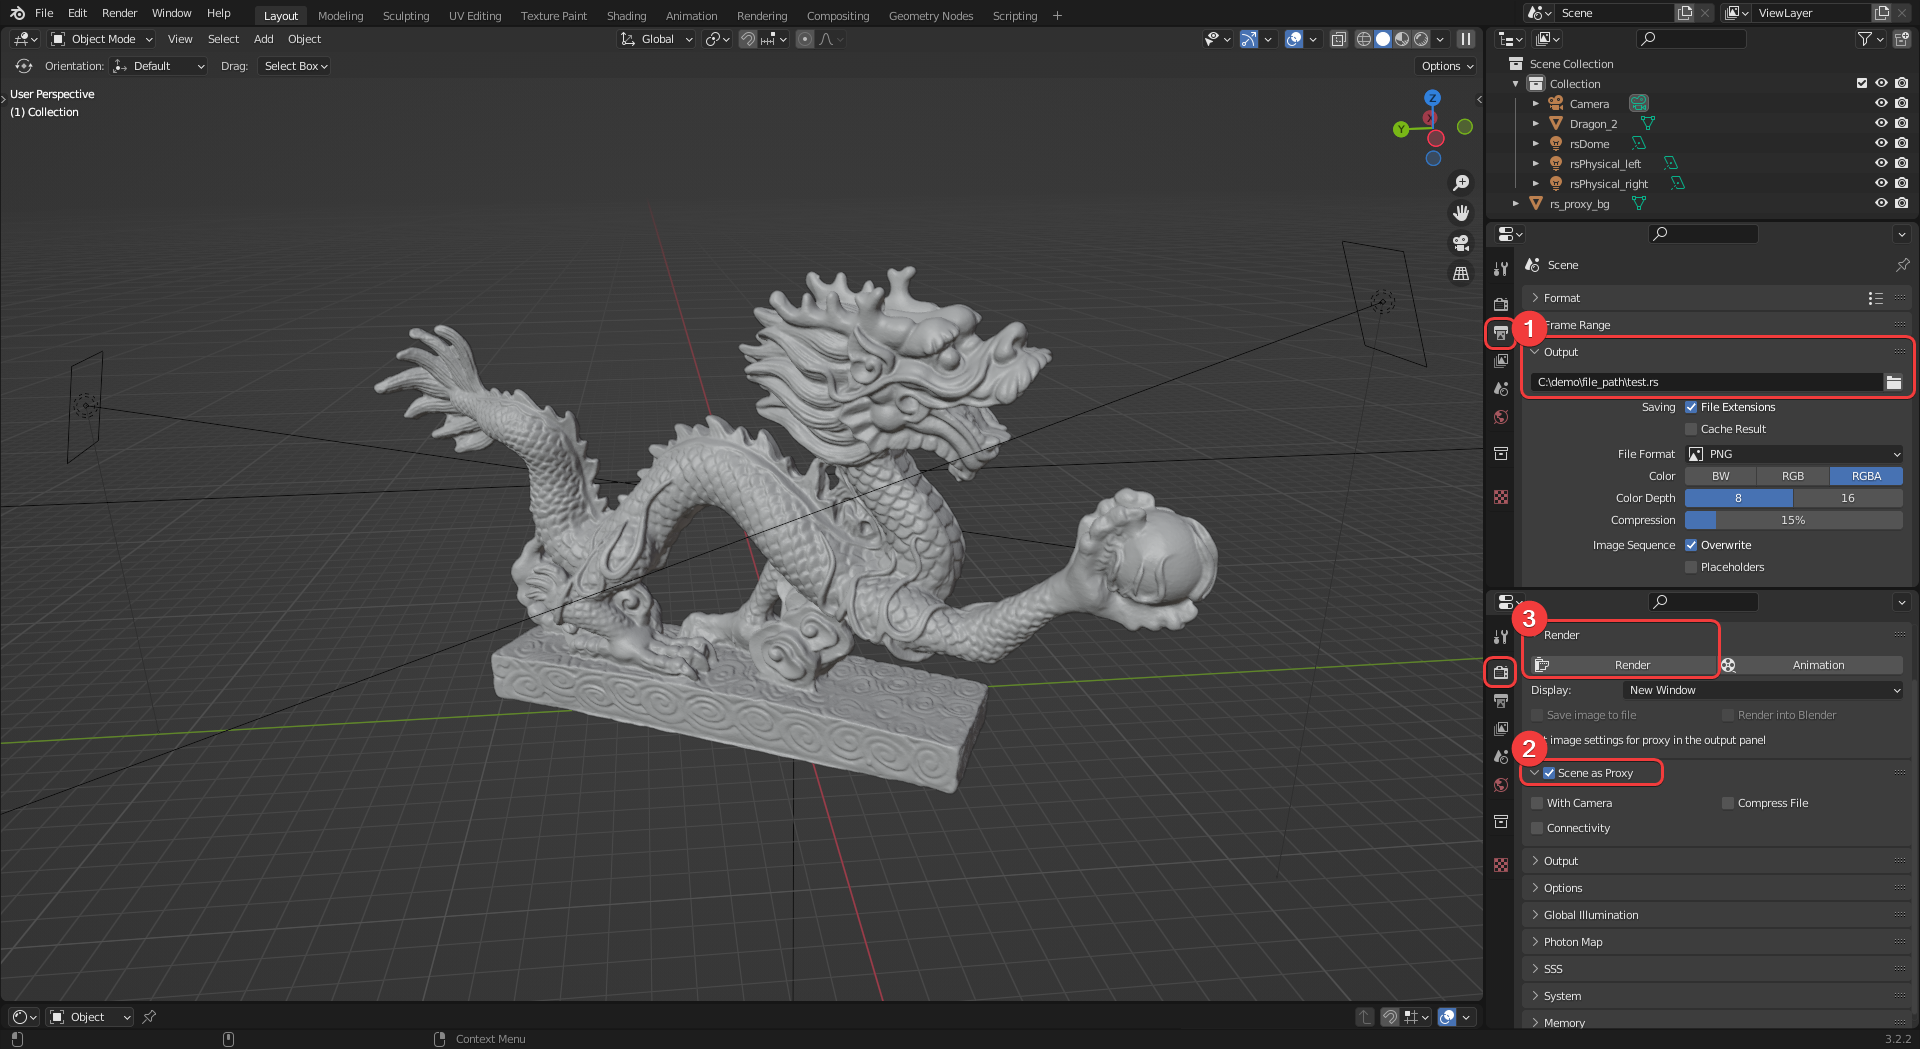
A different workflow is required to export an entire Blender scene as a proxy as demonstrated in the example image below. First set an Output Path (1) for the proxy in the Output Properties panel. Then open the Render Properties panel and enable the option 'Scene as Proxy' (2). Finally click the Render button (3) to start the proxy export process, the render view will open but an image will not be rendered, instead your scene will be exported as a proxy to the output path currently specified.
|
| Exporting an entire Blender scene as a Redshift proxy file |
To load a Redshift proxy into your scene use the Add > Mesh menu and select"Add RS Proxy" (1), this will add an empty proxy to your scene.

|
| Adding a placeholder for a Redshift proxy |
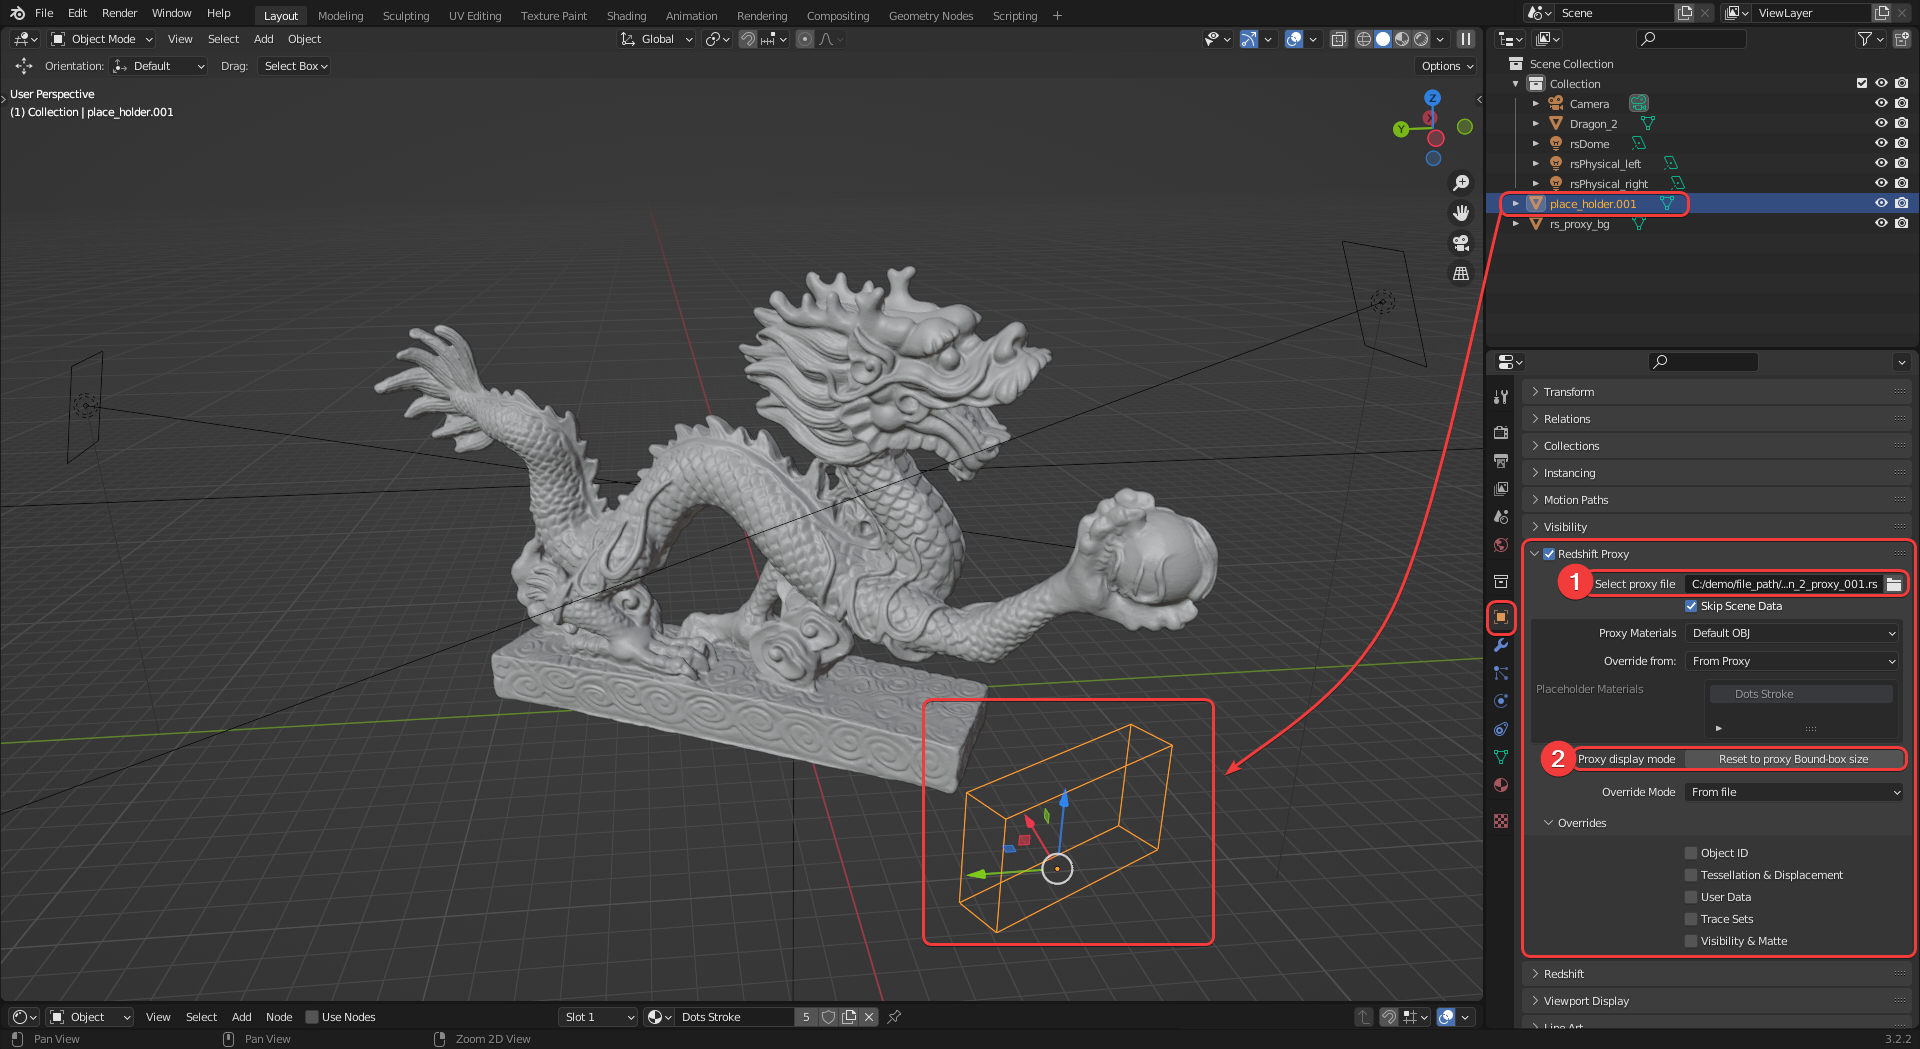
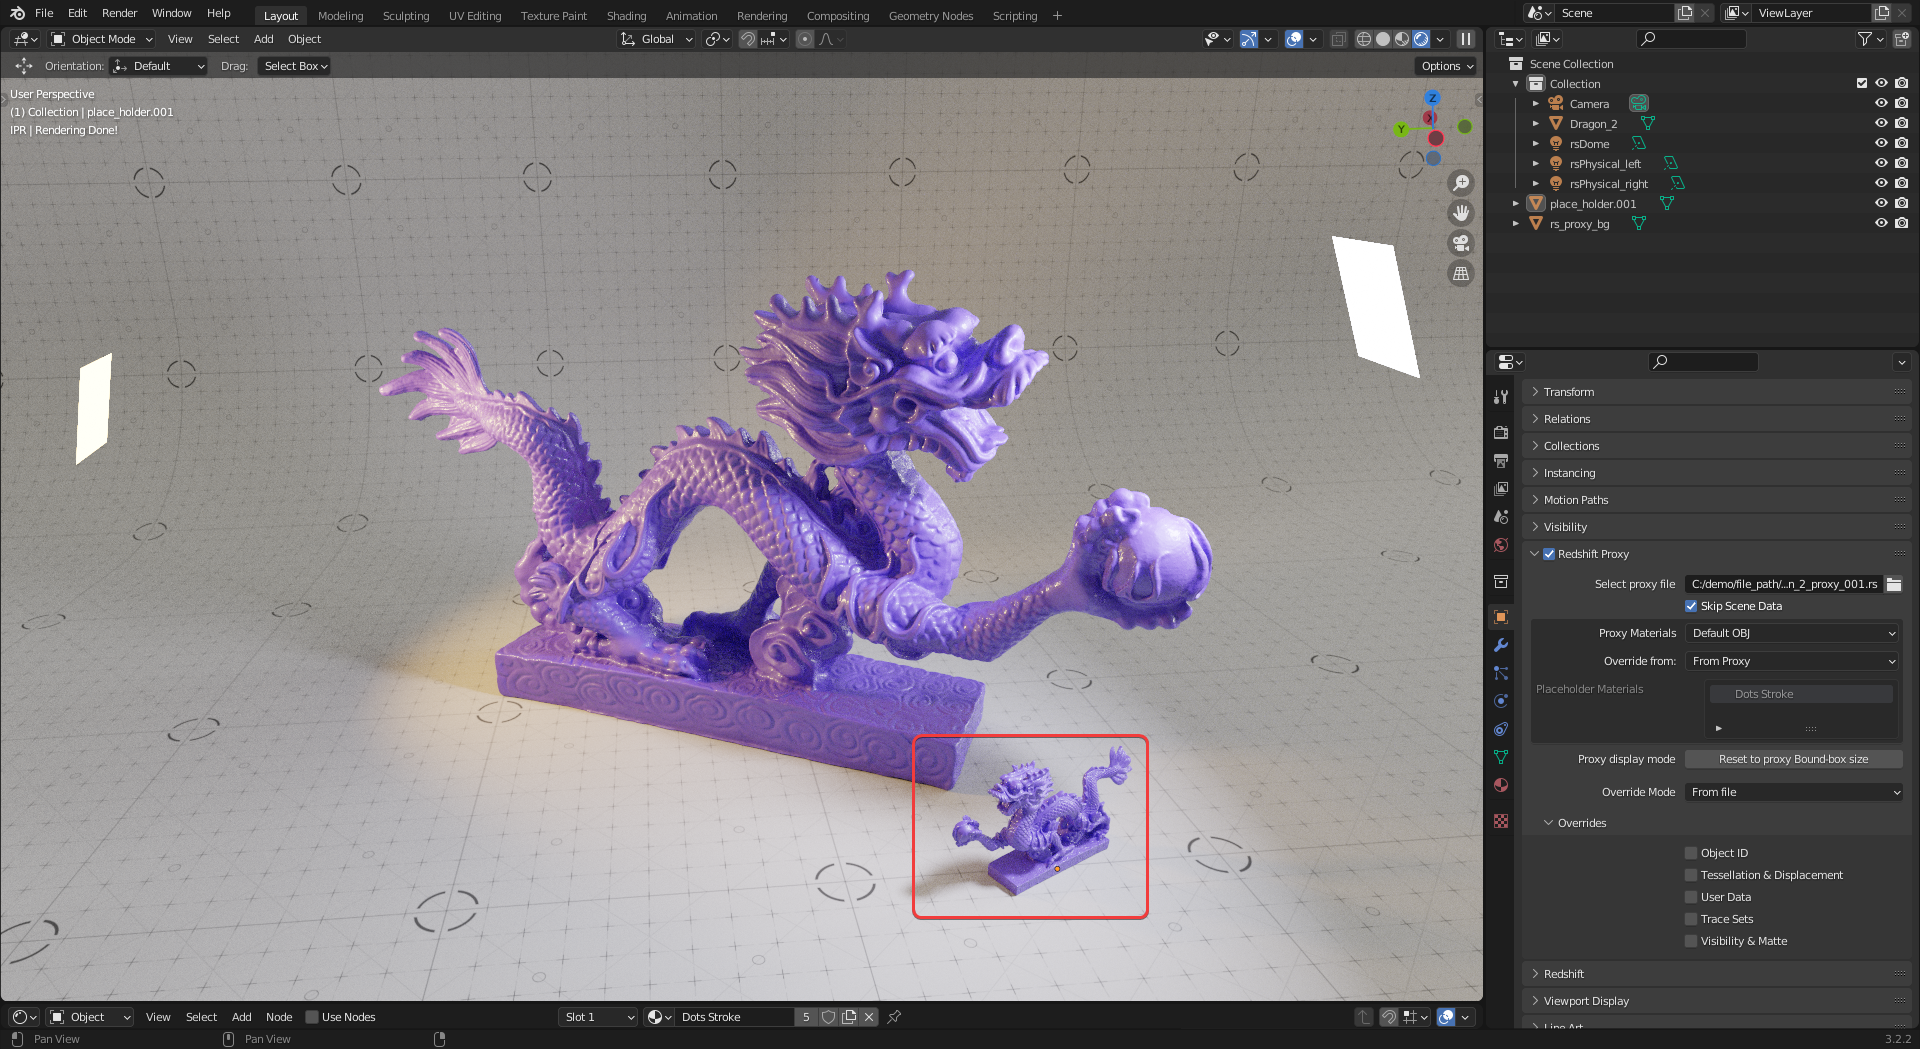
On this new placeholder object, navigate to the Redshift Proxy section of the Object Properties panel and select a proxy from your computer (1) as pictured below. The "Reset to proxy Bound-box size" button (2) can be used to update the placeholder objects bounding box to the size of the proxy object, this is helpful to get an understanding of the placement of the proxy in the scene.
|
| Setting up a Redshift proxy |
After setup, the proxy will render correctly but the viewport and scene can respond more quickly to changes because the proxy is loaded at render time and is saved outside the scene.
|
| Rendering a Redshift proxy |
Redshift supports rendering points from Geometry Nodes natively in Redshift 2025.5 and newer. This can be used with various nodes like "Distribute Points on Faces." It supports instancing of spheres, meshes, and Redshift Proxies.
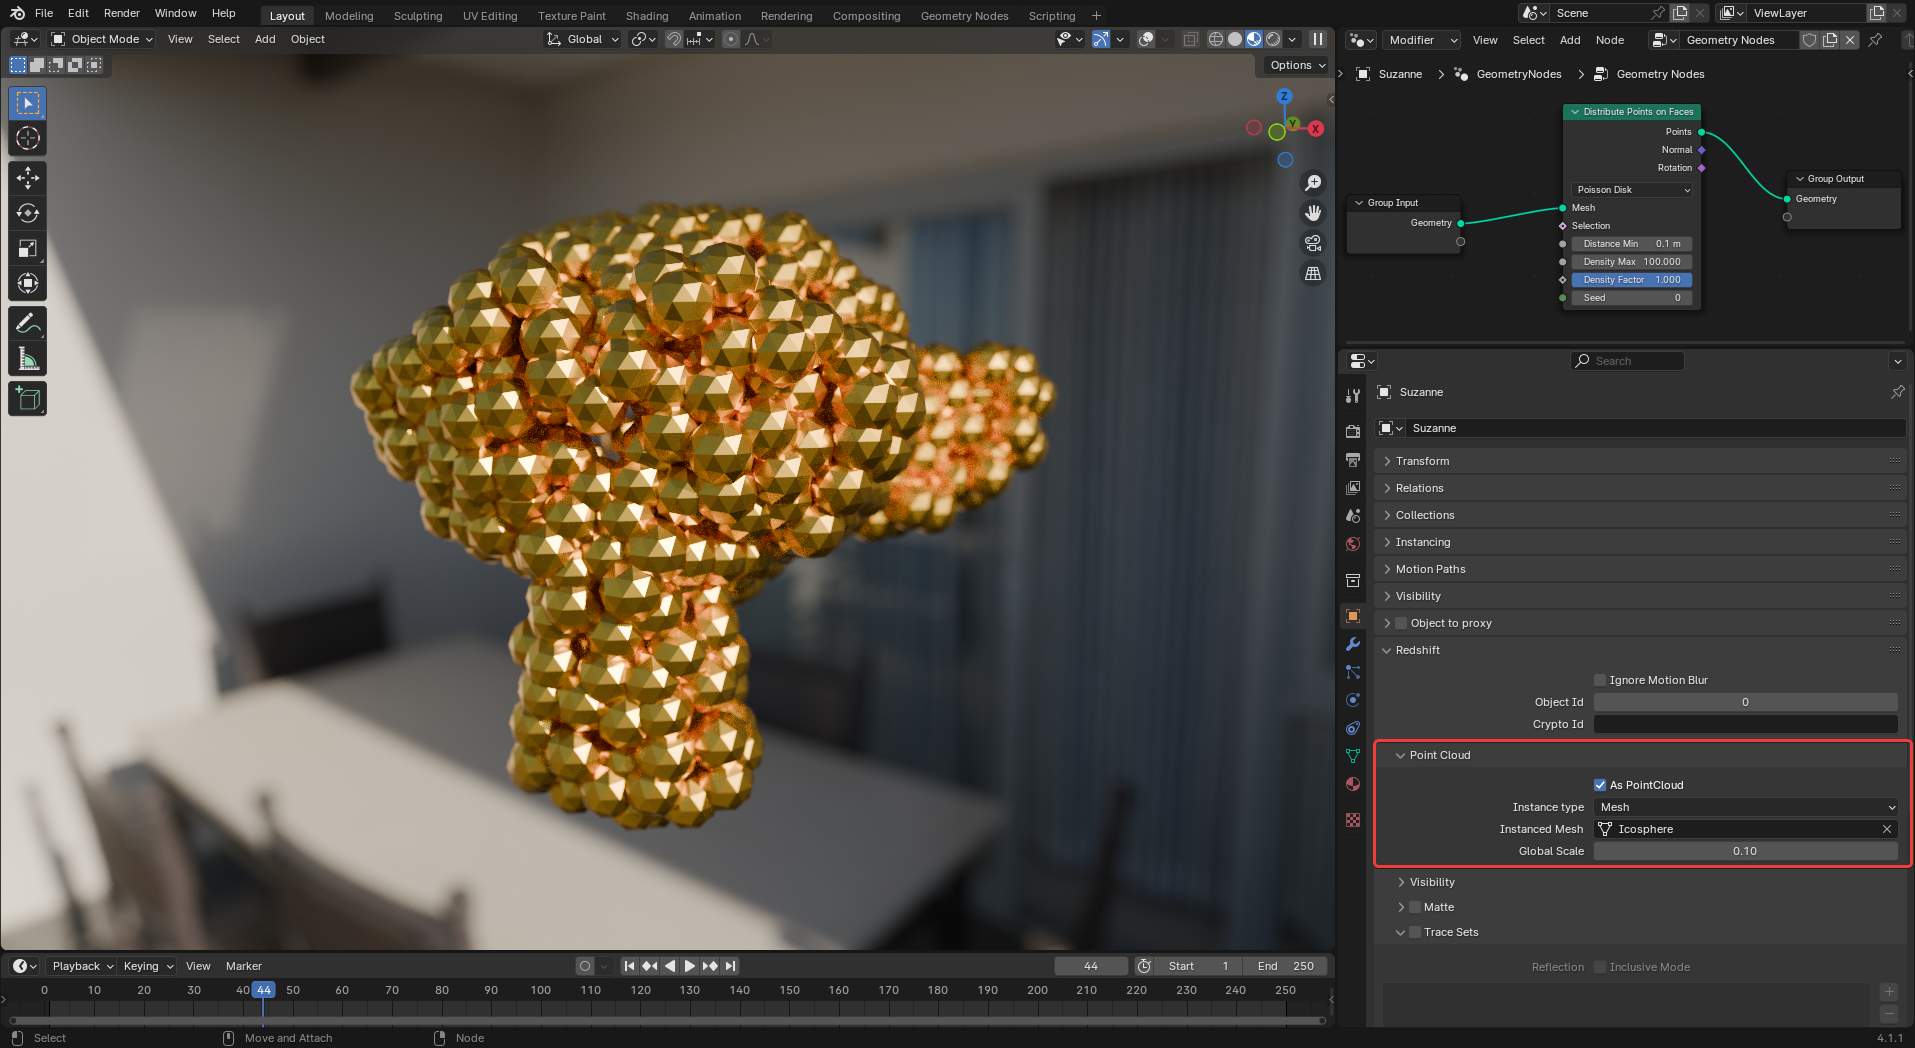
|
| Point Cloud example |
By default Redshift tries to detect and render point clouds automatically but the option can also be manually enabled on objects with point cloud data in the Object Properties tab. Without manual setup, Blender renders the points as instanced spheres.