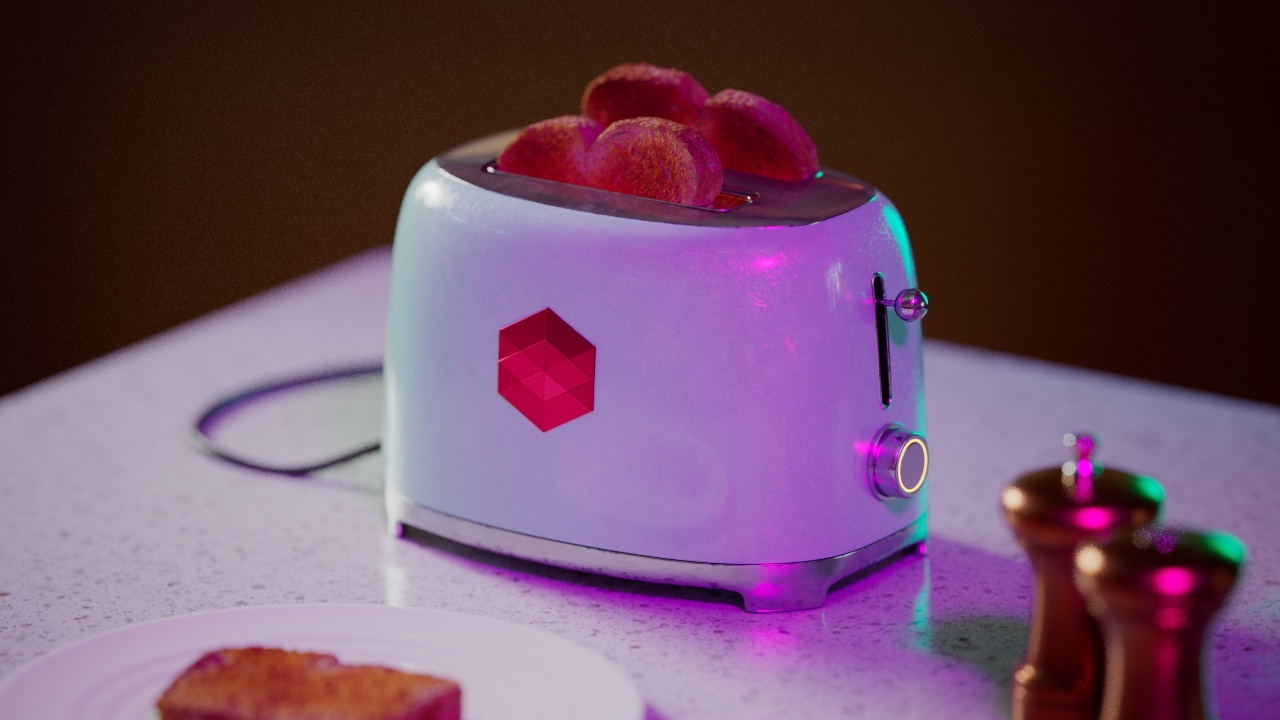
PostFX
Overview
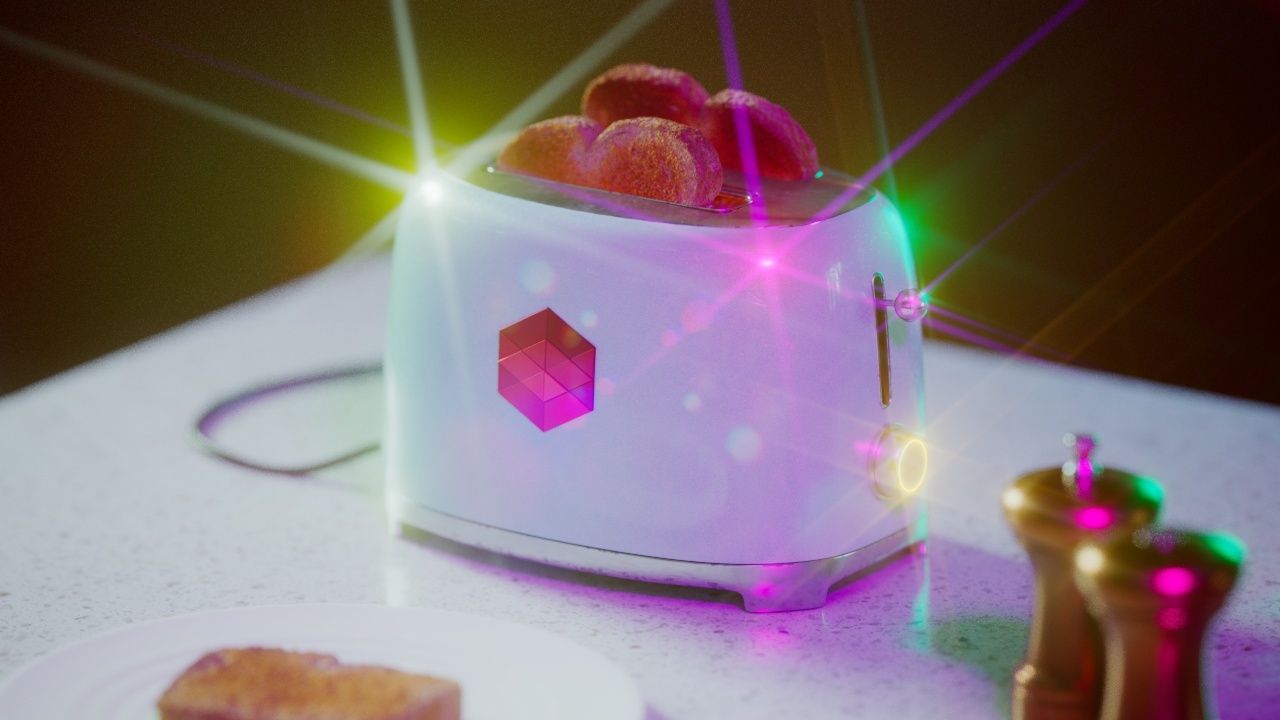
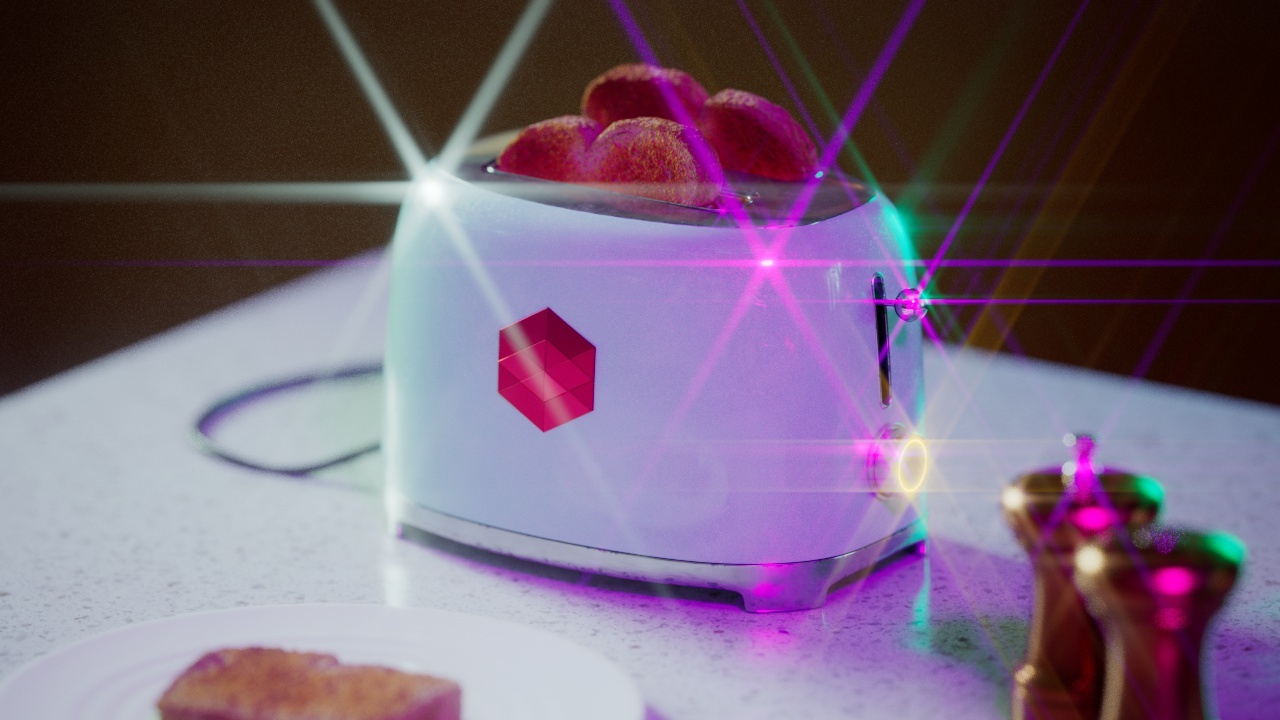
Maximum PostFX
PostFX consists of several post processing features available as optional effects in the Redshift Render View. These can range anywhere from broad image tweaks like saturation and colors curves to adding visual effects like light blooms, flares, and streaks. All of these features give you great flexibility at previewing what your final rendered image could look like after final composite.
LUT
LUTs (Look-Up Tables) apply a color transform to your render. A LUT file changes the RGB information in your render to a new range of colors to match a certain look as defined inside a LUT file.
Redshift supports .cube and .3dl LUT file formats and comes with 125 free LUTs.
Adjusting the strength of a LUT
LUT Parameters
LUT Location
The LUT location determines which folder the LUT files will be loaded from.
LUT File
This dropdown menu lets you select which LUT is applied.
Convert to log space before applying LUT
When enabled your rendered image will be converted to a logarithmic color space before the LUT is applied.
Apply color management before LUT
When enabled your Color Management options will be applied to the rendered image before the LUT is applied.
LUT Strength
The LUT strength controls how heavily the color transform is applied. A value of 0 means no color changes occur.
|
|
|
| LUT Strength: 0
LUT File: Fuji Neopan (Black & White) |
0.5 | 1 |
Color Controls
The Color Controls PostFX section lets you make overall color and brightness adjustments to your rendered image.
Adjusting RGB curve
Color Controls Parameters
Exposure
Here you can increase or decrease your exposure.

|
|

|
| Exposure: 0 | 1 | -1 |
Contrast
Here you can increase or decrease your contrast.
|
|

|

|
| Contrast: 0 | 0.2 | -0.2 |
RGB Curves
The RGB curves feature allows you to easily tweak the brightness of your image on either all color channels or the red, green, and blue channels individually.
|
|
|
| Color Curves: Neutral | Red channel strong adjustment | Green / Blue subtle adjustment |
Photographic Exposure
Photographic Exposure lets you control the look of your image using the same kind of familiar camera controls that you are used to like ISO, f-stop, and shutter speed. Here you can also add a vignette, tonemap, and adjust the saturation of your image.
Using Photographic Exposure is important when working with certain features of the renderer such as IES lights and the physical sun/sky. The reason is that these features can generate very high light intensities. For a more in-depth look please see the Photographic Exposure page.
Toggling Photographic Exposure and adding a vignette
Photographic Exposure Parameters
Film Speed (ISO)
Film Speed controls the sensitivity of the film. Higher ISOs mean the film is more sensitive and will capture more light in a short amount of time.

|
|

|
| Film Speed (ISO): 100 | 10 | 200 |
Shutter Time Ratio
Shutter Time Ratio controls how long the shutter stays open. A value of 30 means 1/30, i.e. a 30th of a second. The smaller the value, the longer the shutter stays open and the brighter the image and vice-versa.

|
|
|
| Shutter Time Ratio: 100 | 10 | 200 |
f-Stop
f-Stop is a divider of the aperture of the camera (the hole through which light come onto the film). If the aperture of the camera is 1.0, an f-Stop of 2.0 means 1.0/2.0. An f-Stop of 16.0 means 1.0/16.0. So the larger the f-Stop value the smaller the aperture. and less light enters the camera and lands on the film, so the image is brighter. The larger the f-Stop, the dimmer the image.
|
|
|
| f-Stop: 8 | 1 | 22 |
Whitepoint
Whitepoint controls what is considered "white" in the image. The color you choose for "Whitepoint" is the color that will be removed from the image. So if your image is slightly reddish you should make "Whitepoint" a bit red (for example [1.0, 0.9, 0.9]) in order to remove the red tint.

|
|
|
| Whitepoint R / G / B: 1.0 / 1.0 / 1.0 | 0.2 / 1.0 / 1.0 | 1.0 / 1.0 / 0.2 |
Vignetting
Not supported with fisheye, orthographic, spherical, or cylindrical camera projection.
Vignetting controls the darkening around the edges of the image, simulating imperfections in real world lenses. The higher the Vignetting value, the more darkening there will be around the edges of the image.

|

|
|
| Vignetting: 0 | 200 | 1000 |
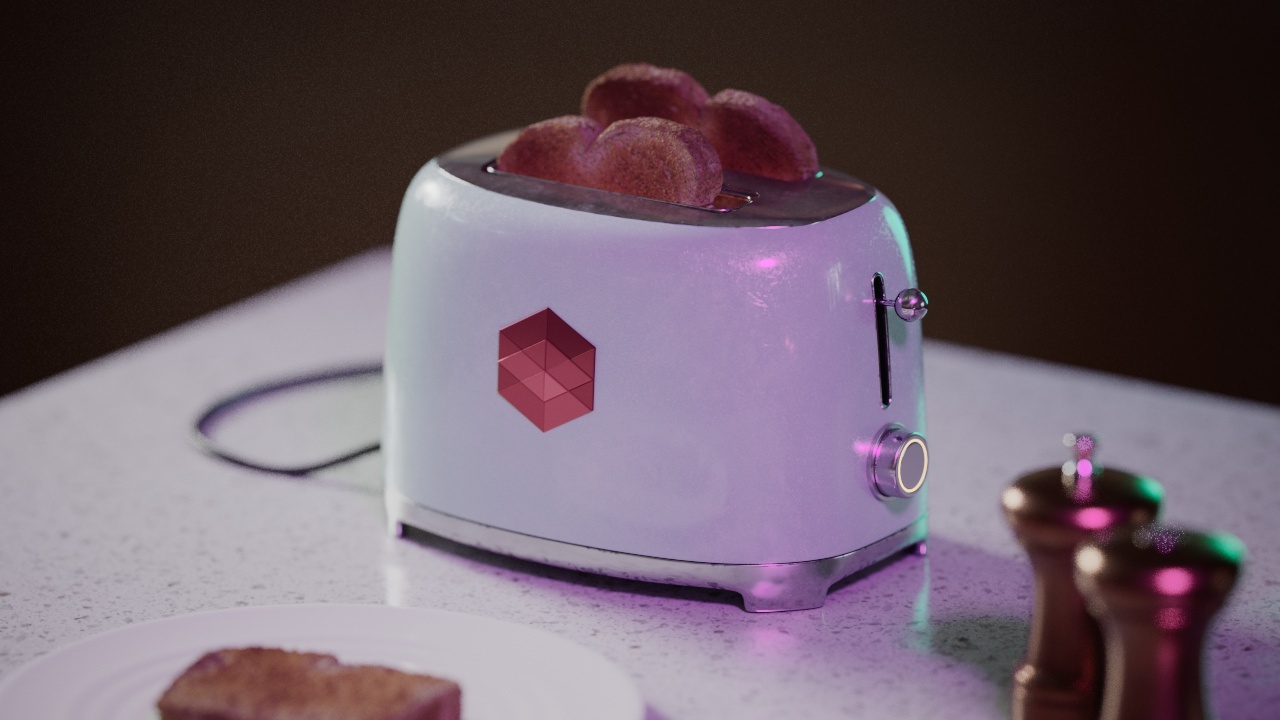
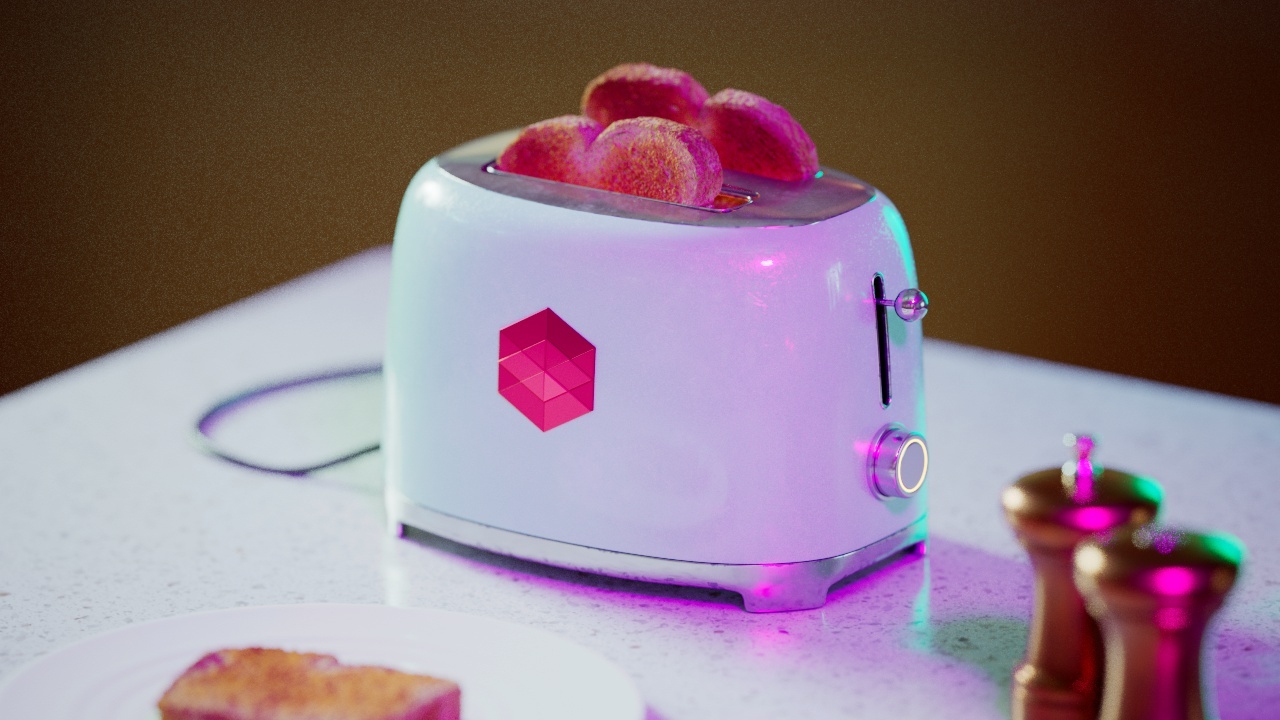
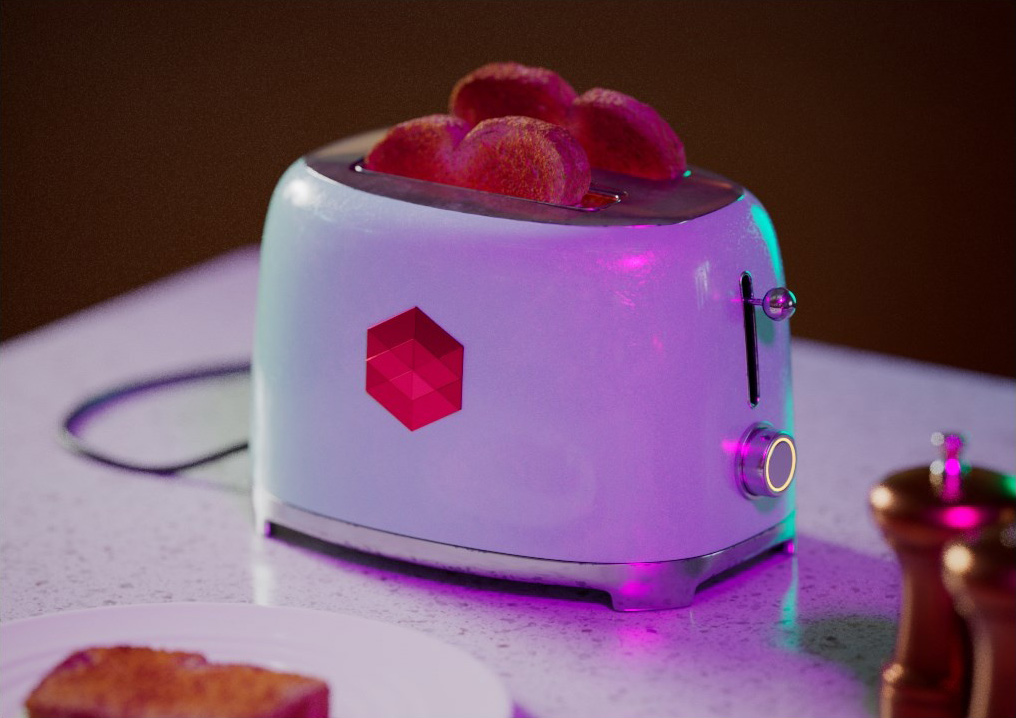
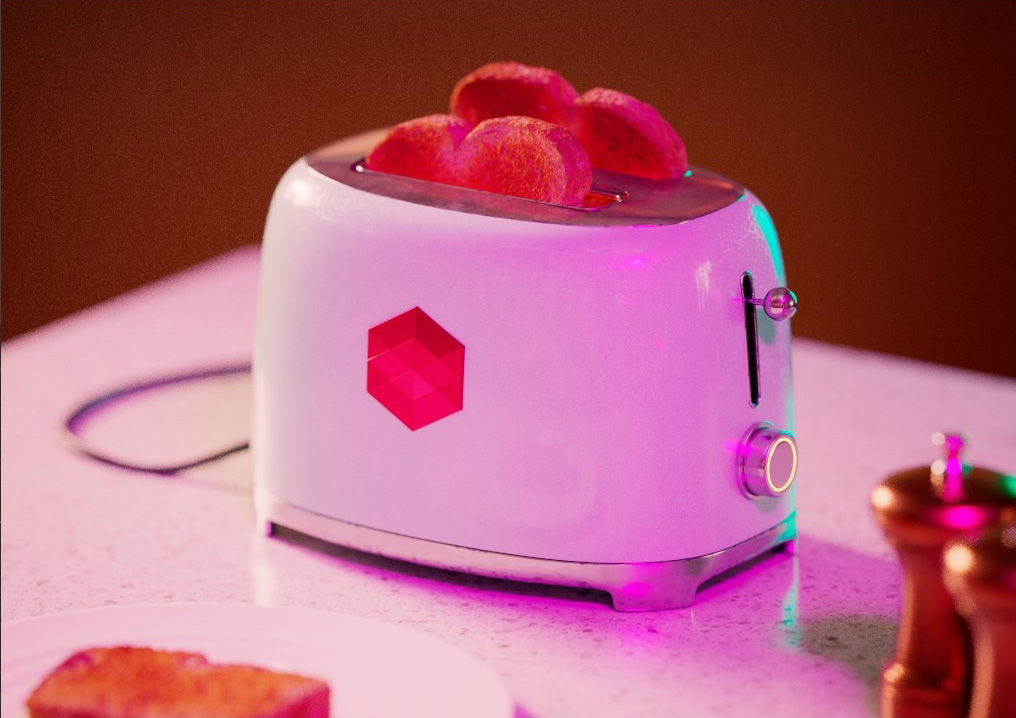
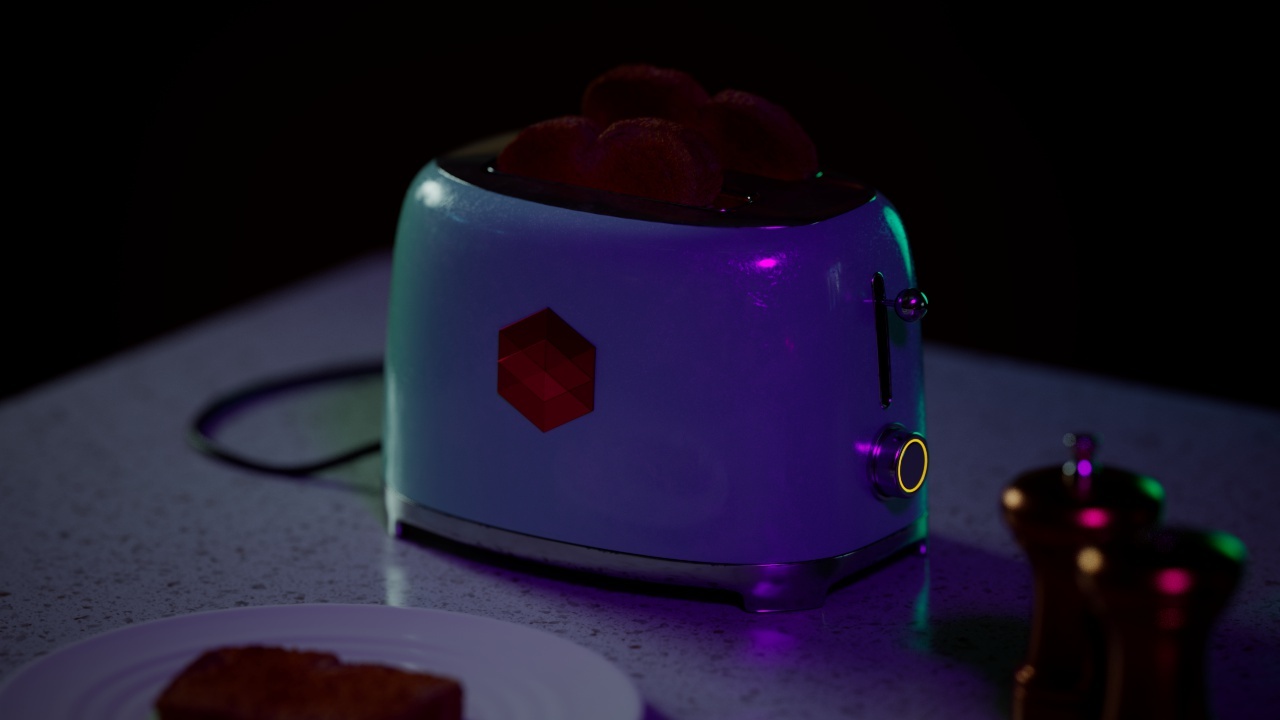
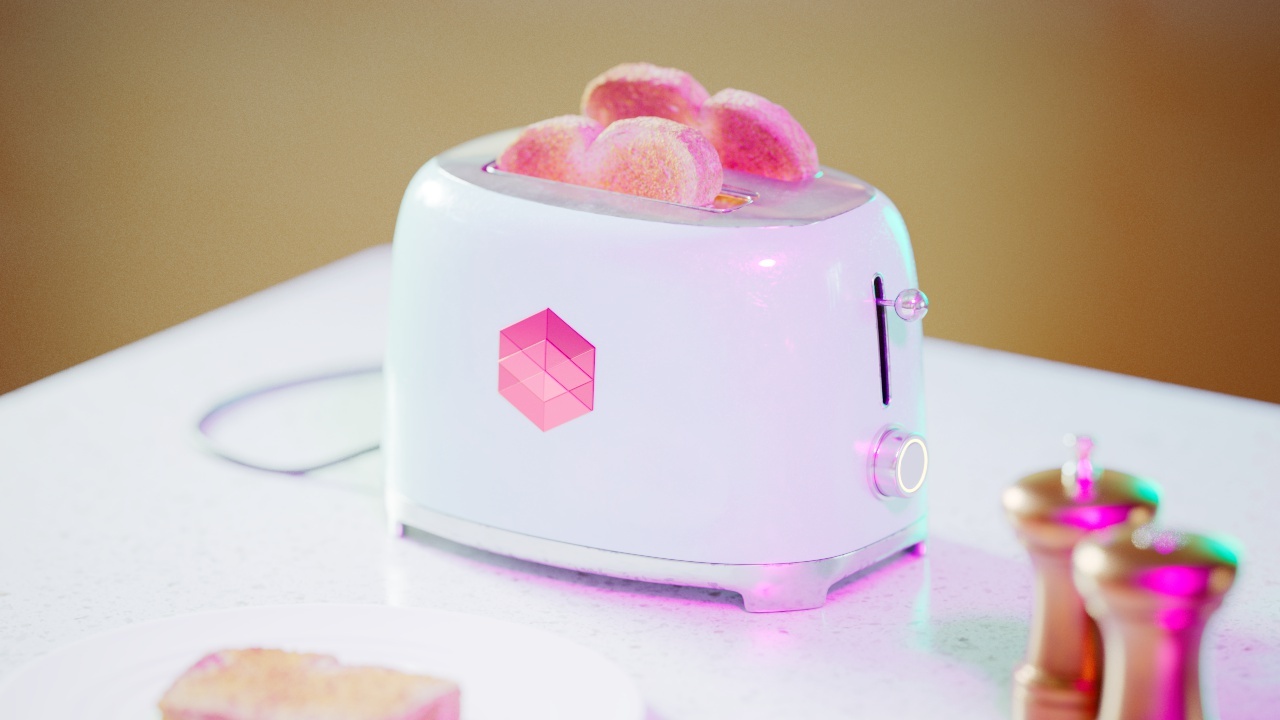
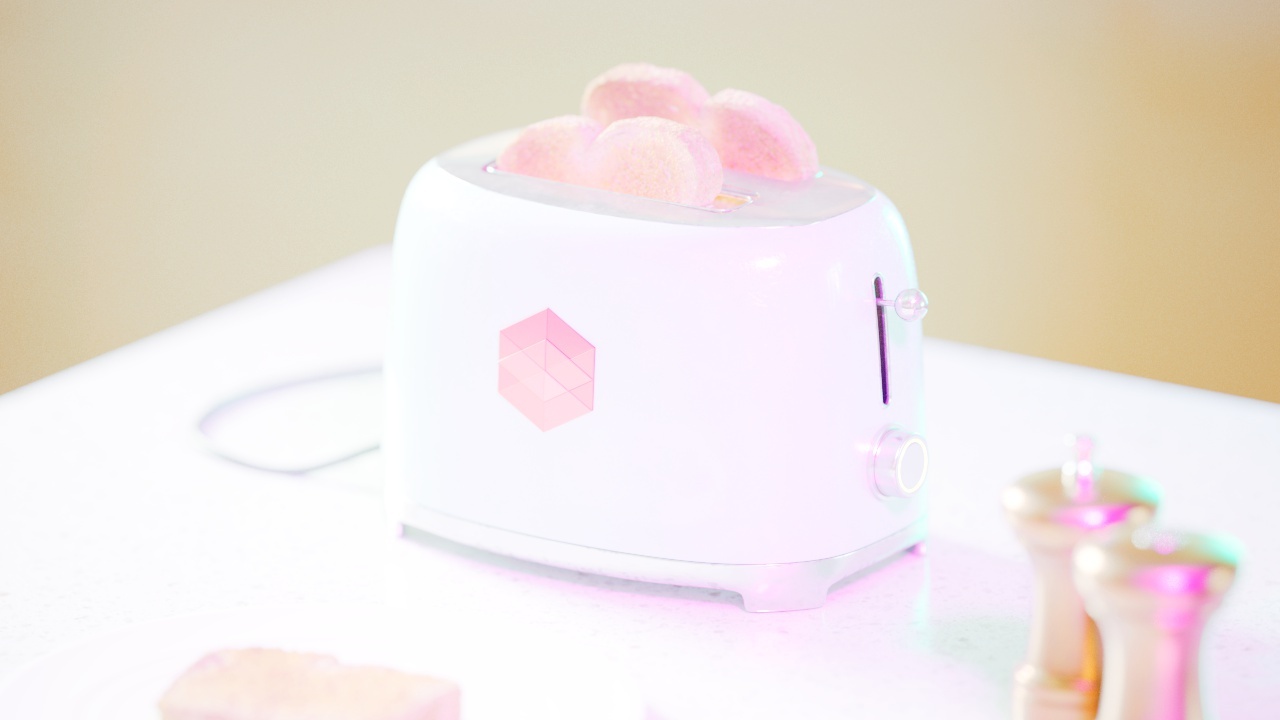
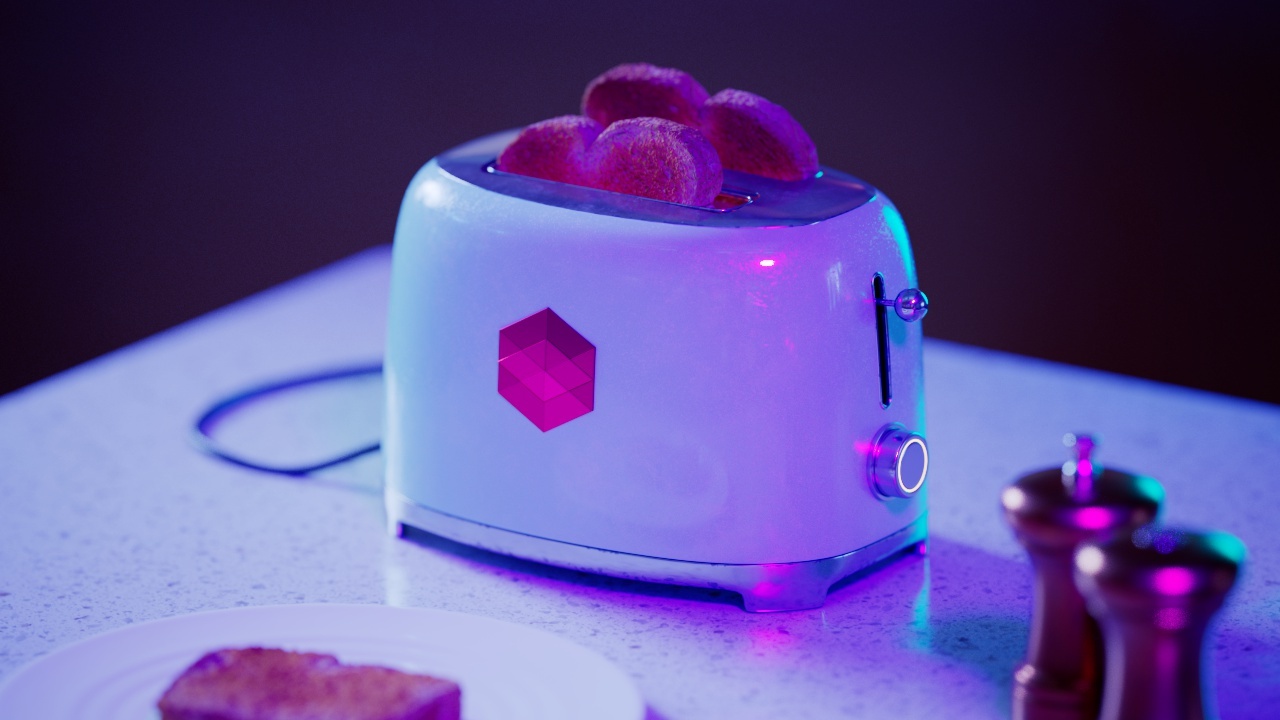
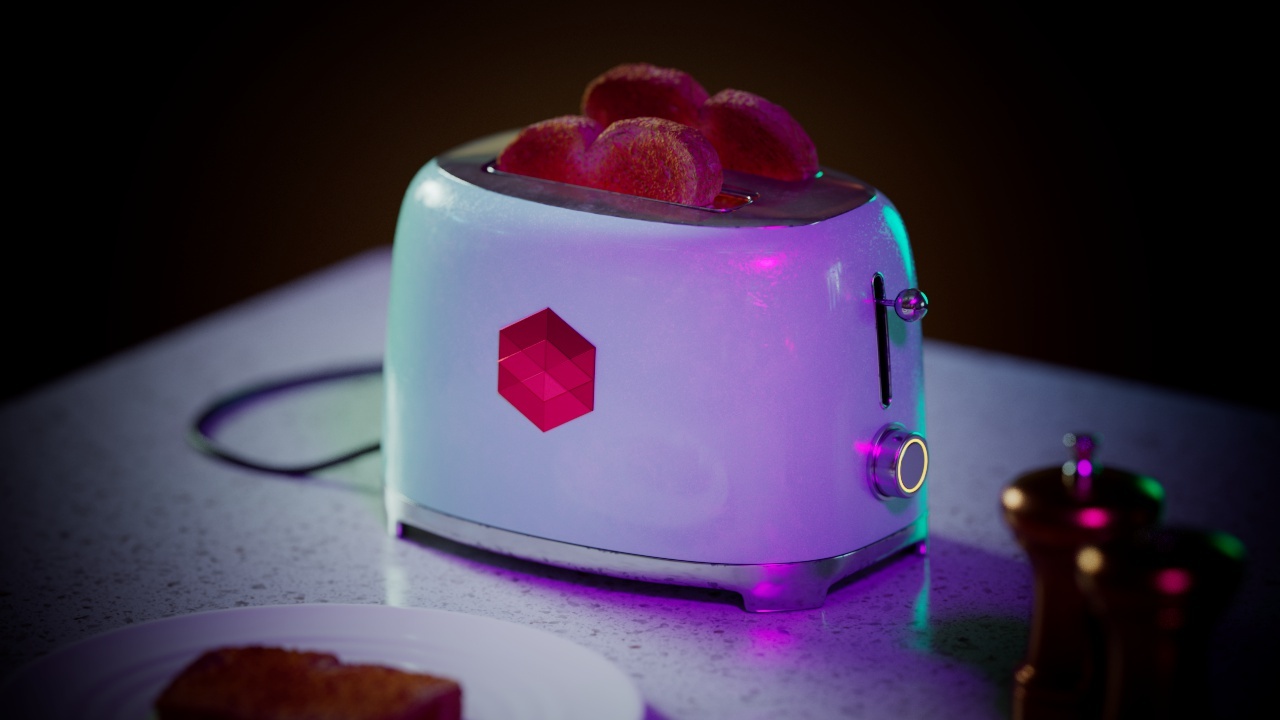
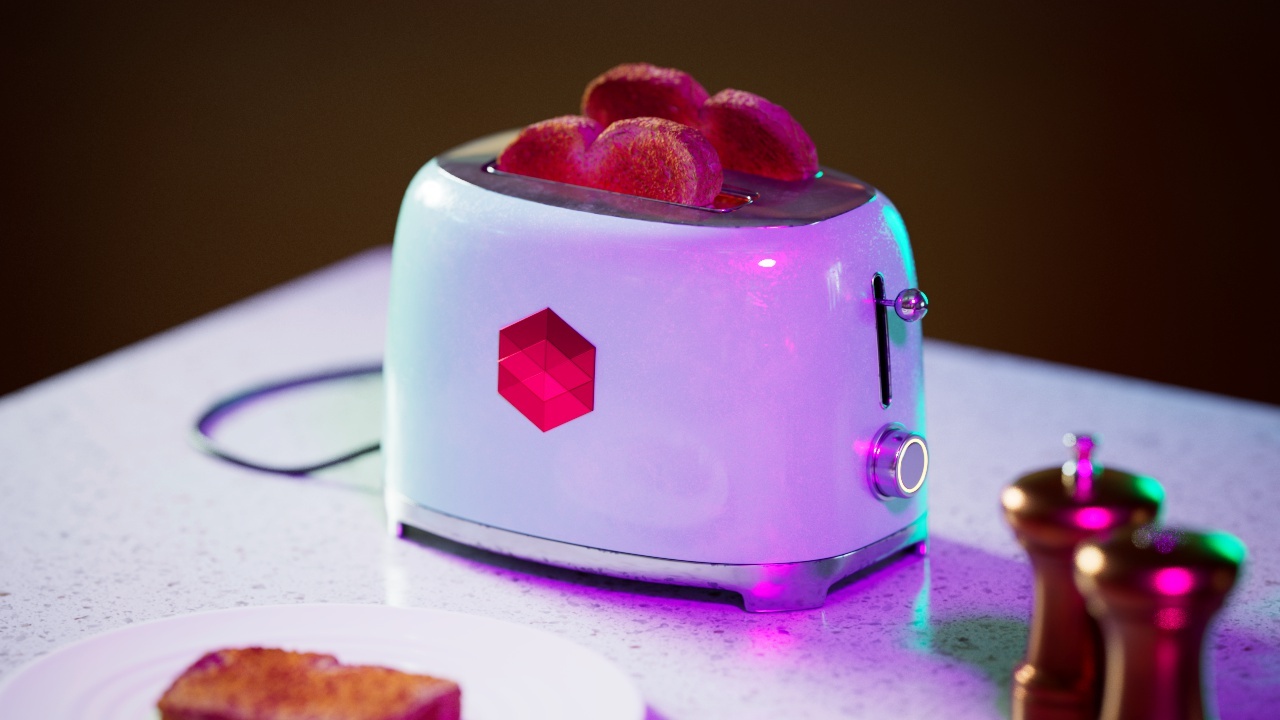
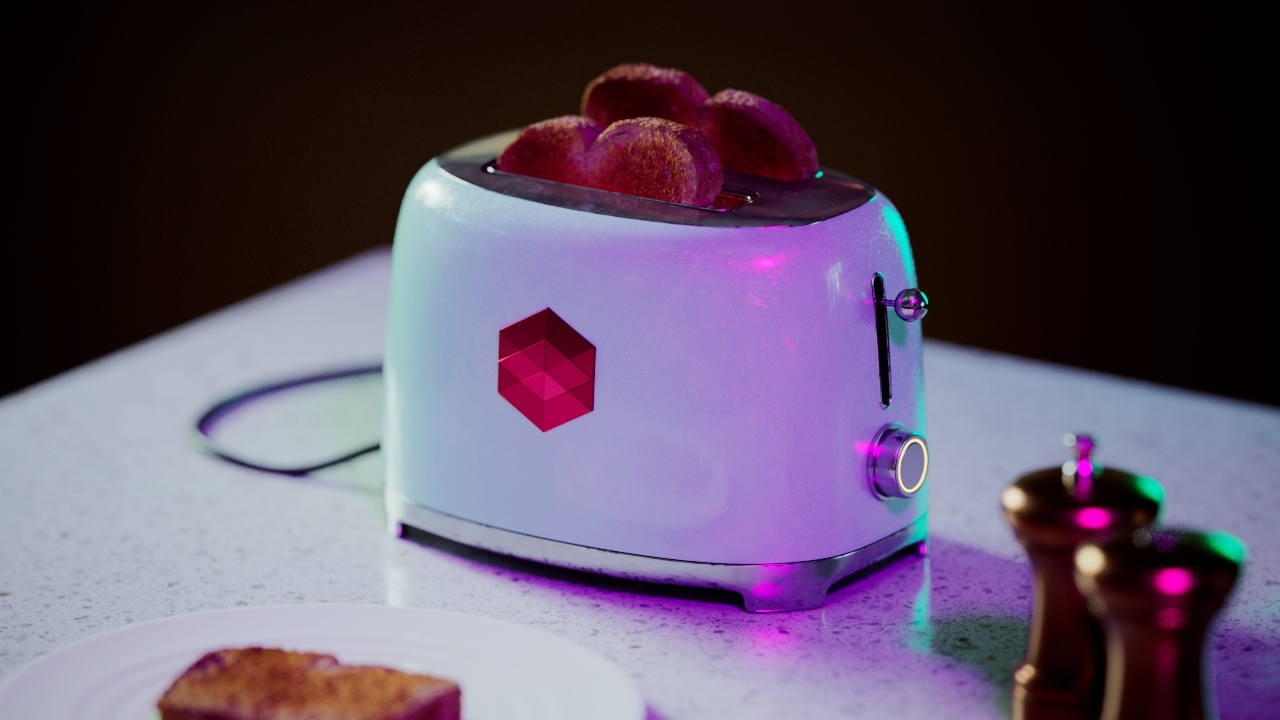
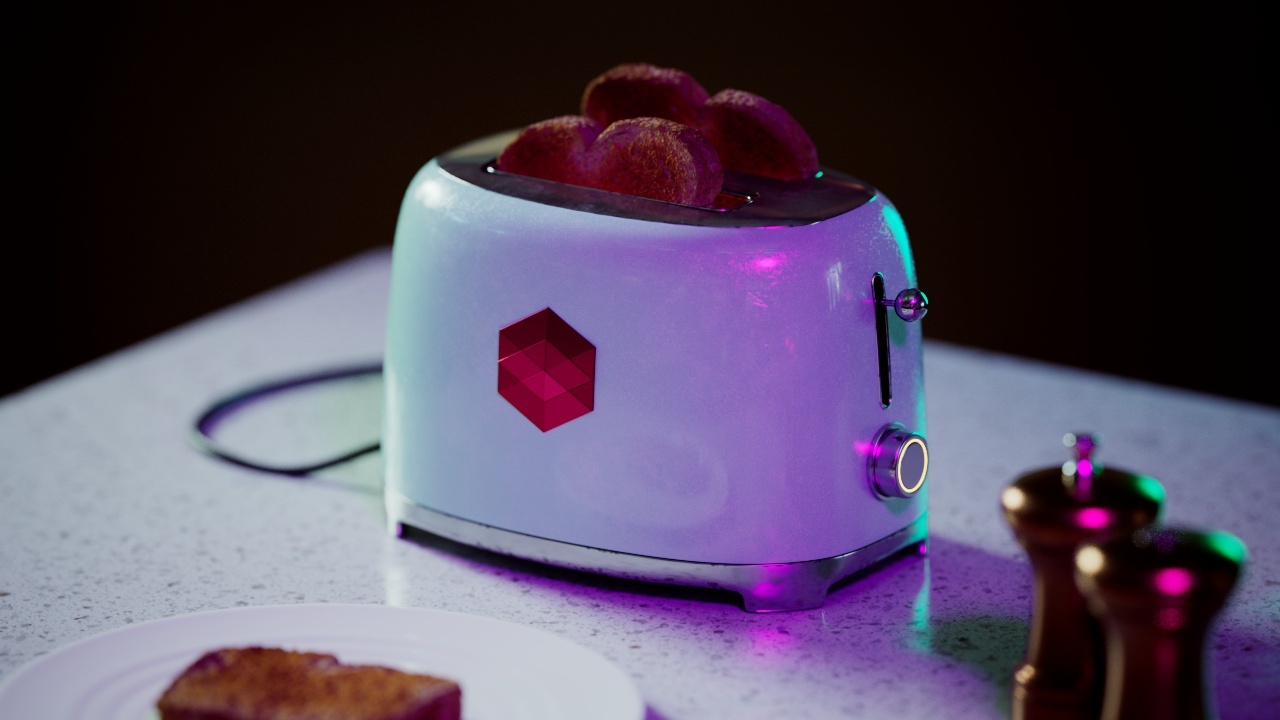
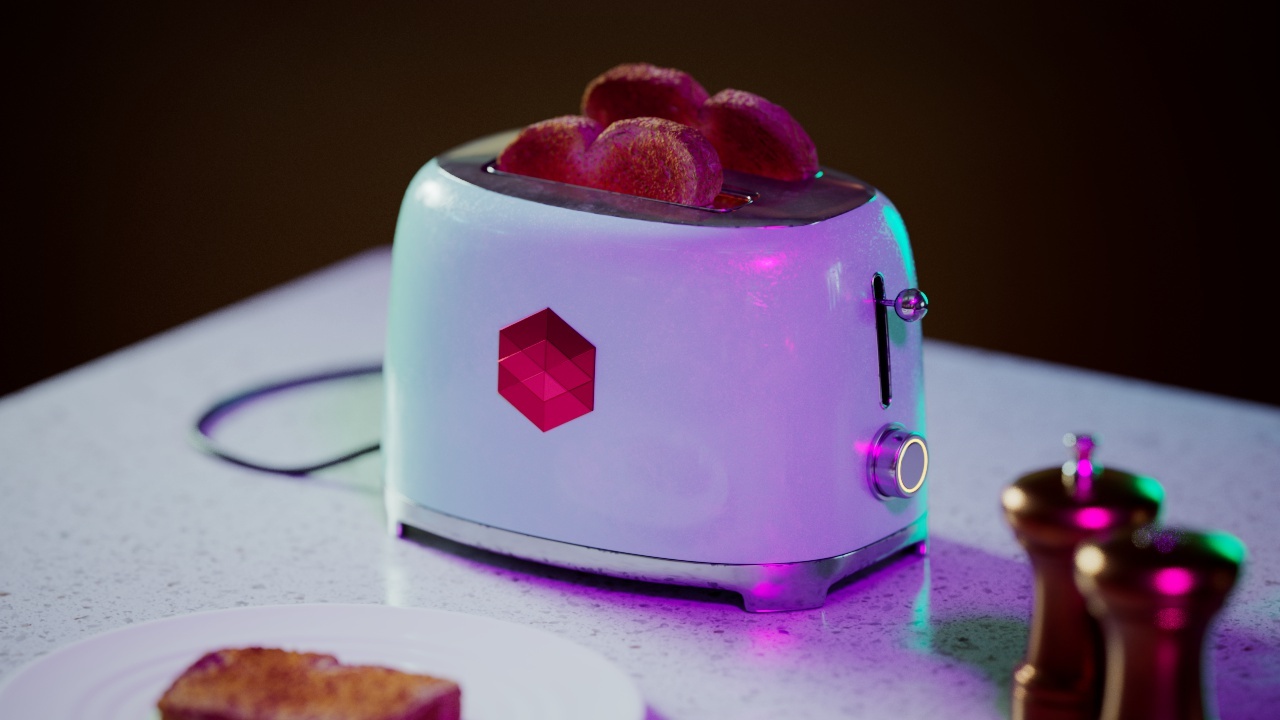
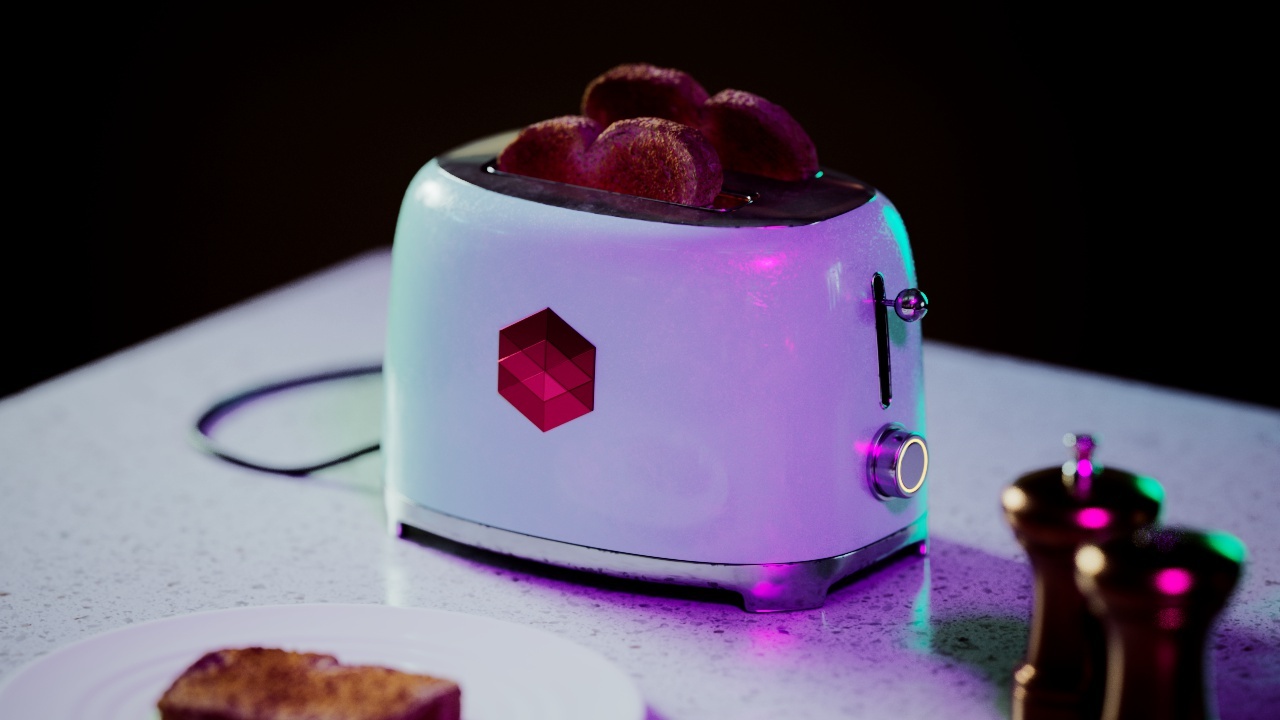
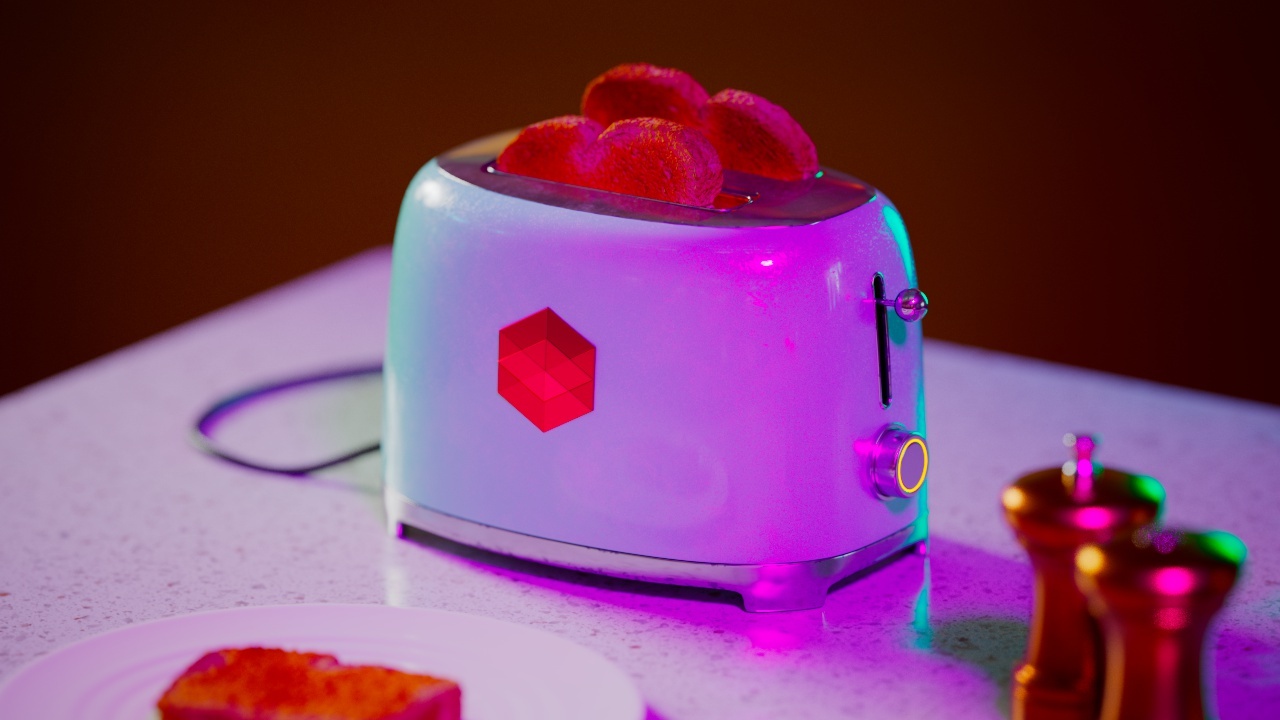
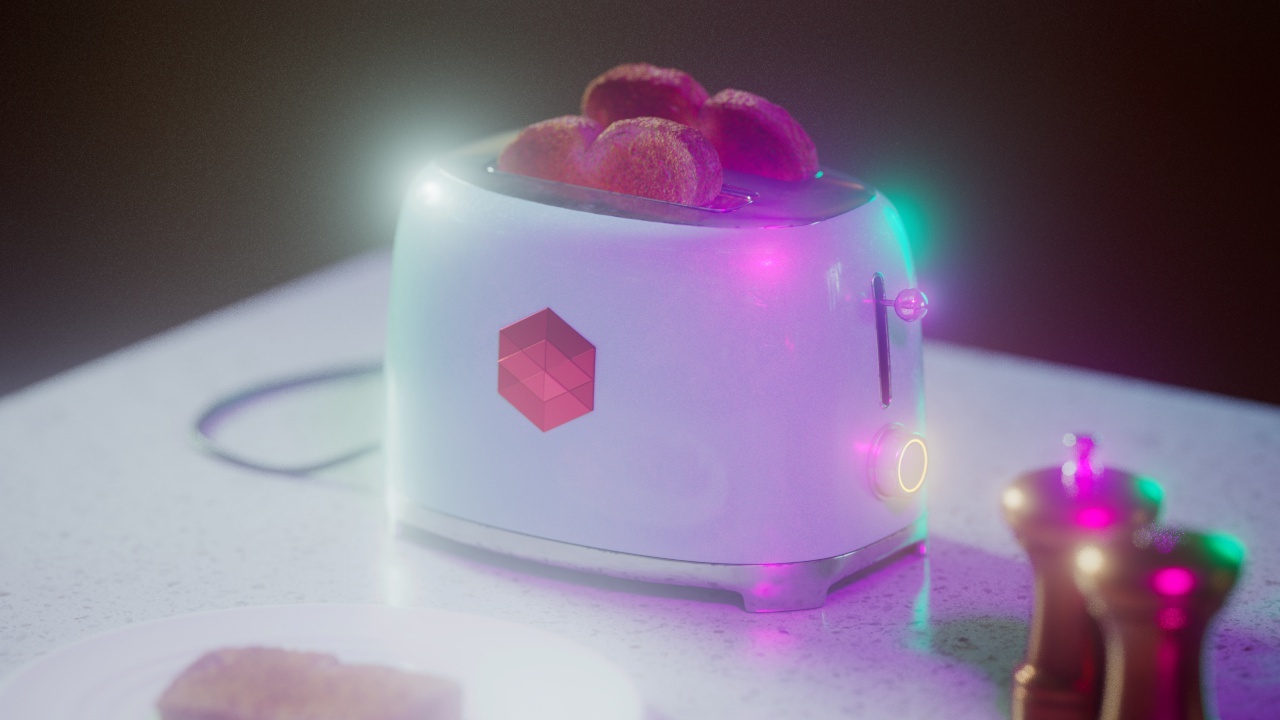
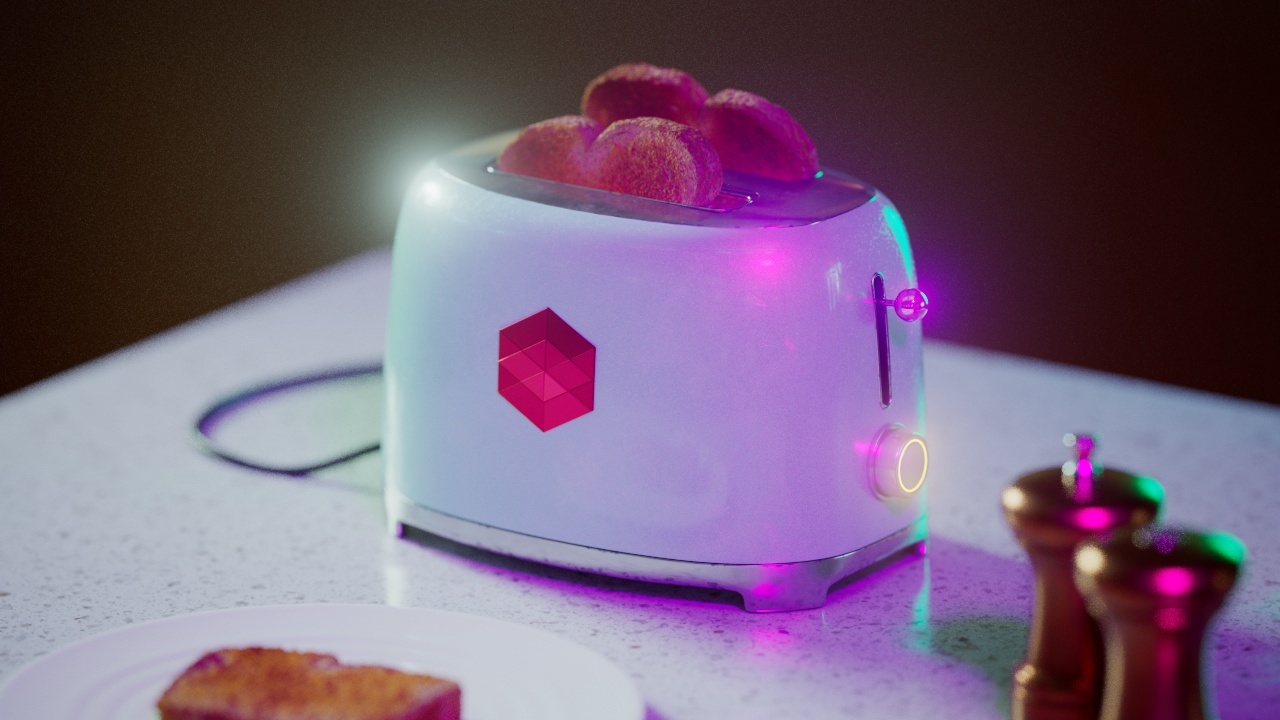
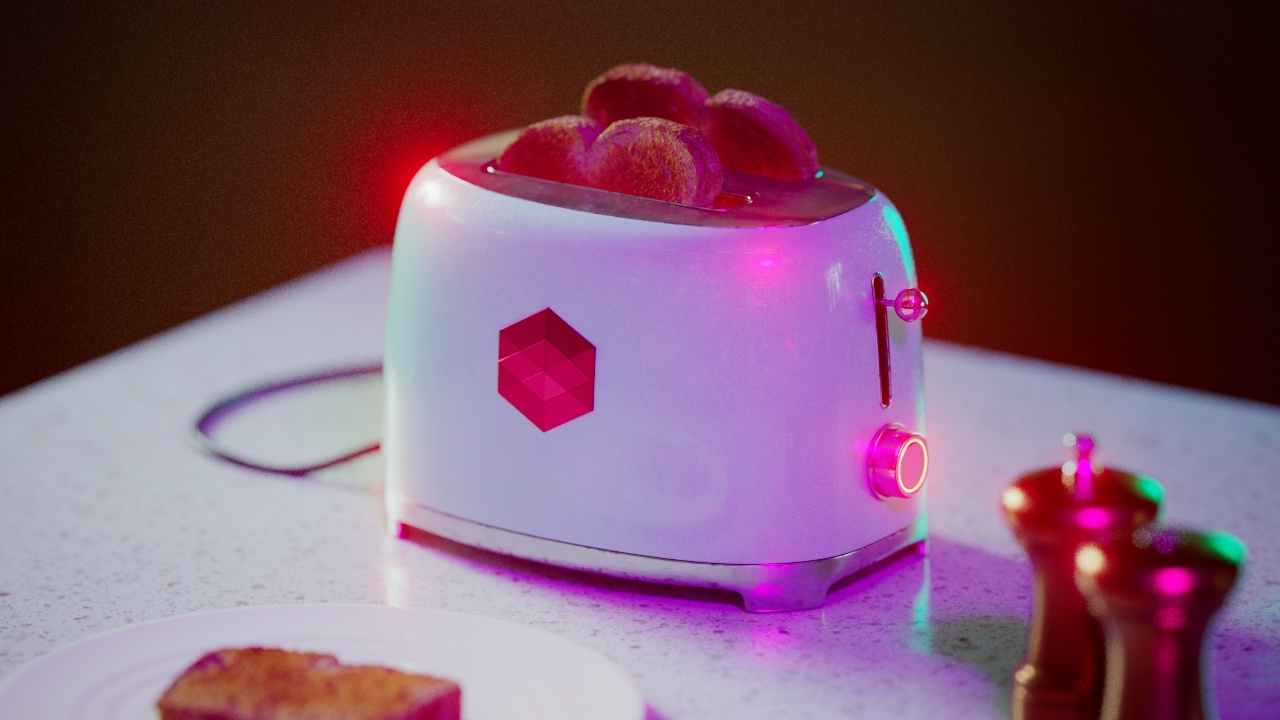
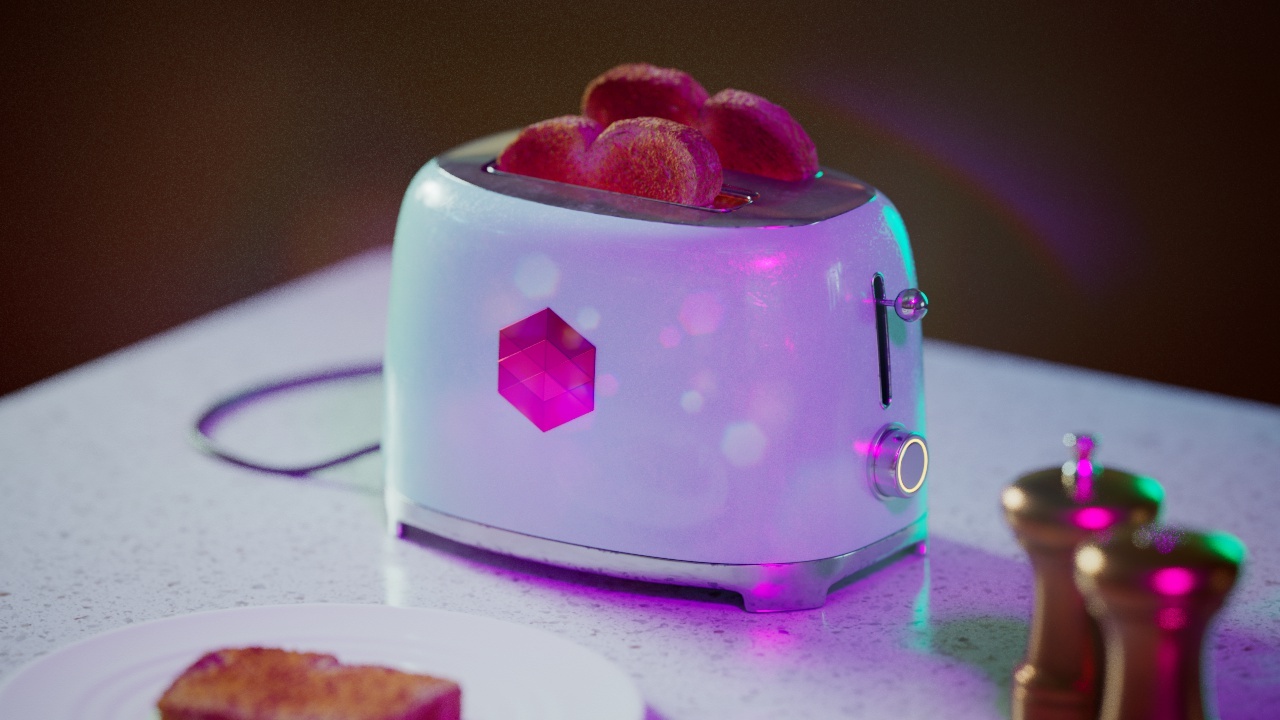
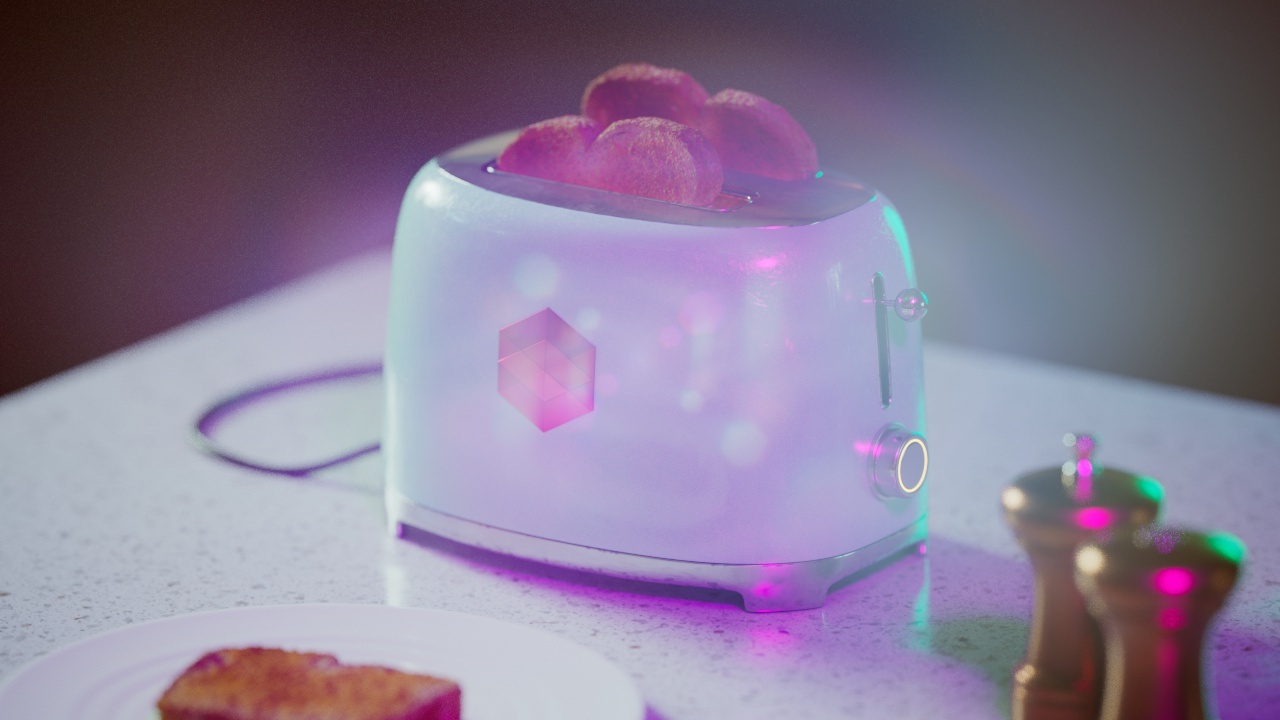
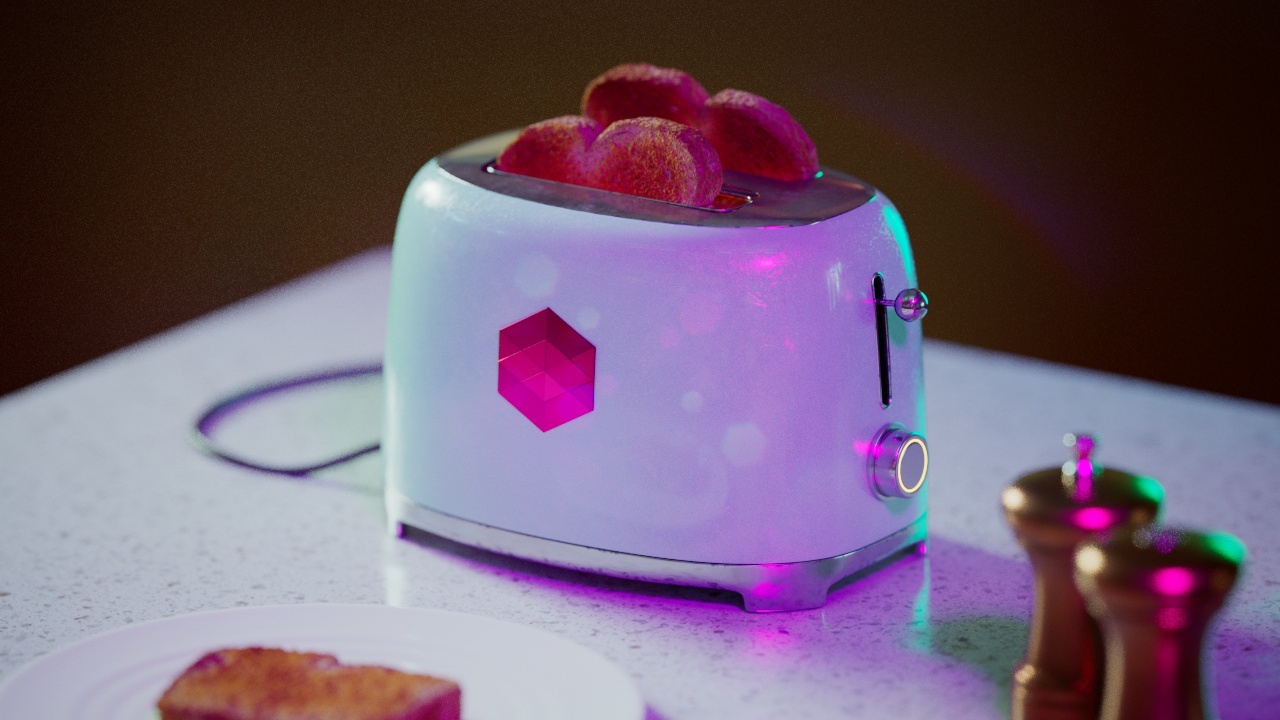
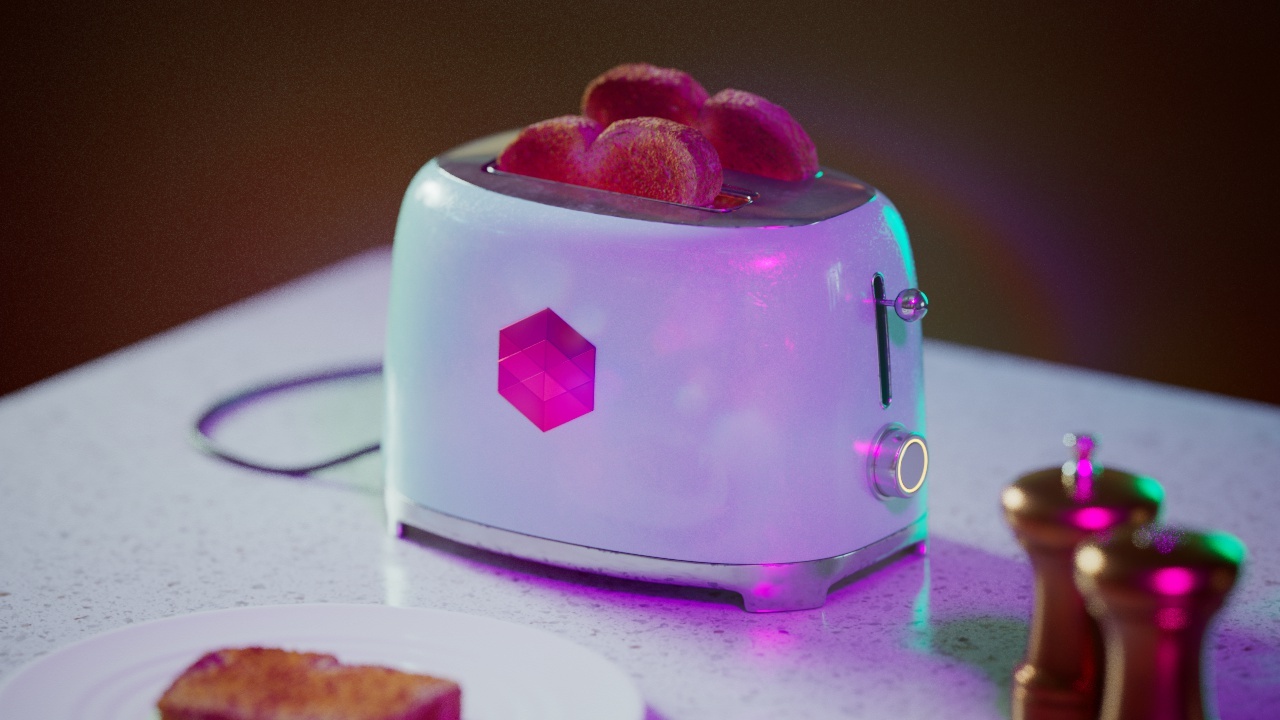
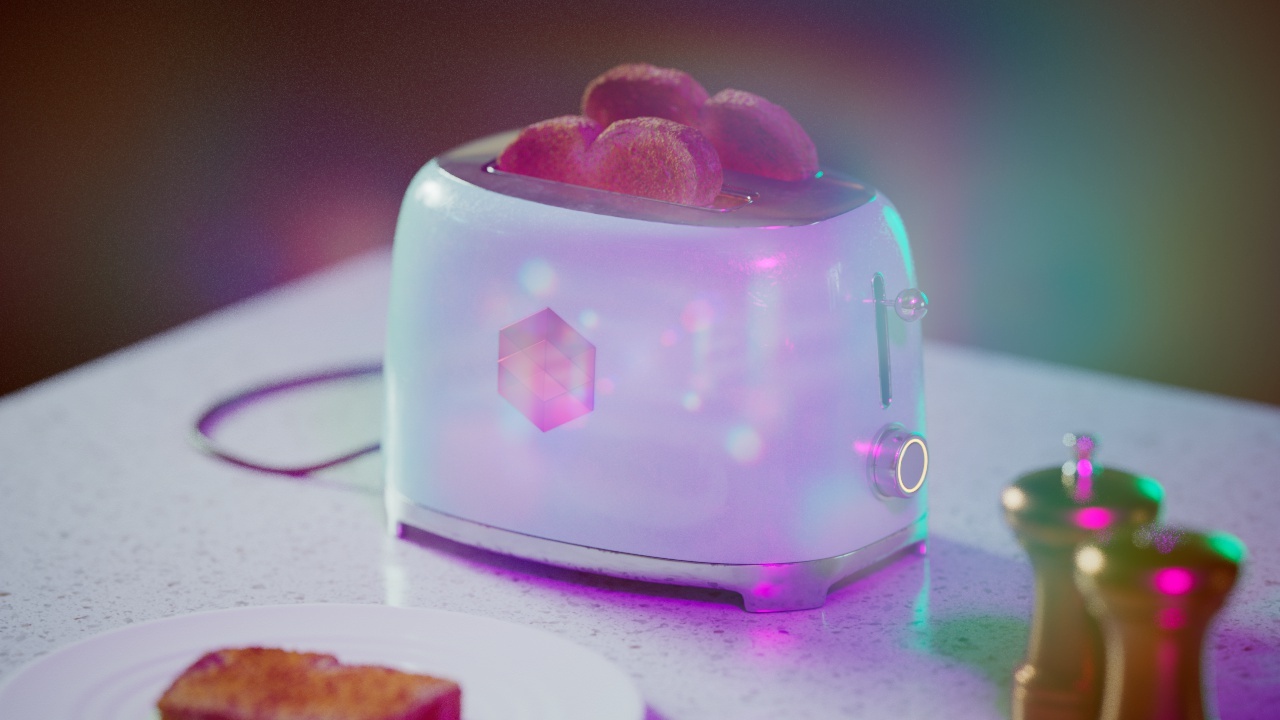
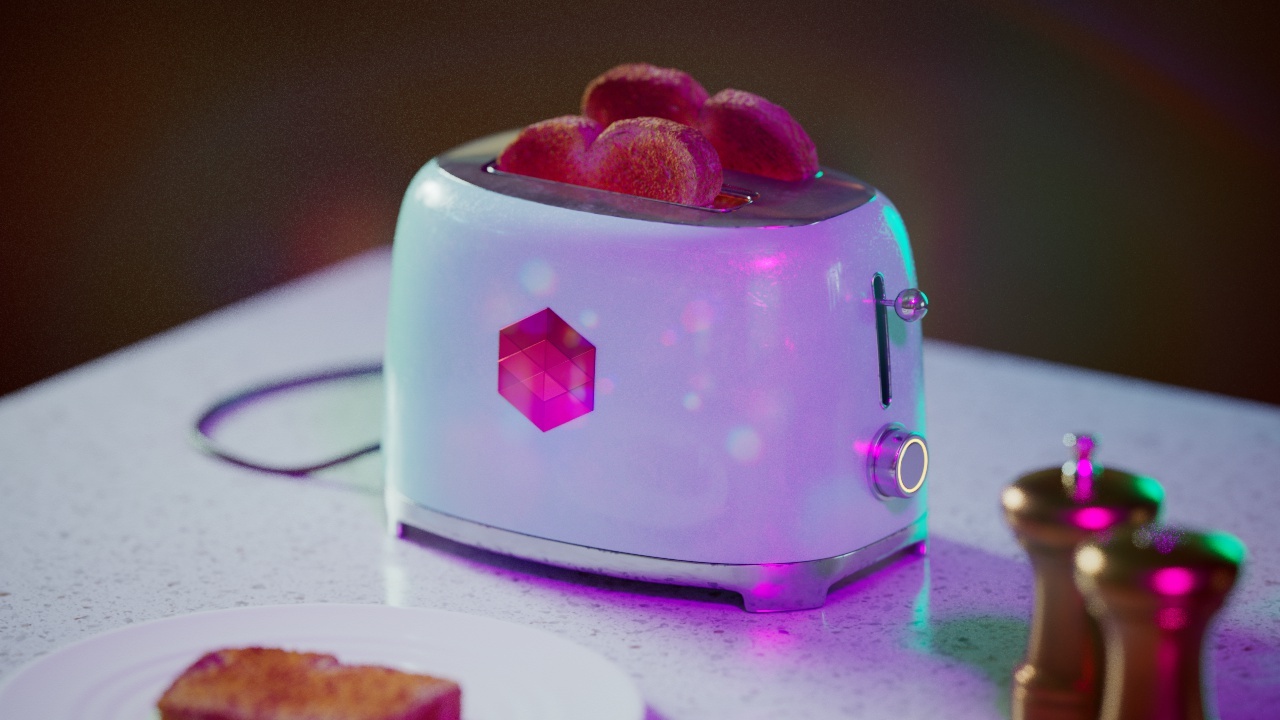
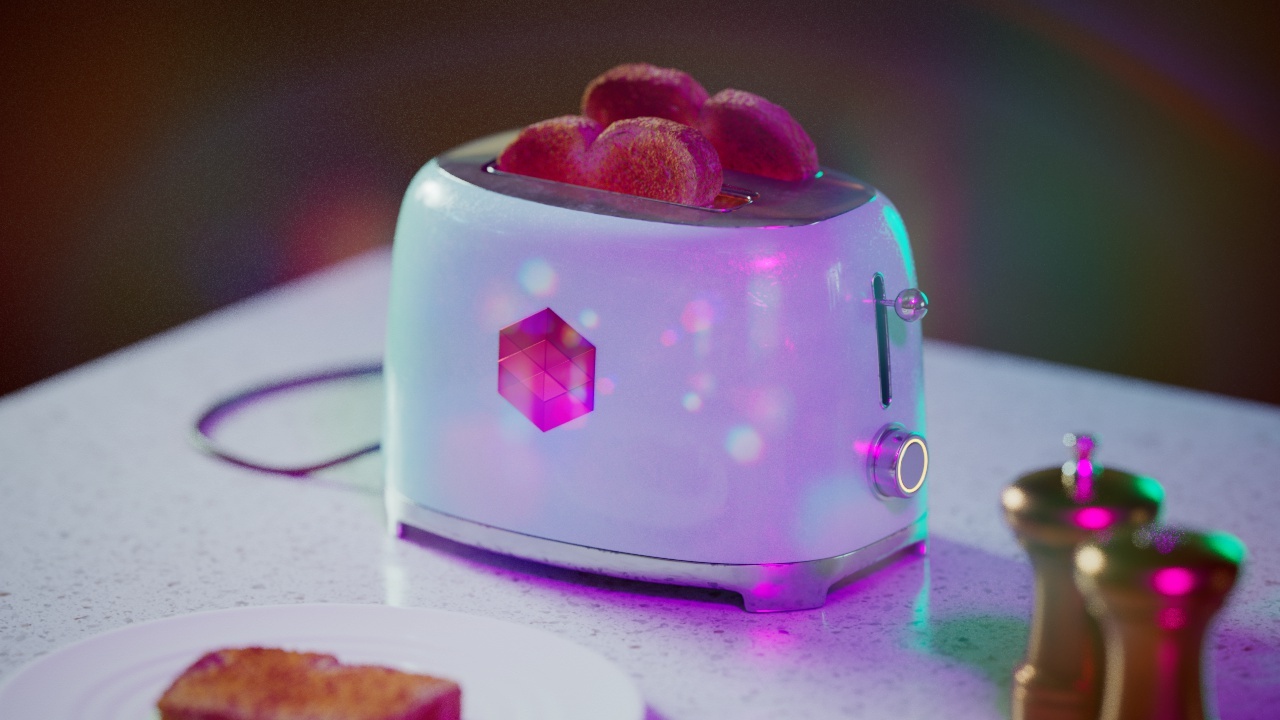
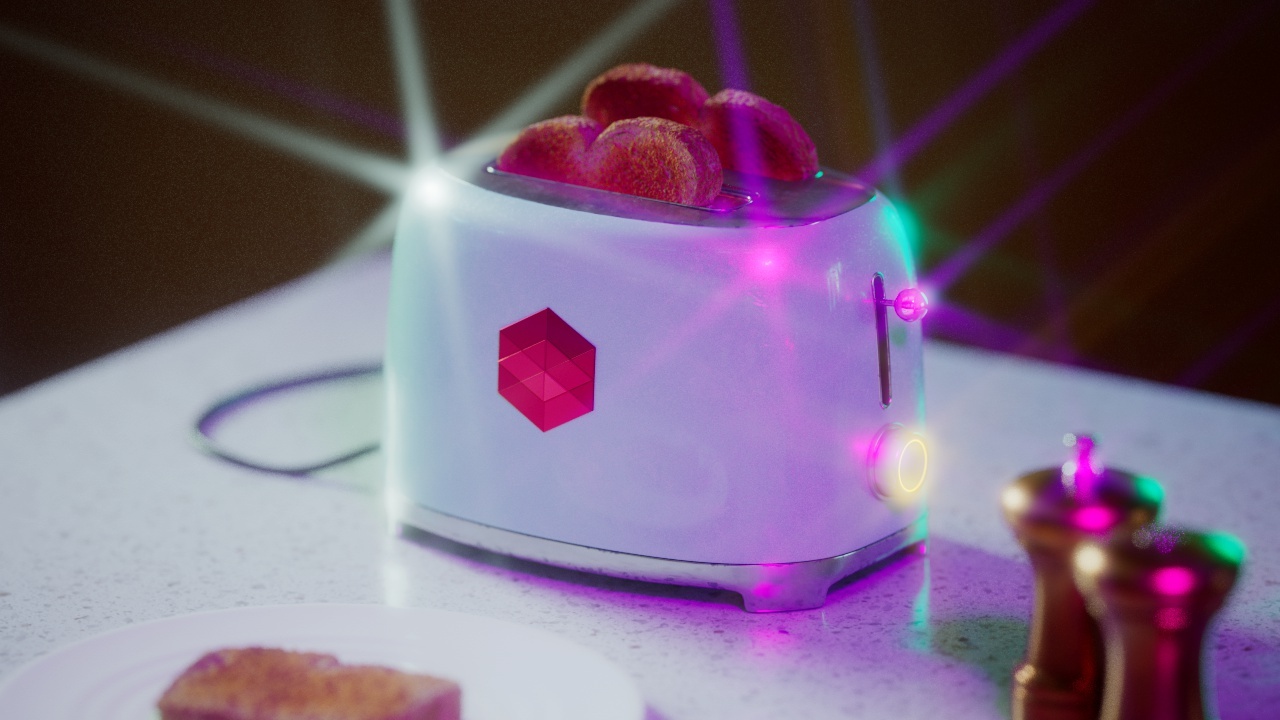
Allow Desaturation
When enabled Allow Desaturation desaturates the highlights of your image once they reach a certain threshold. This desaturation effect simulates what happens in real world cameras/film.
In the image below you can see this effect most notably on the Redshift Logo, bread in the toaster, and the pink highlight on the top front of the toaster.

|

|
| Allow Desaturation: Enabled | Disabled |
Allowed Overexposure
Allow Overexposure controls what happens to high-intensity pixel values. It works by 'squashing' the high intensities into lower intensities in order to preserve fidelity that would normally be washed out white because of these high intensities. A value of 0.0 means that lights have to be extremely bright in order for the final pixels to approach the pure white (1.0, 1.0, 1.0) display color. Larger 'allowed overexposure' values are less aggressive and leave the original intensities more unaffected.

|

|
|
| Allowed Overexposure: 0.100 | 0.0 | 1.0 |
Black Crush
Black Crush controls what happens in the dimmer parts of the image. It effectively squashes the darker colors in order to provide more contrast for images that have too much ambient lighting.
Black Crush Threshold
Black Crush Threshold controls at which parts of the input intensity range the crushing should happen. Low numbers mean 'only crush very dark intensities' while higher values allow more of the input intensity range to be black-crushed.
|

|
|
| Black Crush Threshold: 0.250
Black Crush Amount: 0.2 |
0.0 | 1.0 |
Black Crush Amount
Black Crush Amount controls how much of the Black Crush effect should be applied. A value of 0.0 means 'no crushing'with a value of 1.0 means 'maximum crushing.'

|
|
|
| Black Crush Amount: 0.0
Black Crush Threshold: 0.250 |
0.1
|
1.0
|
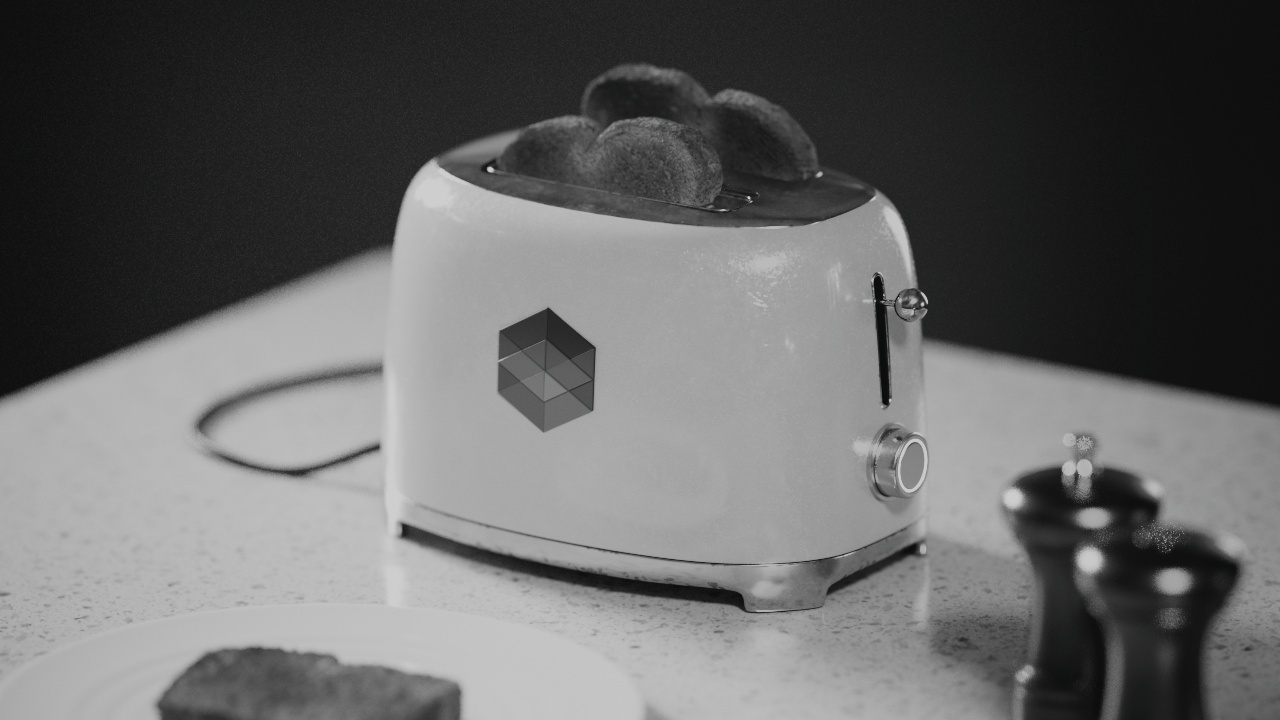
Saturation
This controls the color saturation. The lower this value, the more grayscale the image. The neutral value is 1.0. If you set it to values higher than 1.0, the colors will appear more saturated.

|
|
|
| Saturation: 1.0 | 0.0 | 2.0 |
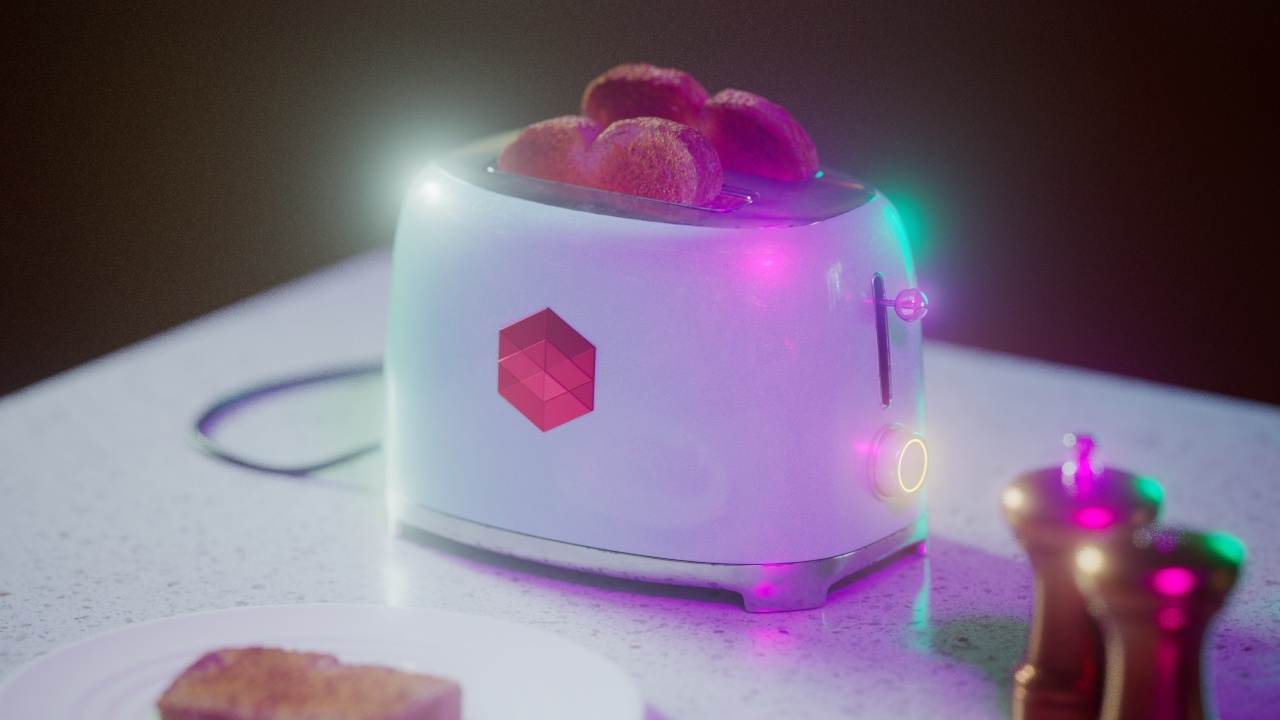
Bloom
The Bloom post effect creates a light bloom effect from highlights in your image.
Adjusting Bloom Threshold
Bloom Parameters
Bloom Threshold
Bloom Threshold determines the minimum pixel value required for a light bloom to occur from highlights in your rendered image. The lower this value the more light blooms are likely to occur.

|
|

|
| Bloom Threshold: 13 | 3 | 50 |
Bloom Softness
Bloom Softness controls how soft the light blooms appear. Higher values result in larger more soft light blooms while lower values result in smaller / tighter light blooms.
|
|
|
| Bloom Softness: 0 | 0.3 | 1 |
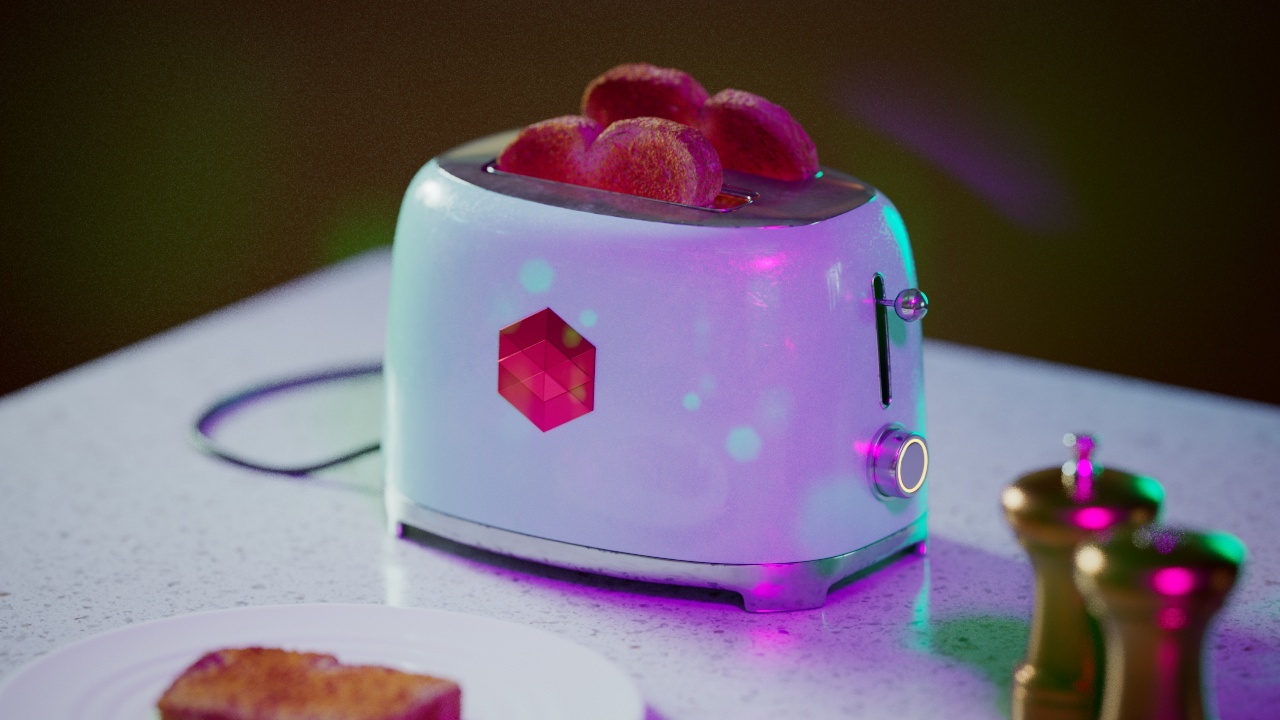
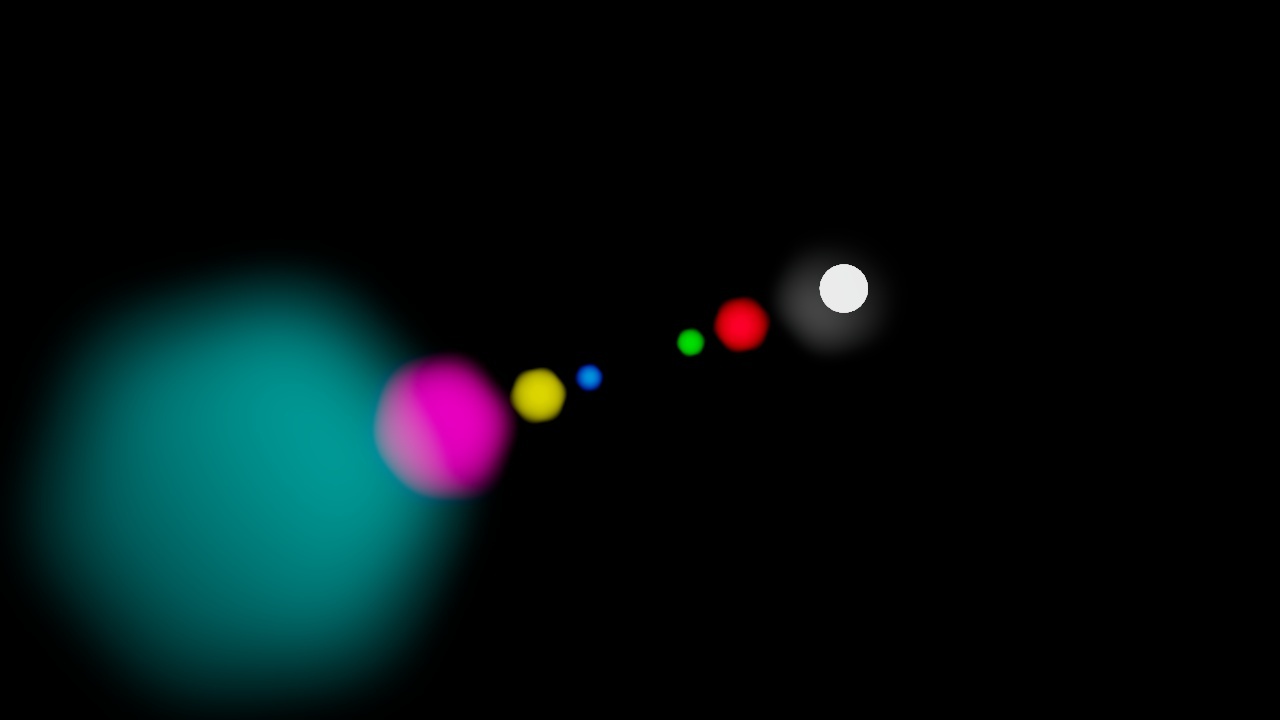
Bloom Tint
By default the light bloom color is dependent on the color of the highlight itself but you can customize the bloom color further by tinting it yourself with the Bloom Tint color swatches.
There are 5 color swatches available for bloom tinting with the left most swatch tinting the smallest bloom radius all the way over to the right most swatch tinting the largest bloom radius allowing you to have multi-colored light blooms.

|
|

|
| Bloom Tint: All White | All Red | All Blue |
![]()
Bloom Tint element separation & settings
Bloom Intensity
Bloom Intensity controls how strong the light bloom effect is applied.

|

|
|
| Bloom Intensity: 0.0 | 1 | 4 |
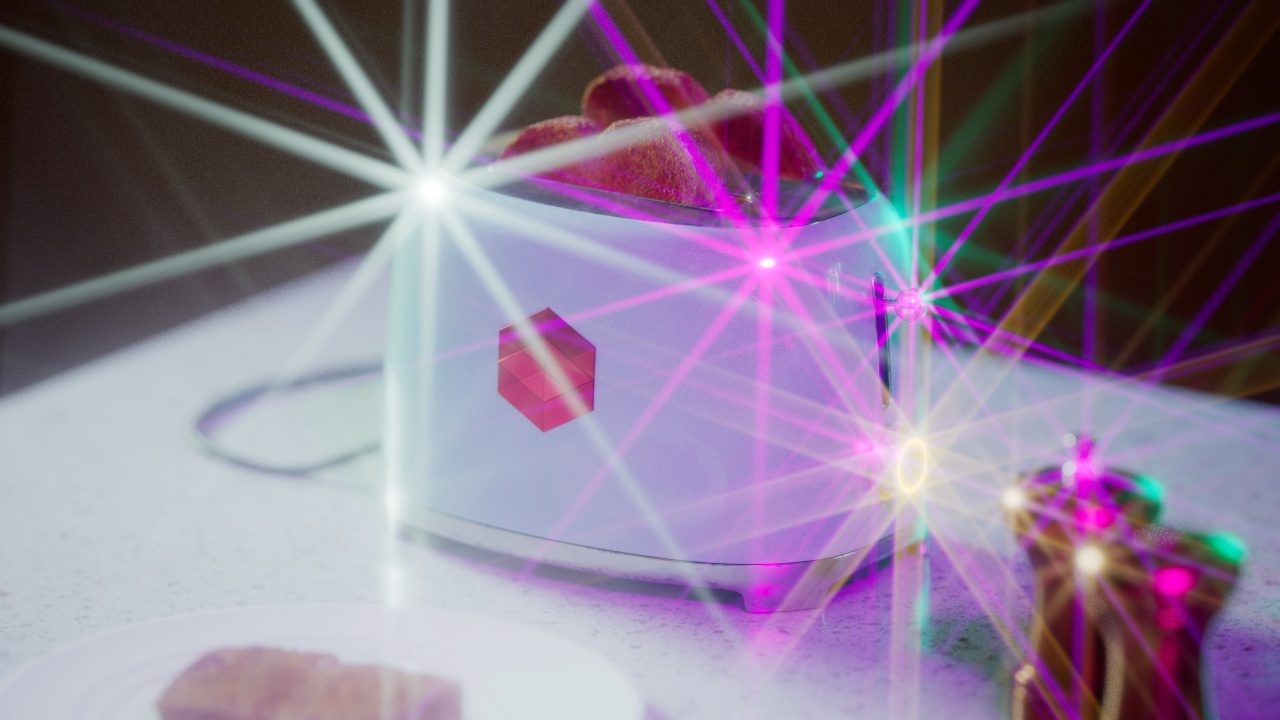
Flare
The Flare post effect creates a lens flare effect from the highlights in your image.
Adjusting Flare Size
Flare Parameters
Flare Threshold
Flare Threshold determines the minimum pixel value required for a lens flare to occur from highlights in your rendered image. The lower this value the more lens flares are likely to occur.
|
|
|
| Flare Threshold: 13 | 2 | 40 |
Flare Softness
Flare Softness controls how soft the lens flares appear. Higher values result in more blurry lens flares while lower values result in sharper lens flares.

|
|

|
| Flare Softness: 0 | 0.5 | 1 |
Flare Chromatic
Flare Chromatic adds a chromatic aberration effect to the lens flares. Higher values result in more chromatic aberration while lower values result in little to no chromatic aberration.

|

|

|
| Flare Chromatic: 0 | 5 | 10 |
Flare Size
Flare Size controls how large the flares appear. Higher values result in larger flares while lower values result in smaller flares.

|
|
|
| Flare Size: 0 | 0.5 | 1 |
Flare Halo
Flare Halo controls if strong enough highlights create a lens flare halo type effect. Higher values create larger halo sizes.
Keep in mind that the flare's halo color is dependent on the color of the highlight creating the flare.
|

|
|
| Flare Halo: 0 | 0.3 | 0.5 |
Flare Tint
By default the lens flare color is dependent on the color of the highlight itself but you can customize the flare color further by tinting it yourself with the Flare Tint color swatches. Flare tint does not affect the color of the Flare Halo.
Flare Tint doesn't have to be used to change the color of the lens flare, it can also be used to control the intensity of each flare element by controlling their value with each color swatch.
|

|
|
| Flare Tint: All White | All Red | All Green |

Flare Tint element separation & settings
(The white flare is the flare halo)
Flare Intensity
Flare Intensity controls how strong the lens flare effect is applied.

|
|
|
| Flare Intensity: 0 | 0.5 | 1 |
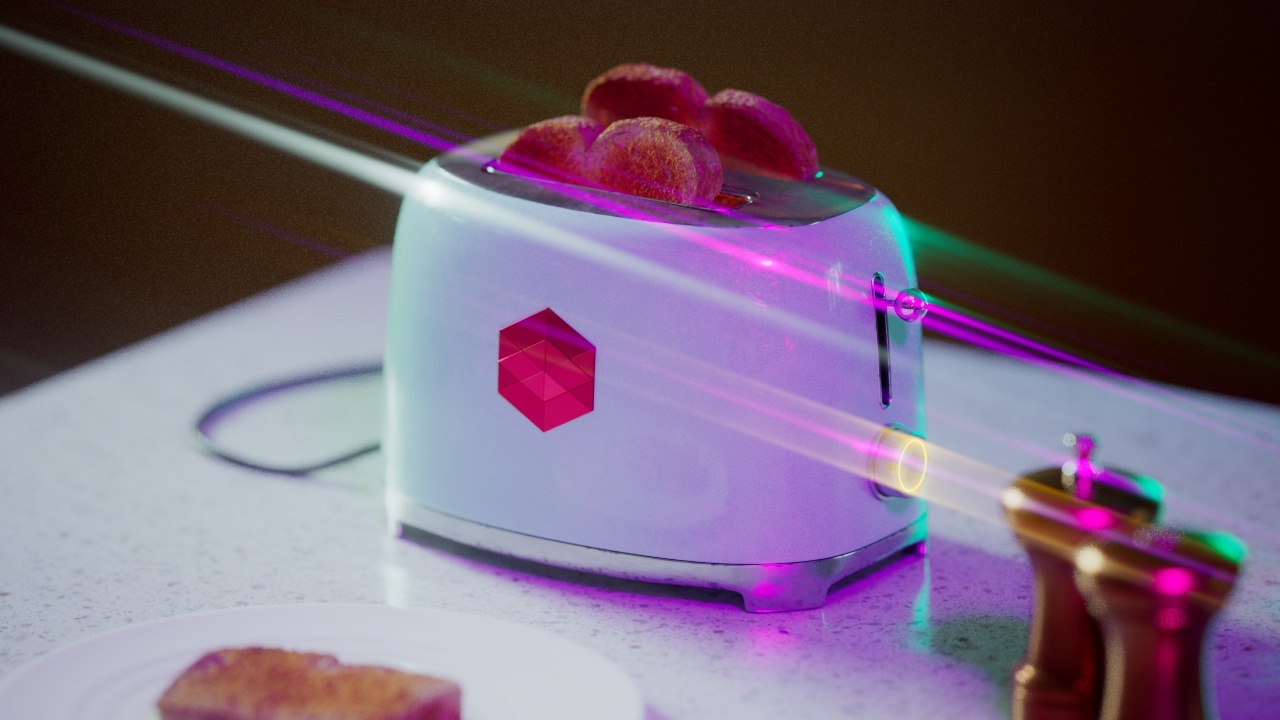
Streak
The Streak post effect creates light streaks from highlights in your image.
Adjusting Streak Angle
Streak Parameters
Streak Threshold
Streak Threshold determines the minimum pixel value required for a streak to occur from highlights in your rendered image. The lower this value the more streaks are likely to occur.
When the Streak effect is used with a low threshold it can create an effect very similar to the Bloom post effect with barely distinguishable streaks on low value highlights. This can be seen in the example image below when set to 5.
|

|

|
| Streak Threshold: 13 | 2 | 50 |
Streak Tail
Streak Tail controls how long the streaks are. Higher values result in longer streaks while lower values result in shorter streaks. Brighter highlights will have longer streaks than darker highlights.

|

|

|
| Streak Tail: 0.25 | 0.5 | 1 |
Streak Softness
Streak Softness controls how soft the streaks appear. Higher values result in more blurry streaks while lower values result in very sharp streaks.

|
|

|
| Streak Softness: 0 | 0.3 | 0.8 |
Streak Number
Streak Number controls how many streaks are created from each highlight.
|

|
|
| Streak Number: 1 | 2 | 5 |
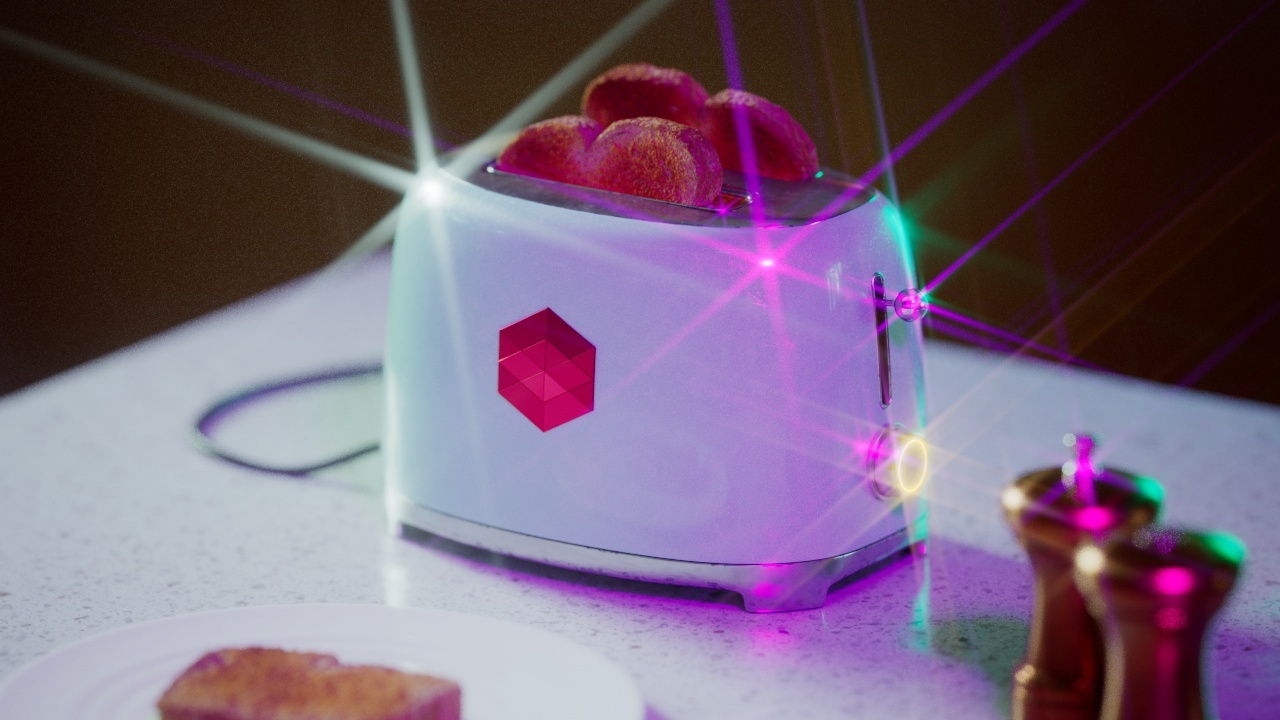
Streak Angle
Streak Angle controls how the streaks are angled.
|

|

|
| Streak Angle: 0 | 45 | 90 |
Streak Intensity
Streak Intensity controls how strong the streak effect is applied.

|

|

|
| Streak Intensity: 0.4 | 1 | 4 |