Glow Fi is a self-animating, fractal-based glow effect for text. Add a unique, organic glow with presets and advanced controls.
Why are there two Glo Fi tools?
You might have noticed that there's also a Glo Fi II in this Red Giant Blurs and Glows section.
The two are functionally similar, but the glow render engine was refactored between the first and section generations. This original Glo Fi remains here for legacy users to help ensure older projects retain compatibility. Those getting started with Glo Fi may prefer the newer version.
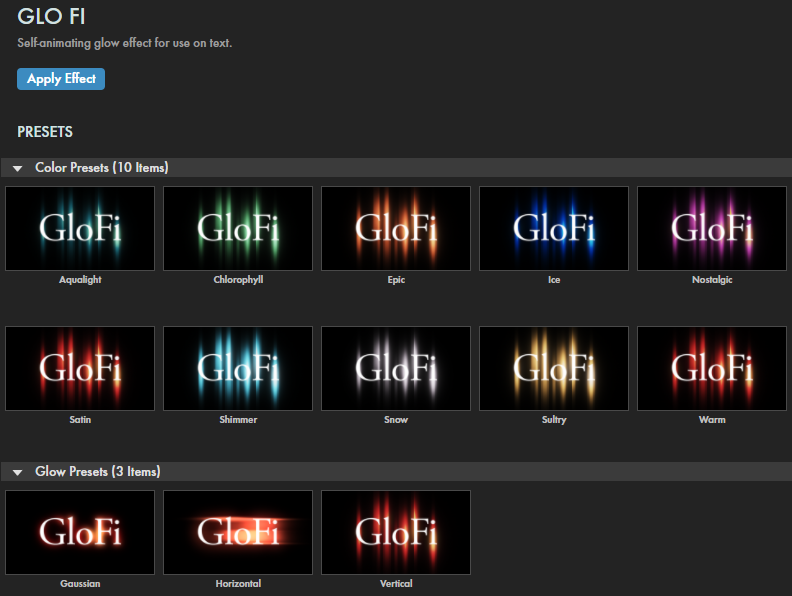
Presets
Glo Fi offers a range of ready-made, animated preset schemes. Find these
via the blue Open Dashboard... button or the Choose a Preset... button below it.
As with all other Universe tools, you can modify or create a Glo Fi look and then save it under its own name by pressing the Save Preset... button.
Modify the Effect
The
Source Pattern
group controls the glow look's animation and underlying noise pattern as it evolves over time.
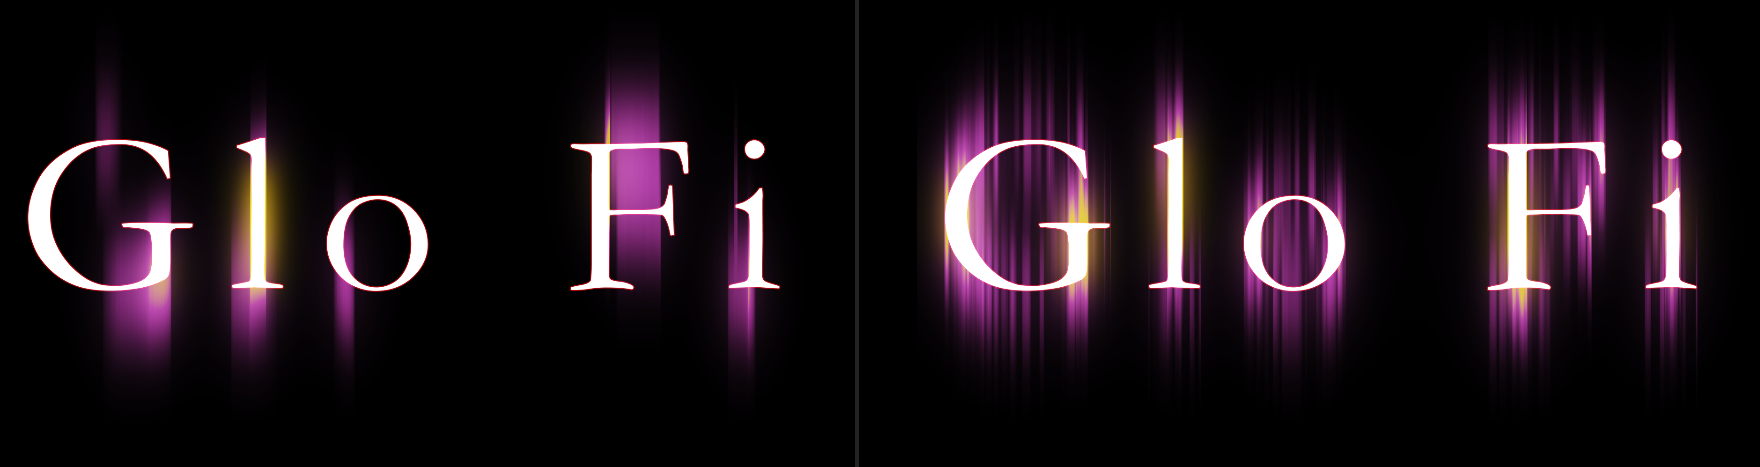
Loop Duration (Sec)
controls how long the looped animation lasts before seamlessly repeating.
Speed
sets how quickly the pattern changes within the loop.
To illustrate, consider the Nostalgic preset with a four-second loop and both a 3.0 (left) and 20.0 (right) Speed.
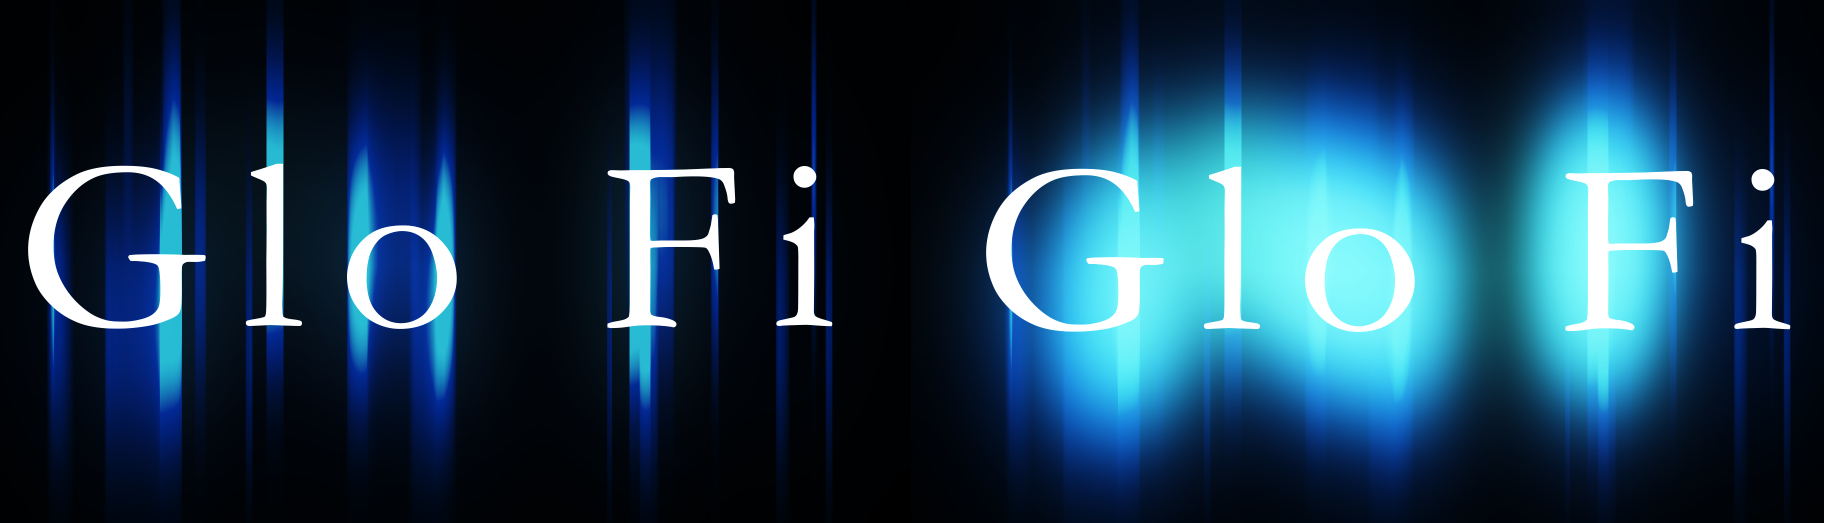
Scale
allows you to change the size of the effect's noise pattern. Lower numbers yield larger, smoother glows. Higher values introduce more detail and streaks. Below are values of 100 (left) and 1000 percent.
Amplitude
raises the brightness of the white levels in your pattern, which intensifies the glow.
Contrast sets the intensity of the glow's light and dark areas. This control's functionality becomes more intuitive when used with the Show Pattern checkbox. To illustrate, we added Glo Fi to our black background
and checked Show Pattern to reveal the effect's noise pattern. Below, you see how Contrast values of -500 (left), 0 (center), and 500 (right) affect this pattern. Notice how -500 is the inverse of 500. When you click Show Pattern for a text layer, the exposed pattern within the text characters may be too small to discern well, which is why we showed the pattern on a plain solid layer.
Glow Brightness
elevates the brightness and occurrence of glowing areas. Lowering this slider to near 1 will limit the glowing areas to only a few spots in the layer.
Glow Size
expands the soft, diffused glow around the bright glow areas when brought raised toward 100. Lowering to 0 removes this bright-area softening.
Use the
Blur Radius
control to blur and expand the bright glowing spots. Raising this control toward 200 spreads the glow intensity, making it more translucent. Lowering it toward 0 will make the spots opaque and more of a blob than a blur.
The
Blur Direction
drop-down menu has three options for orienting the Blur Radius along the x or y axes.
Shown below: Vertical (left), Horizontal (center), and Gaussian (right).
The
First Color
and
Second Color
selectors allow you to change glow colors for better compositing and special effects.
First Color
is for the outer edges of the glow, while
Second Color
is the inner part of the glow effect.
Set to 1.8 by default (as shown in the preceding triptych), higher
Boost
values intensify the overall brightness of the glow effect.
Shown below are values of 0.5 and 3.5.
Diffuse Radius defines the size of a secondary glow applied to the entire image, including the primary glow effect, softening the glow and making the effect more translucent.
Diffuse Mix
spreads and brightens the glow as values increase.
Diffuse Color from Main mixes more source color into the secondary glow. At 0, the diffuse glow is white. At 100, the diffuse glow uses 100% of the source color.
Use the
Blend Mode
drop-down to select the blending mode for compositing the Glimmer result over the original image. By default the Blend mode is set to
Add.
Mask
To begin, enable the Use Mask checkbox to constrain the glow to the masked area.
To see your mask more clearly and adjust it to your liking, enable the Show Masked Area checkbox.
Select an option from the Shape drop-down menu to set the mask as either an elliptical or rectangular shape.
The Invert checkbox, when enabled, switches the glow effect to occur outside the selected mask shape instead of inside.
The Point A cross-hair control corresponds to the position of the top of the mask image.
Point B controls correspond to the bottom position of the mask. Both are pointed out in the above images. Moving these points will
squash or stretch the shape of the mask as well as move its position.
Radius spreads the influence of the masked glow outward from its center. Increasing this value will elongate the mask shape.
Feather Size increases the mask's edge translucency along a gradient.
Feather Direction contracts the feathered gradient toward the mask's center
if lowered toward -100 and expands it toward the edges if increased toward 100.