This effect animates various tiled textures over the output, adding a lively, grungy quality to
footage.
Presets
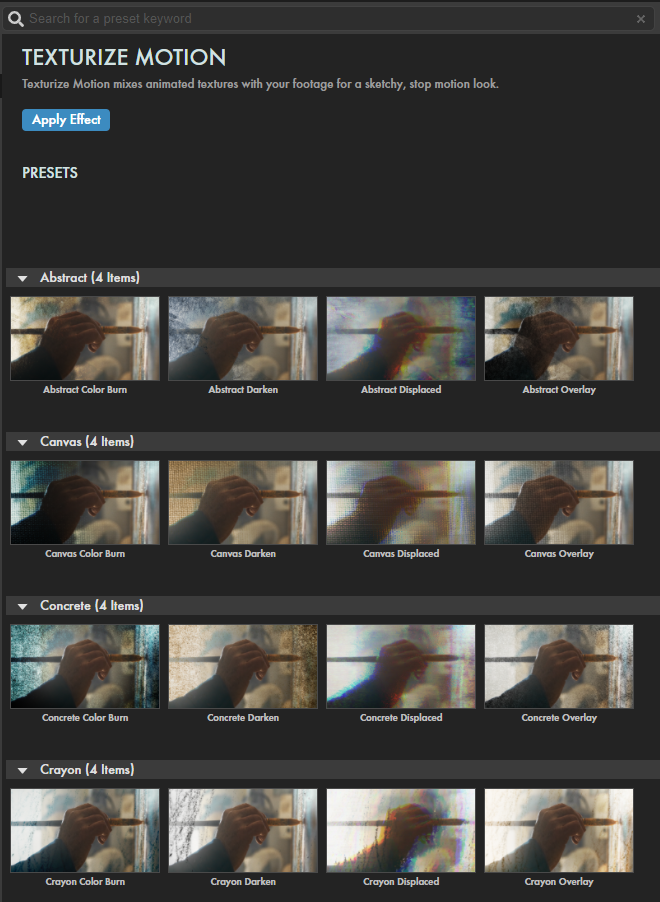
Apply any of more than 50 texture patterns to your compositions with Texturize Motion's convenient presets. Find these via the blue
Open Dashboard... button or the Choose a Preset... button below it.
Once you select a preset, its effect type will automatically populate the Texture Select drop-down menu field.
(Alternatively, you can simply pick a preset from this pull-down and sidestep the Presets pop-up. However, as you can see
in the above screencap, each effect type has four iterations: Color Burn, Darken, Displaced, and Overylay. These sub-presets
are not directly available in the ECP (you'd need to recreate them via additional parameter settings), so the Preset menu may
be your quickest path to a given look.
As with all other Universe tools, you can modify or create a Texturize Motion look and then save it under its own name by pressing the Save Preset... button.
Modify the Effect
Position shifts the distortion's center on the canvas using the x and y numerical
controls or the cross-hair selector.
Scale changes the grunge texture size.
Texture Select lets you choose from various texture types to find your desired grunge look .
Texture Behavior sets whether the texture will Cycle through various similar tiles or remain Still.
Within the Custom Texture subsection, enable the Use Custom Texture checkbox to supply your own texture map. The two pull-down menus let you choose which project layer to use as a source, then whether you want to use that source, Masks, or Effects & Masks. Use the Custom Layer Saturation slider to increase the chromatic intensity of your effect.
Texture Opacity makes the overlaid texture more transparent as values decrease.
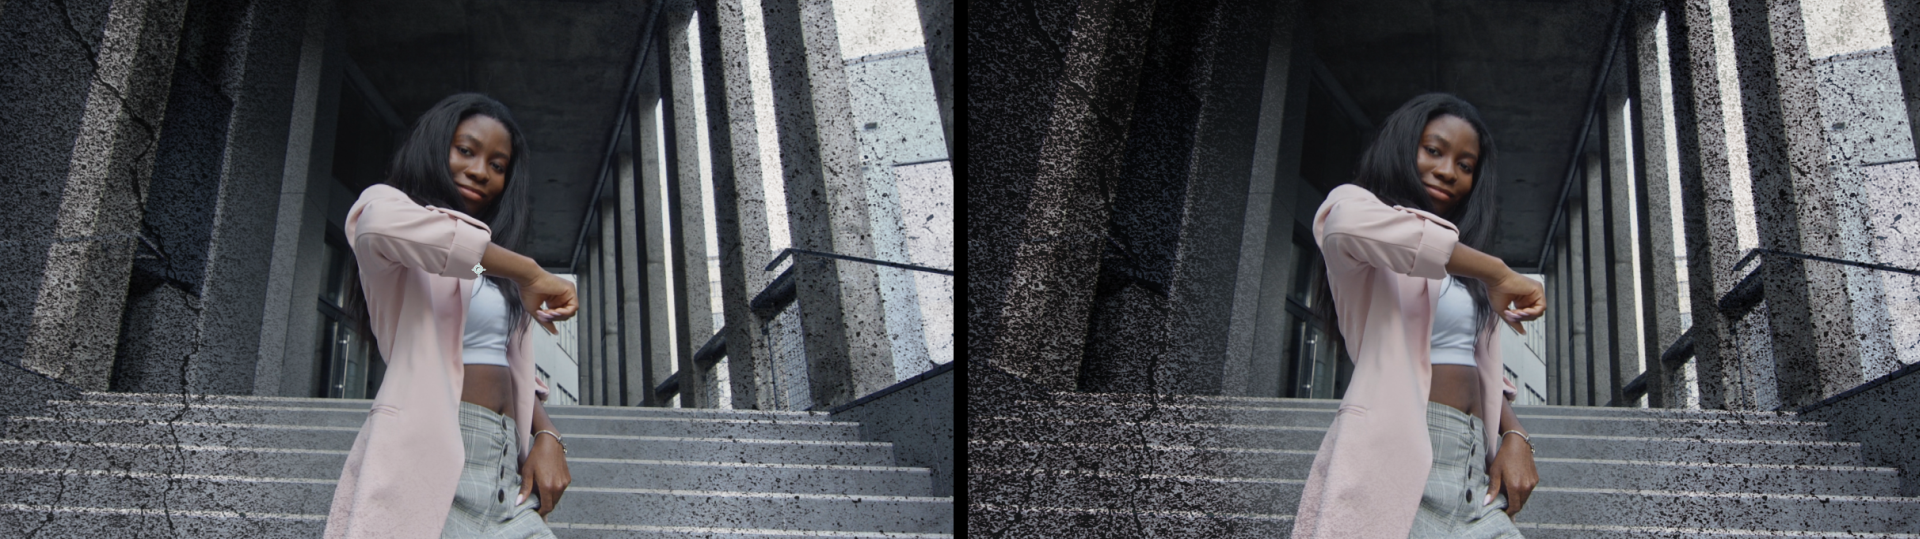
Texture Contrast darkens contrast within the texture as values increase. See the values of 5 (left) and 95 (right) compared below.
Texture Tint adds a hue to the textured effect using the control's color picker.
Tint Strength adjusts the strength of the tint color.
Texture Speed sets how fast textures cycle if you choose Cycle as the Texture Behavior. Higher values may seem frenetic. We suggest trying 10 (as shown in the clip below, which uses the Concrete preset) and adjusting from there. Note that texture speed can also affect the FPS playback of your source footage, especially at lower settings. Depending on your project settings, you may not see any changes from increasing Texture Speed values beyond a certain point.
Texture Frame Offset shifts the texture's cycle starting frame.
Posterize Source Time sets the image tone prior to applying the texture.
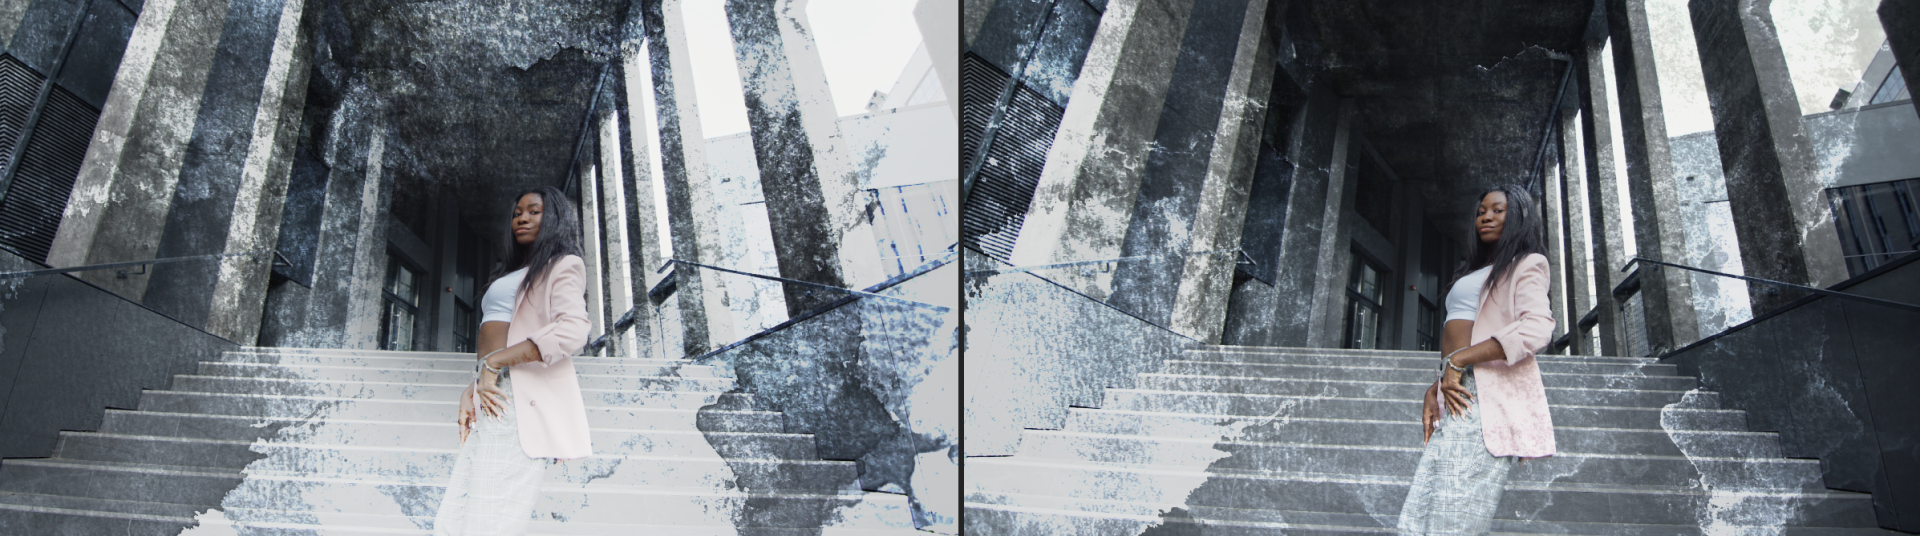
Invert Texture swaps the light and dark parts of the texture image file. The following comparison,
based on the Watercolor preset with Color Dodge selected for a blend mode, illustrates this.
Texture Blend Mode establishes the blending mode used to composite the masked clone
result over the original image.
Displacement Map
The Use Displacement checkbox will activate the grunge layer acting as a displacement
map to distort the original footage layer.
You can then distort the footage even more by raising the Horizontal/Vertical
Displacement controls toward 1.0.
Color Separation sets whether the texture separates the color channels from one
another when Use Displacement is enabled. When used with a light touch, these displacement controls can yield some striking results.
The Soften Displacement Map slider will take away map detail when brought toward 10.0.
Jitter adds an optional jittering effects to the textured image.
Jitter Speed sets the jitter effect's pace.
Animate Rotation, Scale, Position,
and Brightness toggle which factors the jitter affects.
Rotate, Scale, Position, and Brightness Amount set the range within which each factor jitters.
Mask
Uncheck the Enable Mask checkbox to turn off the mask and have the texture overlay affect the entire layer.
Mask Size will scale your mask up or down from 0% to 400% across the image. The Mask Center control allows you
to move the position of the mask along the x and y axes using the cross-hair or numerical controls.
The shape of the masked area can be changed by adjusting the Aspect control. Turn this slider down toward
0 to spread it out horizontally or up toward 10.0 to squeeze it vertically.
The Falloff control will soften the edge of the mask for a more subtle difference between the footage and
the texturized masked vignette.
Random Seed adjusts the randomness formula used throughout the effect rendering. This is useful for discerning one similar effect
from another or seeing other variance options.
Want More?
Texturize Motion is even better when used in conjunction with other Universe tools. Watch the following two-minute video to see what happens when we combine Texturize Motion with Universe Compound Blur and Gradient Ramp.