Render > Render Properties sub-palette
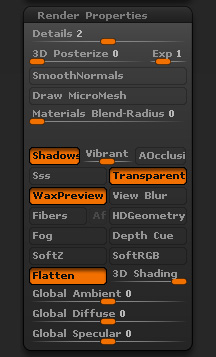
Details
Preview Render Maps Details Level. By increasing the Details slider, you will increase the quality of your render. This is done by creating larger maps for the Light > Environment Maps and will also affect the quality of LightCap creation from a background image. These environment maps control the overall quality of material output.
For quick renders or quick LightCap creation, keep the default setting of 1. Once satisfied with your various settings you can then increase the Details slider’s setting to create environment maps with a higher dynamic range, resulting in your best quality final render.
The size of the Diffuse and Specular maps created by the LightCap process is 512×512 pixels with a Details slider value of 1 and increases to 2048×2048 pixels with a value of 3.
3D Posterize
The 3D Posterize slider applies posterization to a 3D model, regardless of the materials that have been assigned to it. This render 3D posterization works by adjusting the normals for the whole model, so that the light falling on the model is divided into blocks and the colors flattened. It provides a very quick way of creating a posterized render, though without the subtle control that adjusting materials gives.
The higher the value set in the 3D Posterize slider, the more extreme the posterize effect.
Exp
The Exponent slider controls the degree of falloff for the 3D Posterize effect.
SmoothNormals
Activates BPR Smooth Normals Render Mode. With this mode, you won’t need to add extra subdivision levels to create a smoother surface at render time with BPR. This rendering mode instructs BPR to automatically smooth the edges between polygons which in turn gives the model’s surface a perfectly smooth appearance.
In order for this mode to work, you must also enable the Tool > Display Properties >Smooth Normal option for any Tool or SubTool(s) that you wish to be smoothed by the BPR. This means that you can toggle render smoothing for individual surfaces as desired.
Materials Blend-Radius
The radius through which adjacent materials are blended. By increasing the Blend Radius setting ZBrush will blend where materials meet on a model’s surface. This eliminates jarring transitions between materials that have dramatically different properties.
A low value will give a blend with a very short/narrow transition and a fairly sharp effect. A high value gives blending with a broad transition and an extremely soft effect.
This Material blending value is global and will affect your entire model. If you wish to also control some SubTools on an individual basis you will also need to adjust the BPR Material Blender slider in that object’s Tool > Display Properties menu.
Shadows
Render Shadows
AOcclusion
Activates Ambient Occlusion Rendering
Sss
Activates Subsurface scattering Rendering
Transparent
Activates Subtool Transparency Rendering
WaxPreview
Activates Wax Preview mode. When active, this will apply a wax-like appearance to the model’s materials in real-time through the Preview render. This means that the effect will be visible even during normal sculpting and scene set up. The wax effect is fine-tuned globally using the Render > Preview Wax menu and per-material using the Material > Wax Modifers menu.
View Blur
The View Blur switch activates view blur for Preview and BPR renders. View Blur can be useful to help judge a sculpt in more general value patterns. Adjust the degree of view blur using the VBlur Radius slider in the BPR RenderPass sub-palette.
Fibers
Render Fibers
Af
Antialiase Fibers
HDGeometry
Activates HD Geometry Rendering
Fog
Render Fog
Depth Cue
Render Depth Cue
SoftZ
Depth Adjustments
SoftRGB
Color Adjustments
Flatten
Flatten Layers
3D Shading
3D Shading Intensity