SpotLight is a projection texturing system which allows you to prepare your source texture directly in ZBrush, then paint your model with it in 3D. It is similar in some ways to the ZBrush Stencil feature.
You first need to load your textures using the Texture palette or Light Box. You can then use SpotLight to change their scale, rotation and position; nudge them to match any sculpt; clone parts of the texture; fill colors; change the hue to match another texture’s hue and more.
There is a tremendous amount of functionality packed in a simple interface. Your painting productivity will increase more than you can imagine!
The SpotLight Dial
When clicking on a texture loaded in SpotLight, this texture will have a red outline to indicate that SpotLight will operate on this texture. SpotLight is constructed around a widget which is not only used as a manipulator, but also serves as a selector for 2D features like Hue, Clone, Smudge and many more.
The SpotLight dial can be manipulated in different ways:
- Click on a texture or in the document to position the widget on your cursor click position.
- Click and drag between the orange circle and the outer ring of the widget to move the texture and the widget in unison. This will maintain the position of the widget relative to the texture, which can be useful for some operations.
- Click on a function icon located in the widget to activate or deactivate that feature. Some 2D functions use a click and drag operation which is initiated by clicking on the feature’s icon.
For some of these features (like rotation and scale), the center of SpotLight acts as a pivot point. Manipulate the SpotLight widget to set this pivot point by clicking on the desired center point.
For a full list of the functions see the Spotlight Dial page.
Working with SpotLight: the basics
SpotLight workflow is very simple. It will be your knowledge of its various features that will let you unleash your painting abilities.

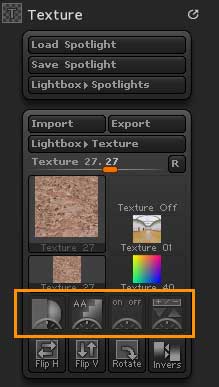
The Spotlight buttons in the Texture palette become enabled when a texture is selected
- Load a Project or a ZTL file.
- SpotLight is based on PolyPaint technology, so make sure that your model has enough polygons to support the resolution of what you wish to paint. (Divide the model if you need more polygons.) You don’t need to have UVs and a texture map to use SpotLight.
- In the Texture palette, load or import a source texture with which you will paint on the model.
- Also in the Texture palette, click on the Add to SpotLight button. Your texture will be displayed as an overlay on the document and the SpotLight widget will appear. An alternative is to double click on a texture of your choice in Light Box.
- Using the SpotLight widget, manipulate your texture as desired, using the controls described below. Basically, the SpotLight wheel includes several features which can be enabled by clicking on them or by doing click and drag of them. As an example, if you want to rotate your texture, move the SpotLight widget by clicking a point on the texture to define a rotation pivot point, then click and drag on SpotLight’s rotation icon to rotate your texture around the selected point.
- You can toggle SpotLight on and off by clicking the Turn On SpotLight button, located in the Texture palette or by using the shortcut Shift+Z.
- To enter 3D Paint mode so that you can begin painting, press Z on your keyboard. Pressing Z again will bring SpotLight back, allowing you to edit the texture some more.
- When the SpotLight dial is visible you can load new textures as described in steps 3 and 4 above. You can also switch between loaded textures by clicking on any of the textures in the SpotLight overlay on the ZBrush Document. The active texture will have a red outline to show that it’s ready to be modified using the SpotLight widget.
- When you have finished painting, turn off SpotLight in the Texture palette or press Shift+Z.
To learn more about SpotLight functions and features, please, read the sections below.
Organizing and Working with multiple textures
You can open as many textures as you need in SpotLight. This lets you combine textures in many different ways before painting them onto your model.
Click on any texture to select it for manipulation.
Clicking in the empty space outside the textures to select them all. This will allow you to manipulate all the textures at once.
Multiple textures loaded at the same time. Selected textures have a red outline.
Saving / restoring SpotLight
Whatever textures you have loaded into SpotLight can be saved as a separate file. The main purpose of this is to keep your best textures available for future production. You can create texture sets, such as for skin, walls, concrete and more.
At any time, you can load your previously saved SpotLight set, which will replace the current one.
For this purpose, you can find the Save SpotLight and Load SpotLight buttons in the Texture palette.
Lock
When lock is on you may control all of the images that have been loaded into SpotLight as a group. This will for example allow you to scale, move and rotate all of the images at the same time. You can turn lock on and off by simply pressing the lock icon in the SpotLight dial.