Maya ASCII export from ZBrush
ZBrush has a seamless integration with Maya for exporting maps and geometry. You can simply export your ZTool as a Maya ASCII file with all the appropriate maps and shader networks preassigned and set up for rendering.
To use this feature follow these steps:
- Step to level 1 and set your UVMap res to 2048 and generate packed UV tiles (PUV tiles). PUV tiles are a new mapping format which are more efficient than the previous AUV and GUV tiles solutions from Pixologic.
- Step up to the highest SubD level and generate a color map from your polypaint by clicking Tool>Texture>New from Polypaint this map will be saved in the subtool texture palette not the main Texture palette. This allows you to have a texture map for each subtoool.
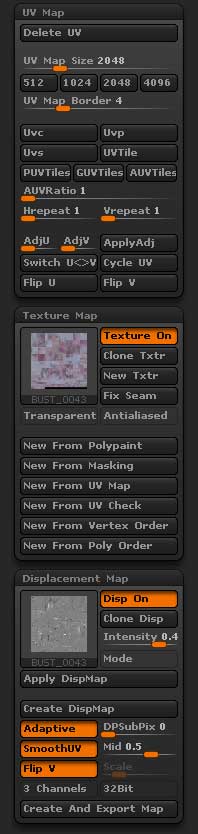
We will now create a 16bit displacement map by going to Tool>Displacement and turning on Adaptive, SmoothUV, and Flip V.
- Step down to level 1 and click Create Dispmap. Again this map will store in the Displacement map palette not the main alpha window as in previous ZBrush versions. This process will only work for 16bit displacement maps not 32bit. You will still need to manually set up a 32bit displacement but with this process the settings export correctly and require little to no adjustment in Maya.
- At this stage you will have a texture map as well as a displacement map loaded in the appropriate swatches under the tool menu.
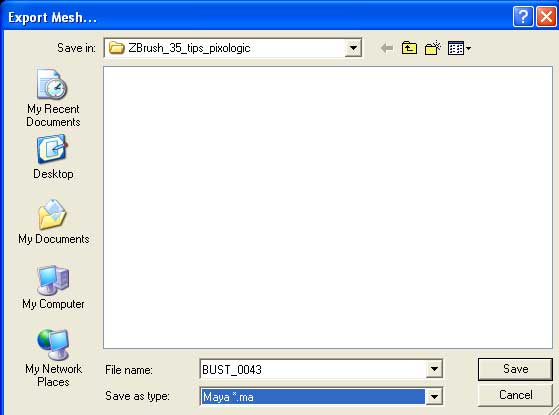
- You may now export your ZTool as a Maya ASCII file by going to Tool>Export and selecting Maya ASCII as the file type (.ma). Make sure you are at level 1 when you export. ZBrush will export the Maya Ascii file as well as the associated maps.
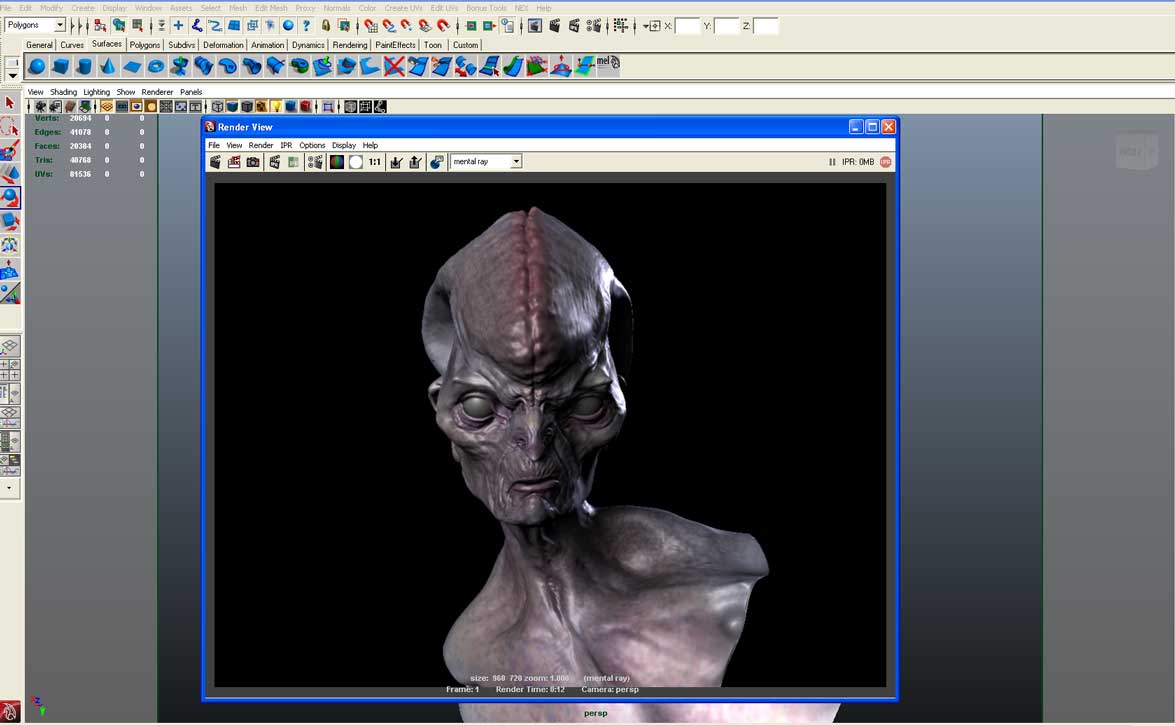
- Open the Maya file. Here you can see a shader has been applied as well as a Mental Ray subdivision approximation node. All the difficult settings of alpha gain and offset on the displacement map have been calculated and set by ZBrush based on the values in the displacement map. The color map has been applied as well as the correct Subdivision approximation node.
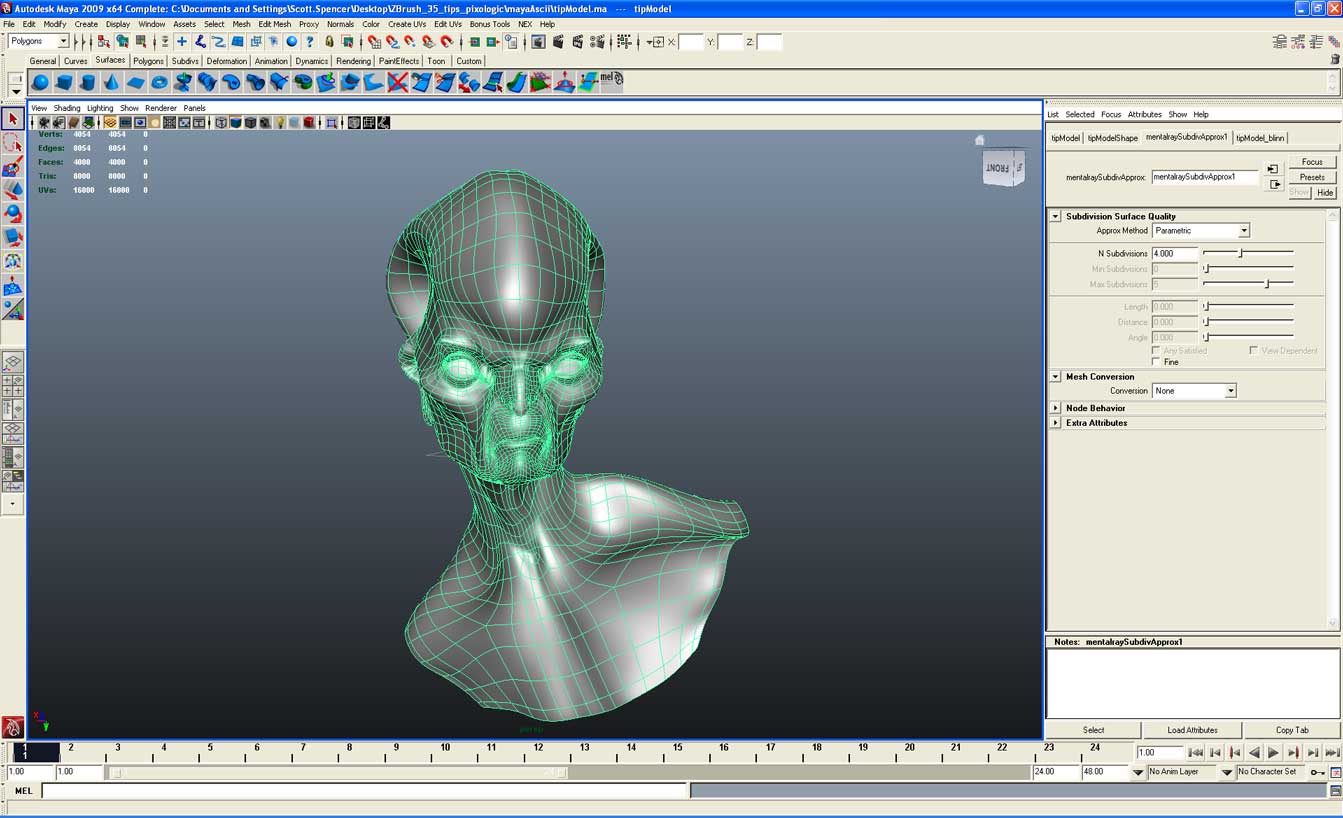
- With no adjustments to the settings you can successfully render your color and displacement maps in maya in this image I have added only lights for clarity.
View Blur
View Blur is a utility that helps digital sculptors observe the figure much in the same way a clay sculptor or painter might. Often as you are working it is beneficial to look at the figure in terms of value patterns or relationships between light and dark. Painters do this by squinting at the model to remove as much surface detail as possible and see just the large value relationships. ZBrush has included this functionality in the view blur button to help digital sculptors see their work with one level of abstraction helping to judge the form based on value instead of detail. 
View Blur is accessed under Render > BPR Render Properties sub-palette, and the radius is set in the Render > BPR RenderPass sub-palette. Set a hotkey for the button and adjust the slider to the level of blur you find most useful. In this image you can see how blurring the image helps us spot the patterns of light and dark across the surface of the figure. If one area seems too light or dark compared to the others chances are there is a problem with the form.
Setting up a Startup Document
Working with a larger document size in ZBrush can be beneficial. The default size becomes prohibitively small when you activate the AA Half button on the right side of the screen. AAHalf will anti-alias the screen and improve the look of your sculpture as you work. This will be especially apparent along the edges of the model where jagged pixels may be apparent as well as inside the finer details of the sculpture. You may also want to change the background color and gradient while you work. I find working against 50% gray makes it easier to judge lights and darks as well as silhouette. 
To set up your own startup document go to the Document menu and set your resolution. I click the double button to double the default size. This way the working area remains a good size when AAHalf is activated. Open the system palette under the color menu and set the RGB value to 128 for R G and B. This will be a 50% gray value. Set your document background color to this by clicking the Back swatch under the Document menu. Lastly you can disable the gradient by turning the range slider down to 0. To store this document so it returns each time you start ZBrush click the Save as Startup Document button.
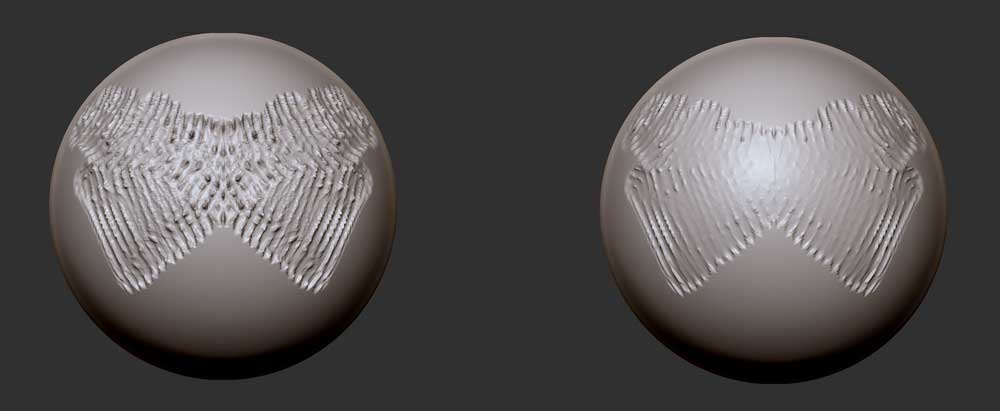
Brush Buildup Mode
You can make your brush more aggressive in the way it adds form to the surface of the model by using the brush buildup button. Buildup mode is found under Brush>Modifiers. This button causes ZBrush to sample the surface of the model underneath your brush stroke including the height of the current stroke to make the brush effect more pronounced.
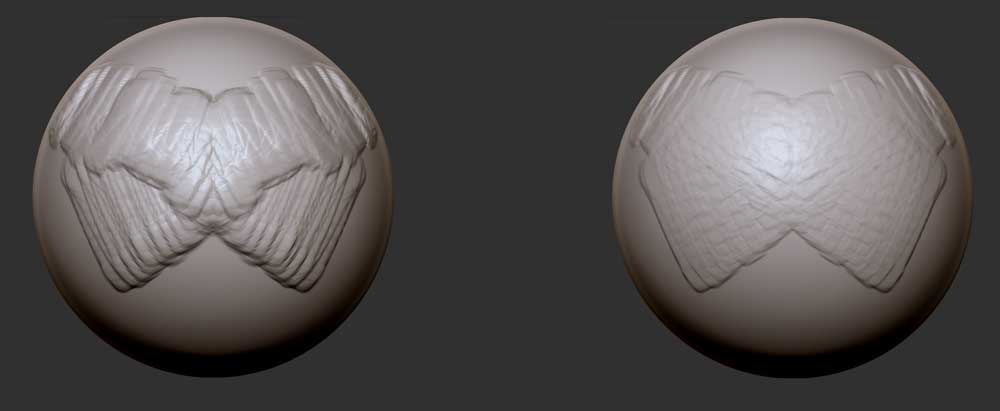
(Left) ClayTubes Buildup ON ….. (Right) ClayTubes Buildup OFF
This mode is very useful at the start of the sculpture as it helps you apply material in a more gestural manner quickly building up shapes without getting caught up in details.
(Left) Rake Buildup ON ….. (Right) Rake Buildup OFF