Connecting and Navigating
The Viewer is one of the most important panels in Autograph. It can be connected to different graphic sources in order to display them.
Viewer connection slot
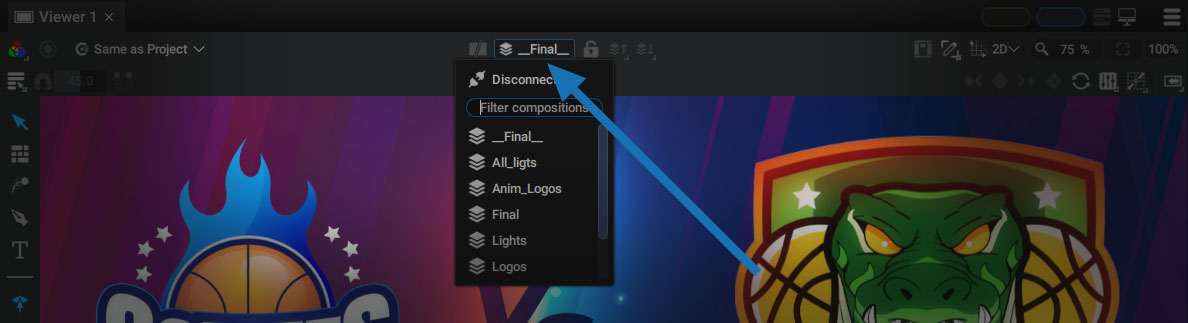
The top of the Viewer contains a central connection slot, initially represented by an unplugged socket.
Clicking on this slot will display the list of compositions visible in the Project Panel and an disconnect option.
Secondary connection slot
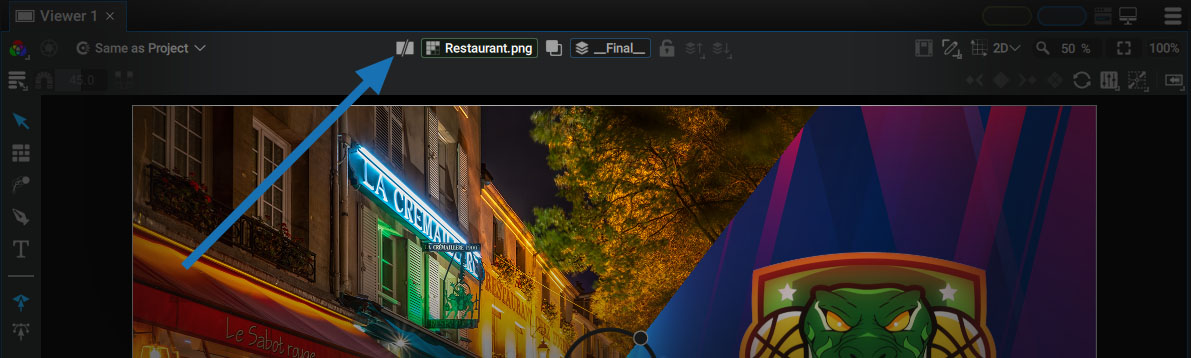
Just to the left of the connection slot there is a button representing two images with a slash symbol.
Clicking on this button will bring up a secondary slot that is outlined in a different color:
- The main slot is located on the right and is outlined in blue.
- The secondary slot is located on the left and is outlined in green.
Connecting an item to the viewer
Right-clicking on an item in the Project Panel will display a Show in ... menu.
You can connect the item to:
- Viewer 1 Main View
- Viewer 1 Secondary View
Viewer 1 refers to the panel of the same name (remember that a panel can be renamed by double-clicking on its name). If several Viewers are visible in the Workspace, this menu will display all connection options by Viewer.
Fast Connection to Slots by Double-Clicking
Double-clicking on an item will connect it to one of the two slots, depending on the keyboard shortcut used.
- Double-clicking with the alt/opt key will connect the item to the Main View
- Double-clicking and pressing ctrl/cmd will connect the item to the Secondary View
Some panels also offer a default action when double-clicking without pressing any key:
- Double-clicking on an item in the Project Panel: will connect the item to the Main View.
- Double-clicking on a layer in the Timeline: if the layer source is a compositon, it'll go into this Sub-composition

Locking or Freezing a Viewer
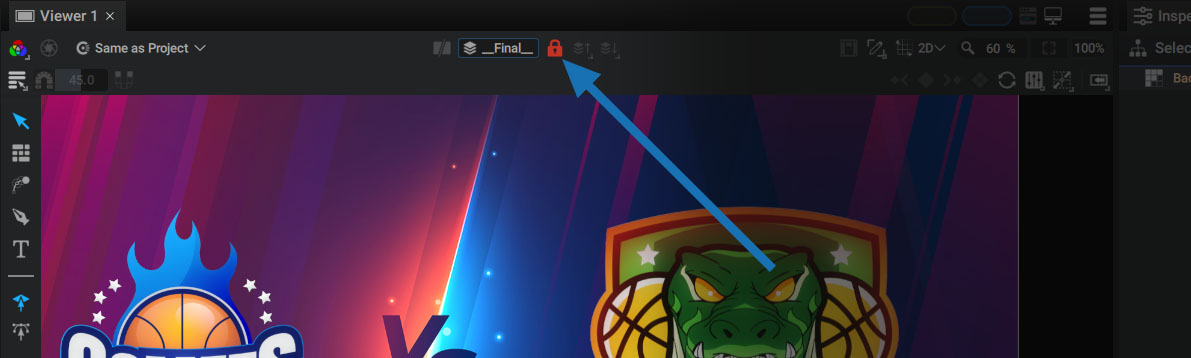
Next to the connection slot there is a padlock, and a little further there is a switch for freezing a Viewer.
Locking
By activating the padlock, you will block any future connection to the Viewer. This ensures that it will always display the same content, even if you accidentally double-click on another composition in the Project Panel.
If you attempt a new connection, the padlock will pop, signifying that the connection could not be made.
Freezing
Clicking on the switch will prevent any updates on the current Viewer and will keep the last computed image on screen. When handling a very large number of layers, Paths, or Keyframes in the Timeline, this option will prevent calculations in order to make Autograph more responsive.
Next to the padlock there are two buttons that also appear in the Timeline that are described in the Timeline controllers section. They allow you to go up or down a level in the Sub-Composition hierarchy.
Not just for compositions
Compositions are not the only items that can be connected this way. The following can also be connected:
- A layer, in order to view it in the context of its composition, with its Modifiers, but without the other layers
- A Source coming from a Reader imported in the Project panel (image, animation, or 3D Asset)
- A Generator used by an image parameter (like a Source or a Mask)
- The result of Image Modifiers added to an image parameter
When an item other than a composition is connected to a slot, it will be outlined in red. This makes it easy to see that the contents of the Viewer are not those of the composition that can be displayed in the Timeline, for example.
Compare two elements
The purpose of having another source connected to the secondary slot is to compare two Sources, whether they be compositions, layers, or images from a Reader. The Display mode will change to Split screen and a new menu will appear in the center to set the Blending Mode.
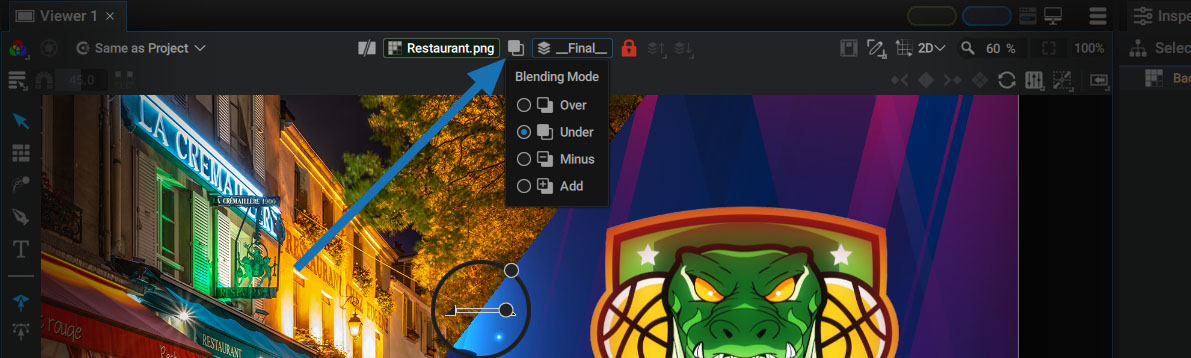
Blending mode
- Over: Main view is composited over Secondary view
- Under (default): Secondary view is composited over Main view
- Minus: Secondary view is subtracted from Main view (Main-Secondary)
- Add: Secondary view is added to Main view (Main+Secondary)
Control widget
The control widget contains three controllers:
- The large main circle allows you to move the split separating the two images
- The small circle on the outside defines the orientation of the split between the two images; it is even possible to reverse the two inputs, via an angle greater than 180 degrees
- The slider lets you control the mix, between 0.0 and 1.0, of the B input compared to the A input, according to the Blending mode; if the mix is set to 0, Input A will be the only one left
When turning this split, it will snap when approaching the 90, 180, and 270 degree angles.
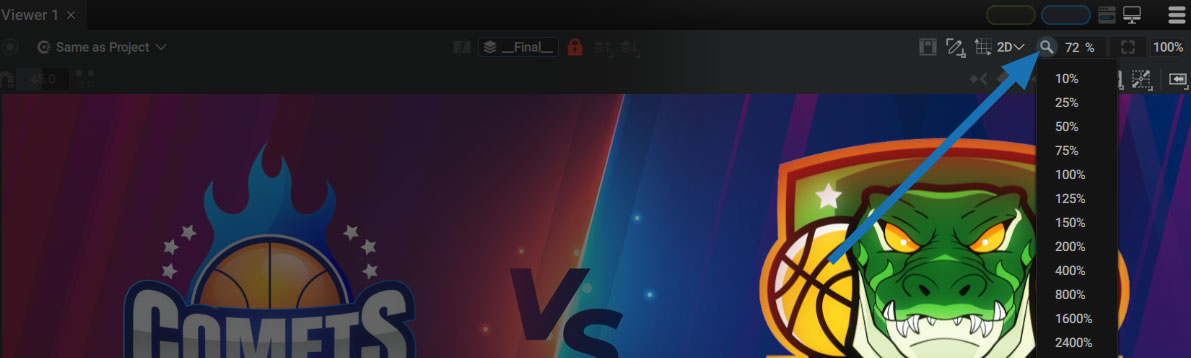
Zoom Factor
At the top-right of the Viewer there is:
- A zoom value (percentage) that can be edited manually
- An Auto-fit button (this option can be activated by pressing the f key)
- A 100% button to display the Source at its real size
By activating the Auto-fit option, the composition format will always be visible, no matter how the Viewer is resized, thanks to an automatic zoom in/out that will fit the composition to the panel edges.
Navigating the Viewer
In order to offer a panel of shortcuts that can work across all platforms (Windows, MacOS, Linux) there are several ways to zoom and move within the Viewer:
- Zooming:
- ctrl/cmd + alt + left mouse button
- "Mouse wheel"
- Panning:
- alt / opt + left mouse button
- middle mouse button
- space + left mouse button
Channel Selector
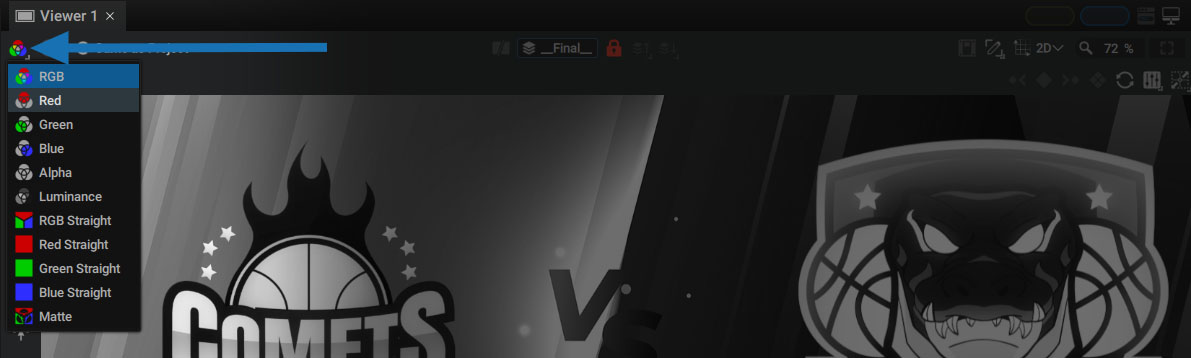
The channel selector at the top left of the Viewer allows you to visualize one of the image components, according to the following list:
- RGB: Displays the RGB channels premultiplied against the alpha channel
- Red: Displays the Red channel premultiplied against the alpha channel
- Green: Displays the Green channel premultiplied against the alpha channel
- Blue: Displays the Blue channel premultiplied against the alpha channel
- Alpha: Displays the Alpha channel
- Luminance: Displays the luminance using Rec 709 luma coefficients (0.2126 x Red + Green x 0.7152 + Blue x 0.0722)
- RGB Straight: Displays the RGB channels unpremultiplied against the alpha channel
- Red Straight: Displays the Red channel unpremultiplied against the alpha channel
- Green Straight: Displays the Green channel unpremultiplied against the alpha channel
- Blue Straight: Displays the Blue channel unpremultiplied against the alpha channel
- Matte: Same as RGB, except that the alpha channel is also added to the red channel
You can simply hover over this parameter to change the mode, without having to validate it and quickly inspect the different image channels. If you want to compare one of the channels with the active one, simply hover over this menu and exit to the left or right to return to the active mode.
Post-processing
Autograph’s engine works exclusively in linear space and uses 32-bits per channel, so that no information is lost during calculation and display. Pixels with very high luminance (greater than what can be displayed by a monitor but detectable by the picker) are kept.
In order to facilitate visualizing these extreme values, or contrarily, very dark pixels, the Viewer has three functions that allow you to boost or reduce image luminance and chrominance:
- Gain (from -6 to +6 stops): acts like the diaphragm of a camera, letting more or less light into the lens
- Gamma (from 0 to 5): changes the image gamma without modifying the perfectly black or white pixels, but only the intermediate values in this range
- Saturation (from 0 to 4): decreases the saturation between 0 and 1, then increases it to 4
To access these features, simply click on the diaphragm icon, located at the top left. This will unfold these three controllers.
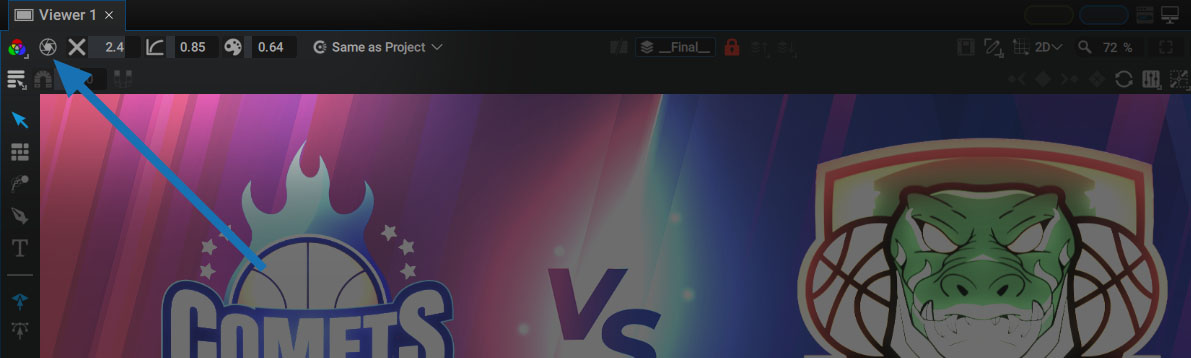
The diaphragm allows you to globally activate or deactivate these post-processes. Each function also has a switch to remove the influence of one of these effects, which will gray out the associated value. These post-processes are extremely useful to analyze HDR images or to better distinguish dark pixels.