Particles (legacy)
Ever wanted to create shark-infested waters, an intergalactic fleet with hundreds of starships, or just some swirly cigarette smoke? Cinema 4D's particle system will do all of this for you, and much more, in a very easy and intuitive way.
At the heart of Cinema 4D's particle system is the emitter, which ejects a stream of particles. These particles and their shapes can be modified by various parameters, Modifiers and Field Forces controls to produce, amongst other effects, rotating, deflecting and decelerating particles.
It's a simple as this:
-
Create an emitter (Simulate / Particle / Emitter).
-
Click the Play icon in the animation toolbar and view the default particle system in the Viewport.
- Make an object a child of the emitter (a sphere is suitable for now). In the Attribute Manager, ensure that the emitter's Show Objects option is enabled.
Cinema 4D enables you to use any object as particles — not only spheres, but also complex, grouped objects with hierarchies such as a jointed bird or a car.
Even light sources can be used as particles. You can create fire or smoke effects very easily using visible lights, and particles can even cast lights and shadows.
All objects in the emitter can be fully animated to create, for example, birds that fly and fish that swim.
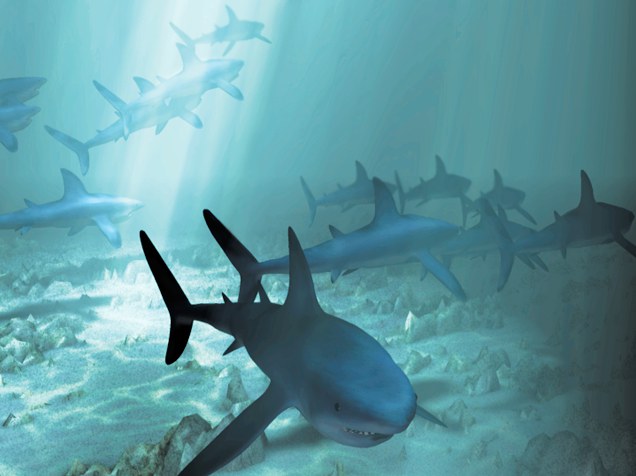
The particle stream can also contain mixed random particle objects (e.g., a variety of different birds). Simply drag the different objects into an emitter. These particles are then emitted in the same proportion.
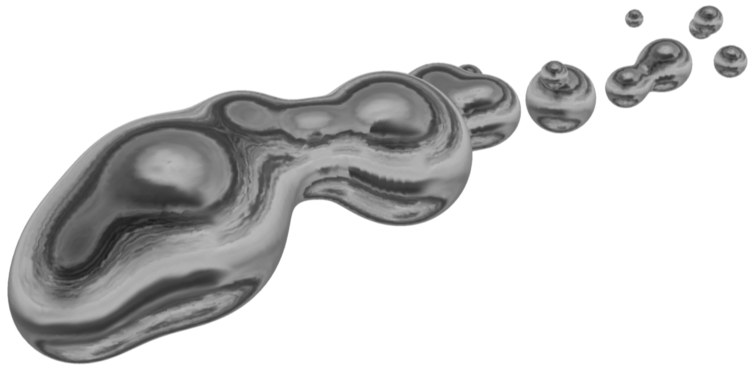
You can also use a Metaball to achieve otherwise difficult effects, such as bubbling liquids.
If the particles from an emitter are to be melded together into a Metaball, the emitter must be a child of the Metaball.
The particles move in a straightforward fashion until they arrive within the range of a modifier. Then they are diverted, slowed down, rotated, etc. These modifiers work, by default, in the Z direction of their coordinate system (e.g., the wind blows in this direction); if this is not the case, it will be explicitly pointed out in the text below. Modifiers can be embedded in other modifiers (i.e. nested). Thus a Turbulence modifier within a Wind modifier results in very realistic smoke effects. Almost all the properties of an emitter and the modifiers can be animated. Why not animate the strength of wind for realistic gusts?
Particle effects will only be displayed accurately when played at a constant rate in the Timeline. If you go backwards in time or move more than one frame forward then strange things may happen on the screen. These strange effects happen because the new position of a particle is calculated from the previous position. Therefore you should always reset the time slider to the starting position when adding new modifiers to the particle system.
When playing back you should enable the Animate / Frame Rate / All Frames option, or click on the Animation tool bar's Options icon and enable All Frames. In order to get an accurate display using the Timeline animation controls, you must single-step through the animation to make sure that no frames are skipped. This does not matter when the scene is finally rendered with the raytracer, since the scene will then be calculated frame by frame from start to end.
When using a light for particles, disable the light's shadow casting, otherwise the many shadow will slow down rendering greatly.
You cannot use emitters as particles. You will find two particle system examples at the end of this chapter, one for light sources as particles, the other for Metaball as particles.
Baking Particles
Under certain conditions it may become necessary to use the Bake Particles command for particle streams. What does this mean?
Under normal conditions particle streams are rendered dynamically and sequentially, i.e., the position of a particle in the next frame depends on its position in the previous one. But this can cause problems in two ways …
First of all let's consider rendering within mixed networks. With the Team Renderer the rendering of an animation within a network can be distributed over several computers for faster results. For this type of network rendering a variety of different platforms can be combined, e.g., Power PC, AMD and Intel processors. Since the floating-point units (FPU) of these processors work slightly differently, the sequential nature of the particle rendering can produce different results on the different platforms. The final output could be a non-continuous particle stream with large gaps in parts along the stream. The solution is to bake the particles before rendering them over the network.
The second problem occurs when using several independent particle systems in a scene. In principle all modifiers will always affect all particles of a scene, no matter what the source. If this is not what you want, remedy it by baking the particles.
When baked, a particle stream will become frozen in its present condition, i.e., the position, rotation and size for each particle for each frame of the animation is fixed (also in the Timeline, although you will not notice it). All computers in a Team Renderer network will now render the particles correctly.
To bake particles:
In the main menu, select the emitter and choose Simulate / Particle / .
Examples
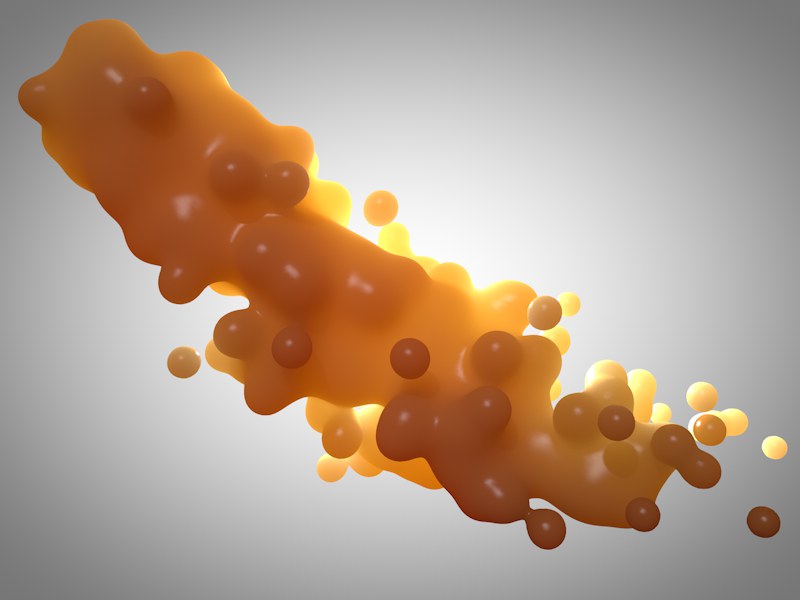
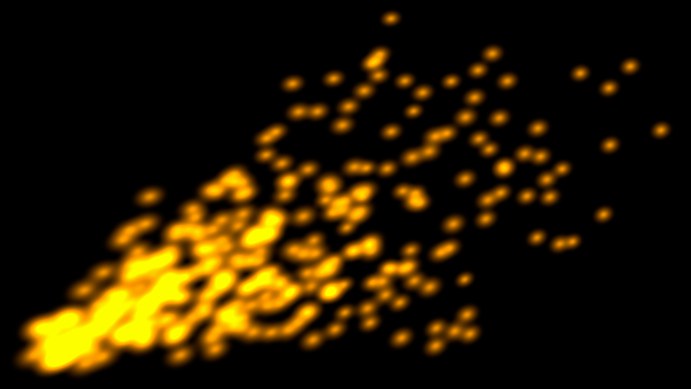
Particle animation with light sources
In this example, we will create a comet tail.
Create a light source with the Attribute Manager settings listed below. Only the values that you need to change are listed — leave other values at their default.
General page
- Color = R 100%, G 70 %, B 0%;
- Visible Light = Visible;
- No illumination enabled.
Visibility page
- Outer Distance = 10 cm;
- Relative Scale Z (i.e. the third Relative Scale box) = 200%;
- Additive enabled.
Next, choose Simulate / Particles / Emitter to create an emitter. In the Attribute Manager, change the following values (again, leave the values that are not listed set to their defaults):
Particle page
- Birthrate Editor = 100;
- Birthrate Renderer = 100;
- Speed Variation = 50%.
Emitter page
- X-Size = 30 cm;
-
Y-Size = 30 cm;
Angle Horizontal = 30°; - Angle Vertical = 30°.
In the Object Manager, Drag & drop the name of the light onto the name of the emitter to make the light a child of the emitter. Move the time slider some way into the animation and render the picture. To refine the tail, animate the light source parameters. For example, the particles could start with a yellow color, changing to orange then black over time. Why not add a few modifiers?
Metaparticles
In this example, you will learn how to combine particles with Metaball. Note that the emitter — including its child — must be a child of the Metaball object.
Start by choosing Create / Modeling / Metaball to create a Metaball object. Now edit the settings in the Attribute Manager. As with the first example, only the values that you need to change are listed — leave the other values set to their default.
Object page
- Hull Value = 70%;
- Viewport Subdivision = 15 cm;
- Render Subdivision = 5 cm.
Next, choose Simulate / Particles / Emitter to create an emitter. In the Attribute Manager, change the following values (again, leave the values that are not listed set to their defaults):
Particle page
- Birthrate (Editor & Renderer) = 15;
- Lifetime = 100 F (Variation = 50%);
- Speed = 500 cm (Variation = 50%);
- End Scale = 0 (Variation 100%)
Choose Create / Object / Sphere to create a sphere. In the Attribute Manager, set the sphere's Radius to 35 cm. In the Object Manager, Drag & drop the sphere's name onto the emitter's name to make the sphere a child of the emitter. Now Drag & drop the name of the emitter onto the name of the Metaball.
Move the time slider some way into the animation and render the picture. Now experiment!