Dynamics
This option enables or disables the tag completely. If disabled, it's the same as not having a tag at all - the object to which it is assigned will not exist in the eyes of Dynamics.
If the tag is assigned to a clone-generating object (e.g., Cloner object, Break object, etc.) and Individual Elements is not set to Off, a MoGraph selection can be used to exclude individual clones from the options at left.
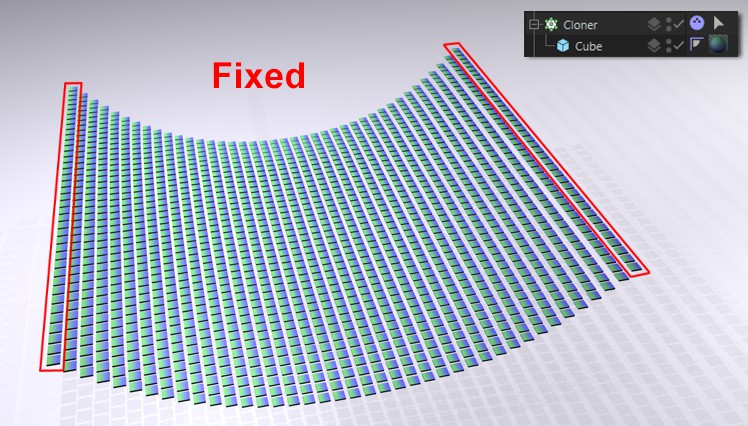
 A MoGraph selection with Dynamics.
This is especially well-suited for fixing certain regions of clone constructs that are calculated as Soft Bodies (option Soft Body Made of Clones).
The following options can be defined in the selection menu:
The dynamic objects will obey the Timeline commands and not Dynamics. Collision detection will, however, still take place.
The dynamic objects will obey Dynamics commands (and not the Timeline commands, as with the previous option). You can animate between the On and Off settings and the Transition Time (described below) will be phased in and out.
Collisions will be registered in this mode but no collision will take place (with rebound). Dynamic objects will simply pass through these objects.
So, what is this good for?
For example, you can use a body to determine if it contains dynamic objects (e.g., with the Dynamics Collision Node, which contains a Ghost port).
Or if a Rigid Dynamics Tag's Trigger parameter is set to On Collision, the impact with such an object will be counted as a collision and in fact take place.
It often occurs that you have a scene, for example with a brick/stone wall, in which the bricks lie too close to one another and you want to correct this by simply letting the simulation run for a moment until all elements have "settled". This state should then be used as the starting state (of course, this also works with Soft Bodies). This is exactly what is done with these two buttons. Let the simulation run for a moment, stop the simulation and click on the Set Initial State button. Internally, this state will be saved as the starting state. You can now go to frame 0 and start the simulation anew.
Clear Initial State will do exactly this and, for example, reset the state defined (e.g., by a Cloner object) at frame 0.
If you want to show the visualization via the Project Settings (Dynamics / Visualization) you can define on tag level if the tag's objects / clones and their effects are displayed.
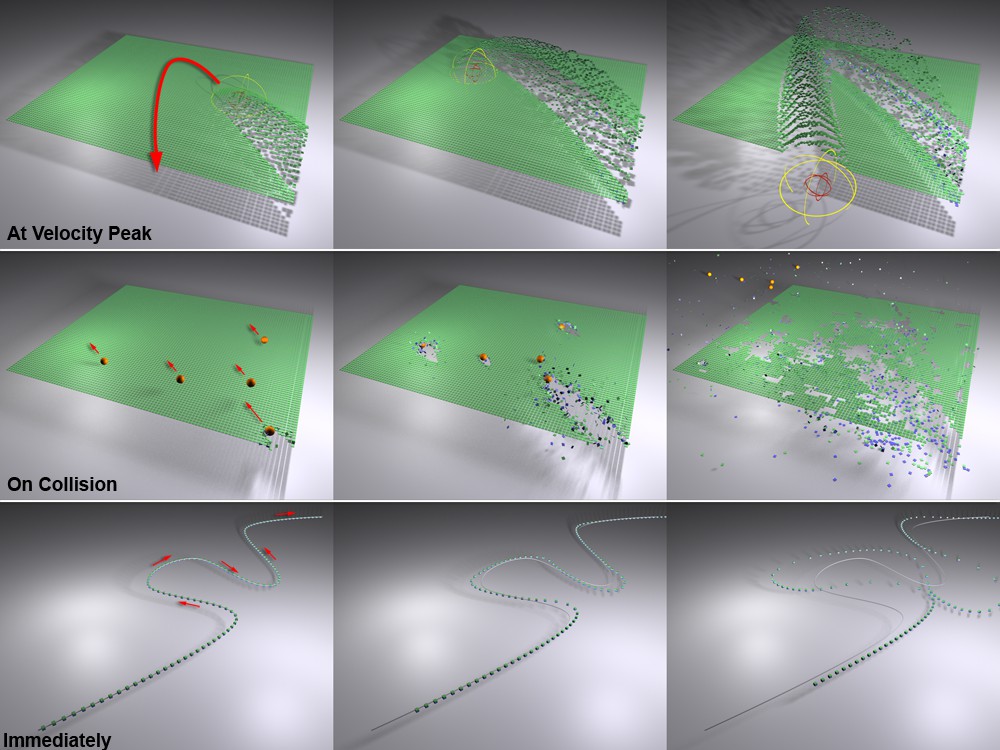
 Different Trigger modes result in different effects.
Using this parameter you can determine the point at which the Dynamics should take effect on dynamic objects. As soon as Dynamics takes effect they will basically take command of the dynamic objects. The extended influence of the initial object settings is then removed. Of course the effect of Dynamics can be turned off again and the dynamic objects will return to their initial or keyframe-animated position.
Dynamics will take effect right away. As soon as the animation is started the dynamic objects will, for example, start falling. If dynamic objects are animated the traditional way via the Timeline, the velocity with which they fall when Dynamics takes effect ( Enabled can be defined freely) will be applied as their initial velocity.
For animated dynamic objects (see previous parameter), Dynamics will take effect when dynamic objects have reached their maximum velocity. Linear and angular velocity per object and frame of animation will be compared. If a velocity not greater than the previous and at least 0.5% less is measured the corresponding object will be affected, i.e., the algorithm cannot foresee if a subsequent animation frame will contain a greater velocity value and will therefore start the effect when the maximum velocity is first reached. Dynamic objects will enter the Dynamics calculation using this maximum velocity.
Dynamics will first affect dynamic objects when they collide with an object/clone to which a Dynamics Body tag has been assigned. With the next parameter Trigger Velocity Threshold you can define the degree of contact required for the effect to take effect.
Trigger Velocity Threshold[-∞..+∞m]
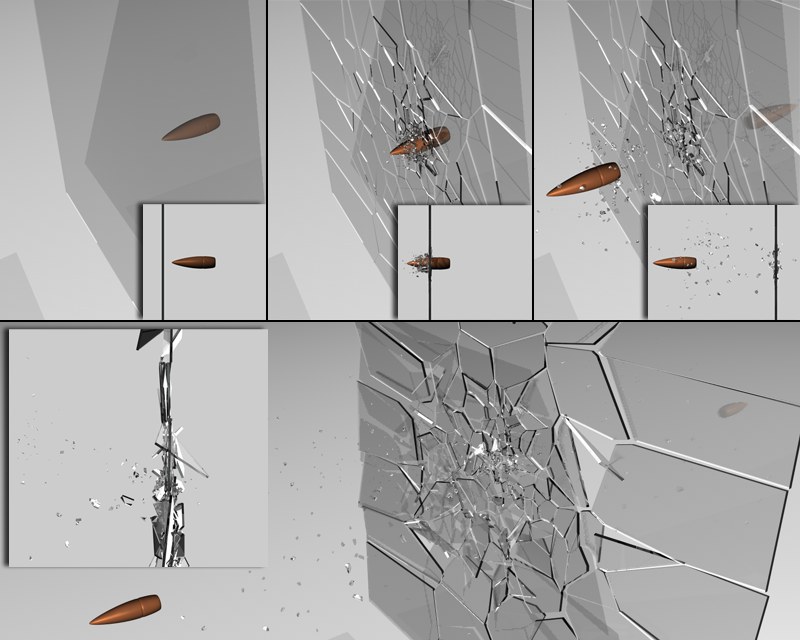
 The Trigger Velocity Threshold ensures that only those elements with which a collision takes place will be affected. At bottom a value that is too high - the entire glass pane shatters.
If Trigger is set to Collision you are able to define this value. The higher the value the greater the velocity required before the collision takes effect. The deciding factor is the velocity in the direction of the surface Normals, i.e., if an object moving at high velocity only strafes an object the collision may not have an effect at all.
The example above was created with the help of the "Xplode" plug-in, which is designed to cut an object into many small pieces.
Using the Dynamics Body Status Node's Trigger command, Dynamics can be triggered using XPresso.
As soon as Dynamics starts to affect dynamic objects, these can be assigned any Custom Initial Velocity desired. For example, as soon as one dynamic object even slightly touches another, the latter can be made to repel with a high velocity. The initial (animated) velocity will NOT be included in the calculation - only the Initial Linear Velocity will be applied.
This can, for example, be used to create interesting chain reactions - like the ones you see in those elaborate mouse trap experiments. In the following example, each clone was assigned a Initial Linear Velocity along the Y axis (upwards).If another clone is dropped onto the center of the construct the chain reaction will be set off:
 The good old mouse trap effect using Initial Linear Velocity.
Note that all velocities defined in this tag are measured in seconds (e.g., if Initial Linear Velocity is set to 200cm, the object will move 200 cm per second). This also applies to the Linear Velocity Threshold setting, which is described further below.
Initial Linear Velocity[XYZ m]
This value defines the absolute X, Y and Z velocity when Dynamics takes effect. Note that you might have to increase the value (also applies to the following option) when working with higher velocities to prevent incorrect calculations for collisions.
Initial Angular Velocity[HBP °]
Use this value to define the rotational velocity, for the H, P and B axes, when Dynamics takes effect.
Use this to define whether the velocities named above should use object's coordinate system (option enabled) or the global coordinate system (option disabled).
 Sphere and clones rotate; sphere repels clones; Dynamic option then disabled and the clones return to their initial position.
You can disable the Dynamic option at any time. Doing so will result in Dynamics no longer affecting the dynamic objects, i.e., the objects will return to their initial position; animated objects will return to their initial state. You can create spectacular effects just by switching between the effects of physics and the Timeline.
The Dynamic Transition option defines whether the dynamic objects will return to their initial position via a force, including collision detection (option enabled) or via simple interpolation (option disabled) without collision detection.
Transition Time defines the number of frames of animation that should lie between the disabling of the Dynamic and the return to the initial position/state.
Linear Velocity Threshold[0..+∞m]
Angular Velocity Threshold[0..+∞°]
These velocity values are designed to optimize the calculation speed. As soon as the velocity of a dynamic object lies below these threshold values for 2 seconds it will be omitted from further Dynamics calculations and will come to an absolute stop. This state will last until it is impacted (collided) from another object. The object will again be included in the Dynamics calculation until its velocity again falls below the threshold values for a period of 2 seconds.
The threshold values can be defined separately for Linear and Angular velocity.

If you want the Falloff value to define when the clones should start falling it can occur that the clones are excluded from the Dynamics calculation prior to the Dynamics taking effect. In this event, set the threshold value to 0.
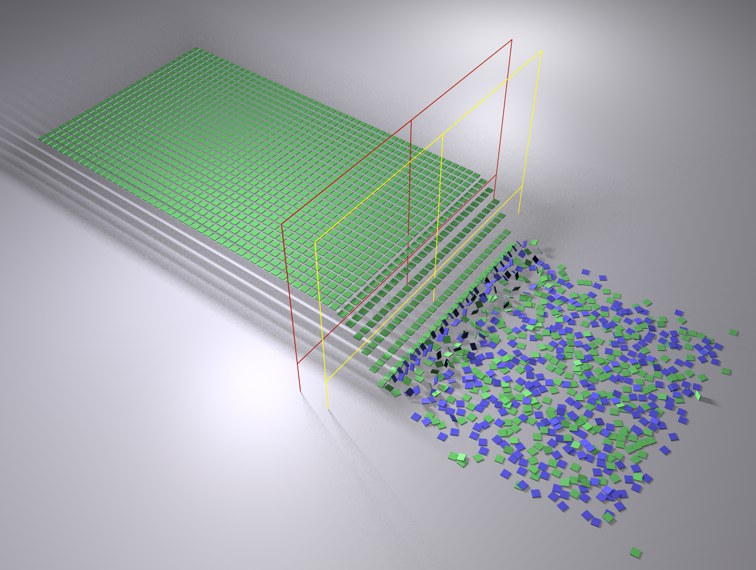
Also make sure not to let the Effector/Modifier pass too quickly through the clones (in particular when the Effector's/Modifier's effect is spatially restricted) because this can result in paradox phenomena due to the great distances the force field has to cover between frames. This can be compensated for by increasing the range of the force field.