GoZ Default Settings
Here you can select what is to be imported or exported in conjunction with ZBrush.
Within ZBrush, you can change the scaling of your object using several plug-ins. For example, Scale Master can be used if you want to print your object with a 3D printer. This can significantly change the scaling of your object. If you therefore want to adjust the model size in Cinema 4D, you will find numerical values here with which the dimensions of the geometry will be multiplied for import or export.
These settings activate or deactivate the import/export of a color texture if it was created in ZBrush, or if it is available on the model in Cinema 4D.
These settings activate or deactivate the import/export of a Normal map if it was created in ZBrush, or if it is available on the model in Cinema 4D.
These settings activate or deactivate the import/export of a displacement map if it was created in ZBrush, or if it is available on the model in Cinema 4D.
These settings activate or deactivate the import/export of UVcoordinates, provided they were created in ZBrush, or are available on the model in Cinema 4D.
Cinema 4D enables the weighting of edges in order to reduce the smoothing in these areas using a Subdivision Surface object. To do this, you can select edges on the geometry in Cinema 4D and save a percentage value for these edges by calling up Mesh>Add>Subdivision Surface Weighting, for example. The higher this percentage value is, the harder these edges appear, even if the object is subordinated to a Subdivision Surface object.
Please note that in Cinema 4D, for example, individual weightings can also be assigned to points. This is not possible in ZBrush. Therefore, only use edge weights. In addition, ZBrush does not offer any intermediate percentage values for the edge weights. You should therefore only use the extreme values 0% and 100% for edge weighting in Cinema 4D in order to obtain identical shapes in both programs.
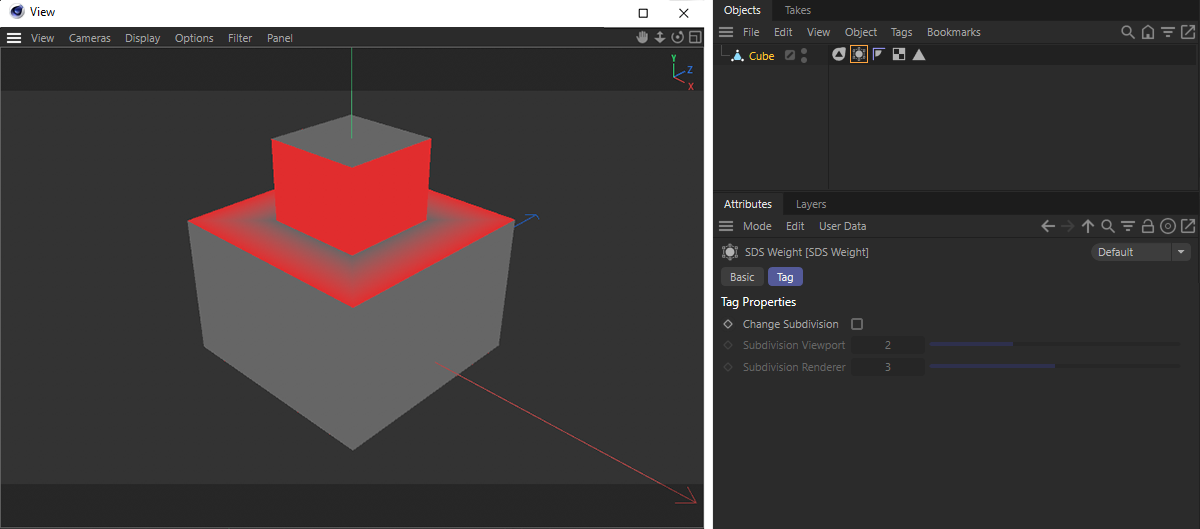
The weighting information will be stored on the object in an SDS Weighting tag, which can also be used in the Viewport for a colored overlay of the weightings. As can be seen in the image above, only the SDS Weighting tag needs to be selected. In this case, the horizontal edges of the model were weighted at 100%.
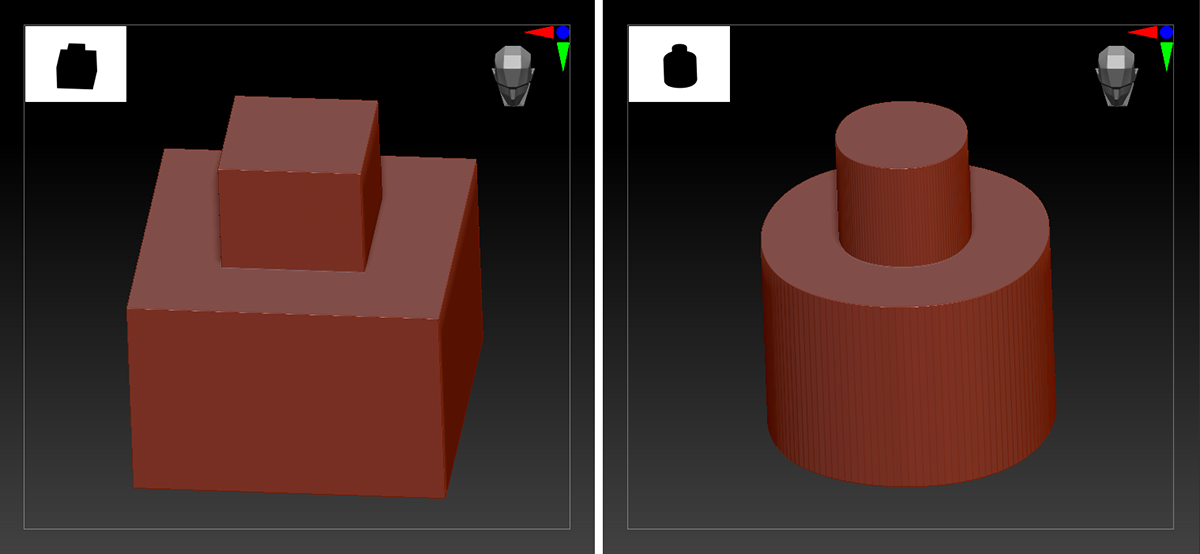
The SDS Weighting tag information will automatically be used in ZBrush to sharpen the edges when the subdivision levels are increased. The image above shows an example of the object imported from Cinema 4D with the weighting information and, to the right, the shape created by multiple subdivisions in ZBrush.
If the option for Subdivision Surface is active, a Subdivision Surface object will automatically be created when importing a ZBrush object into Cinema 4D, provided that sharpened edges (edge loops) are available in ZBrush.
These settings activate or deactivate the import/export of PolyPaint information that is saved in a Vertex Color tag. If you want to recreate PolyPaint information in Cinema 4D and export it to ZBrush, use Vertex Color tags and make sure to use 'Polypaint' for the names of these tags.
These settings activate or deactivate the import/export of polygon groups or ZBrush polygroups. This information is stored in a Polygon Group tag, which you can find out more about here.
If this option is activated: Cinema 4D will try to find out whether the object already exists in the open scene. If this is the case, current elements will be replaced with the newly imported ones. These include:
- The Polygon Group tag
- The Vertex Color tag
- Assigned textures
ZBrush materials, which can contain color information as well as normal and displacement maps, can be imported directly into Cinema 4D. You can choose Cinema 4D renderer for which these materials should be created. The following settings are available:
- Auto: Materials will automatically be created for the renderer currently selected in the Render Settings.
- Standard/Physical: A standard material will be created that is compatible with both the Standard Renderer and the Physical Renderer.
- Redshift: Redshift Node materials will be created. Redshift object tags will also be created on the objects that use displacement.
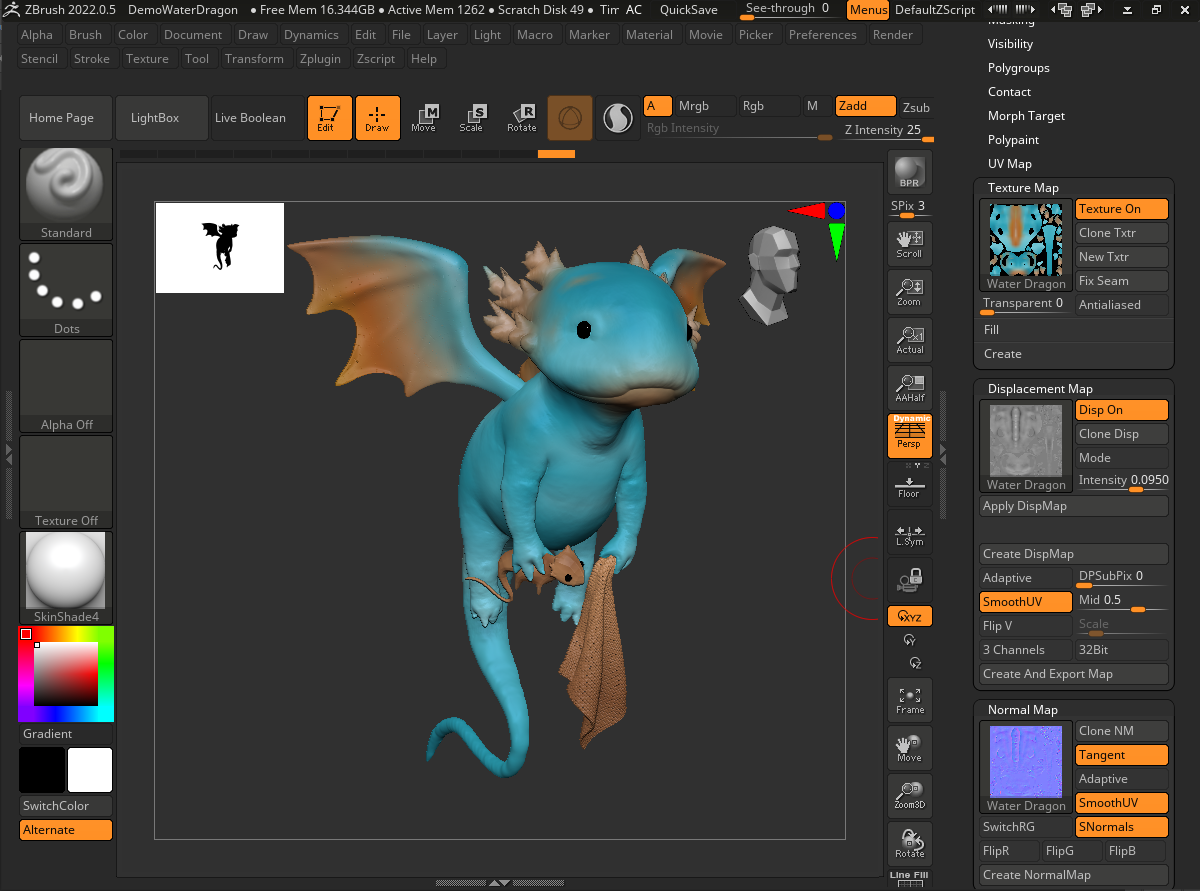
The image above shows an example of a project opened in ZBrush. It is one of the example projects supplied.
As can be seen in the right-hand column, textures have already been calculated for the colors, normals and displacement. However, some of the objects only use PolyPainting information, i.e., they have only been assigned color values that are saved with the points of the geometry. This information will be transferred to Cinema 4D in Vertex Color tags.
If you want to transfer vertex colors from Cinema 4D to ZBrush, this is also possible. Just make sure that the Vertex Color tag is named 'Polypaint'.
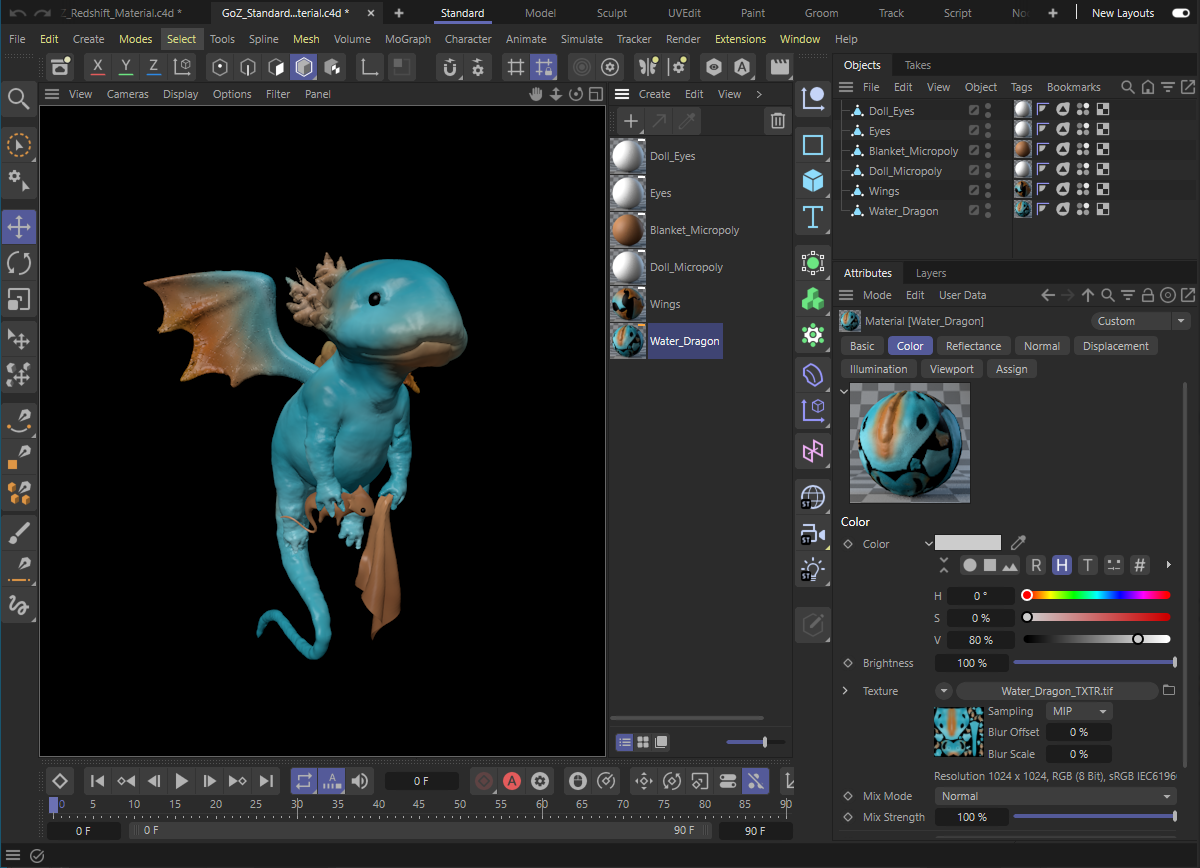
When transferring via GoZ in ZBrush or importing into Cinema 4D using Extensions>Go ZBrush>GoZ Importer, you will find the objects together with the appropriately confirgured materials in the Object Manager, as shown in the image above.
When using standard materials or physical materials, the ZBrush textures will automatically be loaded into the appropriate material channels. This can also be seen in the Attribute Manager in the image above.
If Redshift is used for rendering and has also been selected as the target for material creation, Node materials will be created in which the textures will also automatically be integrated by linking them appropriately with a Redshift standard material:
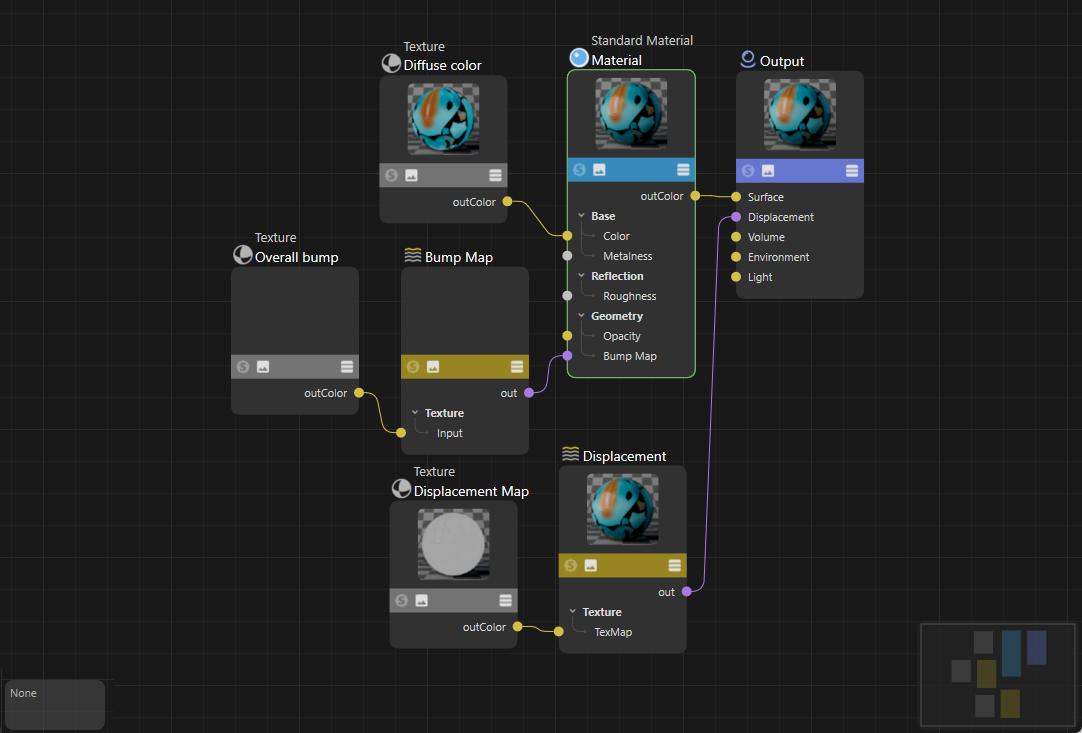
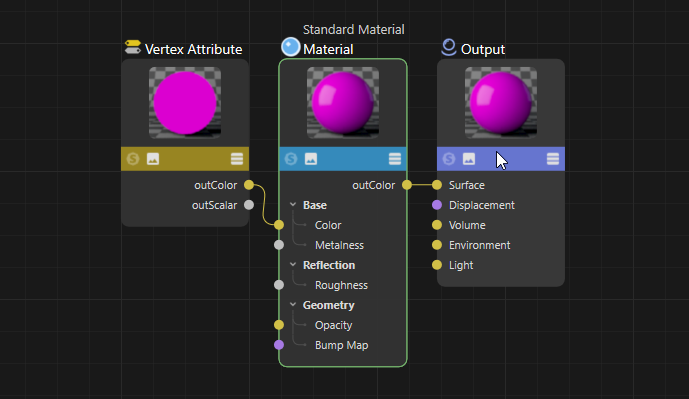
The PolyPaint information available on objects is stored on the objects in Vertex Color tags and will automatically be read from there using the Redshift Vertex Attribute Node and interpreted as a material color, as shown in the following image.
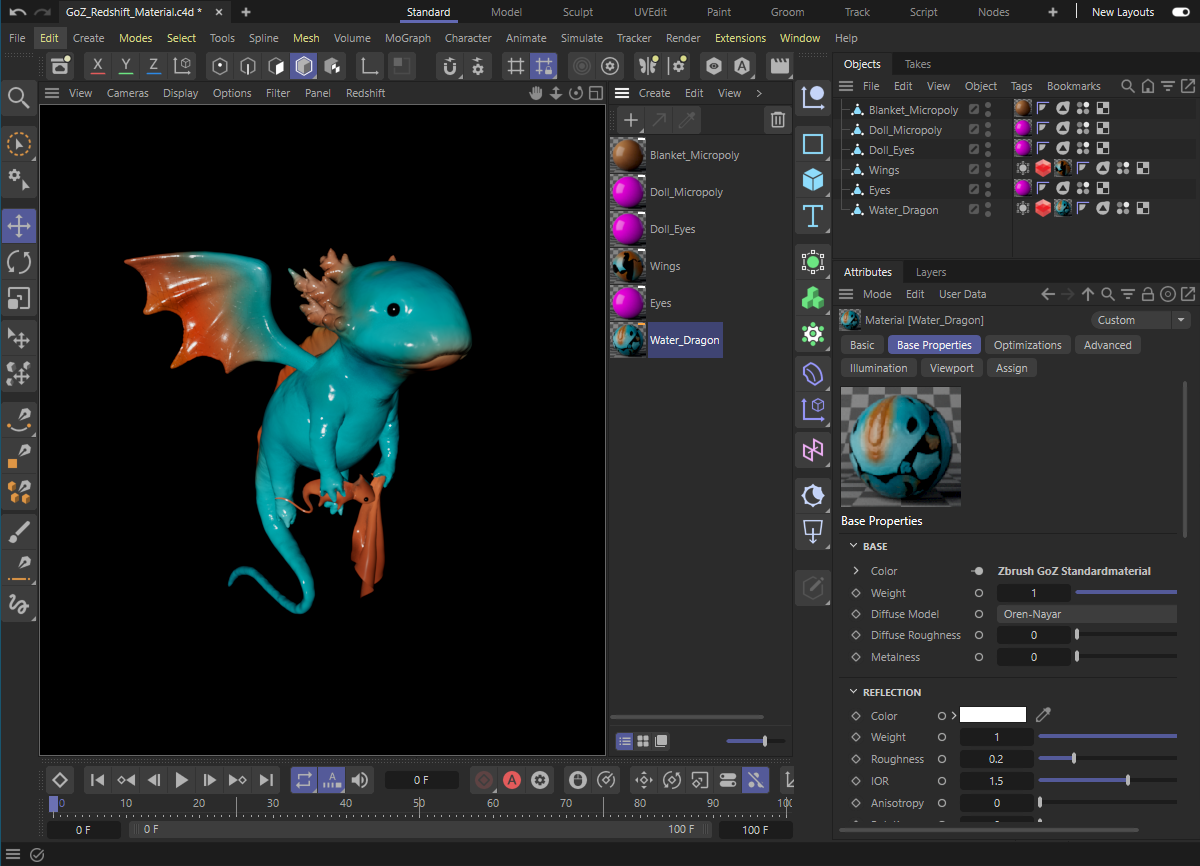
The Redshift Object tags required for displaying displacement will automatically be created on the objects during import from ZBrush if displacement textures have been detected on the objects. The number of subdivisions will also be calculated automatically and will already be entered on these tags. The following image shows an example of how the ZBrush scene is displayed in Cinema 4D with Redshift.
If you use a MatCap material in ZBrush, this will also be exported to Cinema 4D and processed there using the Emission channel and the Redshift MatCap Node.
No textures or vertex color information may be assigned in ZBrush - otherwise they will be imported into Cinema 4D as described above.
If the option is activated, the existing, selected hierarchy (and also, for example, the result of a generator) will be summarized and exported as a single object.
This makes it much easier to export many objects at the same time, as they must not be made editable first, for example.