Camera Calibrator
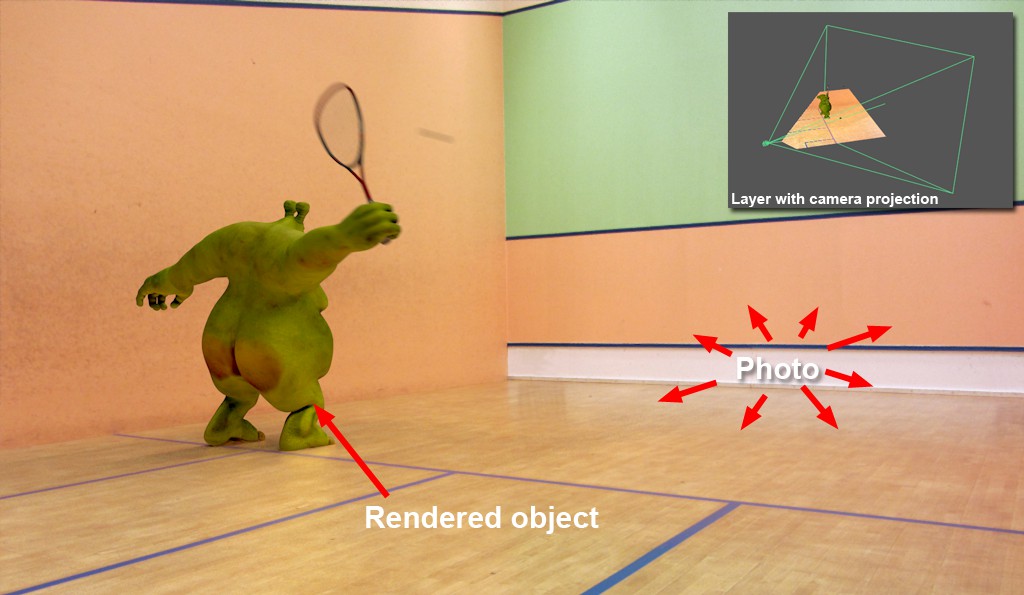 Thanks to the calibrated camera, squash-playing monsters can be composited convincingly into real-world photos.
A common task for almost every 3D artist is compositing rendered objects into real-world scenes - stills or animations. A major problem when doing this is the unknown camera angle with which the real-world material was created - in particular perspective and focal length. These settings must also be reflected in the Cinema 4D camera that is used to render the 3D objects. Only if these settings match can the 3D objects be composited convincingly into the real-world images (of course the lighting must also be set up correctly in Cinema 4D).
Using the Camera Calibrator tag you can load a photo/image (referred to in the following as, reference image’) and interactively reconstruct the camera's focal length, orientation and position.
For the reconstruction, Cinema 4D needs 2 vanishing points and 2 separate, vertically stacked planes. To define vanishing points, parallel lines must be drawn on the image (when displayed in a perspective view, these lines will create a vanishing point):
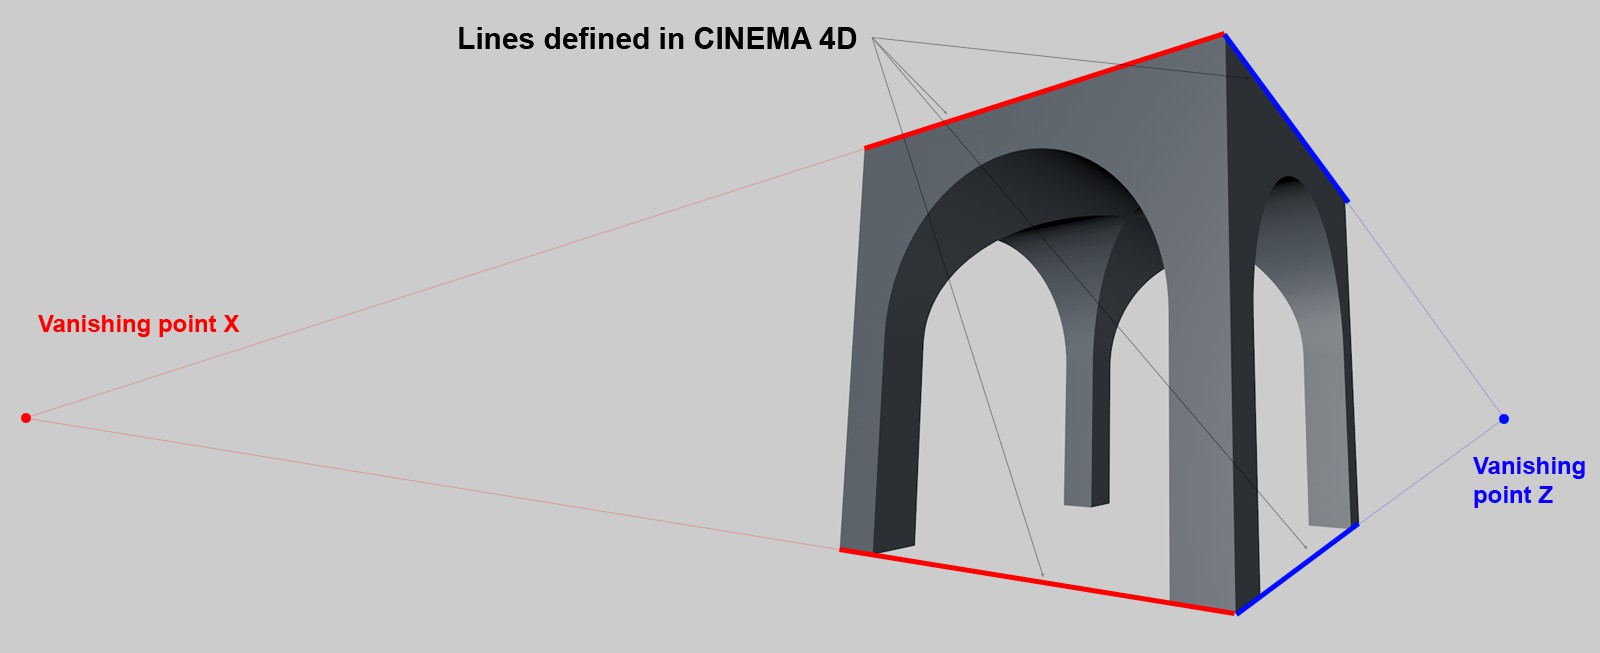 Parallel lines culminate in an imaginary vanishing point.
This works best when working with images of buildings, city squares or similar elements in which clear, parallel lines that lie perpendicular to each other exist.
If you should determine that straight lines are actually depicted bent (extreme example: fish-eye look), it's most likely due to the fact that the recording camera has a lens distortion applied to it. If the distortion is too strong (either very pronounced or the camera calibration is faulty), you have to create a lens profile using the Lens Distortion tool and load it into this tag.
Interactive Control
If the Camera Calibrator tag is selected, the following key combinations will be made available:
- Shift + Ctrl + left click: Moves the reference image
- Shift + Ctrl + right click: Scales the reference image
- Shift + repeated clicking on a line or grid side runs through the different axes: X (red), Y (green), Z (blue), no selection (gray)
- Ctrl + moving a line or grid will duplicate these
- Shift + moving a Pin removes the locking on a line or grid vertex
Example of how a camera can be calibrated based on a photo
- Create a camera and assign it a Camera Calibrator tag. Activate the camera in the Perspective view.
- In the Image tab, load the image whose camera setting is to be recreated into the tag's Image field. The image will be displayed in the Viewport (you can, for example, simply make a screenshot of the image shown below from the documentation and use this image for this example).
- Locate parallel lines or edges in the image that lie perpendicular to each other.
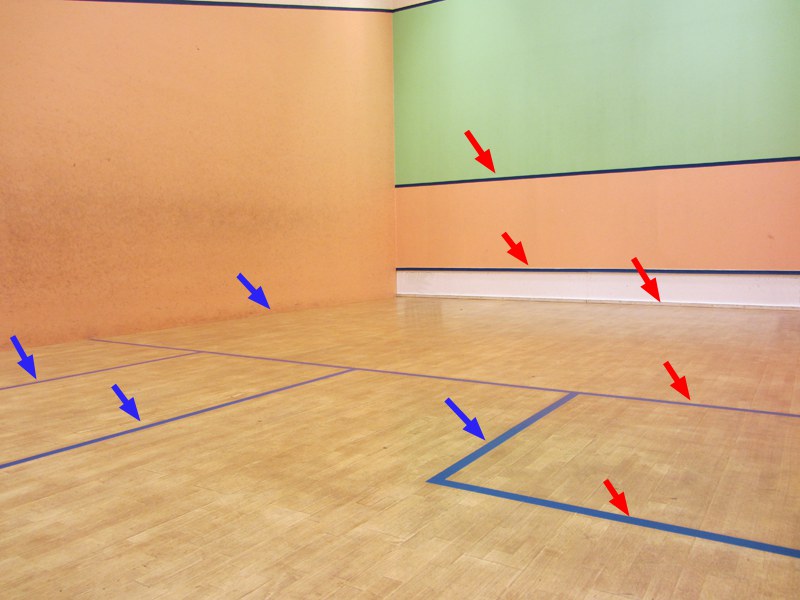
In the image above, lines parallel to the Z axis are marked with blue arrows and lines parallel to the X axis are marked with red arrows. At least 2 lines from each axis will have to be marked in the following step.
- In the Camera Calibrator tag's Calibrate tab, click on the Add Line button. Click and drag on the ends of the line and place them on a corresponding X axis line in the image.
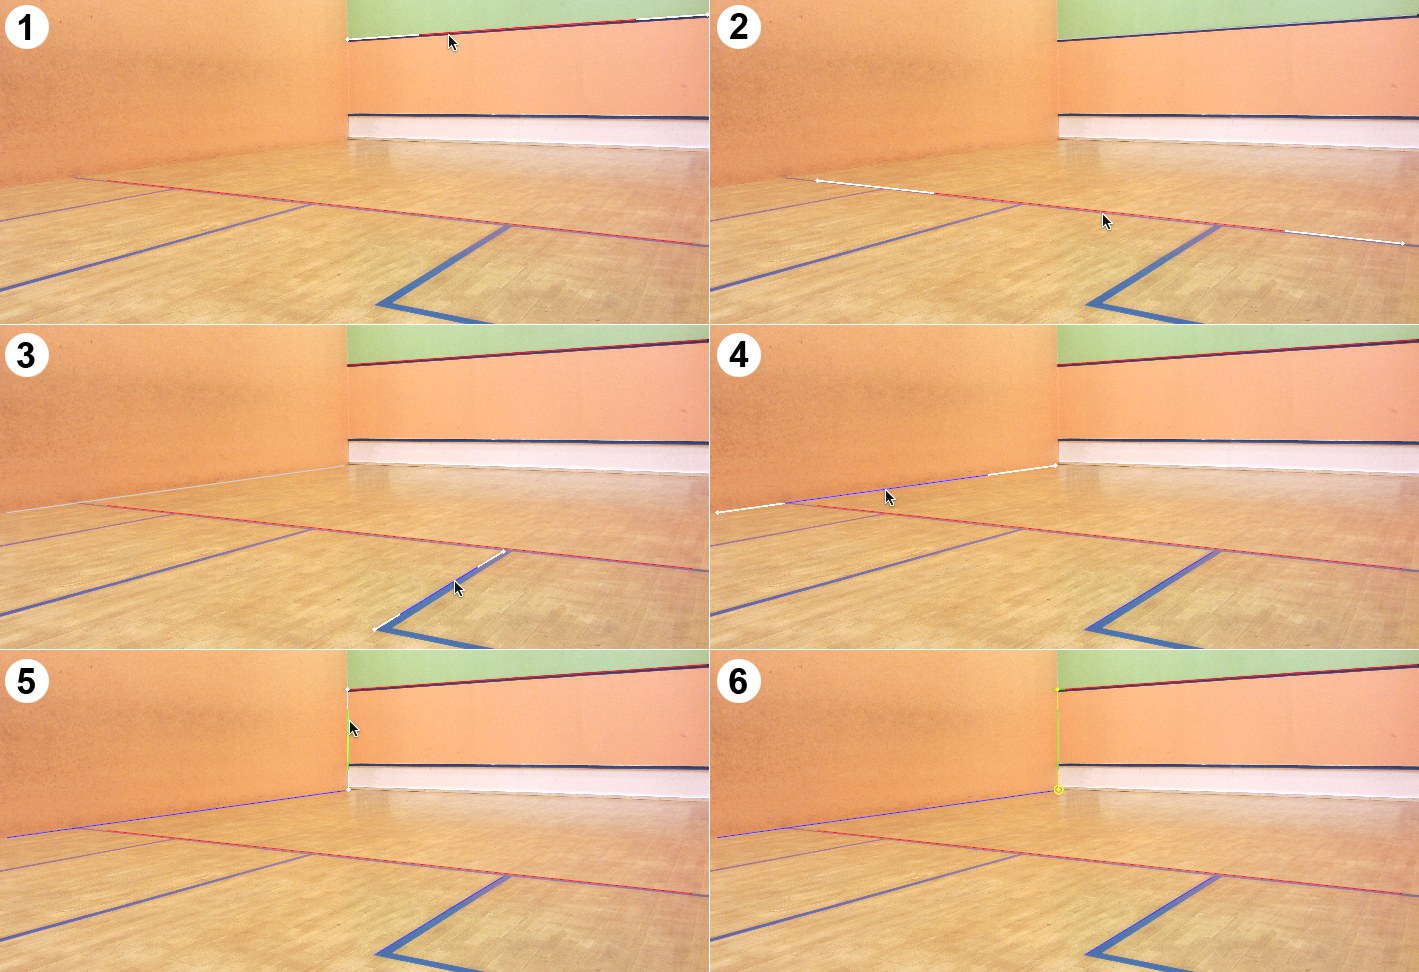
Shift+click on the line until it turns red (X axis).
- Click on Add Line again (or copy the first line by Shift+click+dragging it) and position the line on the line that runs horizontally below it on the floor (2). Shift+click on this line until it turns red (X axis). The vanishing point for the X plane has now been defined and the state of the X Vanishing Point setting will change to Solved.
- Proceed in a similar fashion for the Z axis lines. Add 2 new lines and place them on the floor (3) and along the wall (4). Shift+click on each line until it turns blue, which will assign them to the Z axis. This completes the definition of the vanishing points and the focal length and camera angle can be calculated. The corresponding parameters will be colored yellow and green in the Camera Calibrator's tab.
- Except for the exact camera orientation itself, all pertinent camera settings have been defined. To define the camera's orientation, add a new line and position it in the rear corner (5) and make it a green (Y) axis.
- Click on Add Pin. In the Viewport, drag the Pin onto an end of one of the Y axis lines.
- Click on the Y axis line, which will select both the line and the Pin. Enable the Known Length Y option and enter a value of 178 cm (the squash serve line lies 1.78 m above the floor. Done.

Now all pertinent camera settings have been clearly defined. As a test you can create a Cube object and move it along the axes. You will see that the cube follows the lines according to the image's perspective.
General info and tips
- Keep an eye on the color fields in the Calibrate tab. They offer a good feedback regarding your calibration. Generally speaking, the more green the better.
- When using images in which the camera should move along a street, a corridor or a tunnel, or view a building head-on, lines for all three vanishing points should be added, if possible.
- When using a Material tag projected by the camera (Create Camera Mapping Tag button), the camera view to be rendered should also be set along with the camera used.
- If you scale or move the reference image using the Image tab's settings (or the corresponding hotkeys) for better calibration, don't forget to set it back to 100 using the Full Image button. Otherwise the camera will only be calibrated for that particular view, which is not the desired result.
Limitations of the vanishing point method
- If no vanishing points can be calculated, this method cannot be used. This would be the case, for example, if an image contains only (perspective) lines that run vertically. This is, however, rarely the case. It is therefore important to precisely define lines/grids along vanishing lines. Outdoor images or images depicting nature scenes can also be difficult to define without the presence of right angles. In such an event you'd have to draw by eye and make an approximate placement of the lines on the, floor’.
-
The aspect ratio (Film Aspect) of the recording camera must be known unless the pixels are not square. This is the case for most cameras but not necessarily for still images that were taken from videos. Note also that the aspect ratio of images created using anamorphic lenses (they compress the image horizontally) must be adjusted to the uncompressed value (e.g., how it is viewed on a television screen) using the Image tab's setting.
Tilt-shift lenses are not be supported.