These settings are not available for the Redshift-Renderer.
Lens Distortion
General
Lens distortions are difficult to avoid entirely when using optical recording devices (in contrast to the cameras in 3D applications such as Cinema 4D). These are especially common in conjunction with small focal lengths, i.e., wide angles. This effect is, however, welcome when using fish-eye and anamorphic lenses, etc.
Such lens distortions can, for example, be problematic for motion tracking. Motion tracking works best when the live footage is free from any lens distortion.
Most of the unwanted distortions are barrel or pillow-shaped distortions:
 Left no lens distortion; center barrel-shaped distortion; right pillow-shaped distortion.
The farther away a point in the image lies from the center the more it will be distorted.
The live footage that you feed into the Motion Tracker object (or Camera Calibrator tag) most often has a barrel-shaped distortion. This can lead to a failure of motion tracking or of calibration. In such an event, the distortion must be removed from the footage. During the final rendering, if 3D objects had been adapted, the same degree of distortion must be added so the 3D objects match the footage (unless you use the undistorted material during rendering, e.g., on a background object. However, this is not desired in most cases.).
This is why Cinema 4D lets you distort or un-distort based on a previously defined lens profile using the following functions:
- Lens Distortion tool: to create a lens profile
- Motion Tracker: where the undistorted footage (see Lens Profile).
- Lens Distortion shader: for un-distorting images/videos, e.g., for projection onto a Background object.
- Lens Distortion render post effect: for rendering fittingly distorted 3D objects.
Which function you use when depends on the workflow you use. For each, the lens profile must first be determined using the Lens Distortion tool. This profile can be loaded into all aforementioned functions.
It should be noted that measures for accommodating the lens distortion must NOT be used in all cases. If Motion Tracking/Camera Calibrator works fine without such a measure then you don't need to worry about lens distortion! However, when working on projects that must meet the highest standards (e.g., motion tracking for films in which the smallest distortion of a 3D object would be visible), these measures will be imperative.
Generally speaking, the following can be said:
- Very minor distortions can be ignored. However, if the distortion should nevertheless be removed and a good, accurate lens profile is available, the motion tracking result will be somewhat better.
- If the lens distortion is extreme enough that it is noticeable on the source footage, a lens profile should definitely be applied.
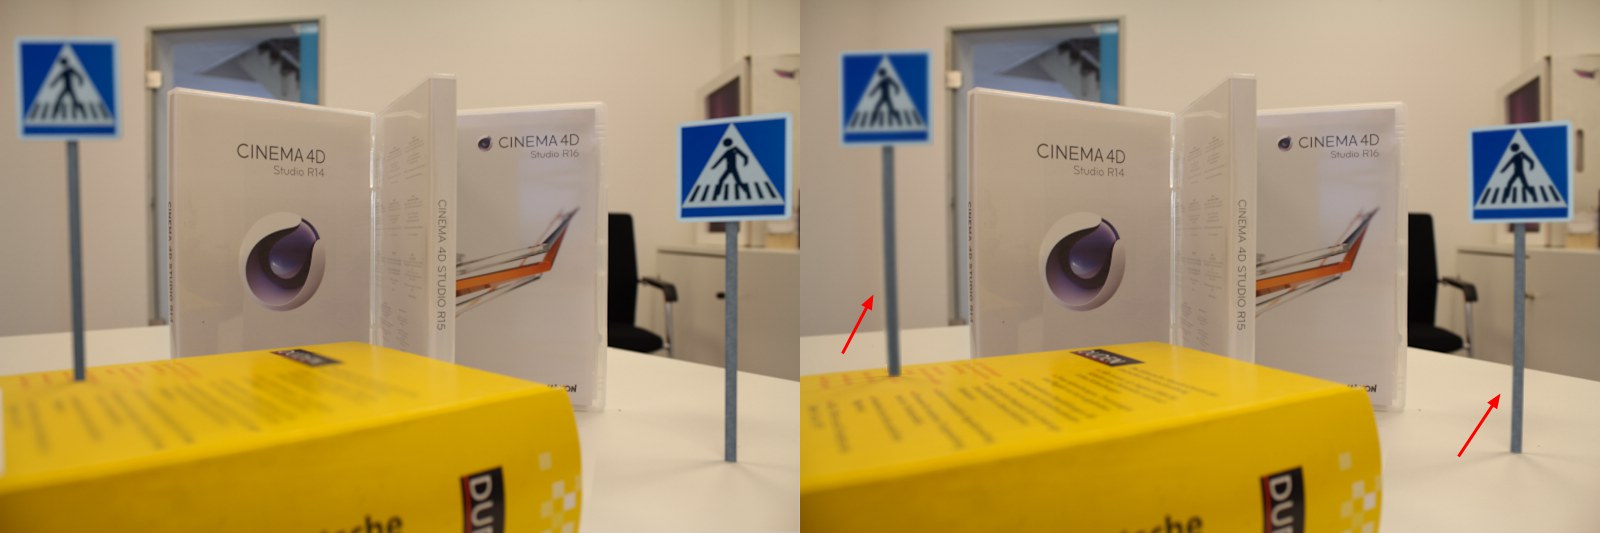 In the image above two traffic signs were positioned in front of a background with obvious lens distortion. At left rendered without compensating for the lens profile, at right with.
The Lens Distortion tool comes into play when dealing with lens distortion effects in Cinema 4D. This tool is used to create interactive lens profiles that uses various lens models (radial, anamorphic, fish-eye) to numerically describe, save and output aberrations at different locations (as described here).
The Lens Distortion tool is applied when an image or video (ideally created using the same camera and focal length as the grid) is loaded. This will then be displayed in the Viewport. Next, interactive guides are then created at linear image edges. There are two ways of un-distorting the image (to be defined in the Lens Distortion tab):
- Manual: The tool's settings are adjusted/fine-tuned until the guides match the image edges. This method is designed for use by experienced users.
- Automatic: The guides are positioned with several points along the distorted, i.e., curved, edges (as evenly distributed as possible). When the function is executed, the guides and those of the underlying image will be straightened and the lens profile will be created. This is the simpler and also the recommended method.
Interactivity
Guides that are created can be adjusted at their points or segments. The following keys can be used:
- Ctrl/Cmd+click to duplicate guides
- Ctrl/Cmd+click once on a guide to add a new point
- Backspace/Del to delete a selected point. Selected guide segments can also be deleted.
Example
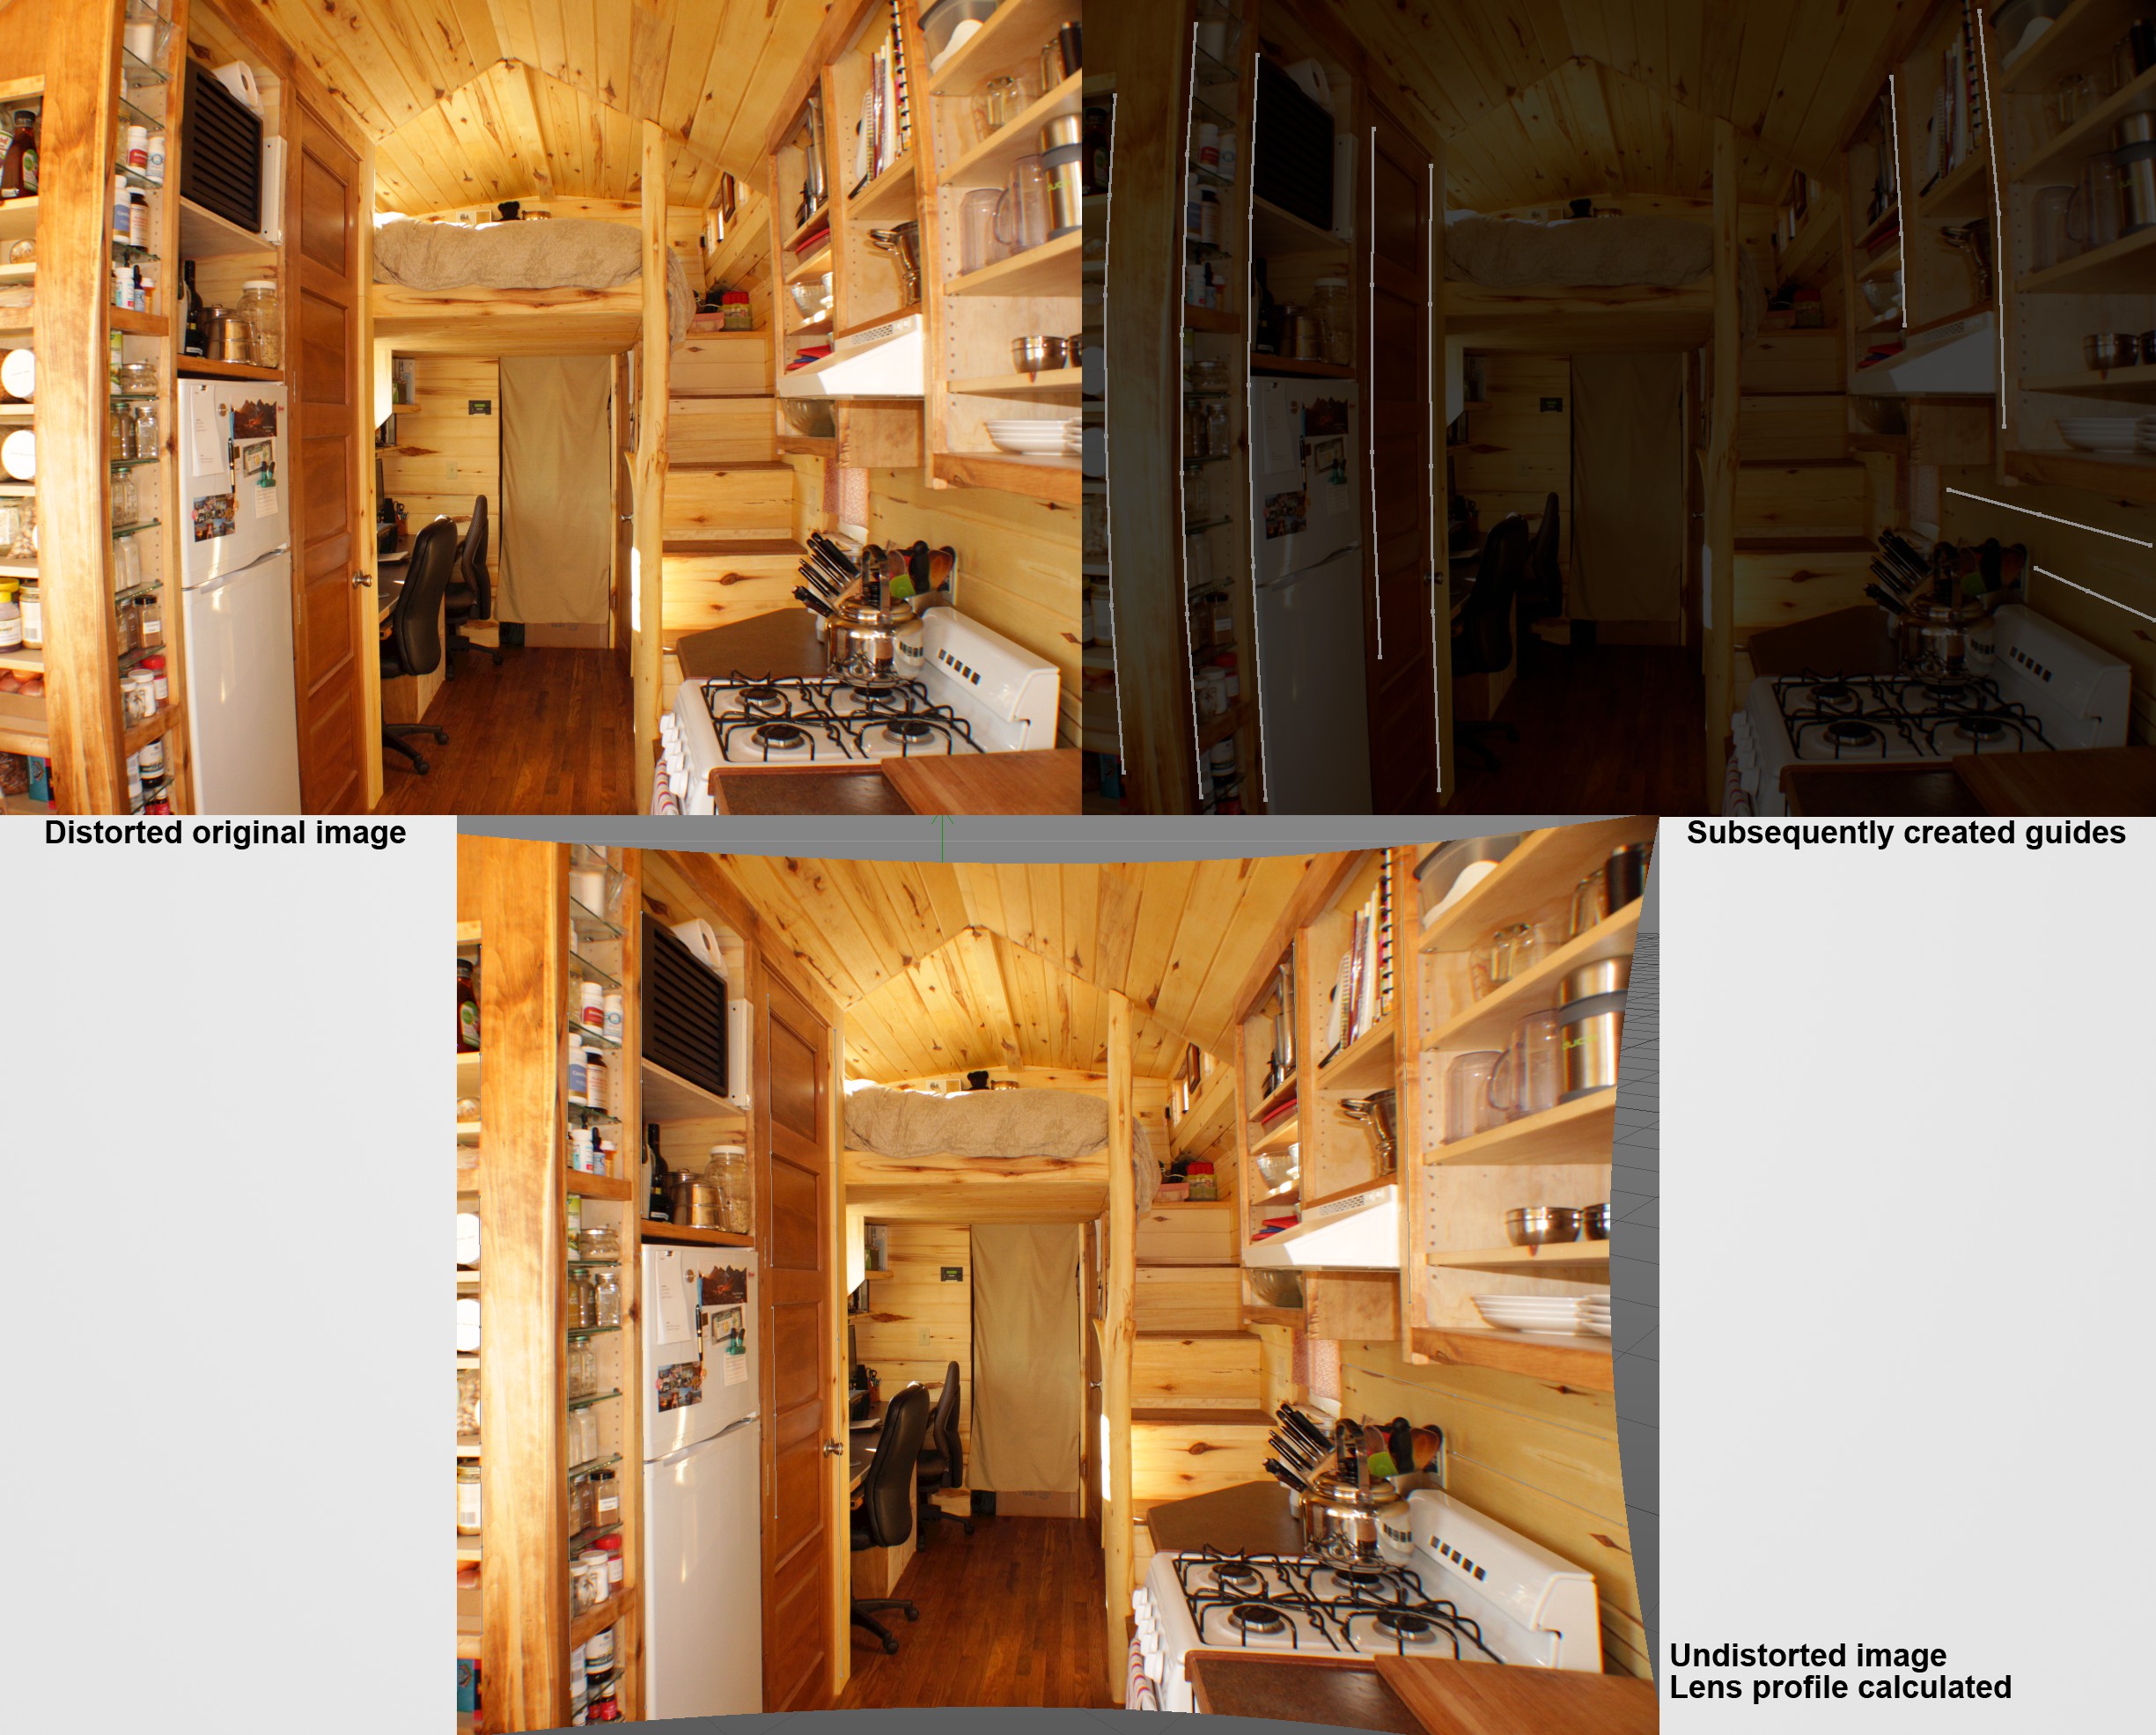 Foto: Erin Harner.
In the image above you can see where guides can be positioned. Generally speaking, the more (precise) guides that are used, the better. If guides can be positioned across the entire image this would be ideal. However, a single guide that is positioned completely wrong (e.g., one that lies on an edge that is in fact curved) can lead to an unusable result. Several parallel guides that lie close together in one region are not as effective if other image regions have no guides at all. The lens distortion can be calculated very accurately at locations at which there are many guides but other regions without guides can be calculated incorrectly. This is why it really helps to include a camera-specific grid for lens calibration!
As you can see, the final, undistorted image is larger than the original image. To rectify this you can, for example, modify the Image Scale or Image Offset X/Y values so that the original format is restored. Depending on your workflow, these settings can be made to match those of the Lens Distortion shader or the Lens Distortion post effect's values to make sure that all values line up.