Brush
![]()
The Brush tool works in all three modes (points, edges, polygons) and affects all points within the preview sphere defined by the radius.
You can use the Brush to shape existing polygon meshes in a variety of ways (although you have considerably more options with the Sculpting Brushes).
This tool has been available in Cinema 4D for some time now, allowing users to interactively and organically deform 3D meshes. Starting with version 2026.3, these functions can also be applied to UV points, edges, or polygons in the UV Editor.
The Brush works very similarly to the ![]() Magnet and shares most of the settings with it. The fundamental difference (see image):
Magnet and shares most of the settings with it. The fundamental difference (see image):
- The Magnet is limited to the area on which you pressed the mouse button at the start.
- The Brush is always active where the cursor is when the mouse button is pressed.
The Brush radius is displayed with a spherical preview in the Viewport. Most painting modes require a Brush center point, to which the Brush draws attention with a dot that is also colored.
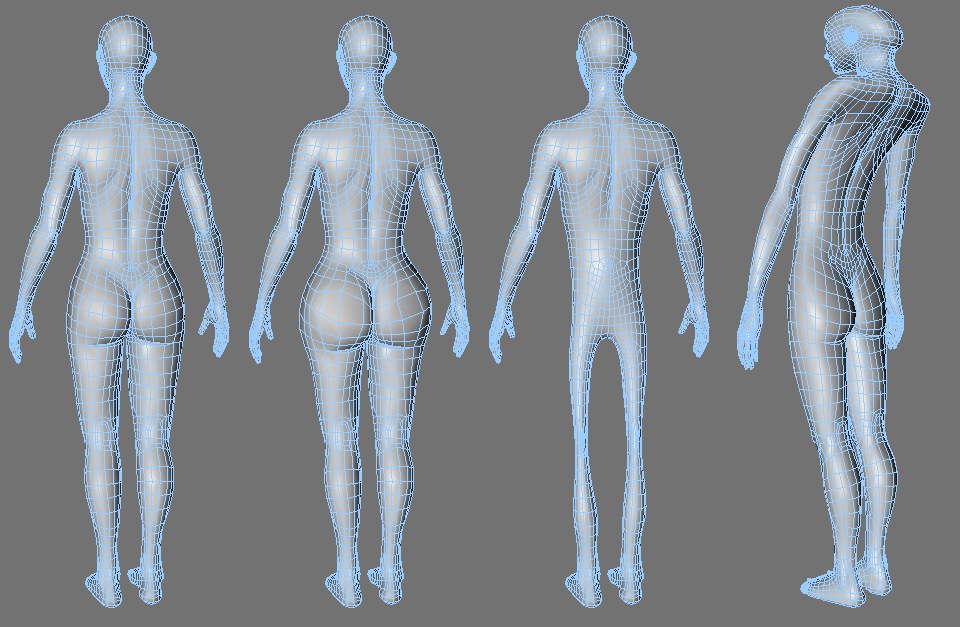 From left to right: Original, Brush mode, Push off, Smooth, Swirl
The deformation of meshes in particular opens up completely new possibilities for interactive modeling. You can now easily paint tentacles or other outgrowths on objects. Or, as in the above image on the right, give a figure a hollow back in Brush mode .
Make sure that your object is subdivided finely enough, as the Brush can only process existing points.
How to use it
The Brush also works as follows: The more often you pass over a spot, the greater its influence. You can deactivate this effect by setting the Strength to 100%, as the process will then be carried out like a mallet.
The following keys apply:
- Ctrl/Cmd: The effect will be reversed (more precisely, the Strength will be inverted).
- Shift: The mesh will be smoothed...
- MMB + mouse left/right adjusts the Brush size.
- MMB + mouse up/down adjusts the Brush hardness.