Cache
General
2 types of Ambient Occlusion calculation are available:
- The usual "brute force" method, which checks the environment's visibility for each individual pixel
- The faster method via cache, which only checks certain points’ visibility and interpolates all others in-between.
The latter works internally in a similar fashion as the Irradiance Cache GI mode and can also be controlled using similar settings. The advantages of using this method:
- The AO calculation is much faster
- The cache can be cached and used again (this is very useful because AO is independent on material and lighting), i.e., if you want to render different views of a given object using AO, the previously checked regions can be re-used by loading the cache and only having the new regions calculated. However, this only works if no changes have been made to objects’ geometry, spacing between objects or anything else that can affect AO.
Ambient Occlusion and Team Render
If Team Render should use existing AO cache files, make sure that these cache files (in the scene's illum folder with an *.ao extension) are also uploaded and the Auto Load option described below is enabled.
Settings
Don't let the numerous settings described below confuse you. Because AO works similar to Irradiance Cache, the settings are for the most part the same. In most cases, you will only have to adjust the Record Density setting. This setting defines the subordinate parameters accordingly (only modify these separately if the AO is consistently wrong or if it does not appear to be precise enough).
A brief statement about how the AO cache works: During rendering, several pre-calculations take place (pre-passes), during which the Project is analyzed in order to check the regions most important for the camera ("shading points" in corners, concave regions, etc.) for visibility of the environment and to calculate an AO value:
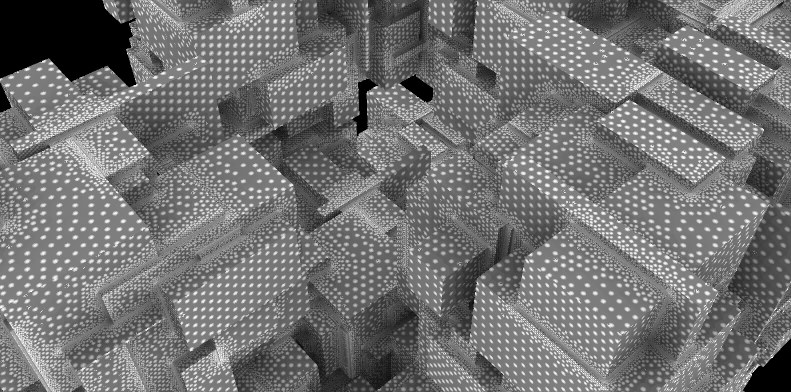 The AO shading points will be arranged on neuralgic locations and saved to the AO cache.
All AO values will be cached to an AO cache and can be saved as a file for later use.
In a second step, the selectively located AO values will be interpolated and smoothed.
The following settings primarily serve to disperse the shading points (reminder: the Basic tab's settings define, among other things, how many samples will be generated hemispherically at each shading point, their length and the effect's color).
If disabled, AO works as follows: The environment's visibility will be calculated for each pixel. If enabled, the AO cache described in the previous paragraph will be used.
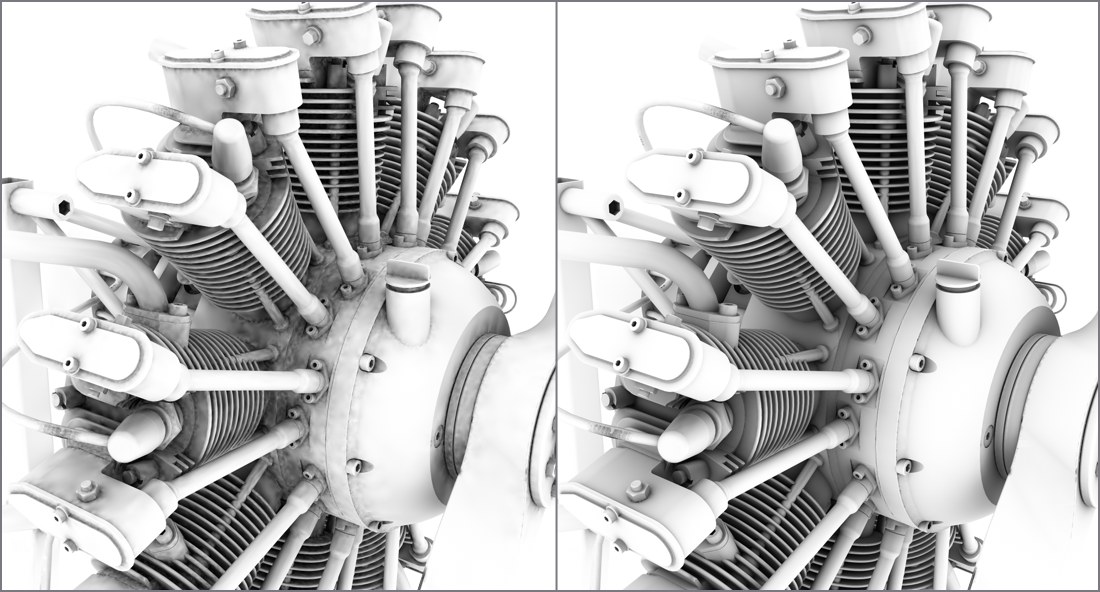 Left: small Samples value. Right: larger Samples value. Model by Steen Winther.
This is the number of samples that are emitted hemispherically from each shading point. If the AO looks spotty, this is the value that should be increased.
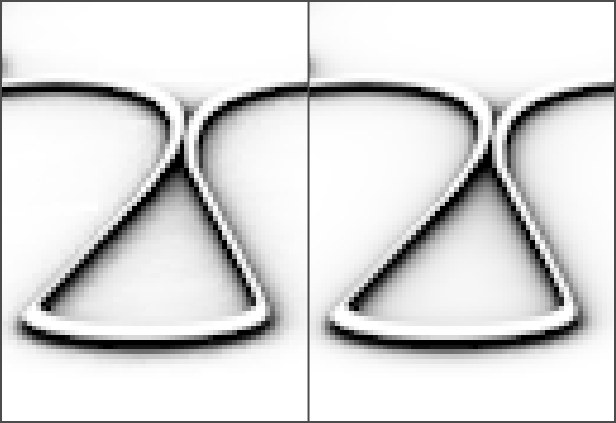 -8/-8 (left) and -8/+4 (right) for Min. Rate and Max. Rate, respectively.
These two settings can, for the most part, be ignored. The effect they have is barely visible. The "worst" setting for Min. Rate and Max. Rate (-8 for each) differs only slightly from their "best" settings (-8 and +4, respectively (see image).
Nevertheless, their function should be mentioned: While the pre-passes are being rendered (the phase in which the squares are at first large and become increasingly smaller) the dispersion of the render density is defined. This is an adaptive process that places particular emphasis on the critical regions. The difference between the Min. Rate and the Max. Rate defines the number of pre-passes.
 -7 and 0 for Min. Rate and Max. Rate, respectively.
A value of 0 will result in full image resolution (pixel size 1*1) and a value of -1 will produce a pixel size of 2*2, -2 = 4*4 and so on. The Min. Rate value should therefore be less than or equal to the Max. Rate value. Positive values can also be used, which will allow caching in the sub-pixel regions (this could, for example be useful in conjunction with Subpolygon Displacement if details get lost).
It's better to describe these three settings together because all three work together and, to put it simply, they define the general shading point density at critical and non-critical areas:
- Density: The general shading point density in consideration of the following to settings.
- Minimum Spacing: The shading point density at critical areas (e.g., corners).
- Maximum Spacing: The shading point density at non-critical areas (e.g., planar surfaces without elements that block the view).
Various values for this setting can be seen if you take a look at the GI's Density setting. The shading point dispersion is exactly that of the AO cache dispersion.
All of the setting just described revolve around the placement of shading points and their calculation.
AO was ascertained selectively at numerous locations within the Project. The selective dispersion must be turned into a flat dispersion for rendering. A smoothing algorithm does this as follows: For each pixel to be rendered on an object's surface, the AO cache is checked for those instances nearest to that pixel and their values will be interpolated for that pixel.
In brief: Values that are too low will result in spotty AO; higher values will result in more homogenous renderings (but even these iron out Samples that are too low). Generally speaking, higher values take into consideration more shading points for the rendered pixel.
Paradoxically, extremely large values will also lead to spotty results.
If disabled, the output size for rendering is irrelevant for ascertaining the shading point density. It will remain constant, regardless if you render at a resolution of 80*80 or 3000*3000. For the former it would be too large and for the latter too small.
If enabled, the shading point density will be linked to the output size for rendering. This will result in a more flexible and adaptive shading point density.

Clicking on this button will delete all saved AO cache files for this Project from your cache. This should be done for the project modifications mentioned above to avoid incorrect results. If the Auto Load option is disabled, you don't have to delete the cache because cache files will be ignored.
At the right of the button the number of Records and the size of the cache are shown, i.e., if Cinema 4D has found an appropriate saved cache.
A brief statement about how the AO cache works: Assuming no previously saved cache is available when you render; the complete cache must be calculated anew. This is done in several pre-passes during which everything in the Project is analyzed, regions are defined that will receive additional attention during rendering, etc., before the actual cached information is rendered in color. This takes some time to complete. However, if a cache is already available, a lot of information still has to be checked but this step can be skipped by enabling the Skip Prepass (If Present) option. This will speed up rendering.
In case no cache exists, it will be calculated regardless of whether or not this option is enabled.
If a cache already exists but the angle of view has changed in the meantime (or if you calculated the AO for very small images but subsequently want to render very large images), we suggest that you do not enable this option because incorrect calculation may otherwise occur.
If the Auto Save option was used to save a cache file, the Auto Load option can be enabled to load this cache. If no cache exists, a new cache will be calculated.
If enabled, the cache file will automatically be saved. If no new save path is defined, it will be saved to an illum folder in your Project's directory. The file name will have an ".ao" extension. If a cache is calculated for each frame of animation (Full Animation Mode enabled), your files will be named "filename0000x.ao".
If enabled, the cache will be calculated anew for each frame of animation and saved with individualized names. If disabled, the same cache will be used for an entire animation (if Auto Save and Auto Load are enabled). The latter works only for animations in which nothing has been modified that affects AO (e.g., object animations)! Otherwise incorrect calculations can occur. If object positions or shapes change, the Full Animation Mode option should be enabled.
Note that when saving caches, the Full Animation Mode saves a large number of files, which can result in a lot of memory being required.
Enable this option and select a path to which you want to save your cache if you want to save it to a specific location.