Irradiance Cache
General
A new Irradiance Cache method has been introduced in Cinema 4D R15 (referred to in the following as IR new). This method bears the following advantages compared to other methods (which are still available in the Irradiance Cache (Legacy) GI mode):
- Small details such as contact shadows - i.e., those that are produced where objects meet, in corner edges, etc. - are of much higher quality (with the right settings in the quality of a pure QMC rendering).
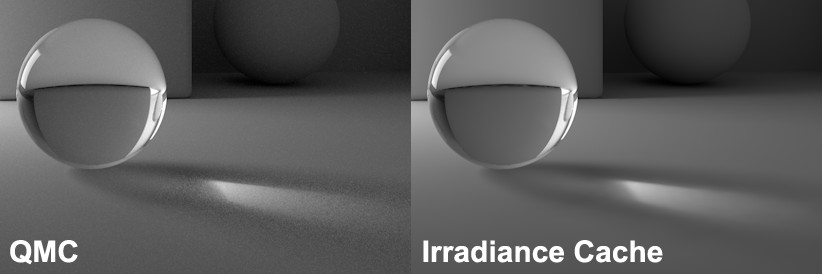
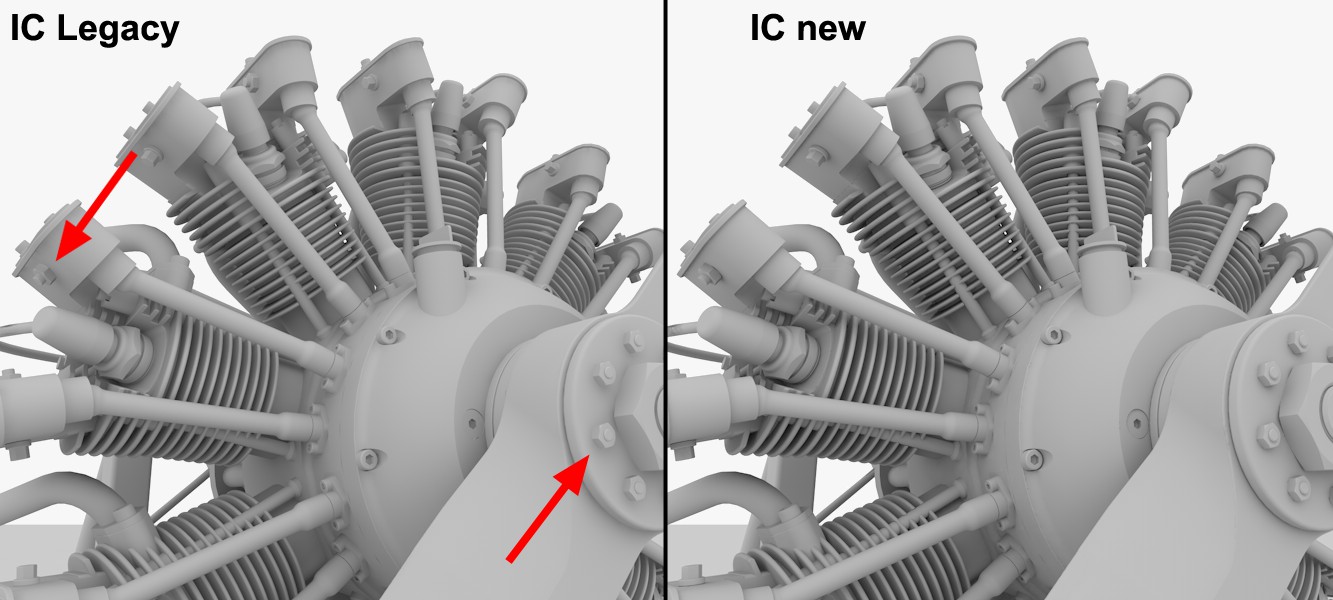 The new Irradiance Cache method offers improved rendering of contact shadows (e.g., in the regions marked in the image on the left). Model by Steen Winther.
- New algorithms speed up rendering.
- IR new works best with the Team Renderer, which also has improved animation quality (e.g., reduced flickering) and speed (see also GI and Animations).
What is an "Irradiance Cache"?
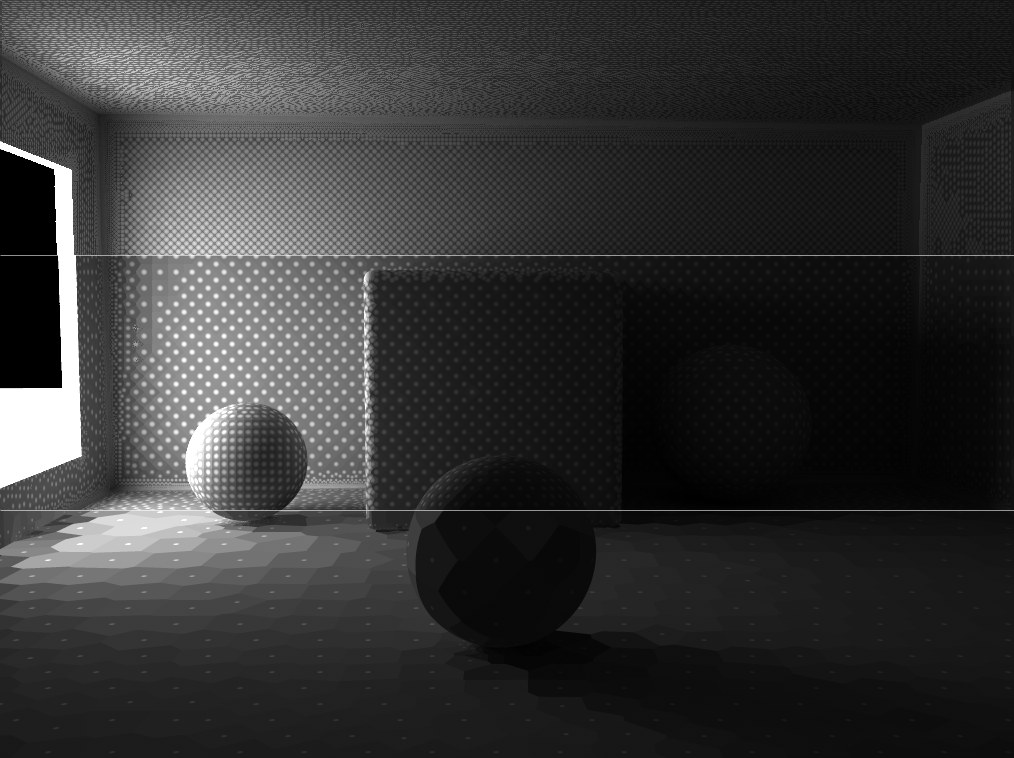
Several pre-calculations (’pre-passes’) are made during IR rendering in which the scene is analyzed in order to ascertain the most important indirect lighting regions (the ,shading points’, which are the points displayed during pre-passes; these become very apparent when using lower Density values). See below for more details:
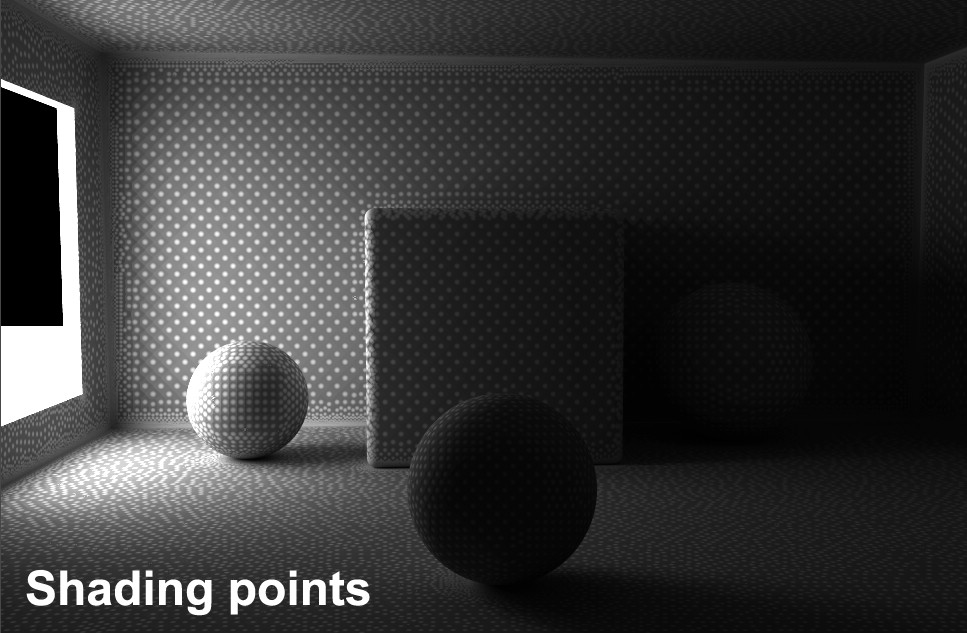 Brightness and color values for these shading points.
The brightness and color values for these shading points will be saved in the Irradiance Cache as so-called ,entries’. This cache can and should be saved (using the Cache Files tab's settings) so they can be re-used e.g., if the angle of view, camera animation, etc. change. Caches can only be re-used if you render to the Picture Viewer (i.e., not when rendering in the Viewport).
These Irradiance Cache entries will be interpolated during final rendering to supply pixels that lie between shading points with indirect light.
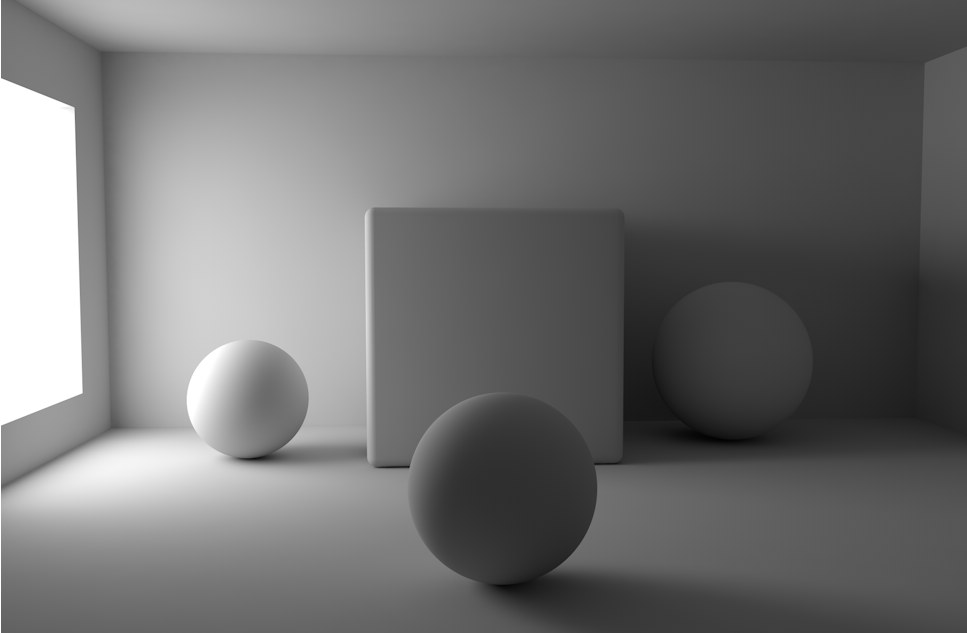 … will be interpolated to ensure a homogenous dispersion of light.
The disadvantages of using the Irradiance Cache method should also be mentioned: When interpolating between the limited number of shading points, details with regard to light and shadow can be lost (however, not nearly as drastically as with the previous version). In this regard, QMC still has the advantage.
Remember that the QMC mode always offers the best GI quality with regard to light and shadow dispersion (and unfortunately the slowest). Irradiance Cache always attempts to produce a result as closely as possible to QMC.
Irradiance Cache tends to flicker when used in animations. The IR new method reduces flickering. Generally speaking, Irradiance Cache tends to flicker most if very bright and small Polygon Lights are used. Large, homogenous light sources (e.g., a sky used for illumination from which light is emitted evenly from many sides) is especially IR-friendly.
General tip: If you get spotty results, these can most often be eliminated by using a higher Record Density value. Improving the Secondary Method’s settings will help. However, if very poor light map quality is available, for example, there is not much Irradiance Cache can do to remedy this.
Most of the following settings will only be used for fine-tuning. For most instances, the Record Density settings Low, Medium and High in conjunction with corresponding values for the settings below will suffice. The Preview mode offers a quick preview of the final result. Custom will be made available as soon as the Record Density value is changed manually.
Generally speaking, the Record Density value must only be modified if, for example, a Polygon Light's (e.g, GI Portals) hard shadow should be shown (and you don't want to use the slow Force Per-Pixel).
When rendering with Irradiance Cache, several pre-passes will first be calculated (the phase in which squares appear that successively become smaller). During this phase, the dispersion of shading points will be ascertained. This is an adaptive process in which particular emphasis is placed on critical regions: corners, shadow edges, etc. The difference between Min Rate and Max Rate defines the number of pre-passes (see also depiction here: Min Rate).
A value of 0 produce a full resolution image (pixel size 1*1) and a value of -1 will produce a pixel size of 2*2, -2=4*4 and so on. Logically, the Min Rate value should always be less than the Max Rate value. Positive values are, however, also possible, which allow sub-pixel cache entries (this can be useful for Subpolygon Displacement if details are lost). In the end, these settings are not as important as they were for previous IR. Render times differ only nominally and as long as the values are kept reasonable (Max Rate not less than 0), the render results will not differ very much, either. If negative values are used for Min Rate, and Max Rate is set to 0, you're pretty much on track.
 Increasing Density values from bottom to top.
The Density value adjusts the general dispersion of shading points. The higher the value, the higher the shading point density.
It makes sense to describe these three settings together because all three work together and, simply put, define the shading point density in critical and non-critical areas:
- Density: General shading point density in consideration of the following two settings.
- Minimum Spacing: Shading point density in critical areas (e.g., corners, shadows).
- Maximum Spacing: Shading point density in non-critical areas (e.g., plane surfaces).
The following image shows the effects of the above-mentioned settings:
 Different variations of the Density, Minimum Spacing and Maximum Spacing settings.
How does shading point dispersion affect the final rendered image? For a cleanly rendered image, a high number of shading points are required in critical areas and a halfway decent density in the remaining areas. If you then make sure that each shading point has as many Samples as possible, there's not much that can go wrong.
All previously described settings revolve around the positioning and calculation of shading points. Indirect lighting was ascertained at numerous locations within the Project. This point-by-point dispersion of brightness must be converted to a planar dispersion during rendering. A smoothing algorithm does this in the following way: For each pixel to be rendered for a given object, Irradiance Cache is scanned to find entries in their close proximity to interpolate their brightness and color values.
The higher the Smoothing value, the more shading points that will be used for interpolation to render a given pixel. This setting represents a threshold value that determines whether or not a given cache entry in its proximity will be used. Smaller values generally produce a sharper (and often more spotty) result, whereas larger values will interpolate across larger areas, which results in a more uniform illumination but also means that small details will be lost. Generally speaking, Smoothing is a setting whose value you will rarely have to modify.
 Note how the cast shadow is much more defined if a higher Color Refinement value is used.
Increasing this setting's value will improve the render quality in regions in which GI lighting changes abruptly (e.g., GI shadows on bright Polygon Lights). What basically happens is that additional shading points will be generated (with a corresponding increase in render time). Important: You should increase the Record Density enough so the dispersion of light is homogenous, otherwise spotty regions will result in regions in which GI lighting changes abruptly.
GI Caustics will also benefit from higher values!
 A QMC-like Caustics rendering (right), which took a fraction of the time to render.
With the previous Irradiance Cache, the shading point dispersion was done independently of the size of the rendered image, i.e., the same pre-pass was used for an image 80 x 80 pixels as for an image with a resolution of 1024 x 768. Enabling the Screen Scale option will adjust the shading point density to the image's resolution. This means that correspondingly more cache entries will be created for an image with a very large resolution than for an image with a very small resolution. Hence, smaller images will render faster and larger correspondingly slower, which also means that more details will be visible.