Render
Here you will find the Sketch material’s rendering controls, such as the options for render culling.
In the Sketch material there are numerous settings which take pixels as their units. The Pixel Units value defines what is meant by a pixel.
This is real pixels, i.e., 1 unit refers to 1 pixel in the image.
These values are all scaled relative to the object’s bounds. This means that 1 pixel thickness may change based on the object’s size; this is the screen size of the object, so moving the camera away from the object gives the same results as scaling the object. What matters is the size of the object rendered onto the screen.
The pixels are transformed from the world space, so a pixel is smaller the further away it is from the camera.
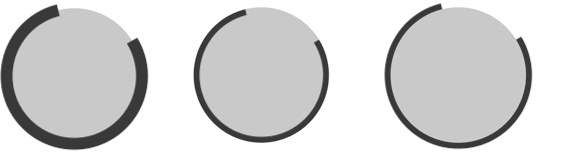
 Original, Disabled, Enabled
This controls how the lines are clipped if part of the object is off-screen. If the option is disabled, the properties are chopped off at the screen’s edge. If the option is enabled, the properties are redrawn to fit the on-screen part of the stroke.
Sometimes it’s useful to render the same line multiple times with different materials. For example, the character below has two outlines: a thin black outline and a thick gray one. To assign multiple Sketch materials to the same object, simply add a Sketch Style tag for each material.
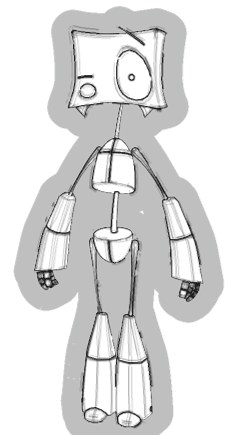 Image ©2003 by Christian Rambow.
The Self-Blend and Blend settings define the blending mode for lines on the same object (Self-Blend) and lines from different objects (Blend).
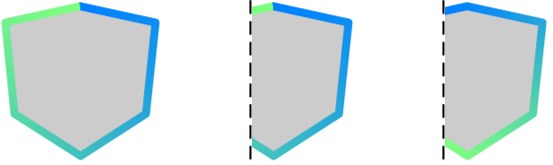
Example 1 - Solving opacity overlaps
To avoid opacity overlaps, set Self-Blend to Average.
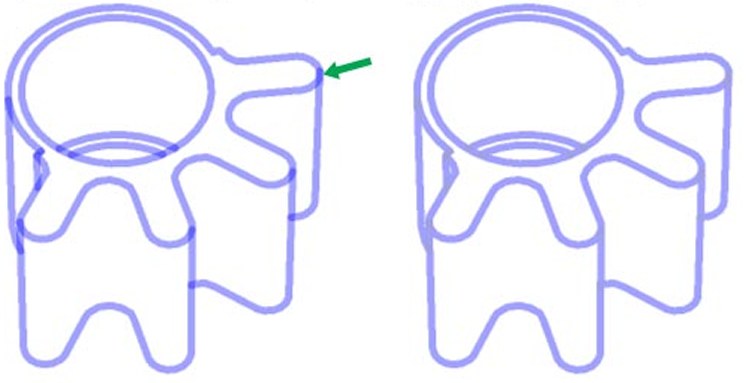
Example 2 - Solving overlapping patterns
Two line types have been enabled for this object: Crease and Outline. Both have a different pattern. Initially you can’t see much of a pattern around the outline (left object) because the two lines overlap and so any gaps in one are filled by the pattern from the other line.
To remedy, first set Self Blend to Overwrite (center object). This removes the overlap, but now the blue line has been overwritten because of the drawing order (see The drawing order below). This is easily resolved by setting the blue line’s Priority value in the Sketch material (Main tab) higher, to give the desired result (right object).
Suppose you have drawn two outlines for the same object, a thin red outline and a thick black one. How does Sketch and Toon know which line you want on top of the other?
Sketch and Toon follows a drawing order for the lines:
- If the lines are at different depths from the camera, the one closest to the camera is drawn on top.
- If the lines are the same depth from the camera but are generated by different Sketch Style tags, the materials are drawn according to the order of their tags in the Object Manager — the left-most tag’s material is drawn on top.
- If the lines are the same distance from the camera and are generated by the same Sketch Style tag, the materials are drawn in order of their priority on the Basic Properties tab — the one with the highest Priority value is drawn on top.
The Blend Mode sets the Mode for Lines of other Objects (Blend Mode).
See Blend Modes.
 None, Inside Geometry, Outside Geometry
This setting lets you clip off parts of the line that are inside or outside the geometry.
The Mode setting controls how an object’s clipping is affected by other objects in the Project. Enable the Self option if objects should clip their own lines as well.
Clipping is not affected by other objects. The object’s lines are clipped to its own geometry only.
In Children mode, the lines are clipped to the object’s own geometry (if Self is enabled) and to the geometry of its children (Children). Hierarchy mode finds the top-most parent and then uses the parent and all its children to clip.
This lets you choose which objects are used to clip the lines of other objects — Drag & drop the objects into the Objects box.
To make each object clip its own lines as well, enable the Self option.
Sketch and Toon has two stages of culling: hidden culling and render culling.
If you set this to Visible or Hidden, Sketch and Toon will only render line pixels that are visible or hidden respectively based on the Mode settings. The default setting is visible (normally you only want to see line pixels that are not hidden by other objects).
Hidden culling takes place while the lines are being generated and its purpose is to separate the lines into visible lines and hidden lines. This is controlled by the Hidden Cull mode and Self-Culling option in the post effect and Sketch Style tag (Lines tab).
The Hidden Cull mode sets which objects are used to check if a line is hidden.
This changes how the render culling works. It has two methods.
Method 1 (option disabled) - this simply checks the pixel itself that is rendering. This is faster than method 2 but can result in the line thinning artifact where lines that are partly hidden along their thickness are culled (because it is per pixel).
Method 2 (option enabled) - this checks the line itself. It is slower than method 1 because it needs to send out extra rays from the line to check if the line point closest to the rendering pixel should be culled.
As with the other clipping and culling modes, this sets which objects in the Project are used to find out if this pixel is visible or hidden. The default is Scene, which means all other objects in the Project are checked. With the default settings, only pixels that are not hidden by other objects are rendered.
The Self option is disabled by default. If you enable it, the object which generated the line will also be checked to see if it hides the line.
Variations Seed [0..2147483647]
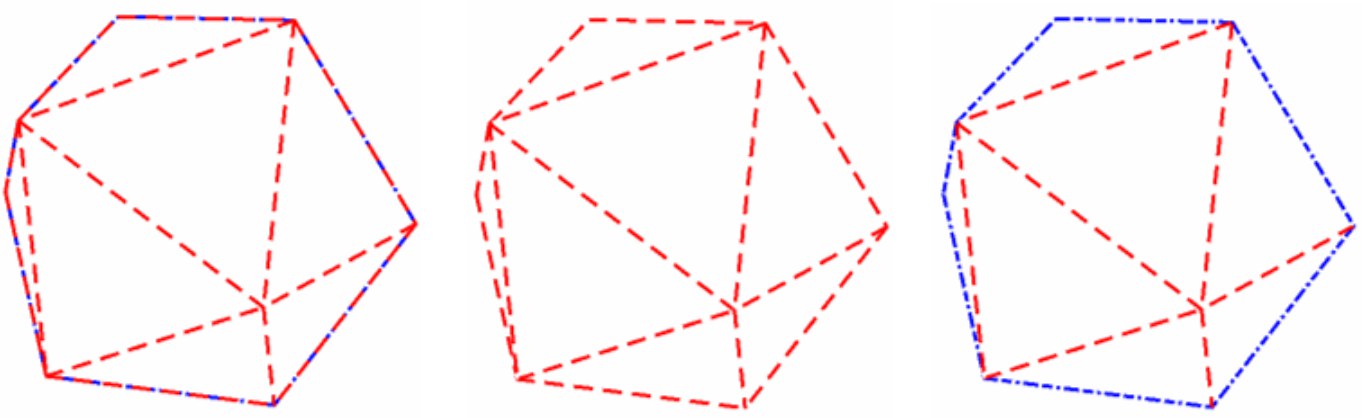
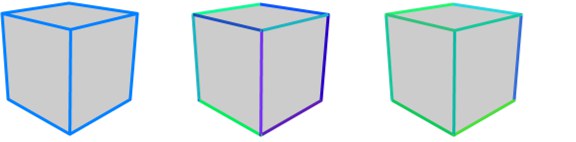 From left to right: original cube; cube with 30% HSV color variation set on the Adjustment tab; the same settings as the center cube except with a different Variations Seed value.
The Sketch material has many variation parameters. For example, the H, S and V values on the Adjustment tab enable you to randomize the color of each line. Suppose you don’t like the particular colors Sketch and Toon has chosen, what then?
Change the Variations Seed value and Sketch and Toon will create a new random look. Changing this value is like throwing the dice again for all variation values. Keep changing it until you are satisfied with the result. Disable the Static option if you are rendering an animation and you want a different variation to be generated for each frame.
Deactivate the static setting if you want a new color dispersion in each frame of your animation.