Object Properties
This option must be activated if you want the feather hair to be displayed in blue in the editor view.
Use this setting to define the Level Of Detail of the feather hair in the editor, i.e., how many of the hairs will actually be displayed (and rendered) in the editor view (this is dependent upon the Spacing menu settings) as thin lines.
![]() Generation
Generation
Use this setting to define how the feather hair will be treated, as hair or as splines.
This setting becomes relevant if you make the Feather object editable. Depending on the setting you choose, an object will either be generated as hair using guides or simply as a spline object. The Splines option lets you drag a Feather object directly onto one of the (Spline)Generators.
This setting will reverse the direction of the graphs in the Shape tab.
Use this setting to define the number of hair segments. Feathers do not require a high number of segments. The preset value of 6 should be enough and can generally remain unchanged.
![]() Spacing
Spacing
There are two methods with which the spacing of the feather hair, the so-called barbs, can be regulated:
The number of Barbs will indirectly regulate the spacing.
Spacing will be regulated by the settings in the Spacing menu.
If the spline length is animated and the amount of feather hair changes in order to maintain correct spacing between hairs (this will happen if the Fixed option was selected), flickering can occur. To avoid this, select the Adaptive option.
Relative Size
Rachis Length [0..+∞m]
Use these settings to define the relative effect the most important Feather settings and the quill length will have on each other. This setting allows you to apply the Feather object to other larger or smaller splines, without changing the basic shape of the feather. When setting the length of the rachis, it’s better to enter a length equal to that of the actual rachis.
If you are planning on using different spline sizes, activate Relative Size before you make the settings for the feather.
Not all settings (e.g., Rotation) will work if Relative Size is active, and all feathers will look similar but will not be identical.
Rachis Radius [0..+∞m]
Top [0..+∞m]
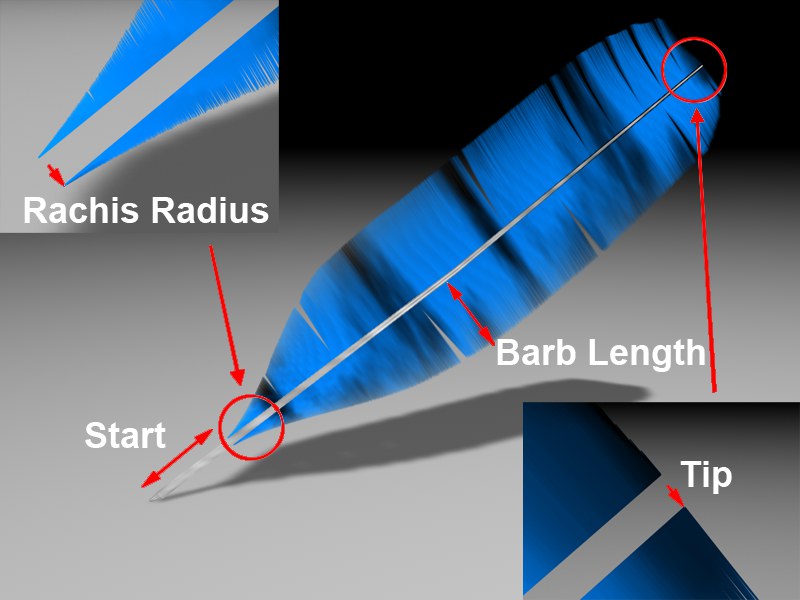 Various Feather parameters.
Rachis Radius defines the distance of the barbs from the start of the spline at the base of the feather. Top defines the distance the barbs will be from the tip of the feather. This setting lets you simulate a narrowing rachis.
These settings let you define at which point on the spline the barb growth will start and end. The feather shown above has, for example, a Start value of 12% and an End value of 100%, i.e., the barb growth takes place along 88% of the rachis, beginning at the 12% point.
Barb Spacing [0..+∞m]
Variation [0..+∞m]
If Fixed spacing has been selected, enter the distance between hairs here. Use Variation to randomly vary the spacing for a more realistic look.
If the Adaptive option is selected in the Spacing menu, enter the number of feather hairs in Barb Count.
Barb Length [0..+∞m]
Variation [0..+∞m]
Use this setting to define the maximum feather hair length, which is restricted by the Shape Tag’s Shape function graph.
![]() Displacement
Displacement
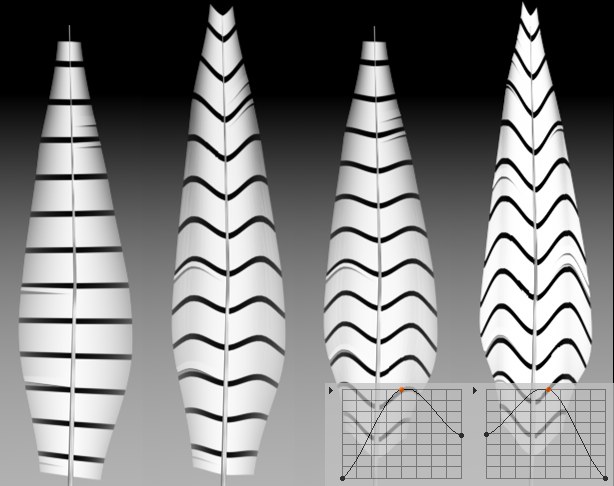 From left to right: Curve (Top) / Curve (Base) = 0; Curve (Top) = 80 / Curve (Base) = 0; inverted; both = 80. The corresponding graphs can be seen at the bottom right.
 Curve (Top) [0..+∞m]
Variation [0..+∞m]
Curve (Base) [0..+∞m]
Variation [0..+∞m]
Together with Curve (Shape tab), you can reshape the barbs along their length. Use the Curve (Top) setting to define the strength of the reshaping at the top of the feather. Curve (Base) defines the strength of the reshaping at the bottom of the feather. The reshaping of barbs between the top and base of the feather is done using interpolation. Variation defines the degree to which the reshaping should be randomly varied.
Displace [0..+∞m]
Variation [0..+∞m]
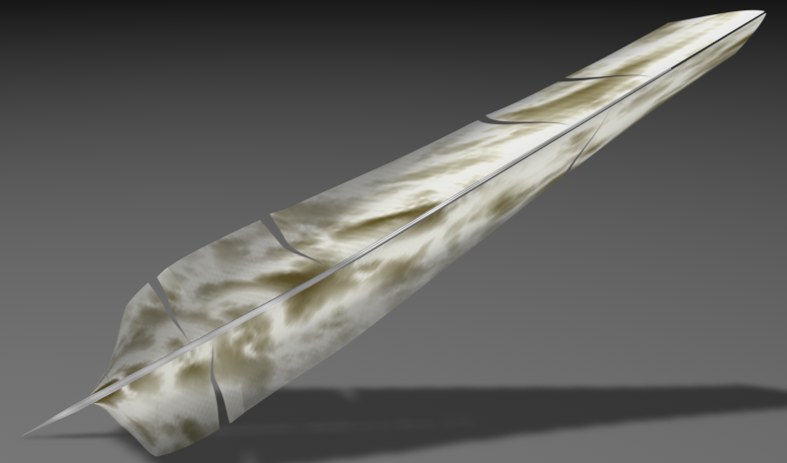
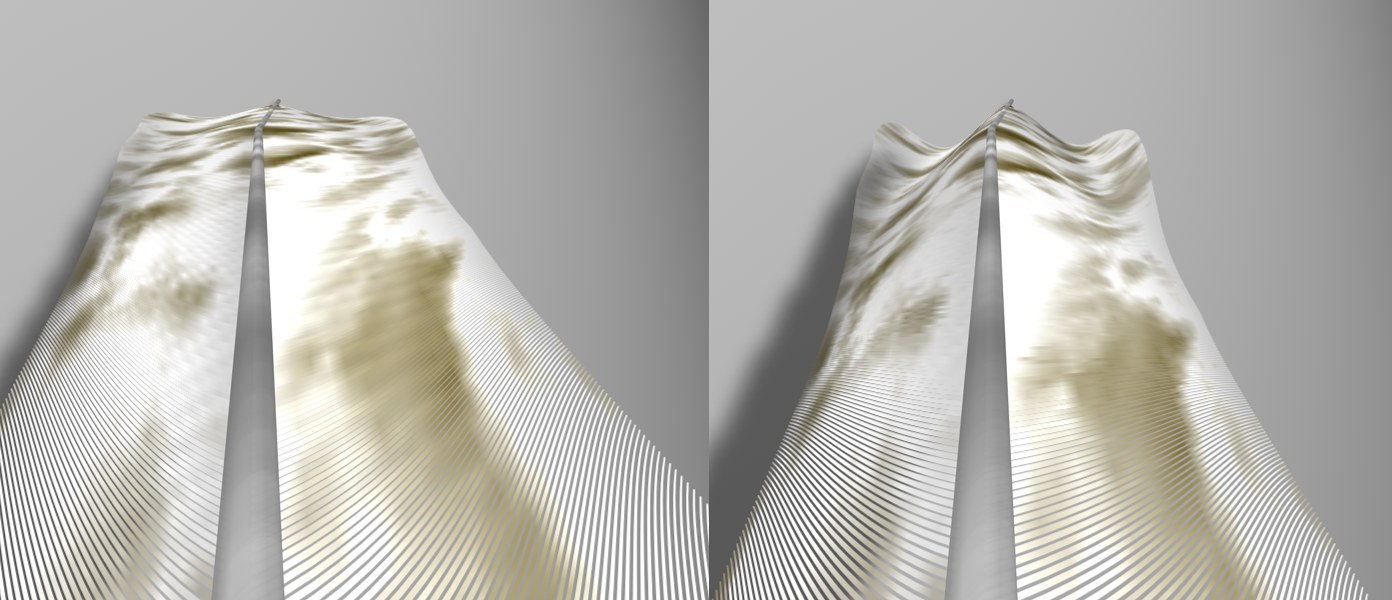 A view along the length of a feather: Left, a lower Displace value; right, a higher Displace value.
The barbs can be curved along their profile by using the Cross Section graphs in the Form tab. The Displace setting simply defines the strength with which the barbs will be curved perpendicular to the spline tangent.
![]() Rotation
Rotation
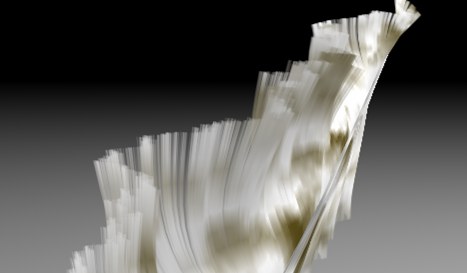
 From top to bottom: Lower, middle, high value.
Use this setting to twist the barbs around the feather’s axis along its length. This setting can be made per barb or hair, along the length of the rachis. The rotation is dependent on the number of hairs, so don’t be surprised if you only need a setting of around 0.001 to make the hair twist 30°.
Use the Variation setting to randomize the Rotation effect. A possible result could look similar to the one below:
Enter lower values here as well, since higher values can lead to a feather duster effect.
Use this setting to rotate the entire feather hair around the spline. This can be practical if the hairs happen to be pointing in the direction of the camera, and thus cannot be seen. The hairs can then be quickly rotated 90°.
Variation is similar in function to Rot Step, with the difference being that the rotation can be randomly applied per spline / segment, when several splines are used under a single Feather object (or a single spline with several segments). The feather hair on each spline will then point in a different direction.
Rachis Rot [0..+∞°]
Barb Rot [0..+∞°]
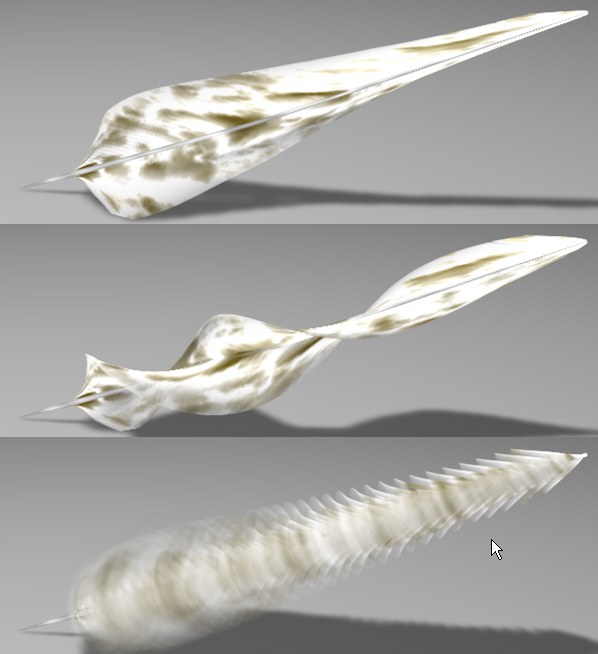
 Effects of Rachis Rotation and Barb Rotation.
Use these settings to randomly rotate every barb around these rotational axes, within the angles entered:
- Rachis Rotation: Spline tangents.
- Barb Rotation: Rotational axis perpendicular to the spline tangent.
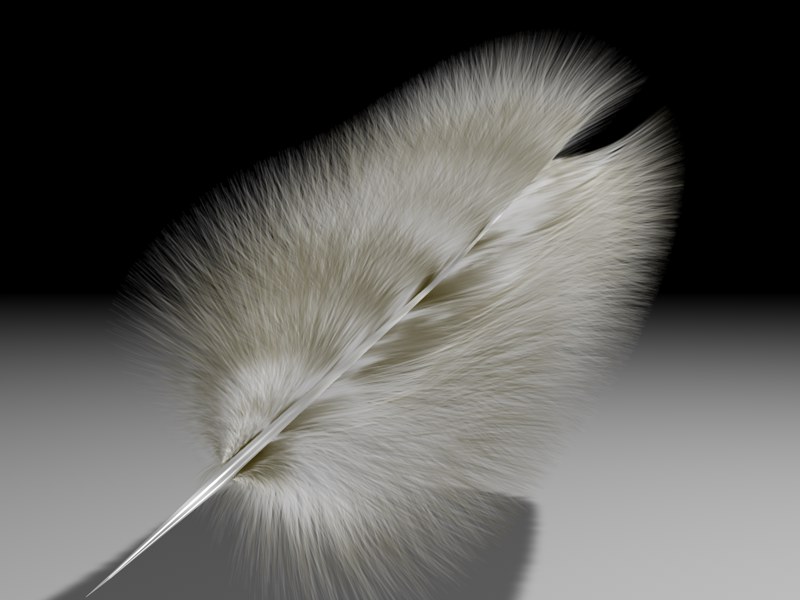
This will bring chaos to the perfectly rowed barbs. The result will be similar to fluffy down feathers.
![]() Gaps
Gaps
 Intermittent gaps make a feather look more realistic.
Use this setting to define the size of the gaps between barbs. If several gaps are already present, and the number of gaps is again raised using the Gap setting, gaps lying in close proximity to one another will be closed. It is not recommended that the Gap settings be animated, since they can start jumping from one location to another.
Use this setting to randomly vary the size of the gaps. After all, ten equally wide gaps just does not look very realistic.
Use this setting to adjust the number of randomly dispersed gaps.